
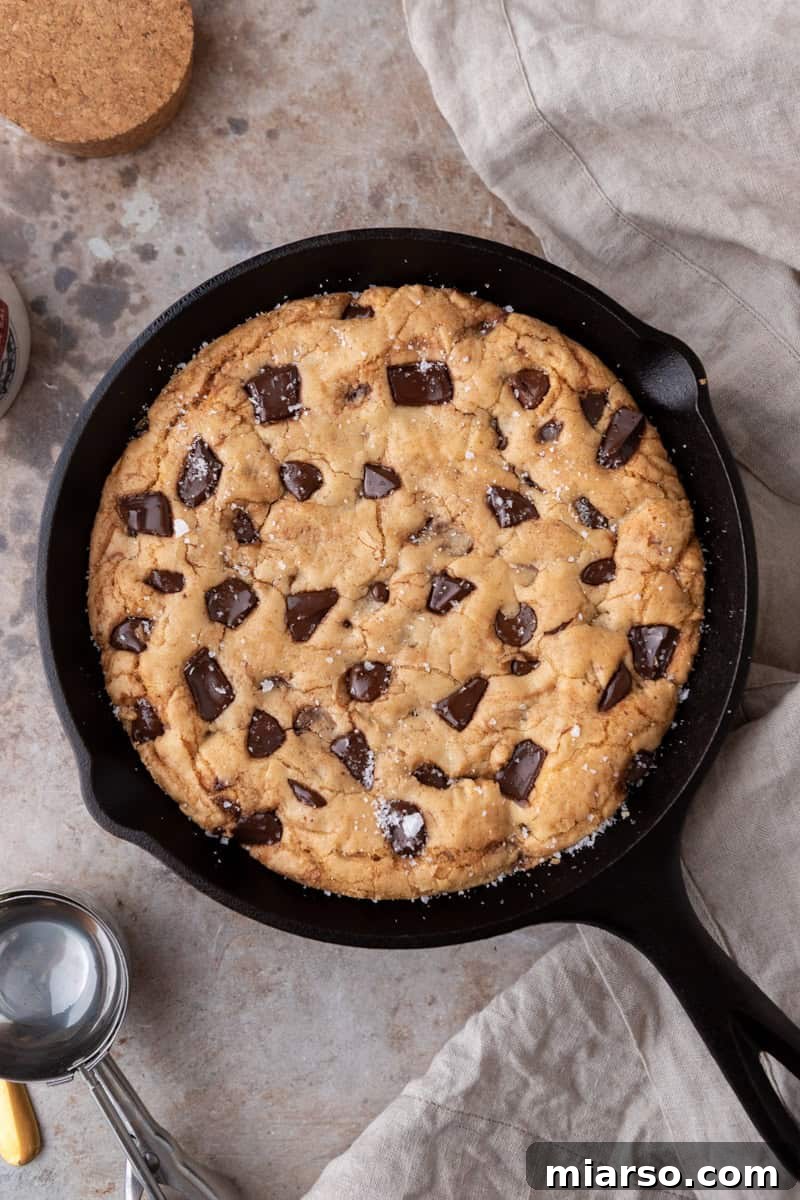
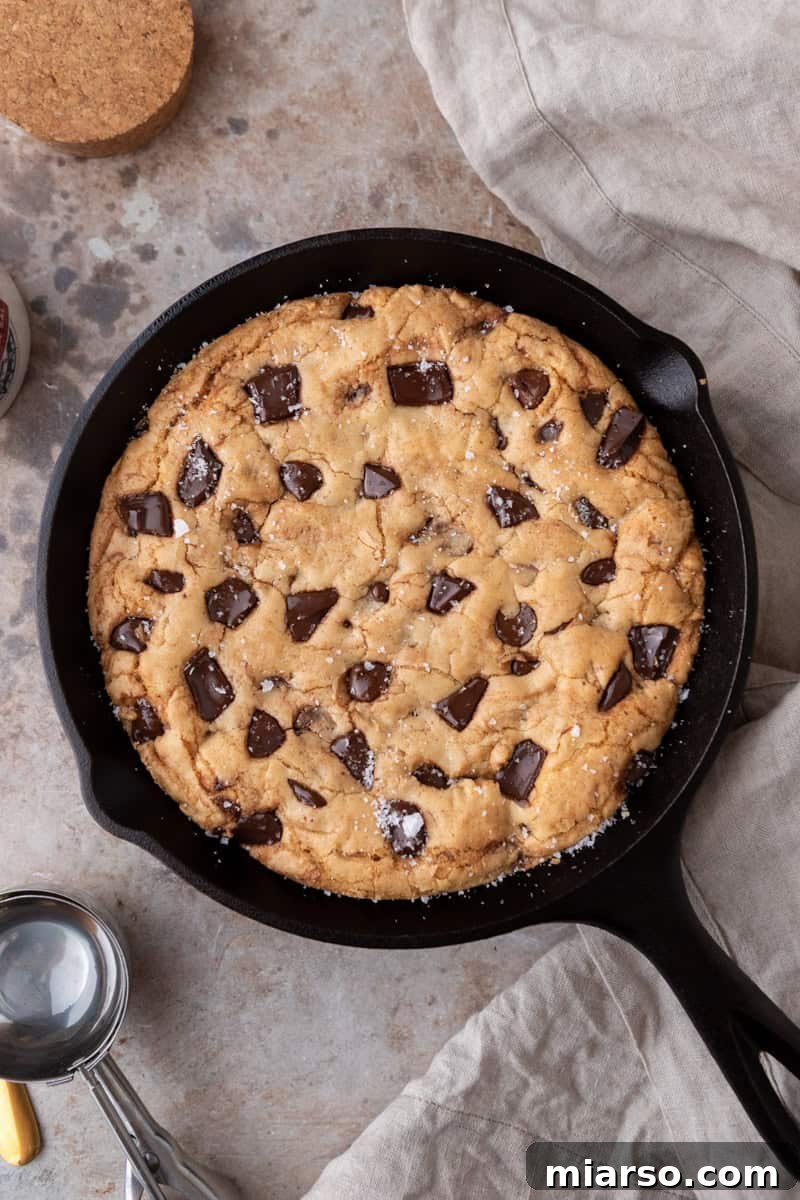
Prepare to be amazed by this **ultimate brown butter chocolate chip skillet cookie**, baked to perfection in an 8-inch cast iron skillet. Unlike larger pans, this smaller size is the secret to achieving a dramatically thicker cookie with an irresistibly soft, gooey center, delightfully chewy edges, and luxurious pools of melty chocolate in every single bite. The magic doesn’t stop there; infusing the dough with nutty, toffee-like brown butter elevates the flavor profile to an entirely new level. Finish this masterpiece with a sprinkle of flaky sea salt and a generous scoop of vanilla ice cream, and you’ll have a homemade pizookie that far surpasses any restaurant offering. This recipe is designed to deliver a decadent dessert experience, optimizing every element from pan size to ingredient ratios for unparalleled texture and taste.
You might initially wonder why a smaller pan makes such a significant difference. The truth is, an 8-inch skillet provides the optimal ratio of crispy, golden-brown edge to perfectly soft, fudgy center – a balance that’s challenging to achieve in a 10 or 12-inch pan. With a thicker layer of dough, the cookie bakes more uniformly, ensuring the core remains wonderfully soft and gooey for an extended period. Furthermore, it’s the ideal portion size for intimate gatherings, comfortably serving about 4-6 people. Whether it’s a romantic date night, a small dinner party, or a satisfying weeknight indulgence, this skillet cookie is designed to be enjoyed without an overwhelming amount of leftovers, making it both practical and utterly delicious.
If your past experiences with skillet cookies have left you with a thin, overbaked perimeter or a sad, sunken center as it cooled, this precisely calibrated 8-inch pan recipe is your solution. We’ve meticulously tested and refined every aspect, from ingredient quantities to baking temperature, to ensure consistent, show-stopping results. Get ready to bake a skillet cookie that holds its shape beautifully while maintaining its incredible soft texture, promising a truly memorable dessert experience.
The Revelation: Why an 8-Inch Skillet Became My Go-To for Skillet Cookies
Like many bakers, I started with a classic 10-inch chocolate chip skillet cookie recipe, which is undoubtedly delicious. However, a recurring dilemma presented itself: for just myself and my partner, or a small group of friends, a 10-inch cookie was often simply too much. We’d enjoy half, only for the remainder to lose its fresh appeal. Attempts to simply use less dough in the larger skillet invariably led to a cookie that spread too thin, resulting in an undesirable, overbaked texture.
This challenge spurred an experimental journey into the world of 8-inch cast iron skillets. The outcome was nothing short of a revelation. The cookie emerged remarkably thicker, reminiscent of a luxurious deep-dish dessert. This added depth proved crucial, allowing the center to retain its coveted soft and gooey consistency for significantly longer. While the cast iron still imparted that signature golden, slightly crisp crust to the edges, the middle transformed into pure, fudgy, melty perfection. This smaller footprint truly maximizes the textural experience, delivering an indulgence with every spoonful.
The true turning point, however, came with the introduction of brown butter. If you’ve yet to incorporate this technique into your cookie baking repertoire, prepare for a culinary transformation. Browning butter involves gently toasting the milk solids until they develop a rich, golden hue and emit an intoxicating nutty, almost caramel-like aroma. This simple yet profound step infuses the cookie dough with a depth of flavor that regular melted butter simply cannot replicate. When combined with the warmth of brown sugar and an abundance of high-quality chocolate, this specialized 8-inch skillet cookie delivers an unparalleled flavor intensity per bite, outshining any larger version I’ve ever crafted. It’s not just a cookie; it’s an experience.
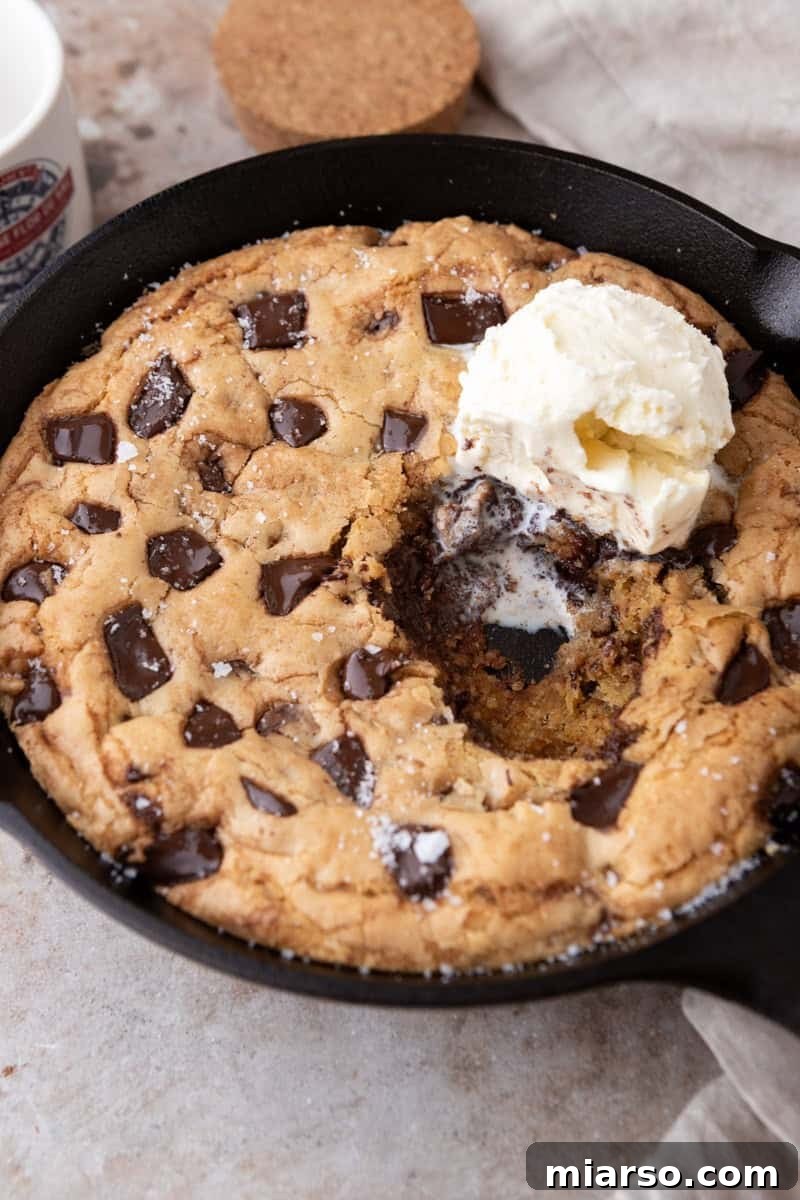
The Definitive Advantages: Why an 8-Inch Skillet Elevates Your Cookie Game
While most skillet cookie recipes traditionally recommend 10 or 12-inch cast iron skillets – excellent for feeding a large crowd – there are compelling, textural reasons why an 8-inch skillet is superior for achieving a truly exceptional cookie:
- **Unparalleled Gooey Center with Thicker Dough:** The very same amount of dough that might spread thin and flat in a larger pan transforms into a substantial, deep layer when confined to an 8-inch skillet. This increased thickness is paramount; it allows the center of the cookie to remain exquisitely soft and slightly underdone, even as the edges bake to a perfect golden crisp. This isn’t just a fleeting moment of gooeyness; it ensures your cookie stays wonderfully soft for 30 minutes or more after coming out of the oven, providing a sustained moment of pure indulgence.
- **Optimized Edge-to-Center Ratio for Balanced Bites:** In larger skillets, you often find an abundance of crispy edge with a comparatively thin center. The 8-inch skillet, however, redefines this balance. It creates a beautifully defined, golden ring of chewy edge that perfectly frames a generously proportioned, soft, and decadent center. This thoughtful design ensures that every spoonful or slice offers that sublime contrast of textures – a hint of crispiness giving way to a rich, molten interior.
- **Achieving Even Baking with a Lower Temperature:** The smaller surface area of an 8-inch skillet facilitates a more uniform heat distribution across the entire cookie dough. When paired with a precisely calibrated lower baking temperature of 325°F (160°C), this combination works wonders. It guarantees that your cookie bakes through consistently from edge to center, eliminating the common pitfalls of a raw middle or an overdone, dry perimeter. This careful baking environment also plays a crucial role in preventing the cookie from doming excessively during baking and then dramatically caving in as it cools, maintaining a beautiful, level surface.
- **Extended Softness and Warmth:** Due to its inherent thickness, an 8-inch skillet cookie boasts superior heat and moisture retention capabilities once removed from the oven. Unlike thinner skillet cookies that tend to firm up rapidly, this thicker iteration remains delightfully warm and incredibly gooey for a significant period – often 20-30 minutes. This extended softness means you can truly savor the experience, especially when paired with a melting scoop of ice cream, without feeling rushed.
- **The Perfect Serving Size for Intimate Occasions:** Gone are the days of oversized desserts leading to excessive leftovers. An 8-inch skillet cookie is thoughtfully proportioned to comfortably serve 4 to 6 people. It’s the ideal choice for a cozy date night, a small family gathering, or when you desire a special, impressive dessert without the burden of an overwhelming quantity. It strikes the perfect balance between generosity and manageability.
- **Brown Butter: The Secret to Bakery-Style Flavor Depth:** The transformative act of browning butter before incorporating it into the dough is a non-negotiable step for this recipe. This technique toasts the milk solids in the butter, imparting a complex, rich, nutty, and subtly toffee-like depth of flavor that cannot be achieved with plain melted butter. It’s a hallmark of high-end bakery desserts and takes merely 5 minutes to execute, yielding a profound impact on the cookie’s overall taste profile.
- **Cornstarch: The Key to a Soft, Stable Center:** A small, yet critical, addition of cornstarch is the secret ingredient for maintaining a perfectly tender and soft cookie center without it being underbaked. Cornstarch works by subtly inhibiting gluten development in the flour, preventing the cookie from developing a tough or “cakey” texture that can sometimes occur in thicker baked goods. It ensures a velvety smooth, melt-in-your-mouth interior.
- **Strategically Higher Flour Ratio for Structural Integrity:** To accommodate the increased thickness of an 8-inch cookie and prevent any undesirable sinking or collapsing, this recipe features a slightly higher ratio of all-purpose flour. This adjustment provides the necessary structural support, allowing the cookie to maintain its beautiful, flat, and even surface both during and after baking, ensuring a visually appealing and stable dessert.
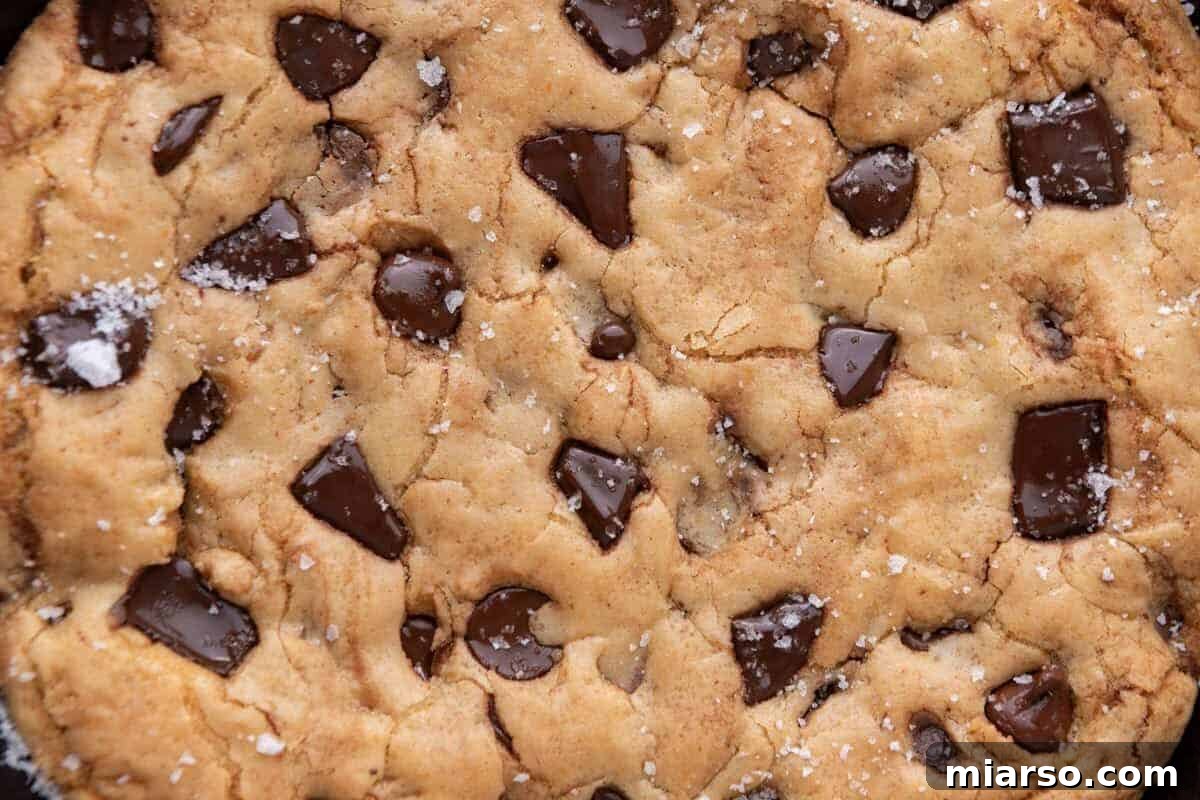
- **Flaky Salt: The Essential Finishing Touch:** Do not underestimate the power of a final sprinkle of flaky sea salt (such as Maldon) just after baking. This delicate addition provides a brilliant textural contrast and a crucial pop of salinity that beautifully cuts through the richness of the brown butter and the sweetness of the melty chocolate. It’s a simple step that elevates the cookie from merely good to truly extraordinary.
Essential Ingredients for Your Decadent Skillet Cookie
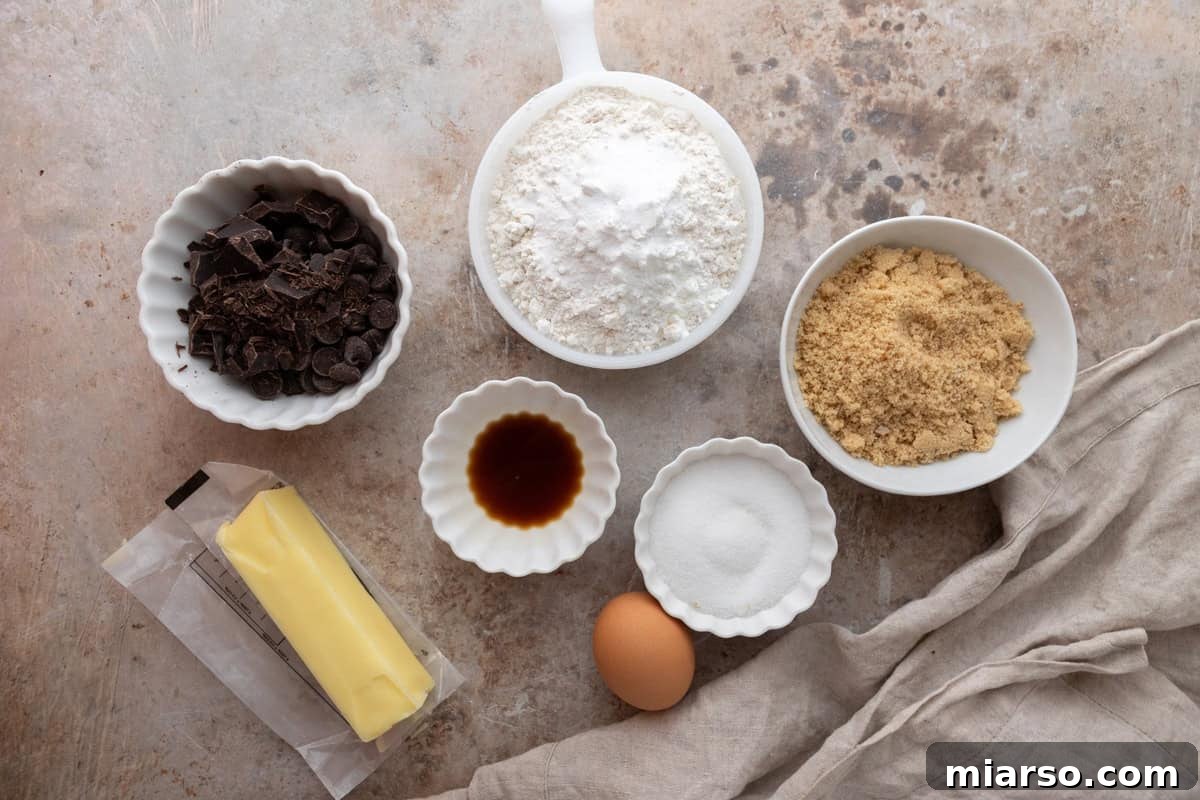
Crafting the perfect skillet cookie starts with understanding the role of each ingredient. Here’s a breakdown of what you’ll need and why:
- **Unsalted Butter:** This is the foundation of our rich flavor. We specifically use unsalted butter to brown it, which develops complex nutty and toffee notes. Using unsalted butter also gives you precise control over the final saltiness of your cookie.
- **Light Brown Sugar:** Essential for imparting moisture, chewiness, and a warm, subtle molasses flavor. Light brown sugar is preferred here to ensure the delicate brown butter flavor isn’t overshadowed by a more intense molasses profile. Dark brown sugar can be used for a deeper, more robust caramel taste if desired.
- **Granulated Sugar:** A smaller proportion of white granulated sugar works in harmony with brown sugar to create those coveted slightly crisp edges, while ensuring the cookie remains perfectly sweet without being overly rich.
- **1 Large Egg, Room Temperature:** The egg provides crucial structure and enriches the cookie dough. Bringing it to room temperature is vital, as it emulsifies much more smoothly with the cooled brown butter, resulting in a cohesive, velvety dough texture.
- **Vanilla Extract:** Always opt for high-quality, pure vanilla extract. It acts as a flavor enhancer, deepening and harmonizing all the other ingredients in the cookie, contributing to an overall more complex and inviting aroma and taste.
- **All-Purpose Flour:** This recipe utilizes a slightly higher ratio of all-purpose flour compared to many skillet cookie recipes. This strategic adjustment is key to providing sufficient structure for the thicker 8-inch cookie, ensuring it bakes evenly and maintains its shape without collapsing.
- **Cornstarch:** The true unsung hero of this recipe! A modest amount of cornstarch is added to inhibit excess gluten development, which is crucial for achieving that tender, soft center. It actively works against a “cakey” texture and helps the cookie remain wonderfully moist.
- **Baking Soda:** Only a tiny amount of baking soda is used, carefully calibrated for the 8-inch skillet size. It provides just enough lift to ensure a soft, tender texture without causing the cookie to puff up excessively and then dome or collapse, contributing to a perfectly flat top.
- **Salt:** A critical ingredient that balances the sweetness of the sugars and chocolate, while simultaneously enhancing and bringing forward the incredible, nuanced flavors of the brown butter.
- **Chocolate Chips or Chopped Chocolate:** For the ultimate chocolate experience, we highly recommend using a mix of semi-sweet chocolate chips (which hold their shape) and finely chopped chocolate bars (which melt into decadent pools). You can experiment with dark, milk, or a combination to suit your preference.
- **Flaky Salt for Finishing:** A final flourish of flaky sea salt, like Maldon, is non-negotiable. Sprinkled on top just after baking, it provides a delightful textural crunch and a burst of salty contrast that perfectly complements the warm brown butter and molten chocolate.
Mastering Brown Butter: A Step-by-Step Guide
If you’re new to the art of browning butter, rest assured – it’s one of the simplest yet most impactful techniques in baking. It transforms ordinary butter into a golden, nutty flavor powerhouse in just minutes:
- **Prepare Your Butter:** Begin by cutting your unsalted butter into uniform pieces. Place them into a light-colored saucepan. A light-colored pan is essential as it allows you to clearly observe the butter’s color change, preventing it from burning. Place the saucepan over medium heat.
- **Melt and Observe:** As the butter melts, it will begin to bubble and foam. Stir occasionally to ensure even cooking and to prevent milk solids from sticking to the bottom.
- **The Transformation Begins:** After a few minutes, the foam will gradually subside. At this point, you’ll notice the butter changing from a clear yellow to a rich golden hue. Simultaneously, tiny brown specks will start to form at the bottom of the pan – these are the toasted milk solids, the source of all that incredible flavor.
- **Reach Golden Perfection:** Continue cooking and stirring until the butter reaches a deep golden amber color and releases a wonderfully nutty, fragrant aroma, reminiscent of toasted nuts or caramel. This usually takes about 5 minutes in total. **Crucially, remove it from the heat immediately.** Brown butter transitions from perfectly browned to burned very quickly, so vigilance is key.
- **Cool for Success:** Promptly pour the browned butter into a separate heatproof bowl to halt the cooking process. Allow it to cool for at least 5-10 minutes (or until it’s slightly warm, but not hot) before incorporating it into your dough. This cooling step is critical to prevent the hot butter from inadvertently cooking the egg in your recipe.
**Expert Tip:** Always use a light-colored saucepan when browning butter. This simple trick makes it significantly easier to monitor the color and prevent accidental burning, ensuring your brown butter is perfectly golden every time.
Crafting Your 8-Inch Brown Butter Skillet Cookie: A Detailed Method
Follow these steps closely to achieve a flawless, perfectly gooey brown butter chocolate chip skillet cookie:
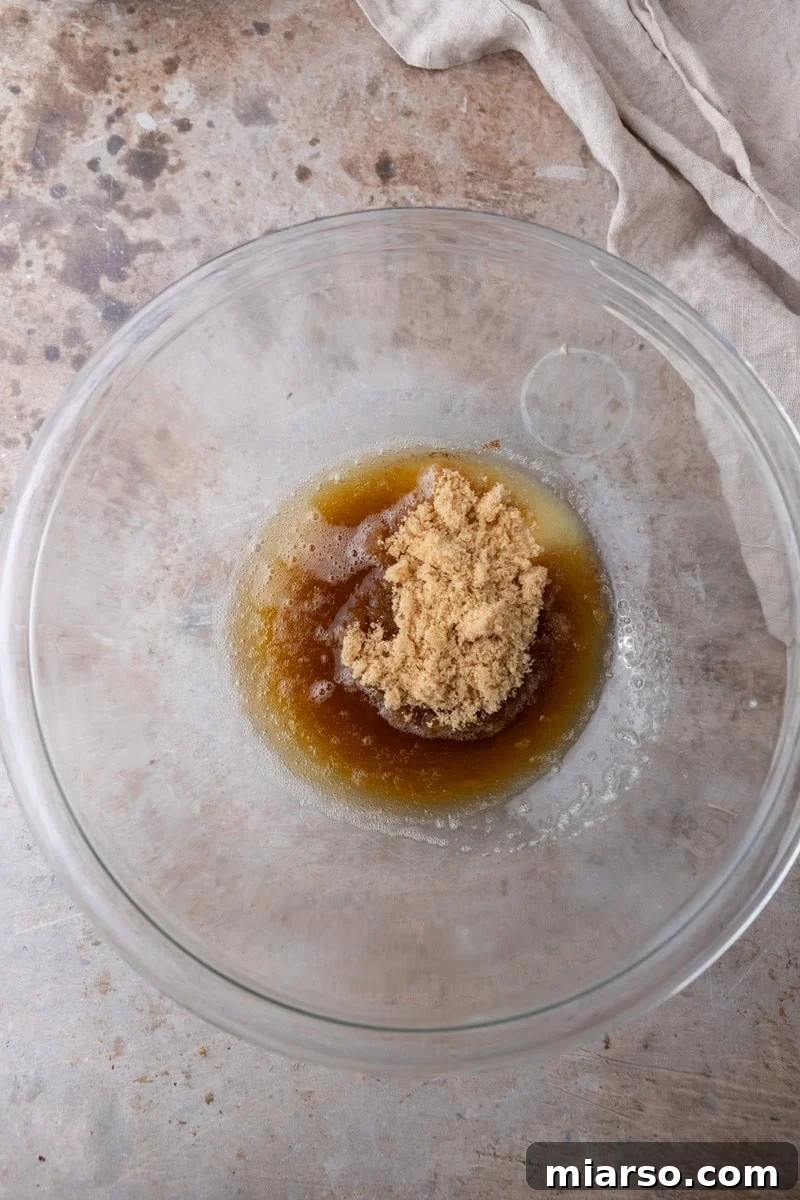
- **Step 1: Brown the Butter to Perfection.** In a saucepan over medium heat, melt the unsalted butter. Continue cooking, stirring occasionally, until it transforms into a fragrant, golden amber liquid with delightful brown specks at the bottom. Immediately pour the browned butter into a spacious mixing bowl and let it cool for 5-10 minutes. This cooling period is vital.
- **Step 2: Combine the Wet Ingredients for a Smooth Base.** To the cooled brown butter, add the light brown sugar and granulated sugar. Whisk these ingredients vigorously until the mixture becomes glossy and well-combined. Next, whisk in the room temperature large egg and vanilla extract until the mixture is completely smooth and emulsified.
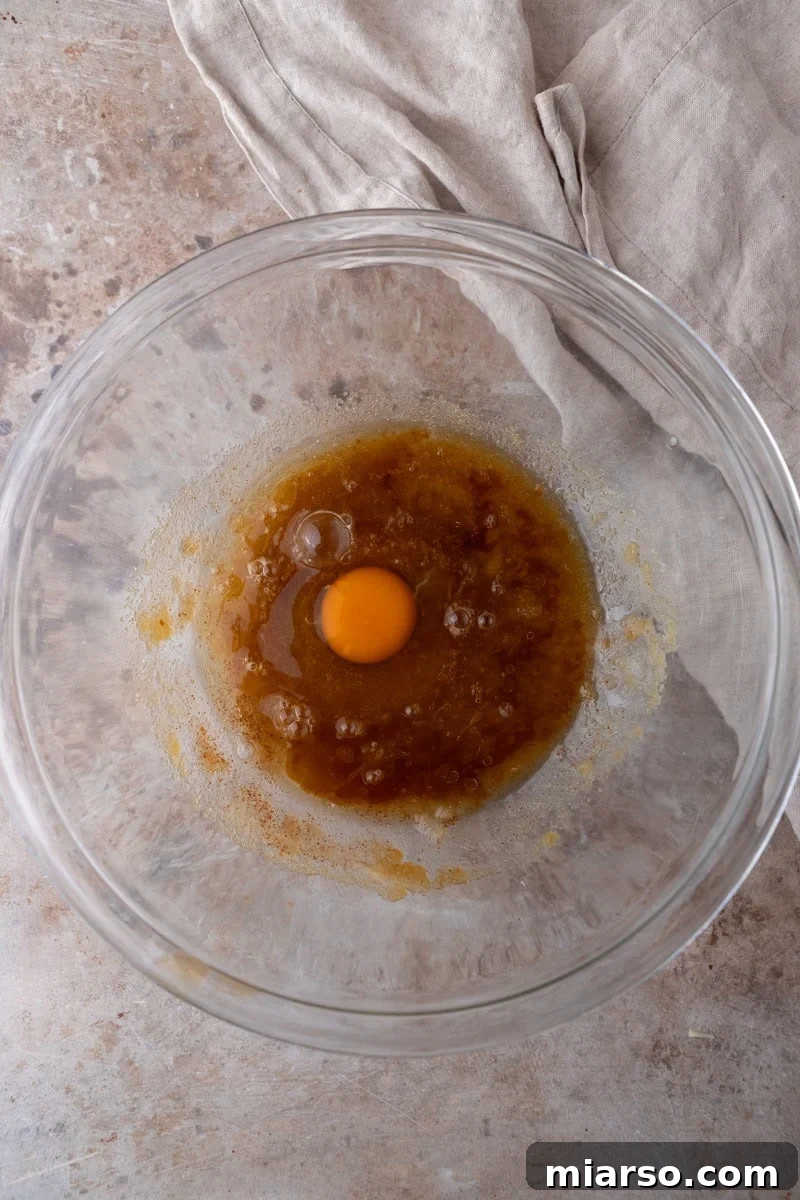
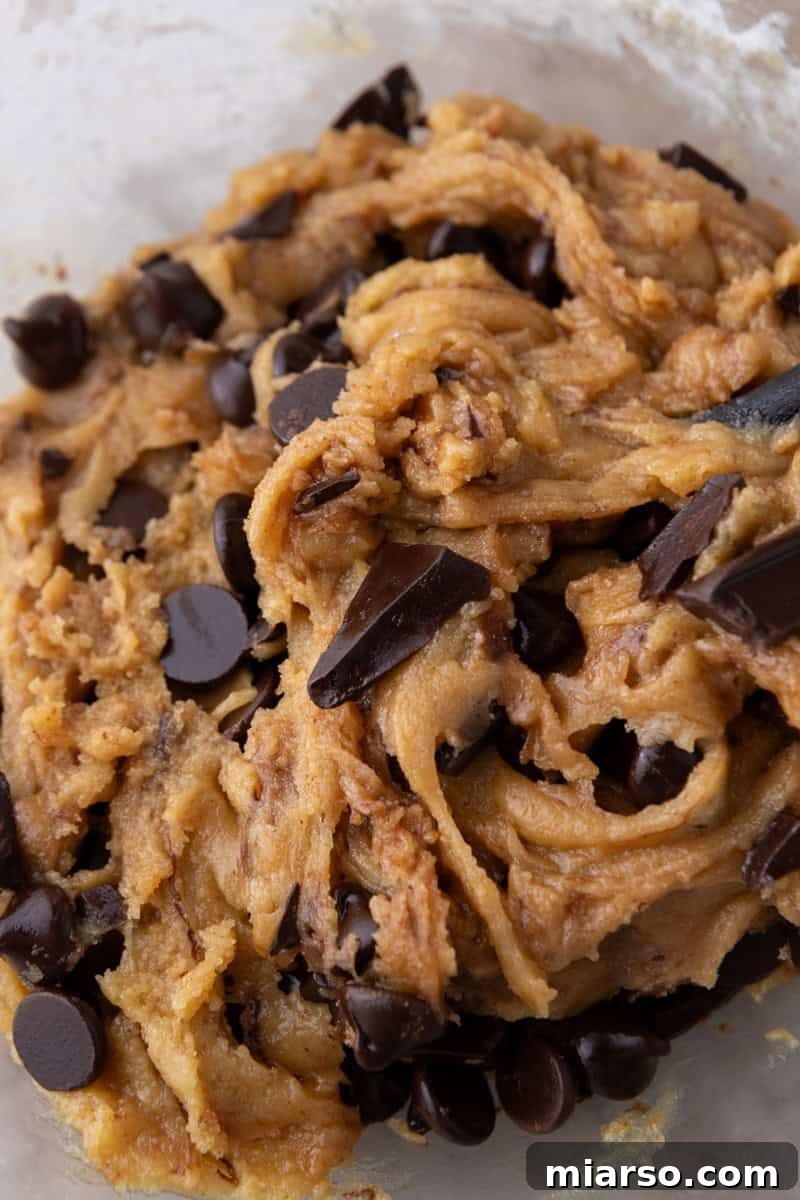
- **Step 3: Gently Incorporate the Dry Ingredients.** Add the all-purpose flour, cornstarch, baking soda, and salt to the wet mixture. Stir these dry ingredients in carefully, mixing just until they are combined and no streaks of flour remain. Avoid overmixing, as this can lead to a tougher cookie.
- **Step 4: Fold in the Decadent Chocolate.** Introduce your chocolate chips or chopped chocolate to the dough. Using a spatula, gently fold the chocolate until it is evenly distributed throughout the dough. You want chocolate in every bite!
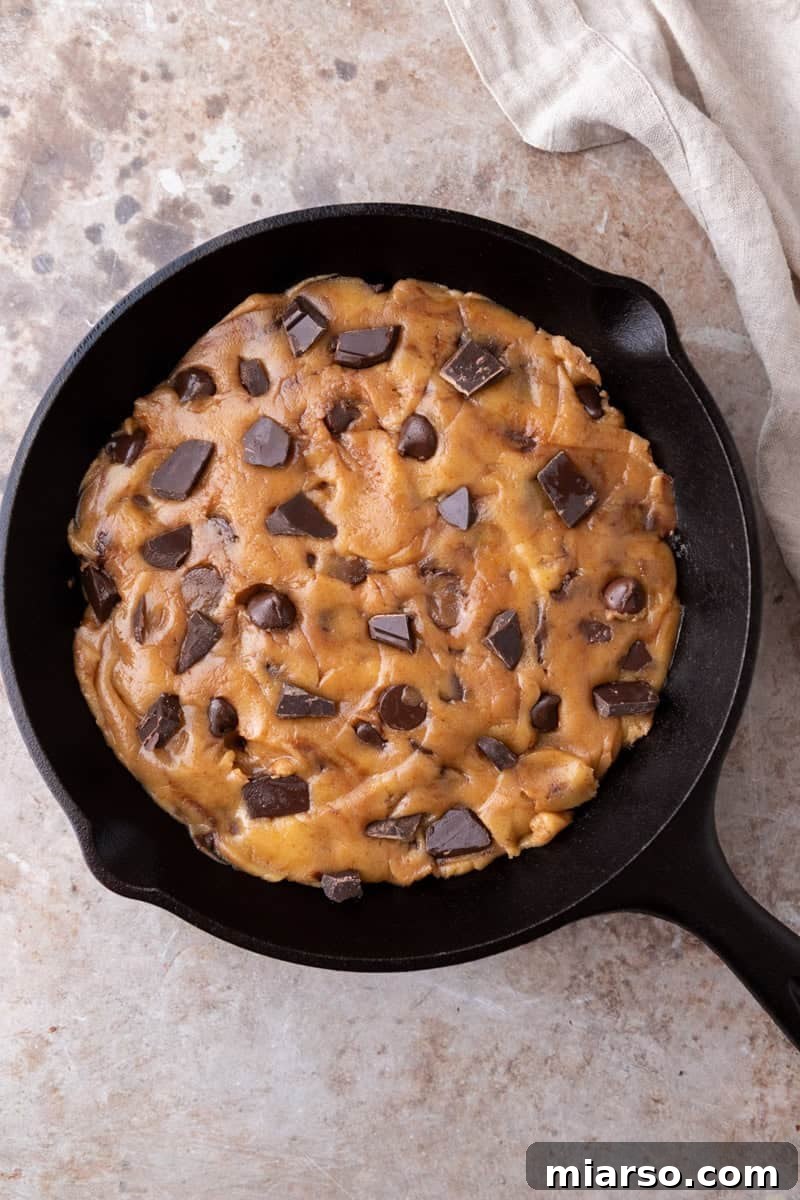
- **Step 5: Prepare and Press into the 8-Inch Skillet.** Lightly grease your 8-inch cast iron skillet with a small amount of butter or nonstick spray, even if it’s well-seasoned, to ensure easy removal. Transfer the prepared cookie dough into the skillet and press it down evenly, smoothing the top flat with your hands or the back of a spoon. Achieving an even layer is paramount for this thicker dough to bake uniformly.
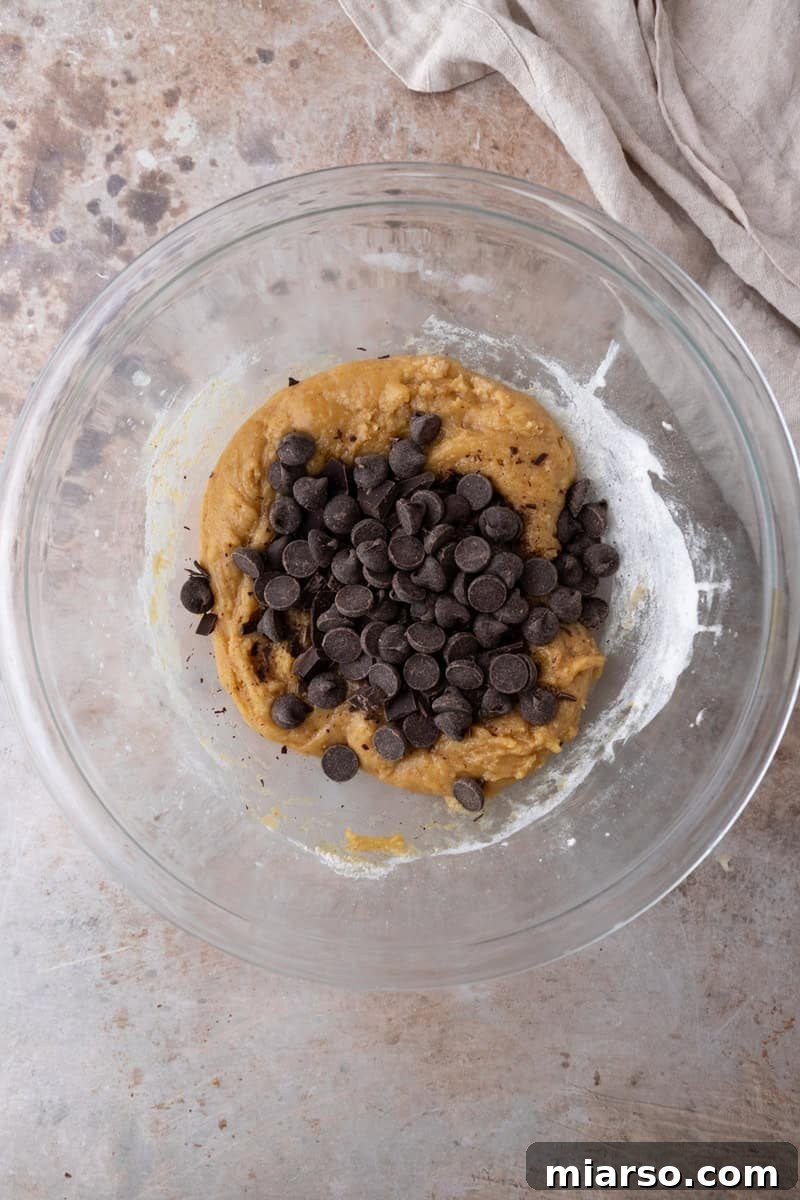
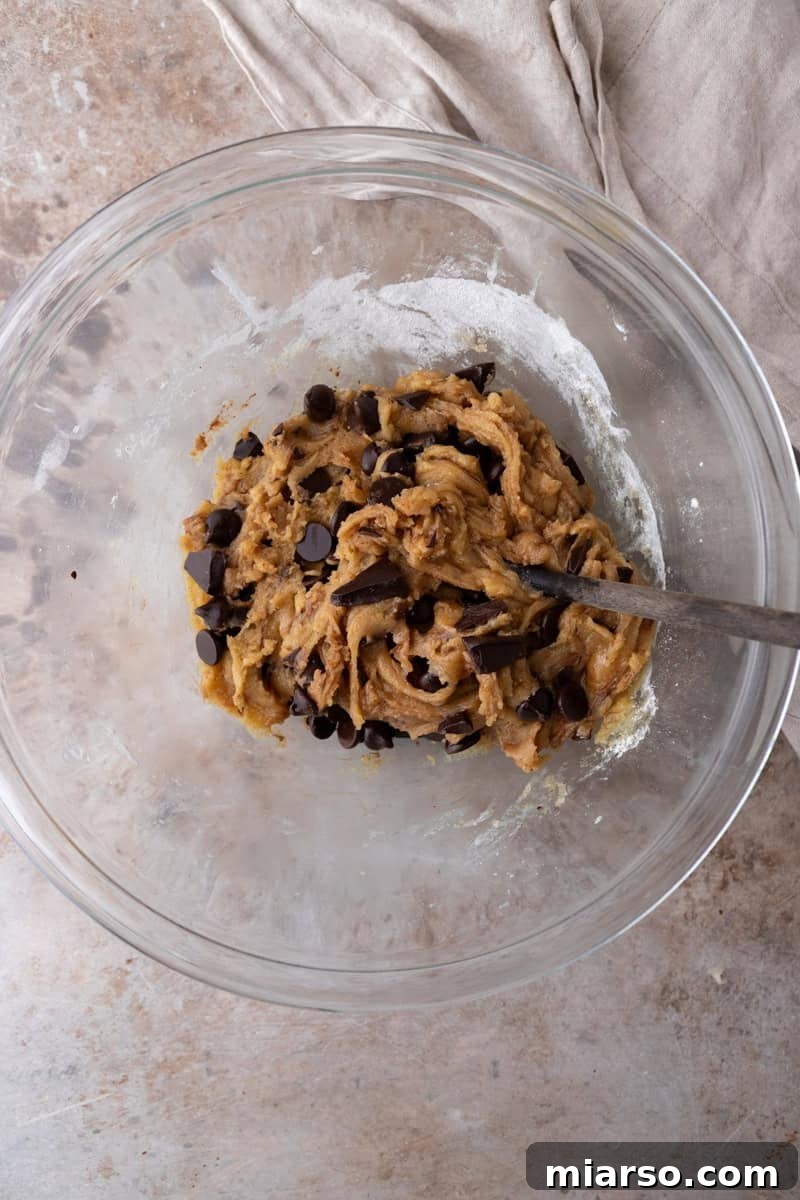
- **Step 6: Bake to Gooey Perfection.** Preheat your oven to 325°F (160°C). Place the skillet into the preheated oven and bake for approximately 24-28 minutes. The cookie is ready when its edges appear beautifully golden brown and set, but the center still looks distinctly soft and slightly underdone. Remember, it will continue to firm up as it cools.
- **Step 7: Rest, Finish, and Savor.** Once out of the oven, allow the skillet cookie to rest for at least 15 minutes. This resting period is crucial for the residual heat of the cast iron to finish cooking the center and for the flavors to meld. Immediately after removing from the oven, sprinkle generously with flaky sea salt. Serve this incredible dessert warm, ideally topped with a generous scoop of cold vanilla ice cream for the ultimate contrast.
Achieving Perfection: Expert Tips for Your 8-Inch Brown Butter Skillet Cookie
- **The Golden Rule: Do Not Overbake!** This tip is even more crucial for an 8-inch skillet cookie due to its increased thickness. When you pull the cookie from the oven, the very center should appear visibly soft and perhaps slightly underdone. Trust the process: the residual heat retained by the cast iron skillet will continue to gently cook the cookie as it rests, bringing it to perfect gooey consistency without drying out.
- **Ensure a Flat and Even Dough Layer:** Given the substantial thickness of the dough in an 8-inch pan, any unevenness will be greatly magnified in the final bake. Take an extra 30 seconds to meticulously press the dough flat and smooth it out across the entire surface of the skillet. A uniform layer is essential for consistent baking and an appealing presentation.
- **Always Cool Your Brown Butter Adequately:** Incorporating butter that is too hot into your dough can lead to unintended consequences, specifically causing the egg to scramble or cook prematurely. Ensure the browned butter has cooled for at least 5-10 minutes, becoming warm but not hot to the touch, before you begin mixing in other ingredients.
- **Room Temperature Egg for Optimal Emulsification:** Just like the butter, using a cold egg can cause the cooled brown butter to seize up, leading to a lumpy or inconsistent dough. Always allow your egg to come to room temperature prior to baking; this ensures it blends seamlessly and creates a smooth, well-emulsified dough.
- **Precision Matters: Use a Kitchen Scale:** Baking is a science, and precision is key, especially in a recipe where ratios are finely tuned for a smaller pan. This recipe was meticulously developed using gram measurements. Measuring cups can have significant variations (up to 30%), which can drastically alter the final texture. For consistent, perfect results, we highly recommend using a digital kitchen scale for your dry ingredients.
- **Embrace the Rest: Patience Rewards Gooeyness:** It can be tempting to dive in immediately, but allowing the skillet cookie to rest for a minimum of 15 minutes after baking is crucial. The excellent news is that this thicker 8-inch version retains its warmth and gooeyness significantly longer than a thinner skillet cookie, giving you ample time to prepare your ice cream and toppings and truly savor every warm, molten bite.
- **Engineered to Resist Sinking:** If you’ve struggled with skillet cookies sinking in the past, rest assured this recipe has been specifically designed to prevent that common issue. The combination of a slightly higher flour ratio for structural support, the inclusion of cornstarch for tenderness and stability, a lower 325°F baking temperature, the method of pressing the dough flat, and a minimal amount of baking soda (just 1/8 tsp) all work synergistically to maintain a beautifully flat and level top that will not collapse.
Serving Your Brown Butter Skillet Cookie: Delightful Options
The absolute best way to experience this brown butter skillet cookie is warm, pulled straight from the cast iron, and crowned with a generous scoop of rich vanilla ice cream. Thanks to its 8-inch size and increased thickness, the cookie retains its warmth for a longer duration than a larger, thinner counterpart. This means you can truly relish that magnificent hot-and-cold contrast without feeling pressured by time.
- **Classic Pizookie Style:** Embrace the communal joy! Place the hot skillet on a heat-safe trivet in the center of your table, hand out spoons, and let everyone dig directly into the pan. The 8-inch size is ideally suited for sharing among 2-4 people for a truly indulgent experience.
- **Elegant Slices, Like a Tart:** If you prefer a more refined presentation, allow the cookie to cool for 20-30 minutes. Once slightly set, you can easily slice it into neat wedges, much like a tart. Its robust thickness ensures it holds its shape beautifully, making it perfect for individual servings.
- **Elevate with Delicious Toppings:** Take your skillet cookie to the next level with additional drizzles. A rich caramel sauce, warm hot fudge, or a smooth chocolate ganache would all be phenomenal. The inherent nutty, toffee notes of the brown butter pair particularly exquisitely with caramel.
- **Explore Different Ice Cream Flavors:** Don’t limit yourself to just vanilla! Experiment with ice cream flavors that complement the brown butter’s complex profile. Salted caramel, rich coffee, or creamy peanut butter ice cream would all create incredible flavor harmonies, adding another layer of decadence to your dessert.
Storage and Reheating: Keeping Your Cookie Fresh
Proper storage and reheating ensure you can enjoy this delicious skillet cookie beyond its initial bake:
- **Room Temperature:** If you plan to enjoy it within a couple of days, cover the skillet cookie tightly with aluminum foil or plastic wrap. Its thicker nature helps it retain moisture better than thinner cookies, keeping it fresh for up to 2 days on the counter.
- **Refrigerator:** For longer storage, wrap the cookie tightly in plastic wrap and store it in the refrigerator. It will remain fresh and delicious for 4-5 days.
- **To Reheat:** For best results, reheat the entire skillet cookie (or individual slices) in a 325°F (160°C) oven for 8-10 minutes. This method helps restore the crispy edges and gooey center beautifully. Alternatively, individual slices can be microwaved for 15-20 seconds for a quick warm-up, though the edges won’t be as crisp.
- **Make-Ahead Dough:** For ultimate convenience, you can prepare the cookie dough in advance. Press the dough evenly into your 8-inch skillet, cover it tightly with plastic wrap, and refrigerate for up to 2 days before baking (you may need to add 2-3 minutes to the baking time). You can also freeze the prepared dough in the skillet for up to 3 months, covered tightly. Thaw overnight in the refrigerator before baking, adding a few extra minutes to the bake time.
Pan Size Adaptations: What if You Don’t Have an 8-Inch Skillet?
While this recipe is meticulously developed for an 8-inch skillet to achieve its unique texture, here’s how you can adapt it if you’re using a different pan:
- **Two Smaller Skillets (5-6 inch):** This is an excellent option for individual servings! Divide the dough equally between two mini skillets. Bake them at 325°F (160°C) for a shorter duration, typically 16-20 minutes. This creates perfect individual pizookies for a personalized date night treat.
- **10-Inch Skillet:** If using a 10-inch skillet, be aware that the dough will spread thinner. Consequently, you’ll need to reduce the baking time to approximately 18-22 minutes. Monitor it closely to prevent overbaking. While still delicious, it will lose some of the signature thick, ultra-gooey magic that the 8-inch pan provides. For a dedicated 10-inch recipe, consider trying a classic skillet cookie recipe specifically designed for that size.
- **Alternative Oven-Safe Pans:** No cast iron? No problem! You can still make this cookie in an 8-inch oven-safe non-stick skillet, a round cake pan of the same size, or a deep-dish pie plate. While the edges might not achieve the exact same level of crispiness as with cast iron, the cookie will still be incredibly delicious and satisfy your craving.
Frequently Asked Questions (FAQs) About Your 8-Inch Skillet Cookie
While you technically can, bypassing the brown butter means missing out on the unique, nutty, and toffee-like depth that makes this cookie truly special. If you must skip it, use ½ cup (113g) of regular melted butter, reducing the amount by 1 tablespoon (14g) to account for water evaporation during browning. For a classic chocolate chip skillet cookie without brown butter, a dedicated recipe might be a better fit.
Due to its intentional thickness, the center of this cookie naturally takes longer to set than thinner versions. If the middle appears genuinely raw (not just wonderfully soft and gooey), your oven might be running cooler than its set temperature. Try baking for an additional 3-5 minutes. For precision, the center should register approximately 175°–180°F (79-82°C) with an instant-read thermometer. Remember, it will continue to firm up considerably as it cools outside the oven.
Sinking in the middle can be attributed to several factors, especially with a thicker cookie. It often indicates that the center didn’t fully set before being removed from the oven. Ensure your oven temperature is accurate (an oven thermometer can help!) and bake until the edges are golden and the center is set but still soft. Over-mixing the dough, too much leavening, or insufficient flour can also contribute to sinking. This recipe is specifically formulated with a balanced flour-to-fat ratio and minimal baking soda to prevent sinking.
Absolutely! Using dark brown sugar will introduce a more pronounced molasses flavor, resulting in a deeper, richer, and more intense caramel note in your cookie. Both light and dark brown sugars work beautifully, offering slightly different but equally delicious flavor profiles.
Yes, feel free to customize the chocolate to your liking! Semi-sweet, dark, milk, or even white chocolate (or a combination of these) will all be delicious. For optimal texture, I love using a blend: chocolate chips tend to hold their shape better, while chopped chocolate bars melt into luscious, gooey pools throughout the cookie. This mix ensures visual appeal and varied texture in every bite.
Yes, it’s highly recommended to lightly grease your skillet with butter or a nonstick cooking spray, even if you have a well-seasoned cast iron pan. This crucial step ensures that the cookie releases easily from the pan once baked, preventing sticking and making serving much simpler.
While you can double the ingredients, simply baking it in a larger 10 or 12-inch skillet will result in a thinner cookie and will alter the unique texture this 8-inch recipe achieves. If you desire more cookie, the best approach would be to bake two separate 8-inch skillet cookies if you have an additional pan. If using a larger skillet, expect a bake time of 28-32 minutes at 325°F (160°C), but anticipate a different (thinner) final texture.
Indeed! “Pizookie” is a playful portmanteau combining “pizza” and “cookie,” and it’s another popular name for a skillet cookie. It gained widespread popularity through restaurant chains like BJ’s, becoming a beloved homemade dessert. This specific recipe offers a smaller, thicker, and deeply flavorful brown butter rendition of the classic pizookie.
Many home bakers have reported success using a high-quality 1:1 gluten-free all-purpose flour blend in this recipe. While the final texture might exhibit slight variations compared to the traditional wheat flour version, it should still yield a delicious and satisfying gluten-free skillet cookie.
My classic skillet cookie typically uses a 10-inch pan, features traditional creamed butter, and a standard chocolate chip cookie dough. This particular recipe, however, is a sophisticated upgrade: it utilizes an 8-inch skillet for a noticeably thicker and gooier result, incorporates brown butter for an exquisite nutty caramel flavor, and includes precise tweaks like cornstarch and a reduced amount of baking soda. These adjustments are specifically designed to create a perfectly level top that resists sinking, delivering a truly indulgent, bakery-style cookie experience. Both are delicious, but this one leans into an elevated flavor and texture profile.
Brown Butter Chocolate Chip Skillet Cookie (8-inch)
15 mins
24 mins
39 mins
4 servings
Print Recipe
Ingredients
- 1/2 cup unsalted butter
- 1/2 cup light brown sugar
- 1/4 cup granulated sugar
- 1 large egg room temperature
- 1 tsp vanilla extract
- 1 cup all-purpose flour and 2 tablespoons (use weight measurement for this)
- 1½ tsp cornstarch
- 1/8 tsp baking soda
- ½ tsp salt
- 3/4 cup chocolate chips or chopped chocolate (extra for topping)
- Flaky salt for finishing
Instructions
-
Brown the butter in a saucepan until golden and nutty; cool 10-20 minutes.1/2 cup unsalted butter
-
Whisk butter with brown sugar and granulated sugar until glossy.1/2 cup light brown sugar, 1/4 cup granulated sugar
-
Whisk in egg and vanilla until smooth.1 large egg, 1 tsp vanilla extract
-
Stir in flour, cornstarch, baking soda, and salt just until combined.1 cup all-purpose flour and 2 tablespoons, 1½ tsp cornstarch, 1/8 tsp baking soda, ½ tsp salt
-
Fold in chocolate.3/4 cup chocolate chips or chopped chocolate
-
Press evenly into a lightly greased 8-inch skillet, smoothing the top flat.
-
Bake at 325°F (160°C) for 24–28 minutes, until edges are set and the center is slightly soft.
-
Rest 15 minutes before serving; sprinkle flaky salt on top.Flaky salt for finishing
Nutrition Facts (Approximate per serving)
Nutrition information is automatically calculated and should only be used as an approximation. It may vary based on specific ingredients and preparation.
Enjoyed this recipe? Leave a comment below!