
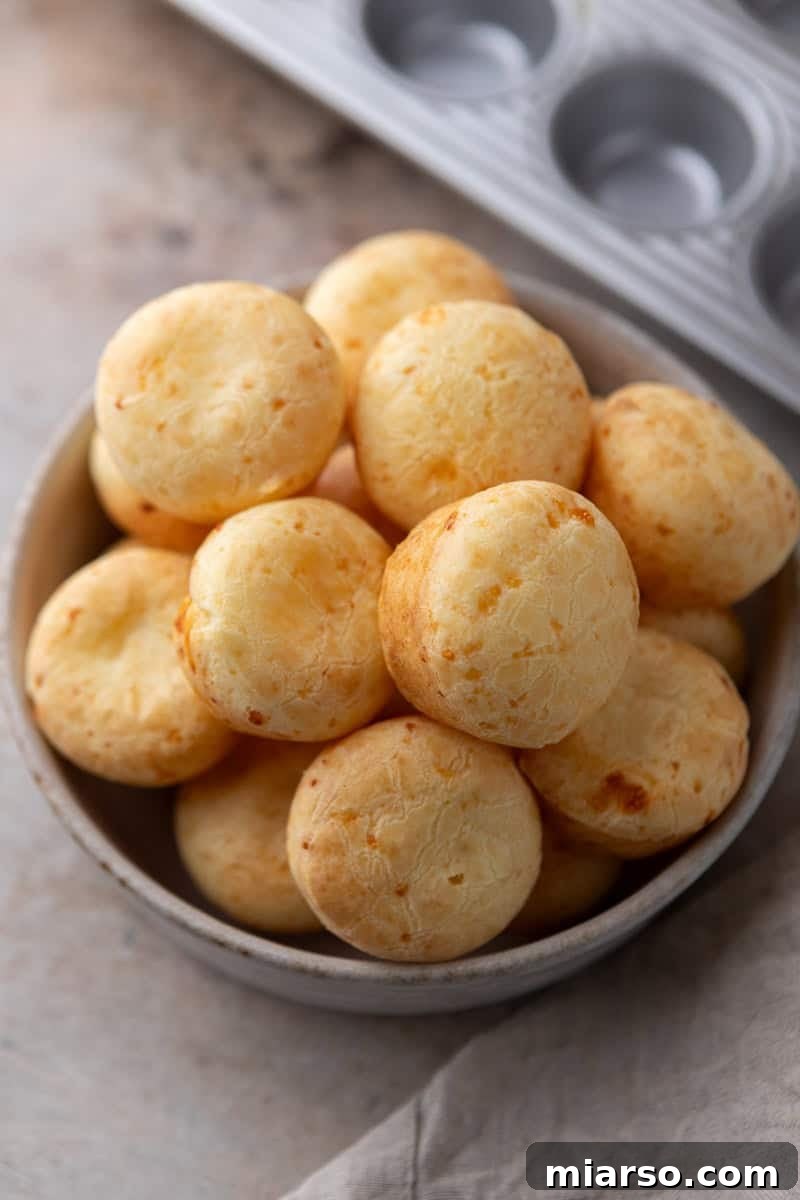
Irresistible Brazilian Cheese Bread Bites: Your Easy Guide to Perfect Pão de Queijo in a Mini Muffin Pan (Naturally Gluten-Free!)
Prepare to be enchanted by these incredible Brazilian cheese bread bites, affectionately known as pão de queijo. This recipe delivers everything these iconic treats should be: a wonderfully crisp exterior that gives way to a delightful, stretchy, and chewy interior. Best of all, they’re naturally gluten-free and so unbelievably addictive that you’ll want to make them again and again. Forget the tedious task of shaping individual balls by hand; this ingenious method bakes them in a mini muffin pan, guaranteeing extra crispy edges and perfectly puffed centers with minimal effort. It’s a game-changer for anyone craving authentic pão de queijo without the fuss.
This incredibly easy recipe relies on readily available pantry staples: tapioca flour, whole milk, your preferred oil, a single egg, and a generous amount of grated cheese. There’s no yeast involved, no need for a blender to achieve the perfect consistency, and absolutely no lengthy resting periods. Simply mix your ingredients, scoop the batter, and bake your way to Brazilian culinary bliss. These golden, savory bites are perfect on their own as a snack, as an appetizer for gatherings, or even alongside your favorite dips, like a zesty Rotel Cheese Dip or a creamy Cottage Cheese Queso. Get ready to experience a taste of Brazil right in your own kitchen!
Why You’ll Adore This Recipe: The Magic of Mini Pão de Queijo
There are countless reasons why this mini muffin pan version of Brazilian cheese bread will become a new favorite. We’ve streamlined the traditional pão de queijo making process to bring you a recipe that is both authentic in flavor and incredibly convenient to prepare. Here’s why this recipe truly shines:
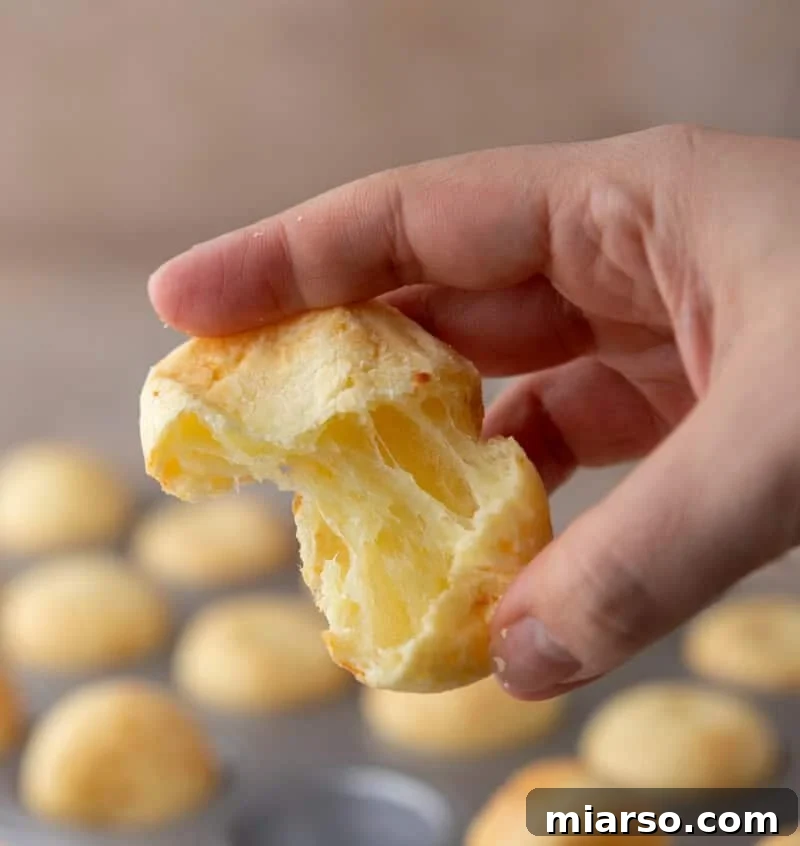
- Authentic Pão de Queijo Texture: Experience the true essence of pão de queijo with a golden, crisp crust and a hollow, unbelievably stretchy, and chewy interior. This unique texture is a hallmark of traditional Brazilian cheese bread.
- Naturally Gluten-Free Goodness: Crafted with tapioca starch instead of wheat flour, these cheese breads are a fantastic option for those with gluten sensitivities or anyone looking to enjoy a naturally gluten-free snack.
- Effortless Preparation: Say goodbye to complex equipment! This recipe requires just one bowl and a saucepan, eliminating the need for a blender and making cleanup a breeze.
- Mini Muffin Pan Perfection: Utilizing a mini muffin pan isn’t just a shortcut; it’s a secret weapon for enhanced structure and an abundance of those coveted crispy edges. Each bite-sized piece offers a satisfying crunch.
- Ready in Under 30 Minutes: From mixing the ingredients to pulling warm, fragrant cheese breads from the oven, this recipe is incredibly quick, perfect for last-minute cravings or unexpected guests.
- The Tapioca Flour Advantage: Tapioca flour, also known as tapioca starch, is the star ingredient. Its unique properties allow it to gelatinize when heated, creating that signature stretchy, mochi-like chewiness. As steam builds during baking, it provides natural lift, resulting in those perfectly puffed, hollow centers without any yeast.
The Story Behind Pão de Queijo: A Brazilian Culinary Gem
Pão de Queijo, which literally translates to “cheese bread,” holds a cherished place in Brazilian culture and cuisine. Originating in the state of Minas Gerais in the 18th century, it was initially a clever way to utilize leftover cheese and the cassava flour (tapioca flour) that was abundant in the region. During the colonial era, enslaved Africans would process cassava to extract its starch, which they then used to create various breads and pastries. Over time, cheese and milk were added, evolving into the beloved snack we know today.
Traditionally, pão de queijo is a staple at breakfast tables, coffee breaks (lanche da tarde), and celebrations across Brazil. Its popularity has spread globally, becoming a highlight in Brazilian steakhouses (churrascarias) and a comforting treat in homes worldwide. The magic of pão de queijo lies in its simplicity and the remarkable transformation of humble tapioca flour into a chewy, cheesy delight. This recipe honors that tradition while offering a modern, easy approach to bring this slice of Brazilian heritage into your home kitchen.
A Chef’s Secret for Perfect Pão de Queijo Bites
As a passionate foodie, I can tell you that these Brazilian cheese bread bites are a true obsession in my kitchen. I’ve personally made them five times in the last week alone, and that speaks volumes about their irresistible charm and ease of preparation. Once you master the unique texture of this dough, it effortlessly transitions into one of those ‘autopilot’ recipes. Whether you need a quick snack, an impressive appetizer for a party, a kid-friendly treat, or simply a delicious indulgence for yourself straight from the pan, these will hit the spot every time.
What I find most appealing about this recipe is how remarkably forgiving the dough is. At first glance, it might appear a bit unusual – perhaps slightly separated, glossy, and very stretchy. But trust the process! With a little mixing, it magically transforms into an incredibly elastic, cohesive, and perfectly scoopable batter. This batter then bakes up into the most satisfying little cheese popovers. You’ll watch in awe as they dramatically puff up in the oven, creating those signature hollow centers, before gently deflating slightly as they cool. This hollow core is precisely what makes pão de queijo so iconic and provides that incredible chew.
If you’ve ever savored authentic Brazilian cheese bread at a steakhouse or been treated to a homemade batch by a Brazilian friend, you’ve likely wondered if such culinary excellence could be replicated at home. I’m here to tell you with full confidence that it absolutely can be, and it’s far simpler than you might imagine. This recipe is your gateway to recreating that beloved experience right in your own kitchen.
Essential Ingredients for Authentic Pão de Queijo
Crafting these delectable Brazilian cheese bread bites requires a handful of simple ingredients, each playing a crucial role in achieving the perfect flavor and texture. Quality ingredients truly make a difference, so choose them wisely.
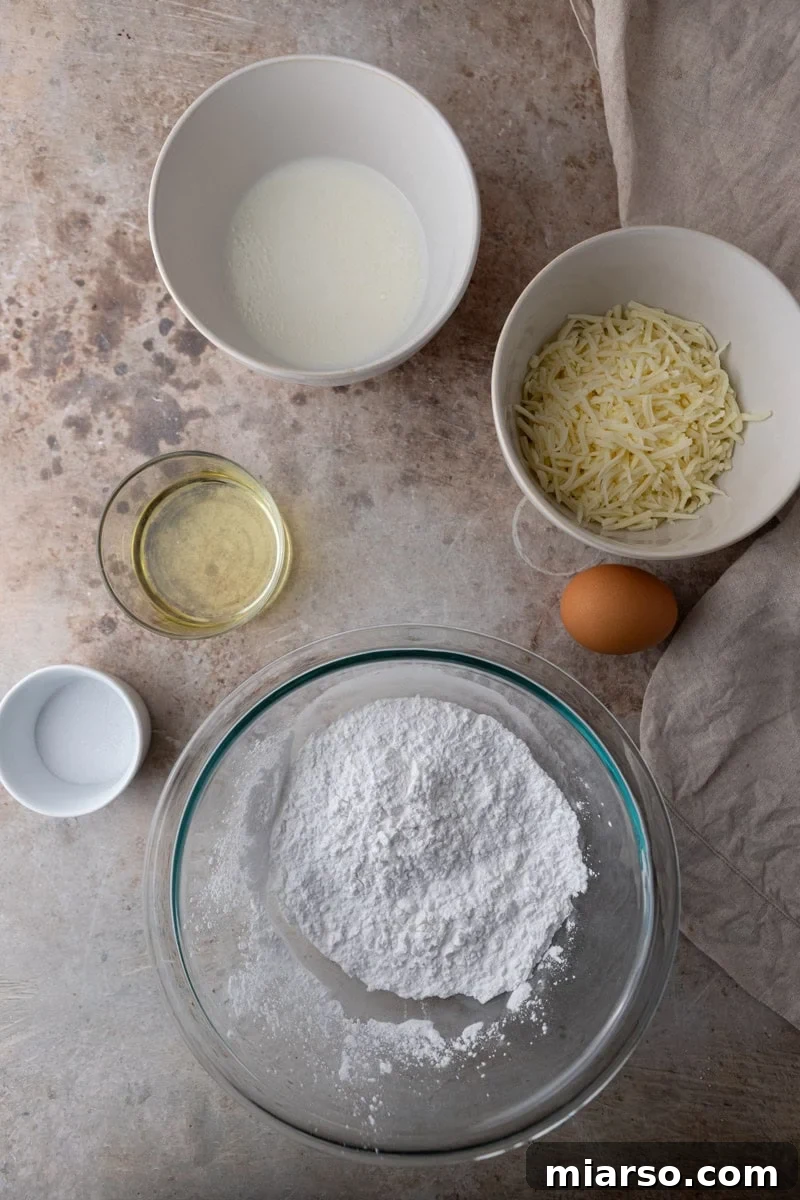
- Tapioca Starch (Tapioca Flour): This is the cornerstone of pão de queijo, essential for its unique chewy, elastic texture and naturally gluten-free nature. Do not substitute with other flours.
- Whole Milk: Provides richness and moisture to the dough, contributing to its tender interior. Full-fat milk is recommended for the best flavor and texture.
- Vegetable Oil (or Olive Oil): Adds essential fat to the dough, keeping it moist and aiding in the crispy exterior. A neutral-flavored vegetable oil works well, but a light olive oil can also impart a subtle, pleasant flavor.
- Salt: Balances the flavors and enhances the cheesiness. Don’t skip it!
- Egg: Acts as a binder, helping the dough come together and providing structure as the cheese breads puff up. Ensure your egg is at room temperature for better incorporation into the dough.
- Grated Cheese: The heart of “cheese bread”! The type and quality of cheese are paramount for flavor and stretch.
Choosing Your Cheese Wisely for the Best Flavor Blend
The right cheese blend is key to achieving that irresistible pão de queijo flavor and the signature stretchy pull. While many cheeses can be used, a combination often yields the best results:
- Parmesan: Adds a sharp, savory depth of flavor and contributes to the overall structure of the bread. Freshly grated Parmesan is always superior to pre-shredded varieties.
- Mozzarella: Provides the wonderful meltiness and stretch that defines pão de queijo. Opt for low-moisture mozzarella for the best texture without excess water.
- Other Options: If you can find it, authentic Minas cheese (queijo minas) is traditional. You can also experiment with a blend of Gruyere, cheddar, or provolone for different flavor profiles, ensuring they grate well and melt beautifully. The finer the grate, the better it integrates into the dough.
The Magic of Tapioca Starch (Polvilho Doce)
A quick note on our star ingredient: tapioca starch. Often labeled as tapioca flour, this finely ground starch derived from the cassava root is what gives pão de queijo its distinctive characteristics. There are two main types: polvilho doce (sweet tapioca starch) and polvilho azedo (sour tapioca starch). Polvilho doce is generally preferred for its neutral flavor and is easier to work with, yielding a softer, chewier bread. Polvilho azedo, which is fermented, offers a slightly tangier flavor and often results in a bread with a more pronounced crispy crust and airier interior. For this recipe, readily available tapioca starch (polvilho doce) works perfectly and ensures a consistently delicious result.
Step-by-Step Guide: Crafting Your Delicious Brazilian Cheese Bread Bites
Follow these detailed instructions to create perfectly puffed and wonderfully chewy Brazilian cheese bread bites. Precision in a few key steps will ensure success!
- Prepare Your Pan: Preheat your oven to 375°F (190°C). This is a crucial first step for even baking. Next, generously grease all 24 cavities of a mini muffin pan. These cheese breads puff up significantly and can stick if the pan is not adequately greased, so don’t skimp on this step!
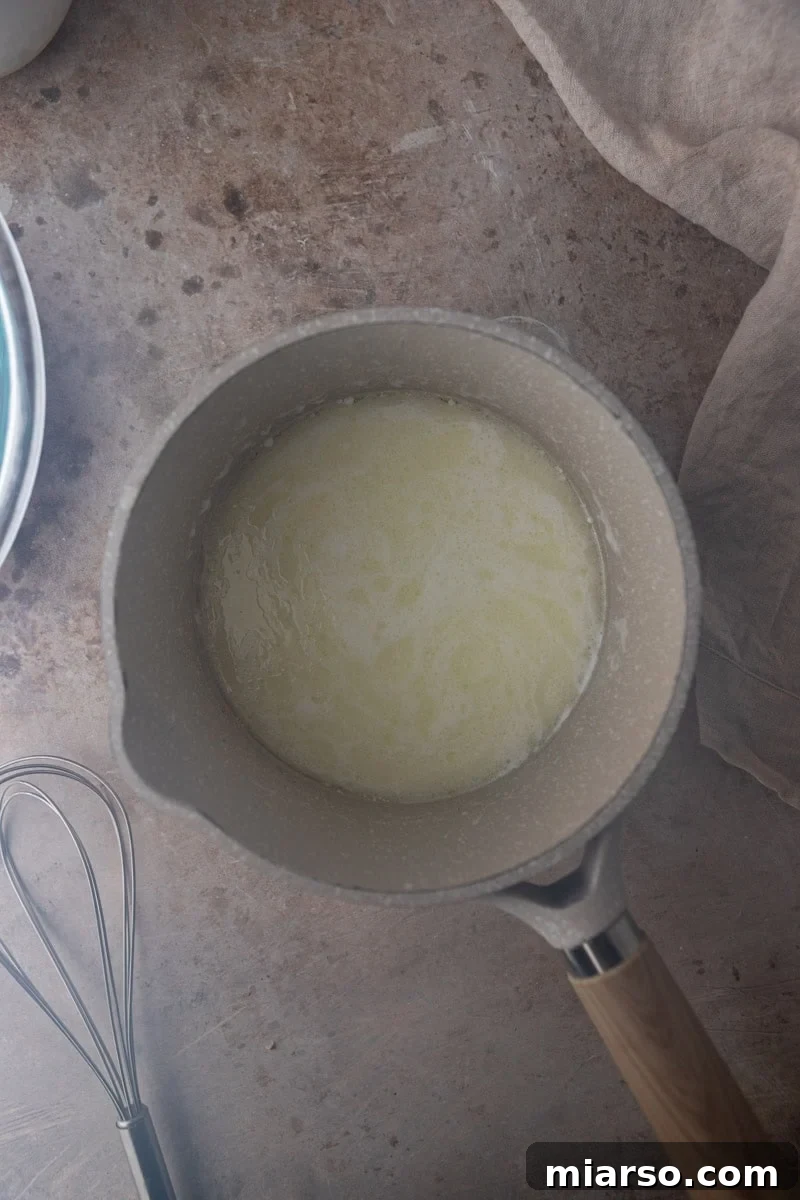
- Heat the Liquids: In a small saucepan, combine the whole milk, vegetable oil, and salt. Heat this mixture over medium heat until it just begins to simmer around the edges. It’s important not to bring it to a rolling boil, as this can affect the texture of the tapioca flour. Remove from heat immediately once simmering.
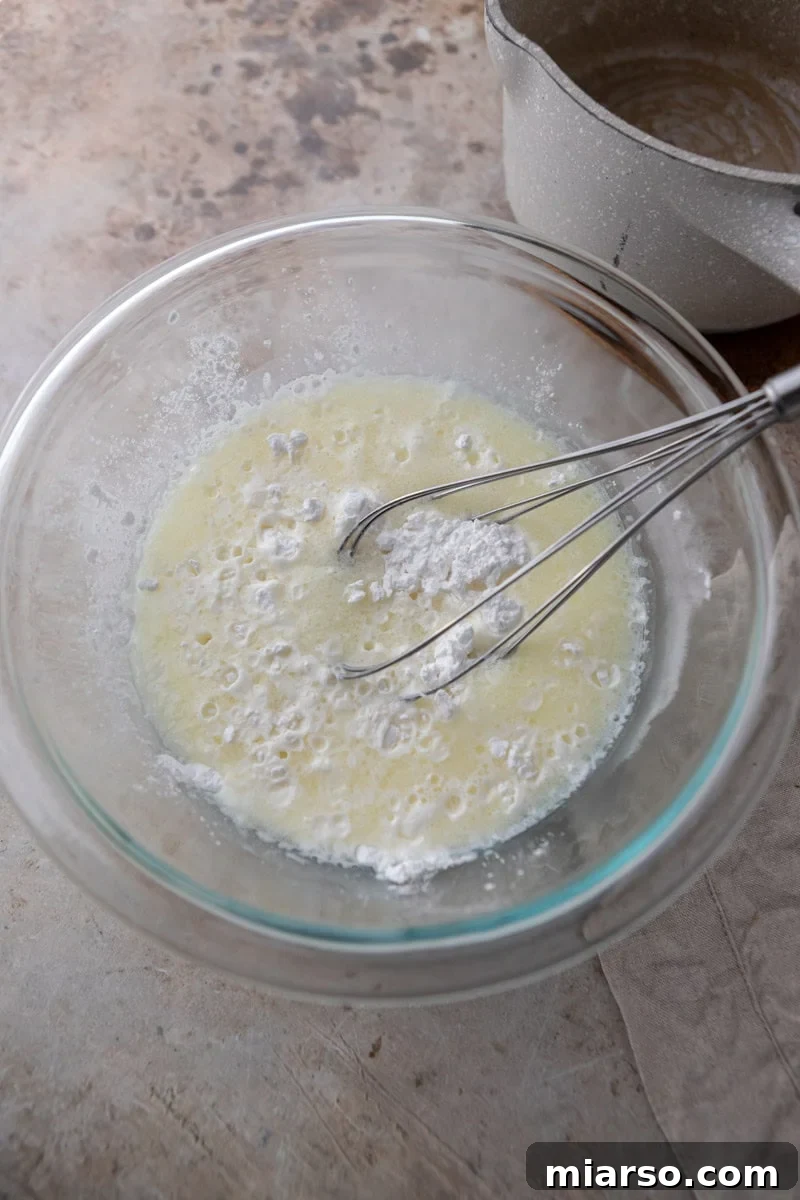
- Form the Dough Base: Place the tapioca flour in a large, heat-safe mixing bowl. Carefully pour the hot liquid mixture from the saucepan directly over the tapioca flour. Stir immediately and vigorously with a sturdy spoon or spatula until a thick, glossy, and somewhat cohesive dough forms. The hot liquid gelatinizes the starch, which is key to the texture.
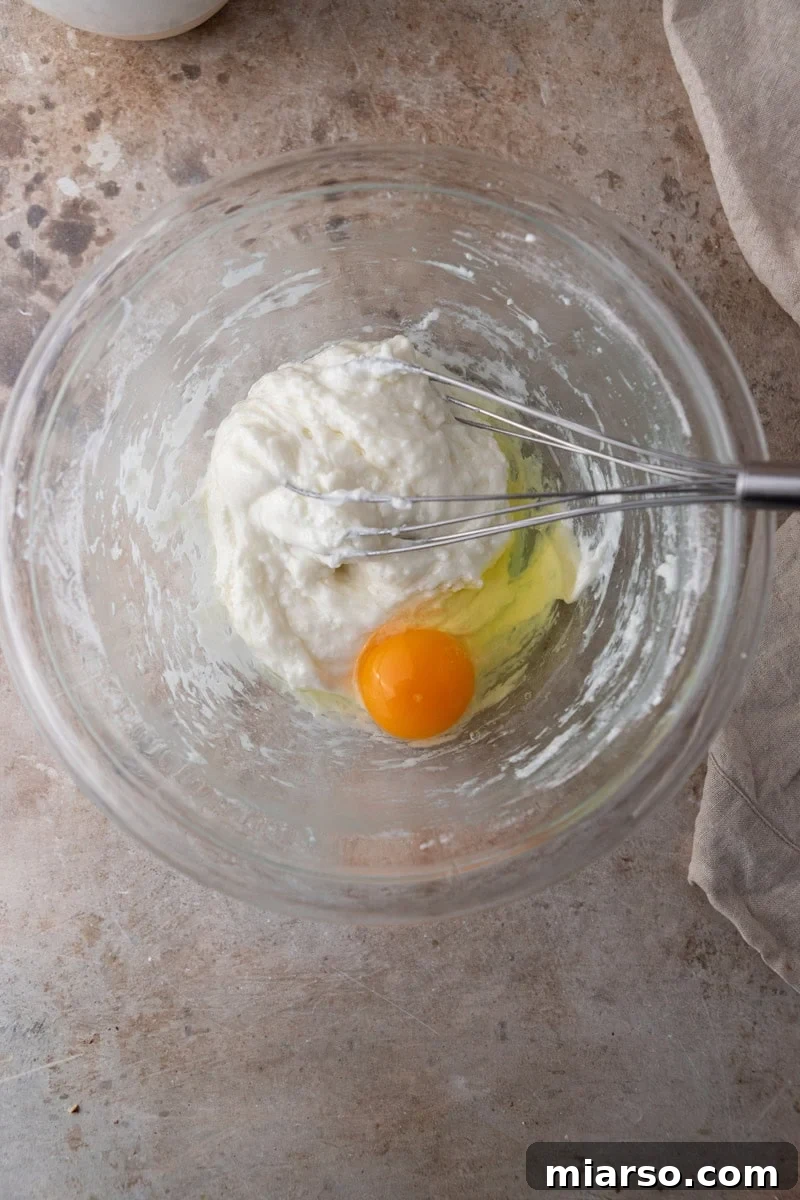
- Incorporate the Egg: Allow the dough to rest for 2-3 minutes. It should be warm to the touch, but not hot enough to cook the egg. Add the room-temperature egg to the warm dough. Whisk vigorously (you can use a hand whisk or a stand mixer with a paddle attachment) until the dough becomes completely smooth and elastic. It will appear separated or “shaggy” at first, but keep mixing – it will come together into a wonderfully stretchy consistency.
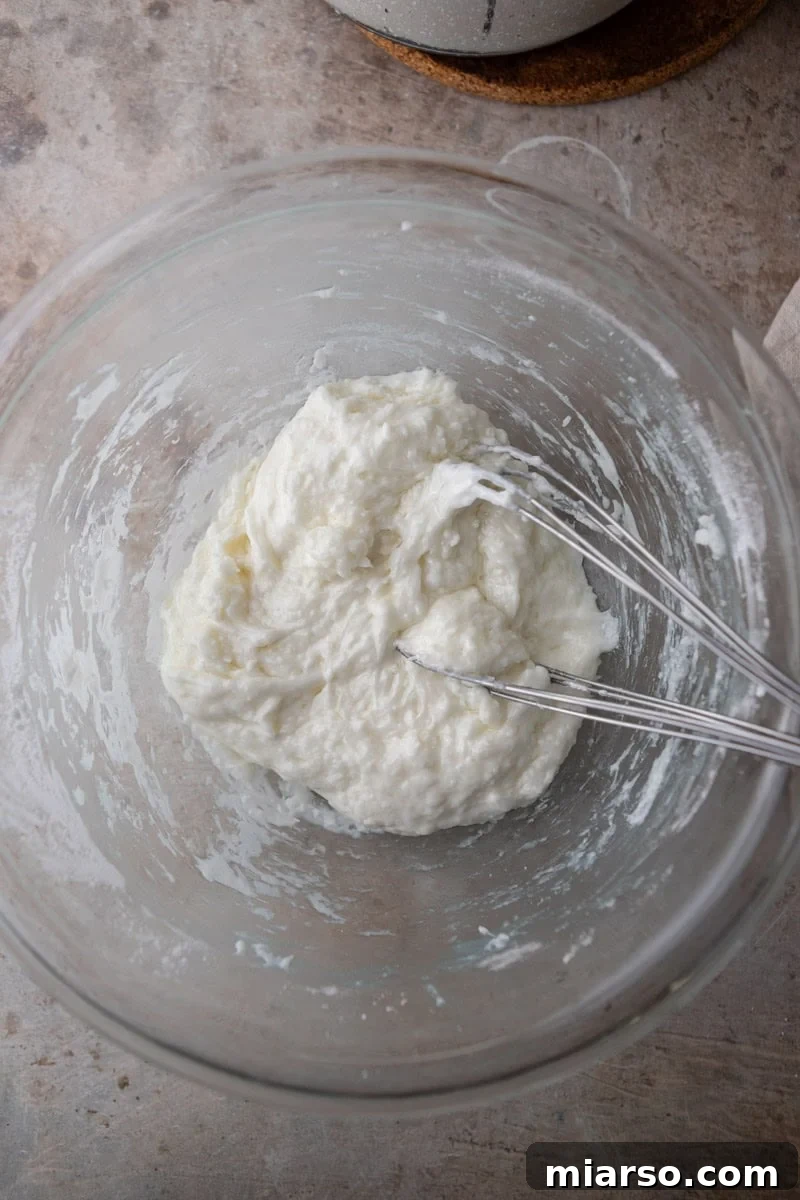
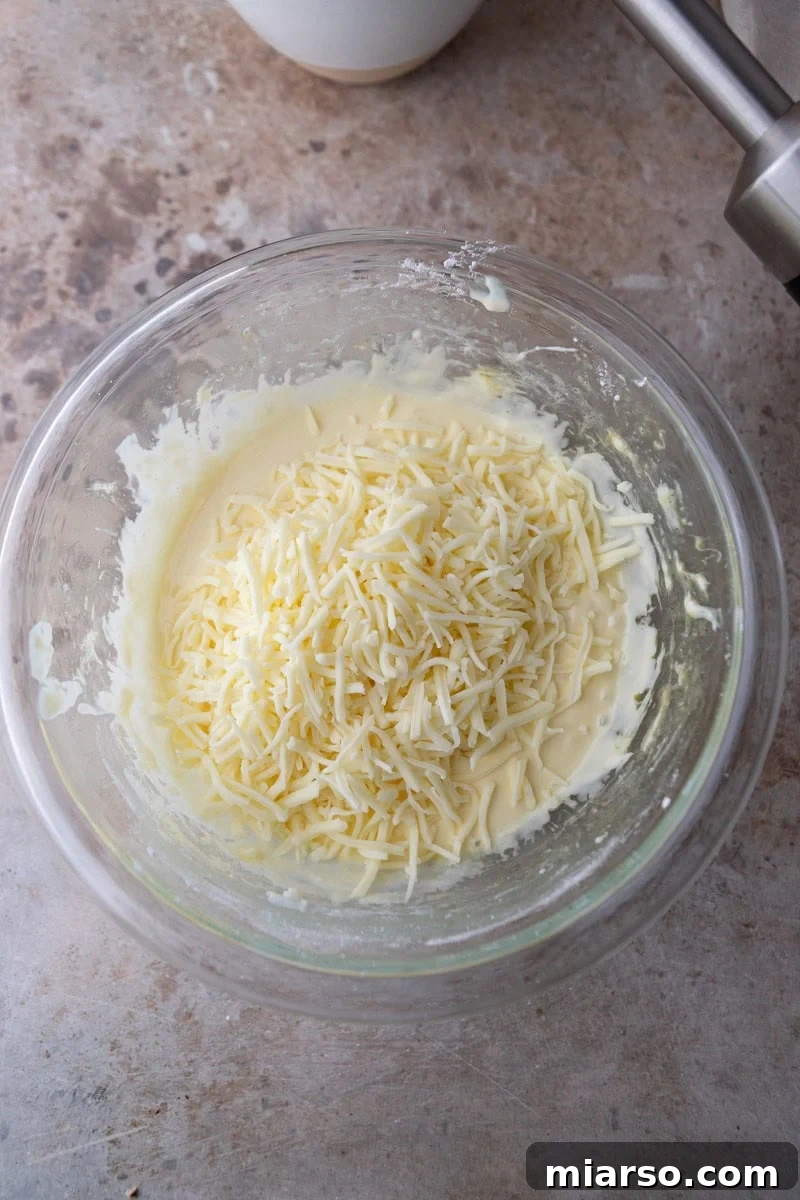
- Add the Cheese: Gently fold in the grated cheese until it is evenly distributed throughout the batter. The final batter should be thick, visibly stretchy, and easily scoopable – it will have a consistency similar to a very sticky choux pastry dough.
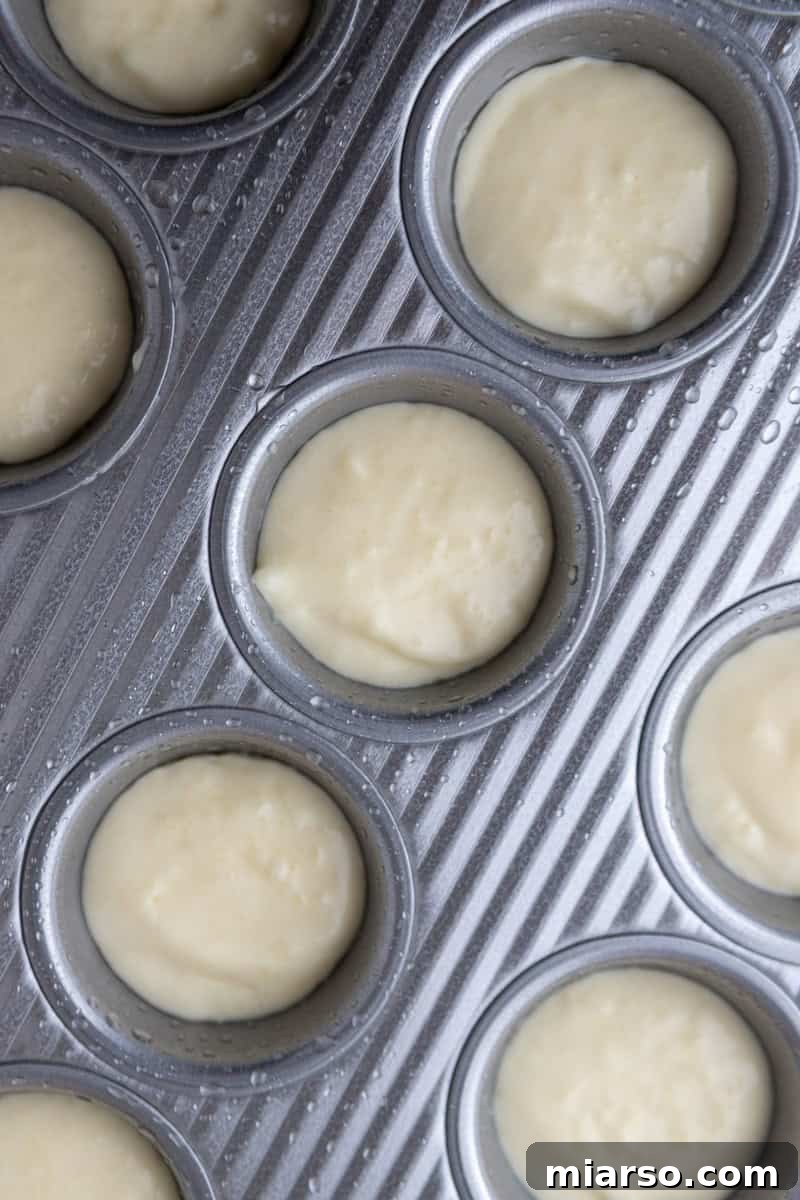
- Fill the Muffin Cups: Using a small spoon, a mini ice cream scoop, or a piping bag, fill each mini muffin cup about halfway with the cheese bread batter. Avoid overfilling, as they will puff up considerably.
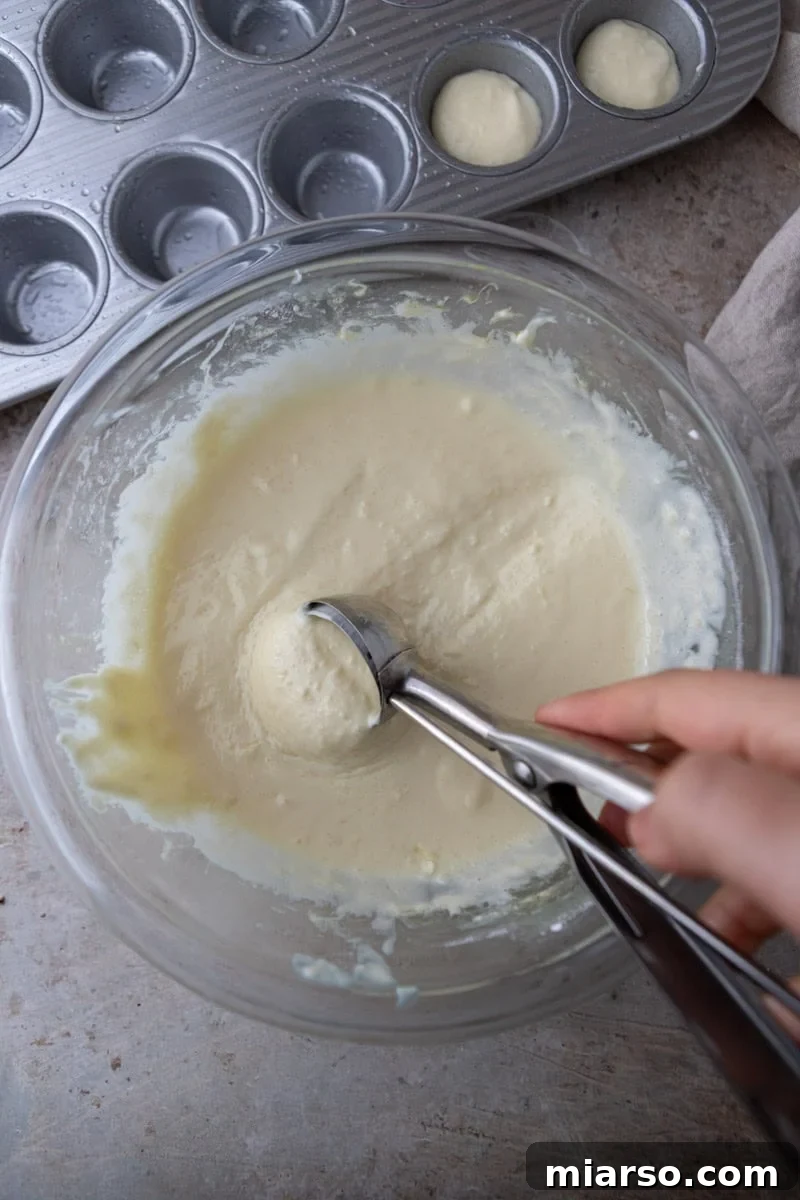
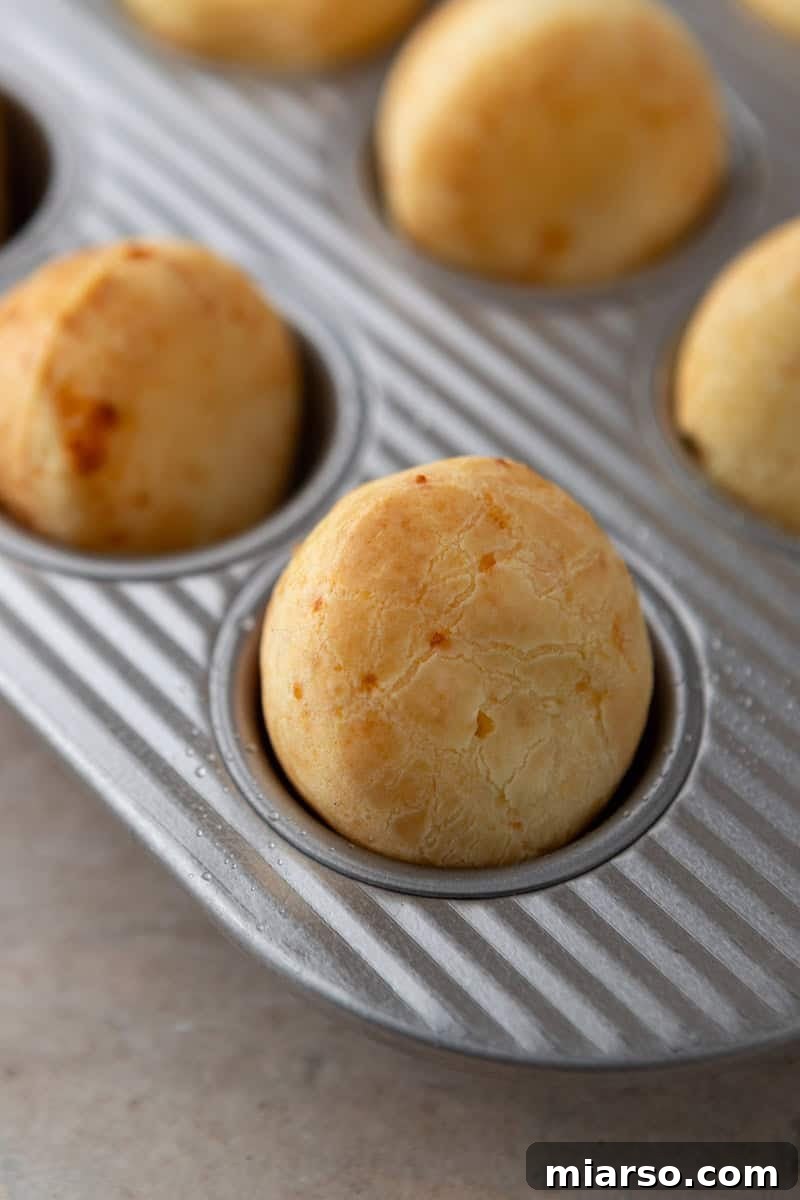
- Bake to Perfection: Place the mini muffin pan in your preheated oven and bake for 16-18 minutes. The cheese breads should be beautifully puffed up, lightly golden brown on top, and set. If you prefer a deeper, more pronounced golden color and extra crispiness, you can bake them for an additional 1-2 minutes, keeping a close eye to prevent burning.
- Rest and Serve: Once baked, remove the pan from the oven and let the pão de queijo rest in the pan for 3-5 minutes. This resting period is important as they firm up slightly as steam escapes. After resting, carefully remove them from the pan and serve warm. Enjoy!
Expert Tips for Flawless Pão de Queijo Bites
Achieving the perfect pão de queijo texture is simple with a few insider tips. Here’s how to ensure your cheese bread bites turn out perfectly every time, specifically tailored for the mini muffin pan method:
- Achieving Extra Crispy Bottoms: For those who love an extra crunch, preheat your empty mini muffin pan in the oven for about 3 minutes before you scoop in the batter. The hot pan will immediately begin to cook the dough, creating a crispier base.
- Why Your Pão de Queijo Might Be Flat or Dense: If your cheese breads don’t puff up or turn out dense, it could be due to a couple of factors. Ensure your dough doesn’t cool down too much before baking – the warmth is key for activating the tapioca starch. Also, check your cheese choice; using a cheese that is too heavy or has too much moisture can weigh down the batter.
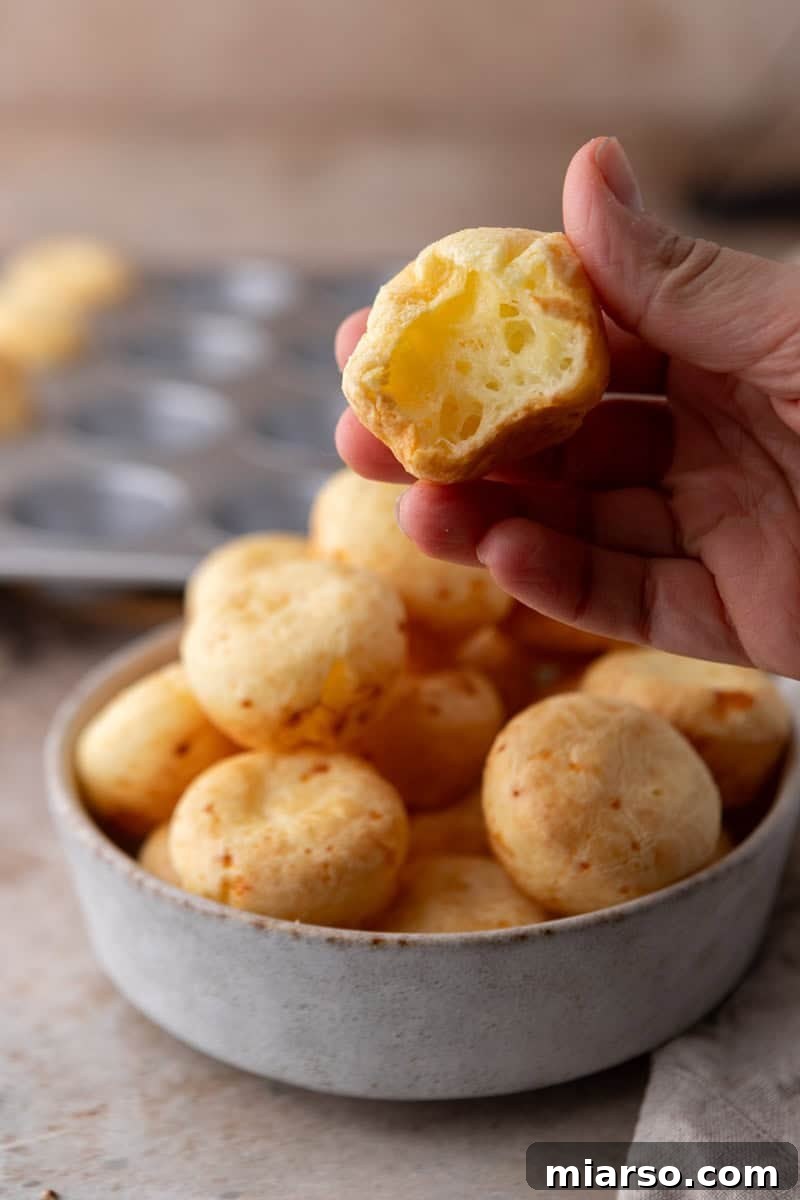
- Understanding the Hollow Interior: Don’t be alarmed if your pão de queijo has a noticeably hollow space inside. This is completely normal and, in fact, an authentic and desired characteristic of this traditional Brazilian bread. It’s a result of the steam created during baking, contributing to its light, chewy texture.
- Preventing Sticky Bottoms: If you find your cheese breads are sticking to the pan, it’s likely that the mini muffin pan wasn’t sufficiently greased, or you tried to remove them too soon. Always grease thoroughly, and allow them to rest for the recommended 3-5 minutes after baking; they firm up as they cool slightly, making them easier to release.
- Room Temperature Ingredients: Ensure your egg and milk are at room temperature. This helps them emulsify more effectively with the other ingredients, leading to a smoother batter and better overall texture.
- Don’t Overmix (After Egg): While vigorous mixing is needed to initially combine the hot liquid and tapioca flour, once the egg is added and the dough is smooth, avoid excessive overmixing, especially after folding in the cheese. Just mix until combined.
Exciting Flavor Variations to Explore
While classic pão de queijo is utterly delicious on its own, it also serves as a fantastic canvas for various flavor enhancements. Feel free to get creative with these delicious variations:
- Garlic Cheese Bread: Elevate the savory profile by adding ¼ teaspoon of garlic powder to the dry tapioca flour, or finely mince 1-2 cloves of fresh garlic and fold it in with the cheese.
- Herby Delights: For a fresh, aromatic twist, fold in 1-2 tablespoons of finely chopped fresh herbs like rosemary, chives, oregano, or a mix of Italian herbs with the cheese.
- Spicy Kick: If you enjoy a bit of heat, add a pinch (⅛ to ¼ teaspoon) of cayenne pepper or smoked paprika to the dough along with the salt. A dash of red pepper flakes can also add a pleasant warmth.
- Onion & Everything Bagel: Incorporate 1-2 tablespoons of dried minced onion or onion powder for a subtle savory note. Alternatively, sprinkle a little “Everything Bagel” seasoning on top of the batter before baking for a unique crust.
- Sun-Dried Tomato & Basil: Finely chop a few oil-packed sun-dried tomatoes and fresh basil leaves, then fold them into the batter with the cheese for a Mediterranean-inspired twist.
Make-Ahead & Freezer-Friendly Option
These Brazilian cheese bread bites are wonderfully freezer-friendly, making them perfect for meal prepping or having a quick snack on hand whenever a craving strikes.
- To Freeze Unbaked Batter: Prepare the batter as directed. Scoop the batter into the greased mini muffin pan cavities, filling them halfway. Place the entire pan in the freezer and freeze until the portions are solid. Once frozen, pop the individual cheese bread portions out of the pan and transfer them to a freezer-safe bag or airtight container. They can be stored for up to 2-3 months.
- Baking from Frozen: When you’re ready to bake, there’s no need to thaw! Simply preheat your oven to 375°F (190°C), place the frozen portions back into a greased mini muffin pan, and bake for 20-22 minutes, or until puffed, golden, and cooked through.
- Storing Baked Pão de Queijo: Fully baked pão de queijo can be stored in an airtight container at room temperature for up to 1 day, or in the refrigerator for up to 3 days.
- Reheating Baked Pão de Queijo: For the best texture, reheat baked cheese breads in a preheated oven at 350°F (175°C) for 5-7 minutes, or in an air fryer for 3-4 minutes, until warmed through and the exterior is crisp again. Microwaving is not recommended as it can make them chewy but soft.
Frequently Asked Questions (FAQs) About Brazilian Cheese Bread (Pão de Queijo)
Pão de queijo is a beloved traditional Brazilian cheese bread, originally from the state of Minas Gerais. It’s distinctive for being made with tapioca flour instead of wheat flour, which makes it naturally gluten-free and gives it a unique crisp outside and a wonderfully stretchy, chewy interior.
Yes, absolutely! Authentic Brazilian cheese bread is exclusively made with tapioca starch (cassava flour), not wheat flour. This makes it a fantastic and naturally gluten-free option for everyone to enjoy.
While many pão de queijo recipes utilize a blender for convenience, this specific version emphasizes a saucepan and bowl method for optimal texture control and a slightly chewier result. However, if you prefer a quick shortcut, you can blend the room-temperature milk, oil, egg, tapioca flour, and cheese until smooth, then proceed with filling and baking.
It’s completely normal for the dough to appear somewhat separated, lumpy, or glossy after you pour the hot liquid over the tapioca flour and even after adding the egg. Keep mixing vigorously; the starch needs time to fully hydrate and emulsify with the other ingredients. After a minute or two of continuous whisking, the batter will magically transform into a smooth, elastic, and cohesive consistency.
For the best balance of flavor and texture, a blend of cheeses is ideal. Parmesan provides a robust, salty flavor and contributes to a good crust, while mozzarella adds that essential meltiness and irresistible stretch. You can also experiment with other firm, flavorful cheeses like Gruyere, or traditional Brazilian Minas cheese if available.
Yes, you can. Store any leftover baked cheese breads in an airtight container in the refrigerator for up to 3 days. For the best possible texture and a return to their crispy exterior, reheat them in a preheated oven or an air fryer before serving.
The distinctive hollow center in pão de queijo is not a flaw, but a signature characteristic! It’s created by the steam that generates inside the dough during the high heat of baking. This steam causes the bread to puff dramatically, leaving that wonderfully airy and chewy core that makes pão de queijo so unique and enjoyable.
Pão de queijo is incredibly versatile. They are delicious on their own as a snack, with coffee or tea. They also pair wonderfully with savory dips like our suggested Rotel Cheese Dip or Cottage Cheese Queso. For a complete Brazilian experience, serve them alongside a traditional feijoada or a simple grilled steak. They are also excellent with a smear of cream cheese or a light drizzle of honey for a sweet and savory contrast.
Brazilian Cheese Bread Bites (Mini Muffin Pan)
These steakhouse-style Brazilian cheese bread bites are irresistibly crisp on the outside and wonderfully stretchy on the inside. Baked conveniently in a mini muffin pan with tapioca flour, they are naturally gluten-free and dangerously addictive.
Prep time: 7 mins
Cook time: 16 mins
Total time: 23 mins
Servings: 24 servings
Equipment
- Mini Muffin Tin
- Small Saucepan
- Large Mixing Bowl
- Whisk or Sturdy Spoon
Ingredients
- 1 cup tapioca starch (tapioca flour)
- ½ cup whole milk
- ¼ cup oil (vegetable or light olive oil)
- ½ tsp salt
- 1 large egg, room temperature
- ¾ cup finely grated cheese
Best cheese blend: ½ cup finely grated Parmesan & ¼ cup low-moisture mozzarella
Instructions
- Preheat oven to 375°F (190°C). Generously grease all 24 mini muffin cups. This prevents sticking as they puff.
- In a small saucepan, combine milk, oil, and salt. Heat until the mixture just begins to simmer around the edges (do not boil).
- Place tapioca starch in a heatproof bowl. Pour the hot milk mixture over it and stir immediately until a thick, glossy dough forms.
- Let the dough rest for 2–3 minutes until warm (not hot). Add the egg and whisk vigorously until smooth and elastic. The dough may look separated at first, but keep mixing until it comes together.
- Fold in the grated cheese until evenly distributed. The final batter should be thick, elastic, and scoopable.
- Scoop or pipe the dough into each muffin cup, filling each about halfway.
- Bake for 16-18 minutes, until puffed, lightly golden, and set. For a deeper golden color, bake an extra 1–2 minutes, monitoring closely.
- Let rest for 3–5 minutes in the pan before carefully removing. They firm up as steam escapes. Serve warm and enjoy!
Nutrition
Nutrition information is automatically calculated, so should only be used as an approximation (per serving).
- Calories: 55 Calories
- Carbohydrates: 5g
- Protein: 1g
- Fat: 3g
- Saturated Fat: 1g
- Polyunsaturated Fat: 1g
- Monounsaturated Fat: 2g
- Trans Fat: 0.01g
- Cholesterol: 10mg
- Sodium: 98mg
- Potassium: 16mg
- Sugar: 0.3g
- Vitamin A: 43IU
- Calcium: 34mg
- Iron: 0.1mg
Like this recipe? We’d love to hear from you! Leave a comment below and share your experience!