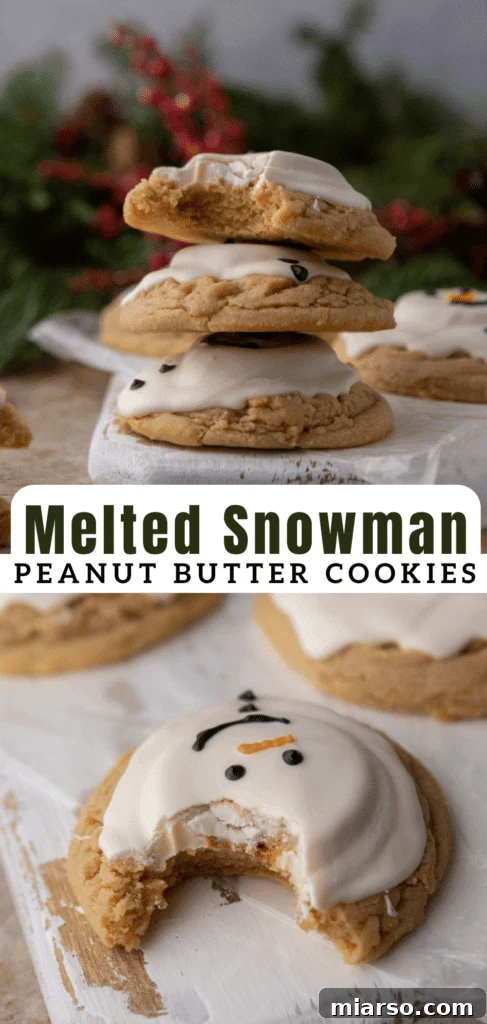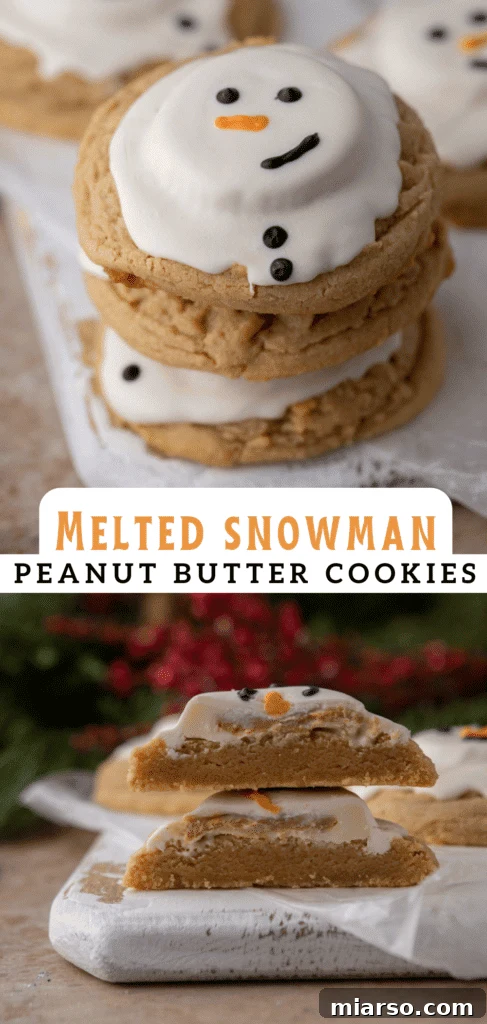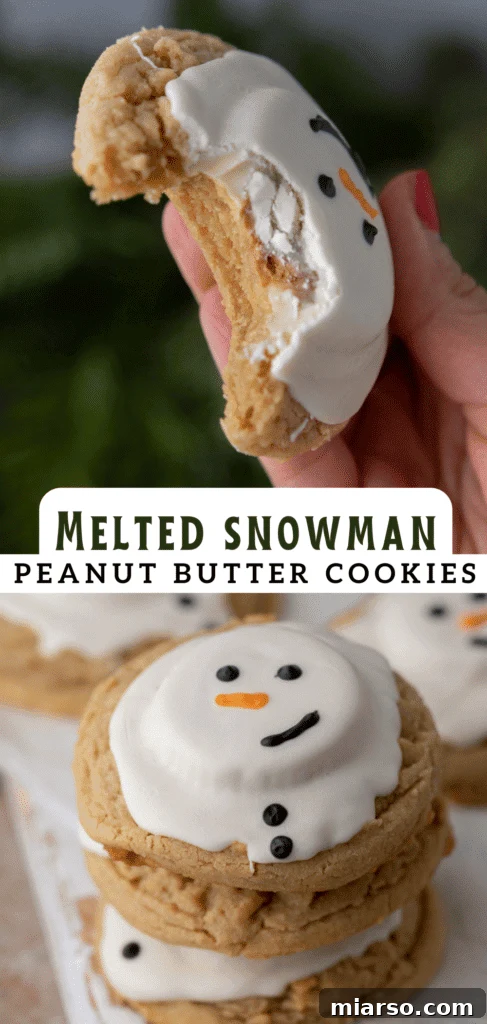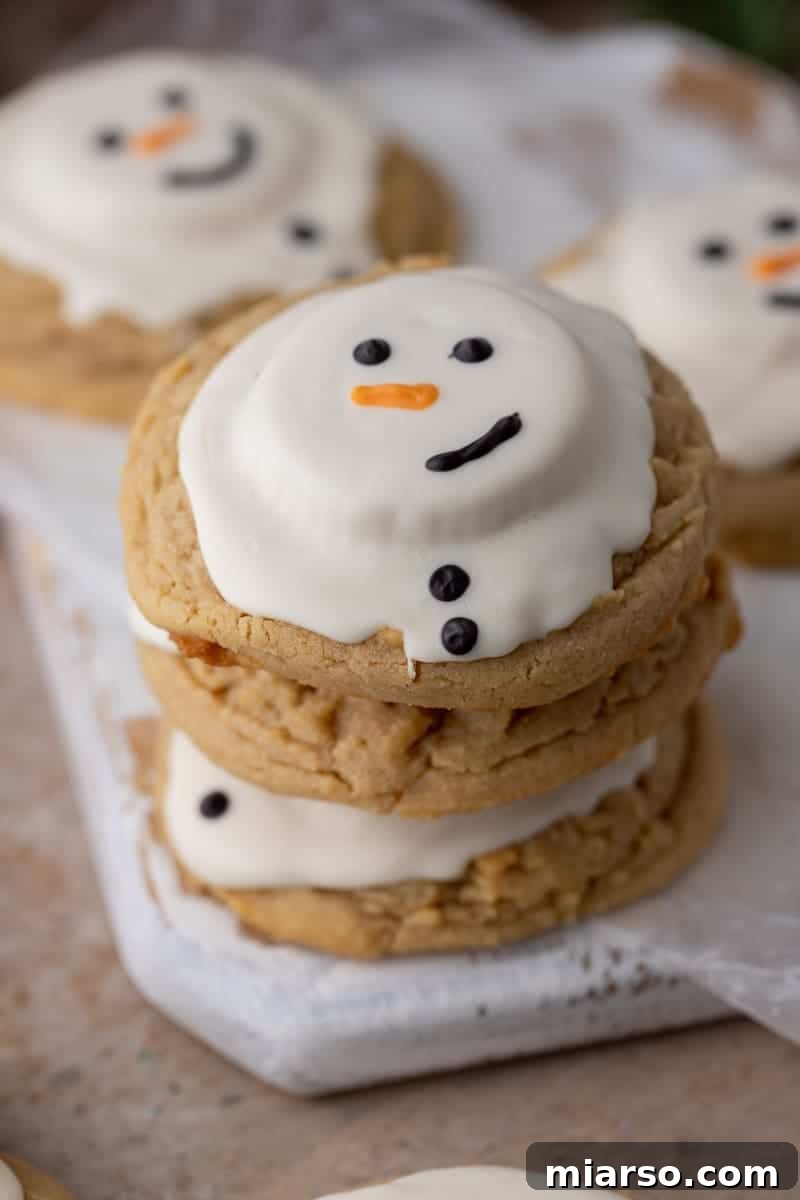
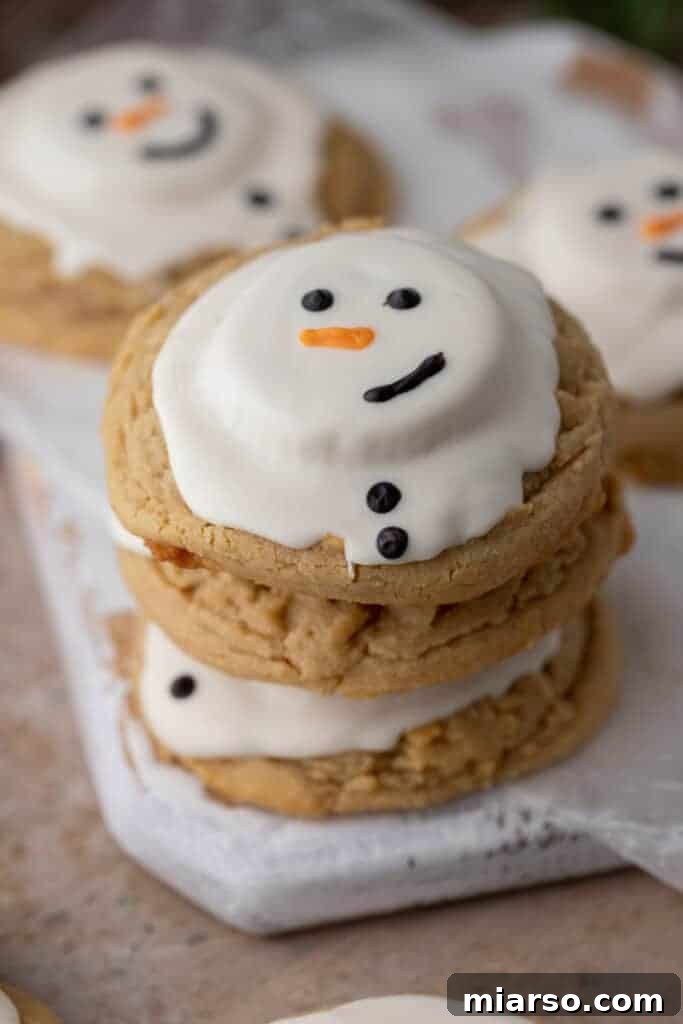
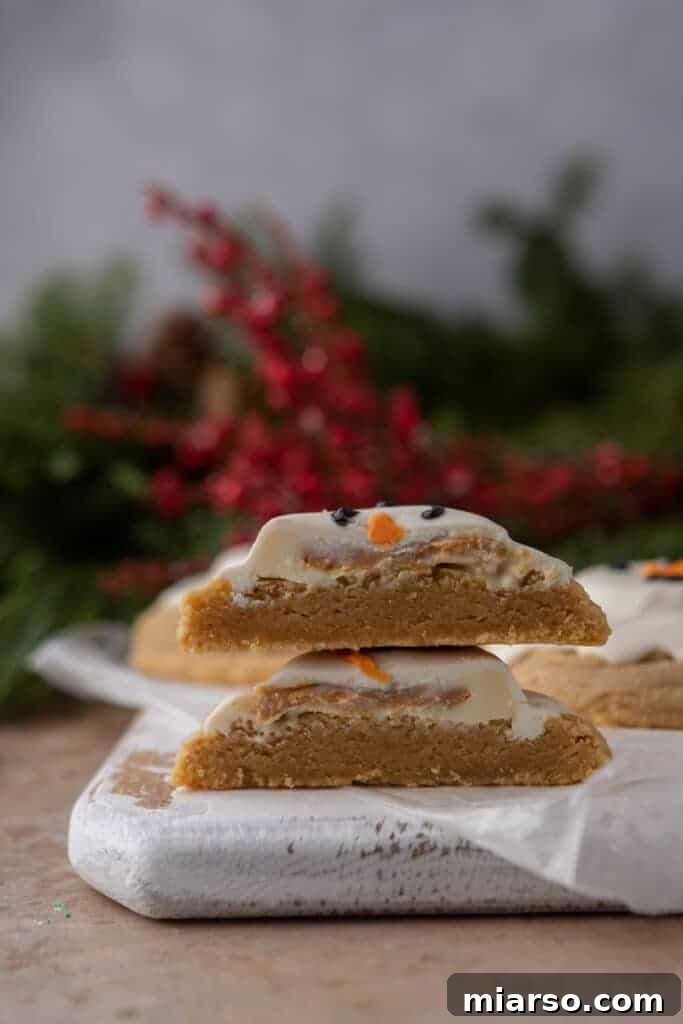
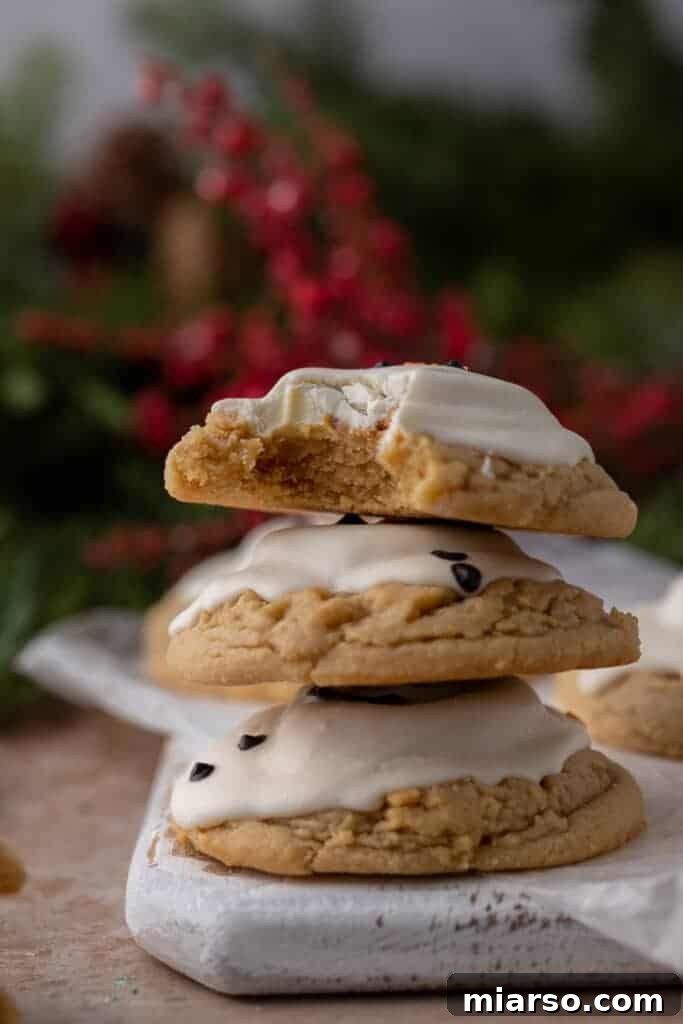
Step into the enchanting world of holiday baking with this utterly delightful and irresistibly cute Melted Snowman Peanut Butter Cookies Recipe. These charming holiday treats combine the rich, comforting flavor of a soft, buttery peanut butter cookie base with the sweet surprise of a white chocolate peanut butter cup, all adorned with a playful melted snowman face. Perfect for igniting the festive spirit, these snowman cookies are not just a dessert; they’re a delightful experience waiting to unfold in your kitchen. Whether you’re planning a cozy family baking session or preparing impressive edible gifts, these easy-to-make cookies promise smiles and delicious memories. Get ready to create a batch of festive magic that will undoubtedly become a cherished part of your holiday traditions!
If you’re as passionate about holiday-inspired desserts as we are, you’ll love exploring other festive creations. Don’t miss out on this amazing Peppermint Chocolate Chip Cookies Recipe for a refreshing twist, or dive into the artistry of this Festive Marbled Christmas Sugar Cookie Recipe. For those who enjoy a touch of whimsy, these adorable Grinch Sugar Cookies are an absolute must-try! These recipes are sure to add extra cheer to your holiday baking list.
Why This is The Best Melted Snowman Peanut Butter Cookies Recipe for Your Holidays!
There’s peanut butter, and then there’s peanut butter elevated to a new realm of deliciousness, especially when combined with chocolate. Our Melted Snowman Peanut Butter Cookies take this classic pairing a step further, featuring a creamy white chocolate coating that creates an unparalleled flavor fusion. The magic of these cookies lies not only in their exquisite taste but also in their charming and whimsical visual appeal. Each cookie transforms into a delightful “melting snowman,” making them a unique and conversation-starting treat for any holiday gathering.
This recipe distinguishes itself through its remarkable simplicity. Utilizing straightforward, readily available ingredients, it’s designed to be a joyous and stress-free baking project, making it ideal for involving children and creating cherished family memories during the holiday season. The process is as much fun as the outcome, fostering a sense of togetherness and creativity in the kitchen.
Beyond their incredible flavor and ease of preparation, these festive peanut butter cookies beautifully encapsulate the essence of winter and Christmas. They’re more than just a sweet treat; they’re tiny bundles of holiday cheer, promising to bring warmth and joy to your home. Imagine the delight on faces as guests discover these adorable, delicious snowmen on your dessert platter.
Whether you’re baking for your own enjoyment, crafting beautiful Christmas cookie boxes for friends and family, or simply seeking a delightful activity to brighten a cold winter’s day, these holiday peanut butter cookies are guaranteed to be a hit. Watch them disappear as quickly as you make them, leaving behind nothing but happy smiles and a festive glow!
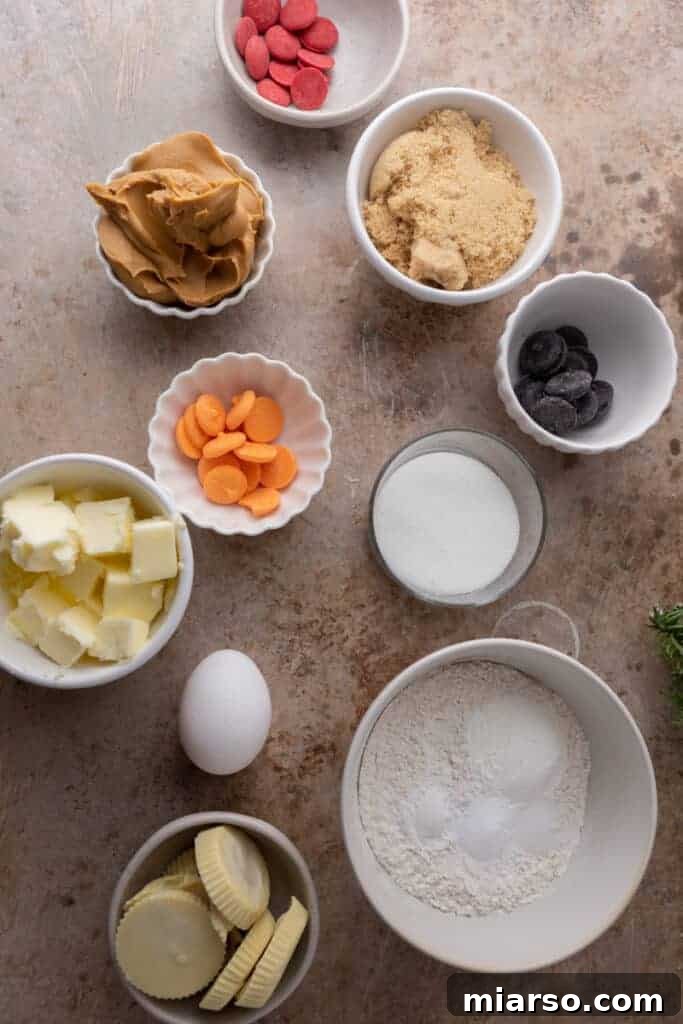
Essential Ingredients for These Adorable Melted Snowman Cookies
Crafting the perfect Melted Snowman Peanut Butter Cookies begins with selecting quality ingredients. Each component plays a crucial role in achieving the desired flavor and texture that makes these cookies so special. For precise measurements, please refer to the detailed recipe card at the bottom of this page.
The Irresistible Peanut Butter Cookie Base
- Peanut Butter: The star of our cookie base! Opt for smooth and creamy peanut butter over natural varieties. Processed peanut butter offers a more consistent texture and flavor, preventing the cookies from becoming too crumbly or oily. This ensures that classic, beloved peanut butter taste that forms the foundation of our festive snowman.
- Butter: High-quality, softened butter is key to a rich, melt-in-your-mouth cookie texture. Butter not only imparts a luxurious flavor but also contributes to the tender crumb. For avid bakers, purchasing butter in bulk from stores like Costco or Sam’s Club can be a smart, cost-effective choice without compromising on quality. Ensure it’s at room temperature for optimal creaming.
- Brown Sugar: This provides more than just sweetness; brown sugar adds a wonderful depth of flavor with its subtle caramel notes and essential moisture, resulting in a softer, chewier cookie. Its presence helps keep the cookies from drying out during baking.
- Granulated Sugar: A baking staple, white granulated sugar delivers pure sweetness and contributes to the slight crispness at the edges of the cookie. The combination of both sugars creates a balanced sweetness and ideal texture.
- Egg: A single large egg acts as the binding agent, holding all the ingredients together and providing structure to the cookies. It also adds richness and helps with emulsification, creating a smooth dough. Make sure it’s at room temperature for better incorporation into the batter.
- Vanilla Extract: Often overlooked, vanilla extract is a crucial flavor enhancer in almost every sweet baked good. It amplifies the taste of the peanut butter and chocolate, adding a warm, aromatic note that brings all the flavors into harmony.
- All-Purpose Flour: This forms the structural backbone of our cookies. Flour absorbs the wet ingredients, creating a dough that holds its shape while baking. Ensure it’s accurately measured, preferably by weight, to avoid tough cookies.
- Baking Powder and Baking Soda: These leavening agents work in tandem to give the cookies a beautiful rise and a light, fluffy texture. Baking soda reacts with the acid in brown sugar, while baking powder provides an extra lift, ensuring your cookies aren’t dense.
- Cornstarch: A secret weapon for tender cookies! Cornstarch helps balance the heavier ingredients like peanut butter, preventing the cookies from becoming tough and giving them a delightfully soft, almost powdery crumb. It also helps prevent excessive spreading.
- Salt: Essential in all sweet recipes, a pinch of salt is vital for balancing the sweetness and enhancing the overall flavor profile. It brightens the taste of the peanut butter and chocolate, preventing the cookies from tasting overly saccharine.
Whimsical Toppings for Your Melted Snowmen
- White Chocolate Peanut Butter Cups: These are the quintessential ingredient for our adorable melted snowman faces. Their festive white color provides the perfect canvas, and the additional layer of peanut butter flavor from inside the cup perfectly complements the cookie base, creating a harmonious and utterly delicious treat.
- White Chocolate Chips: Once melted, these white chocolate chips cascade over the peanut butter cup and cookie, creating the iconic “melted snow” effect. Choose good quality chips for a smooth, glossy finish that sets beautifully.
- Candy Melts: These vibrant confectioneries are ideal for bringing your snowman’s face to life.
- Black or Green Candy Melts: Use these for the eyes and a cheerful button smile, or even tiny buttons down the snowman’s “body.”
- Orange Candy Melts: Crucial for sculpting those adorable carrot noses.
- Red Candy Melts (Optional): For an extra touch of festive detail, a thin line of red candy melts can be piped to create a cute scarf around your snowman’s neck, adding another layer of visual charm.

Crafting Your Melted Snowman Peanut Butter Cookies: A Step-by-Step Guide
Bringing these charming holiday peanut butter cookies to life is a fun and straightforward process. Follow these detailed instructions to create your own batch of delightful melted snowmen. Remember to refer to the recipe card below for the full ingredient list and precise quantities!
Preparing and Baking the Perfect Cookie Base
- Preheat and Prepare: Begin by preheating your oven to 350°F (175°C). While the oven heats, line a large baking sheet with a sheet of parchment paper. This non-stick surface will ensure your cookies bake evenly and release easily without sticking. Set the prepared baking sheet aside.
- Cream the Wet Ingredients: In a spacious large bowl, combine the softened butter, smooth peanut butter, brown sugar, and granulated sugar. Using an electric mixer on high speed, cream these ingredients together until the mixture is light, fluffy, and well-combined. This step incorporates air, contributing to the cookies’ soft texture.
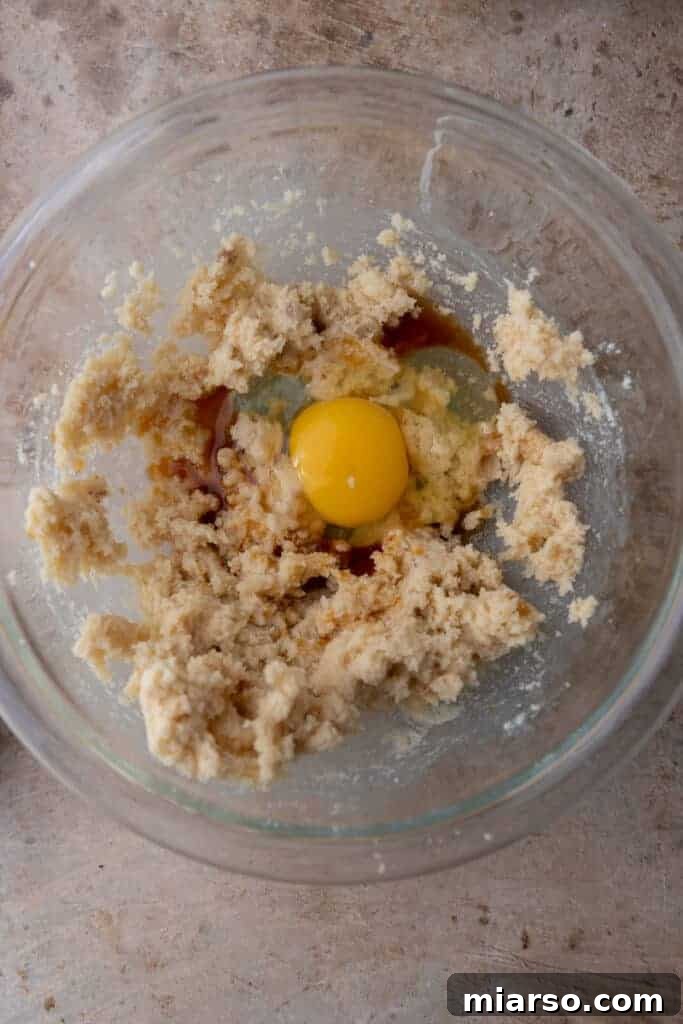
- Incorporate Egg and Vanilla: Reduce the mixer speed to medium. Crack in the single room-temperature egg, followed by the vanilla extract. Mix again until these wet ingredients are fully incorporated into the sugar-butter mixture, ensuring no streaks of egg remain.
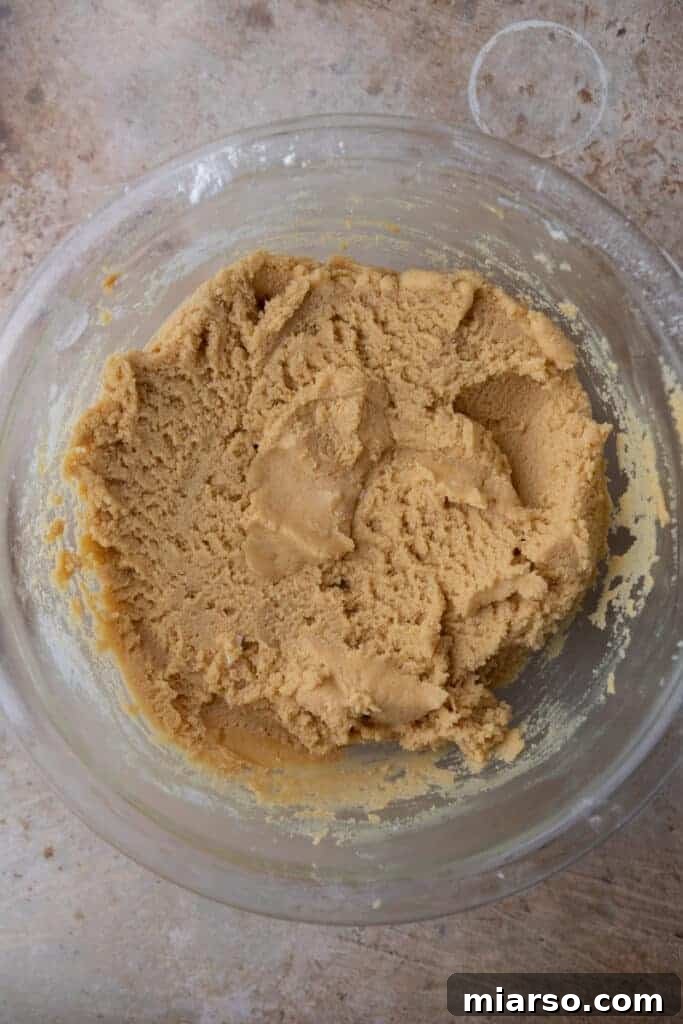
- Add Dry Ingredients: Sift or whisk together the all-purpose flour, baking powder, baking soda, cornstarch, and salt in a separate bowl. Gradually add this dry mixture to the wet ingredients in the large bowl. Mix on low speed just until the flour mixture disappears and a soft dough forms. Be careful not to overmix, as this can lead to tough cookies.
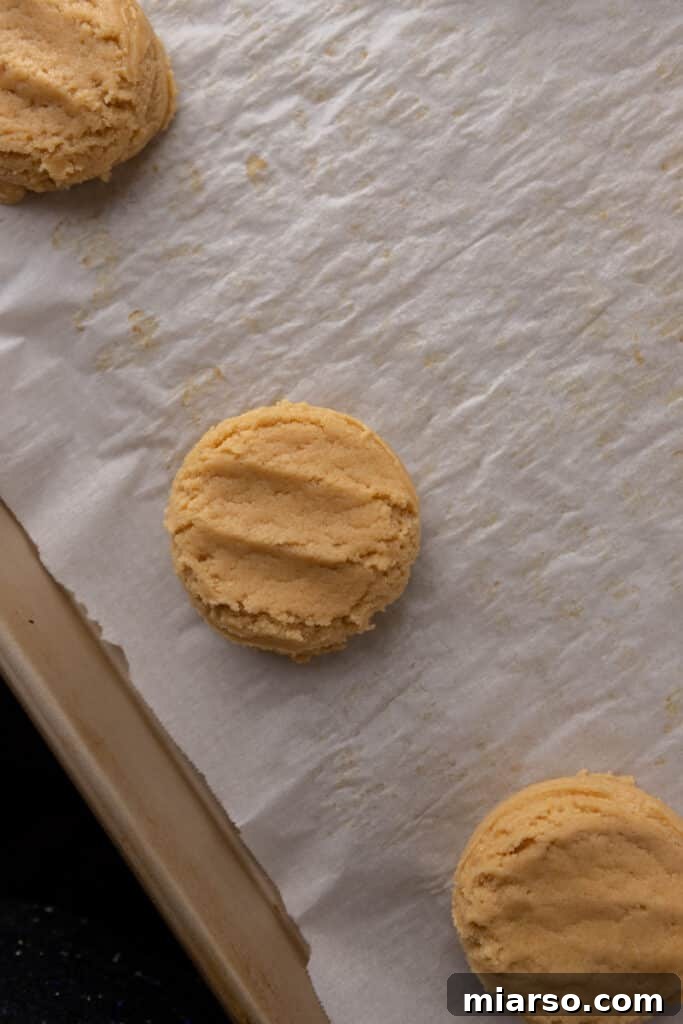
- Scoop and Bake: Using a large cookie scooper (about 2 tablespoons), portion out 9 equally sized balls of cookie dough. Place them onto your prepared baking sheet, leaving ample space between each. Gently flatten each cookie dough ball to about ¾ inch in thickness. This ensures they bake evenly and provide a good base for the peanut butter cup. Bake in the preheated oven for exactly 9 minutes. The edges should be lightly golden, and the centers still slightly soft.
- Cooling Period: Once baked, remove the cookies from the oven. It’s crucial to let them cool on the baking sheet for approximately 10 minutes. Set a timer! You want the cookies to remain warm, not fully cooled to room temperature, when you begin the decorating process. This warmth helps the peanut butter cups adhere and the white chocolate spread beautifully.
Bringing Your Snowmen to Life: Decoration Steps
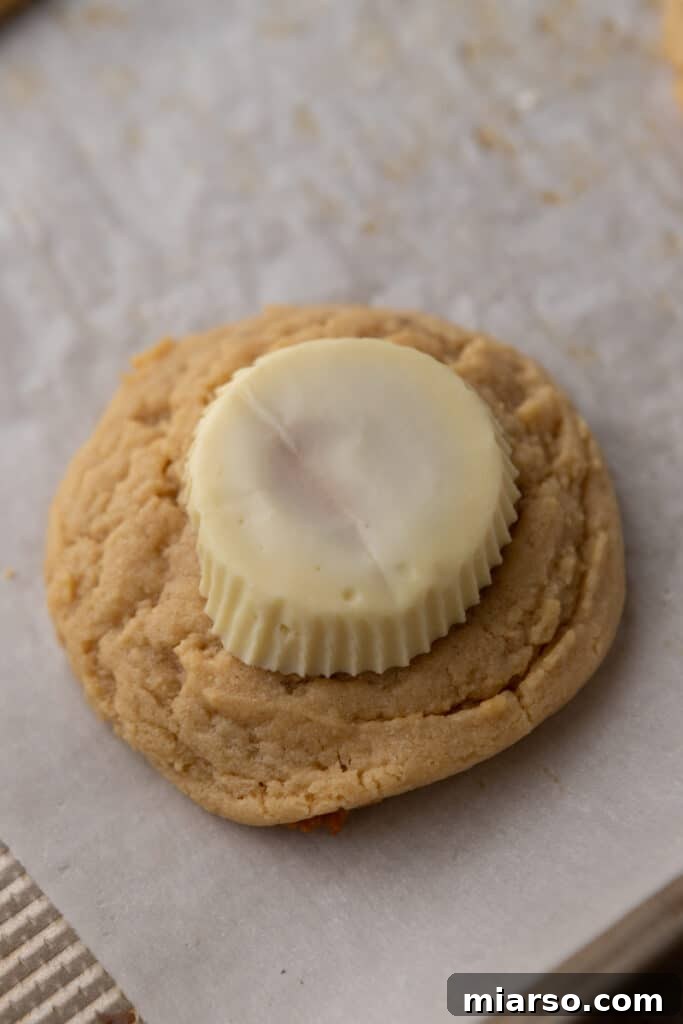
- Place the Peanut Butter Cups: Once the 10-minute cooling timer is up, carefully unwrap each white chocolate peanut butter cup. Place one upside down directly onto the center of each warm cookie. Gently press it down into the cookie, allowing its base to slightly melt and adhere to the warm surface. This forms the head of your snowman.
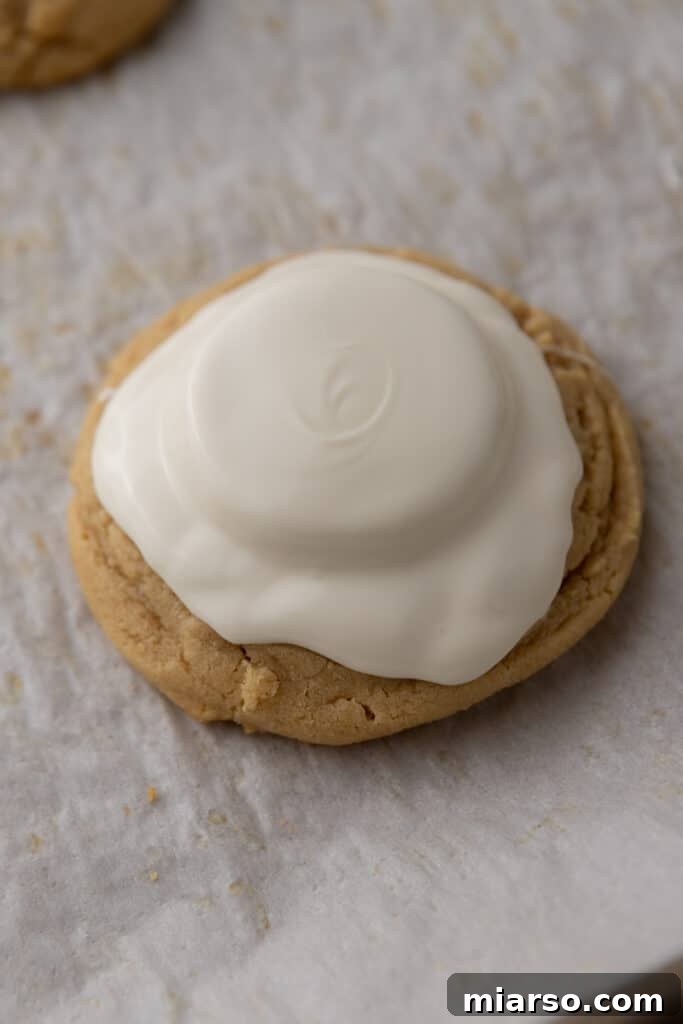
- Melt and Spread White Chocolate: Pour your white chocolate chips into a microwave-safe bowl. Microwave in 30-second increments, stirring thoroughly after each interval, until the chocolate is completely melted and smooth. Be careful not to overheat. Scoop about 1-2 tablespoons of the melted white chocolate onto the top of each cookie, directly over the peanut butter cup.
- Create the Melted Effect: With oven mitts on, carefully grasp the sides of the baking sheet. Gently tap the baking sheet up and down on your counter several times. This subtle vibration will help the melted white chocolate spread more evenly over the peanut butter cup and the top of the cookie, creating that wonderfully organic, melted snowman appearance.
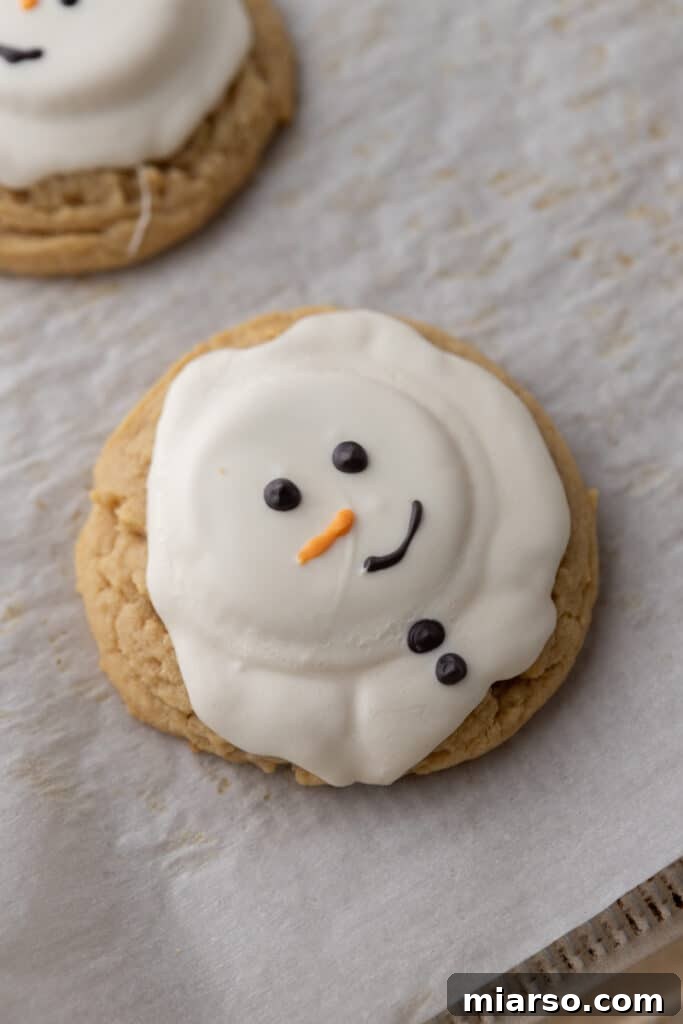
- Decorate the Faces: Now for the artistic part! Melt your black, orange, and any optional red candy melts in separate small microwave-safe bowls or, even better, in piping bags (or small ziplock bags with a tiny corner snipped off) in 15-30 second increments. Massage the bags until the candy melts are fully smooth. Snip a very small tip off the piping bags. Use the black candy melts to pipe two eyes and a dotted smile, and possibly some buttons further down the “body” of the melted snowman. Switch to the orange candy melts to pipe a small, pointed carrot nose in the center. If using red, pipe a small scarf detail. Allow all the decorations to set completely at room temperature or in the refrigerator for a few minutes until firm. Then, your adorable melted snowman cookies are ready to be admired and enjoyed!
Why You Absolutely Must Make This Melted Snowman Peanut Butter Cookies Recipe This Holiday!
- Effortlessly Festive: These snowman cookies are surprisingly quick to prepare, requiring only a handful of common pantry ingredients. You won’t spend hours in the kitchen, making them perfect for busy holiday schedules.
- Unmatched Charm: Their whimsical melted snowman design makes them the absolute cutest addition to any holiday cookie tray or dessert spread. They’re guaranteed to be a conversation starter and a visual delight!
- A Joy for All Ages: This recipe is ideal for family baking! Gather your little helpers and enjoy the process of creating these adorable snowmen together. The decorating stage, especially, offers endless fun and creativity for everyone.
- Endless Creativity: The beauty of these holiday cookies lies in their customizable nature. Feel free to unleash your imagination and decorate the cute little snowmen any way you desire, adding unique touches to each one.
- Perfect for Gifting: Beautifully packaged, these melted snowman peanut butter cookies make heartfelt and delicious homemade gifts for friends, neighbors, teachers, and loved ones.
- Deliciously Unique Flavor: The combination of a soft, rich peanut butter cookie with a decadent white chocolate peanut butter cup topping is simply irresistible, offering a taste experience that stands out from typical holiday cookies.
Frequently Asked Questions – FAQ About Melted Snowman Cookies
How to Properly Store Melted Snowman Peanut Butter Cookies for Freshness
Ensuring your delightful melted snowman cookies stay fresh is simple! For optimal taste and texture, store them in an airtight container at room temperature for up to 4 days. This keeps them soft and prevents them from drying out.
For extended enjoyment, these cookies can be stored in the refrigerator for up to 1-2 weeks. To prevent them from absorbing odors or moisture, consider wrapping each cookie individually in plastic wrap before placing them in an airtight container. If you wish to store them even longer, these cookies freeze beautifully for up to 2-3 months. Again, individual plastic wrap followed by an airtight freezer-safe container or bag will protect their quality. Thaw them at room temperature before serving for the best experience.
What If I Don’t Have White Chocolate Peanut Butter Cups? Creative Substitutions!
No white chocolate peanut butter cups on hand? No problem! There are several fantastic alternatives you can use to still create adorable snowman cookies:
- Regular Chocolate Peanut Butter Cups: Since you’ll be covering the peanut butter cup with melted white chocolate, you can absolutely use regular chocolate peanut butter cups. The white chocolate “melted snow” layer will conceal the dark chocolate, and you’ll still get that incredible peanut butter and chocolate flavor combination.
- Large Marshmallows with White Chocolate: This is an incredibly cute and simple alternative! First, spread a tablespoon or two of melted white chocolate directly onto your warm cookie. Then, immediately place a medium-sized marshmallow on top of the melted chocolate. The warmth of the cookie and melted chocolate will soften the marshmallow slightly, creating a wonderfully plump snowman head. Once the marshmallow is set, you can proceed with decorating it with candy melts for the eyes, nose, and mouth.
- White Chocolate Discs or Rounds: You could also melt white chocolate, spread it into small discs on parchment paper, let them set, and then place these on top of the warm cookies as the snowman head. This gives you full control over the size and thickness.
What Other Fun Ways Can I Decorate My Snowmen Faces?
Unleash your creativity when decorating your melted snowman cookies! Here are some additional ideas to make each snowman unique:
- Miniature Chocolate Chips for Eyes: Instead of piping, use two miniature chocolate chips for quick and easy eyes. The pointed end gives a classic look!
- Orange Sprinkles for the Carrot Nose: For a delightful texture and vibrant color, use an orange jimmie sprinkle or a tiny triangle sprinkle to create a perfect carrot nose.
- Reese’s Peanut Butter Cup Miniatures for Hats: Cut a Reese’s peanut butter cup miniature in half and place it on top of the snowman’s head to create a charming little “hat.” You can even use a dab of melted chocolate to secure it.
- Edible Markers: For precise details and different expressions, consider using edible food markers to draw faces directly onto the set white chocolate.
- Powdered Sugar “Snow”: Once the cookies are completely set, a light dusting of powdered sugar over the entire cookie can give a lovely “fresh snow” effect.
The Best Melted Snowman Peanut Butter Cookies Recipe

Melted Snowman Peanut Butter Cookies
Print Recipe
Ingredients
Peanut Butter Cookie Base
- 1/2 cup smooth peanut butter
- 1/2 cup butter softened
- 1/2 cup brown sugar
- 1/3 cup granulated sugar
- 1 egg at room temperature
- 1/2 tsp vanilla extract
- 1 & 1/3 cup all-purpose flour
- 1/2 tsp baking powder
- 1/2 tsp baking soda
- 1 tbsp corn starch
- 1/4 tsp salt
Decoration
- 9 white chocolate peanut butter cups
- 2/3 cup white chocolate chips melted
- 3 tablespoons black candy melts or semi-sweet chocolate chips melted
- 1 tablespoon orange candy melts melted
Instructions
-
Preheat the oven to 350F then line a baking sheet with parchment paper and set aside.
-
Cream the butter, peanut butter, brown sugar, and granulated sugar. Add in the eggs and vanilla extract then mix until combined.1/2 cup smooth peanut butter, 1/2 cup butter, 1/2 cup brown sugar, 1/3 cup granulated sugar, 1 egg at room temperature, 1/2 tsp vanilla extract
-
Add in the flour, baking powder, baking soda, corn starch, and salt, and mix just until the flour mixture disappears.1 & 1/3 cup all-purpose flour, 1/2 tsp baking powder, 1/2 tsp baking soda, 1 tbsp corn starch, 1/4 tsp salt
-
Using a large cookie scooper, scoop out 9 equally sized cookie dough balls, place them on a baking sheet, and gently flatten to about 3/4 inch in thickness. Bake in the preheated oven for 9 minutes.
Decorate the cookies.
-
When the 10-minute timer is up, take your white chocolate peanut butter cups out of the wrapper and place one upside down on top of each cookie. Gently press it down into the cookie.9 white chocolate peanut butter cups
-
Pour your white chocolate chips into a bowl and microwave it in 30-second increments while stirring in between until it’s melted. Scoop and pour 1-2 tablespoons of melted chocolate on top of the cookie.2/3 cup white chocolate chips
-
With oven mitts, carefully grab the sides of the baking sheet and gently tap it up and down on the counter. This will help the melted chocolate spread more evenly across the top creating that melted snowman look.
-
Finally, melt your colored candy melts in the microwave in 15-30-second increments. I like to do this in a piping bag or ziplock bag before I cut the tip-off. Massage the chocolate until fully melted then snip off the edge and create the eyes, smile, and buttons. Do the same with the orange candy melts and create the nose. Allow everything to set and enjoy!3 tablespoons black candy melts or semi-sweet chocolate chips, 1 tablespoon orange candy melts
Nutrition
Nutrition information is automatically calculated, so should only be used as an approximation.
If you enjoyed this Melted Snowman Peanut Butter Cookies recipe, make sure to pin it for later!