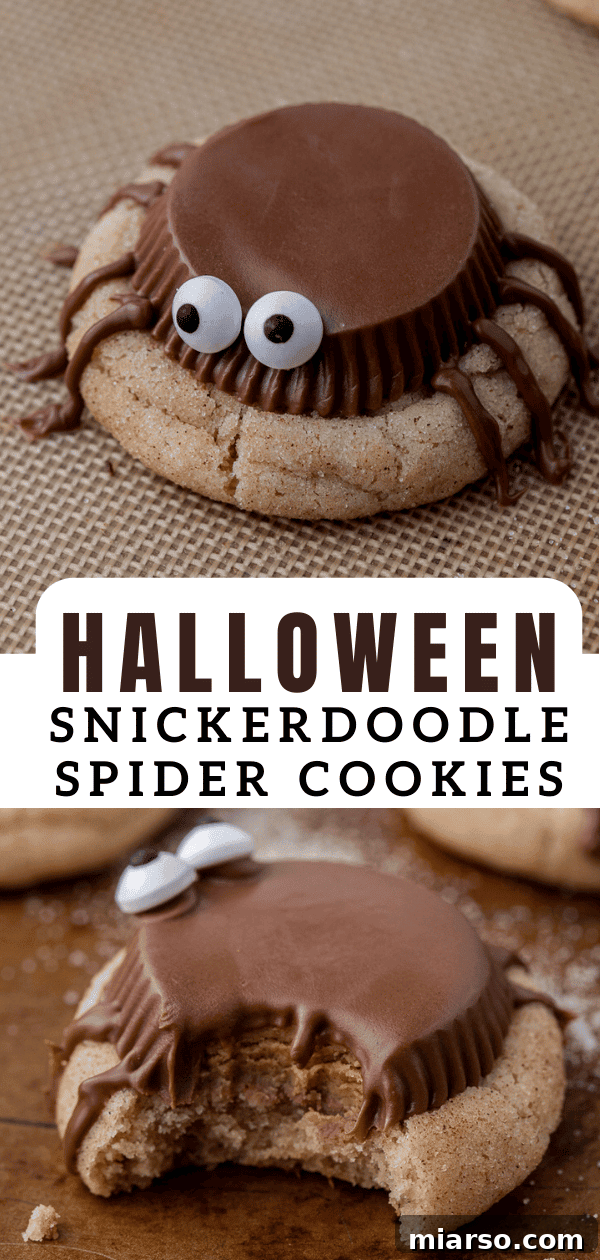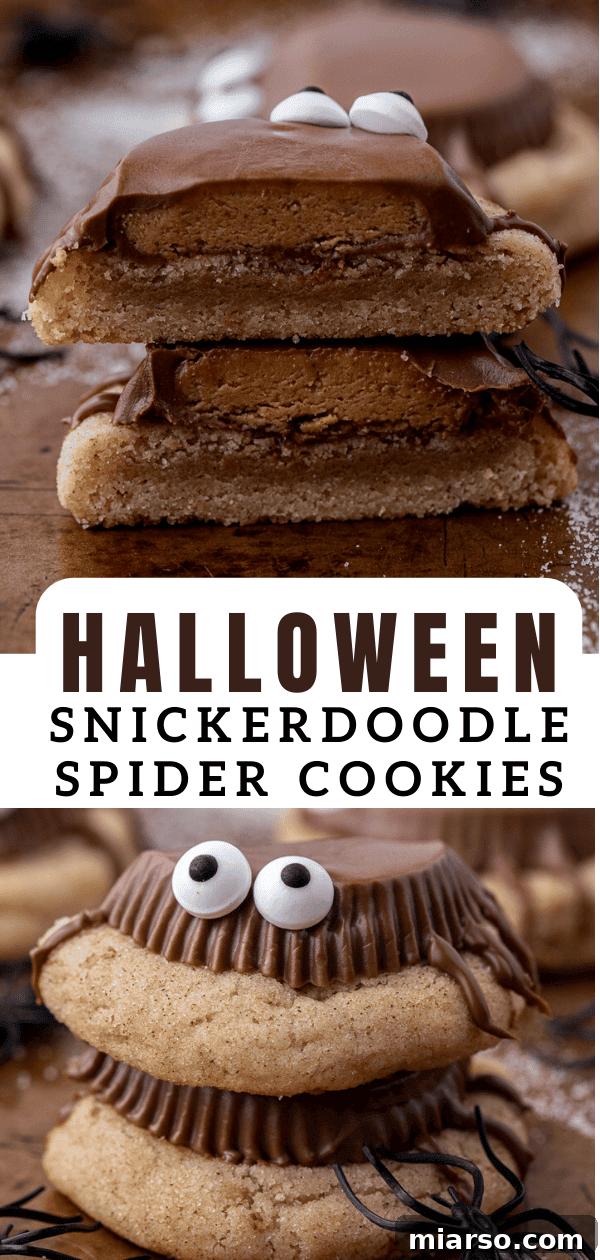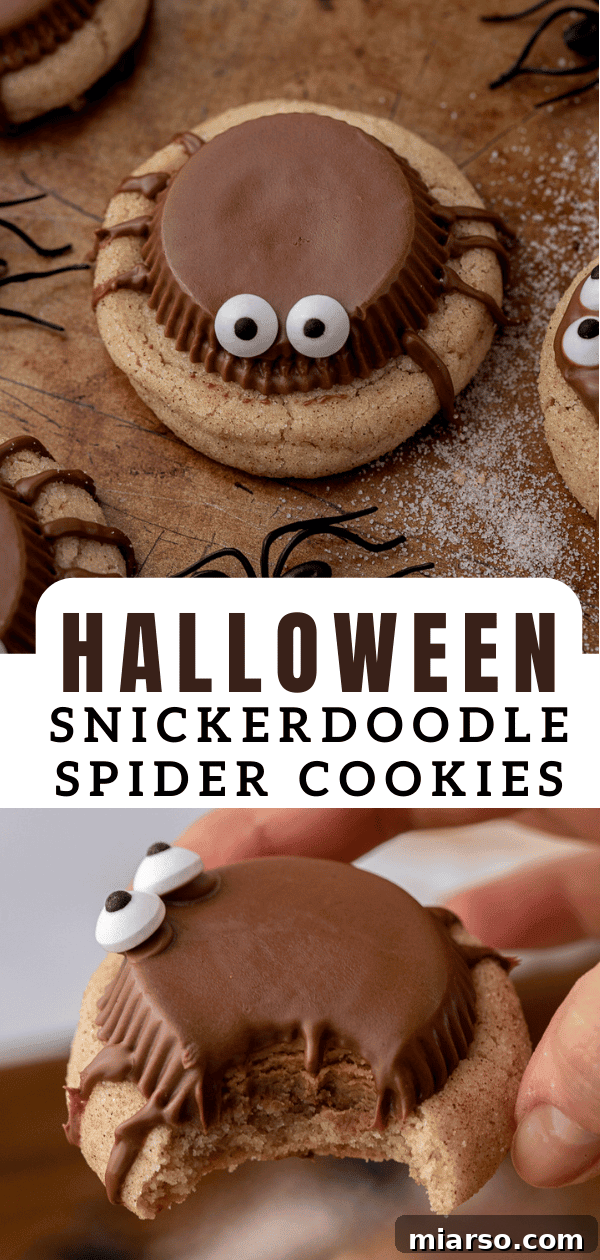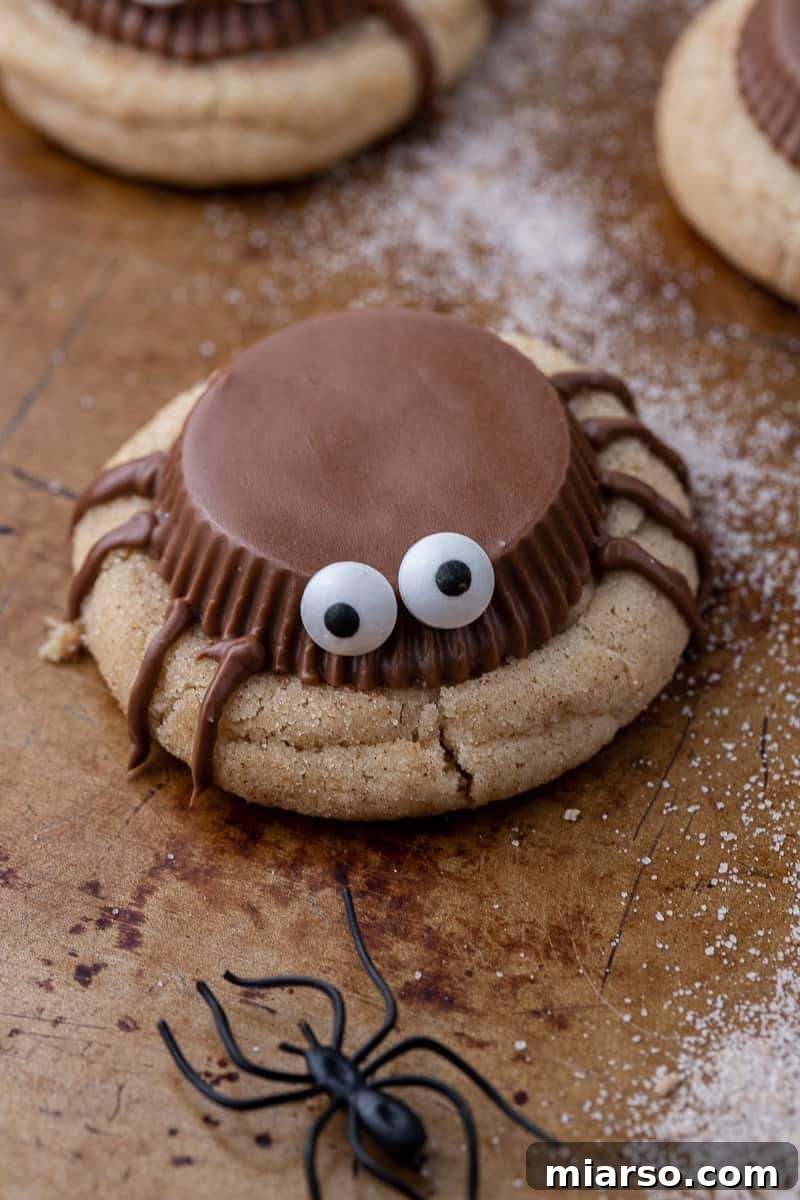
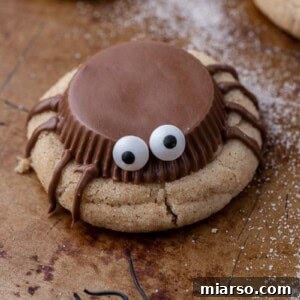
Delight your senses and add a touch of playful spookiness to your Halloween festivities with these irresistible Snickerdoodle Halloween Spider Cookies. Featuring a perfectly soft and wonderfully chewy snickerdoodle cookie base, each treat is creatively topped with classic Reese’s Peanut Butter Cups, whimsical candy eyeballs, and elegantly piped chocolate legs for a truly unforgettable finish!
If you’re already captivated by the allure of spooky treats, you’ll surely love exploring other festive delights like our Spooky Black Halloween Monster Cookies and these decadent Halloween Monster Cupcakes | Black Velvet!
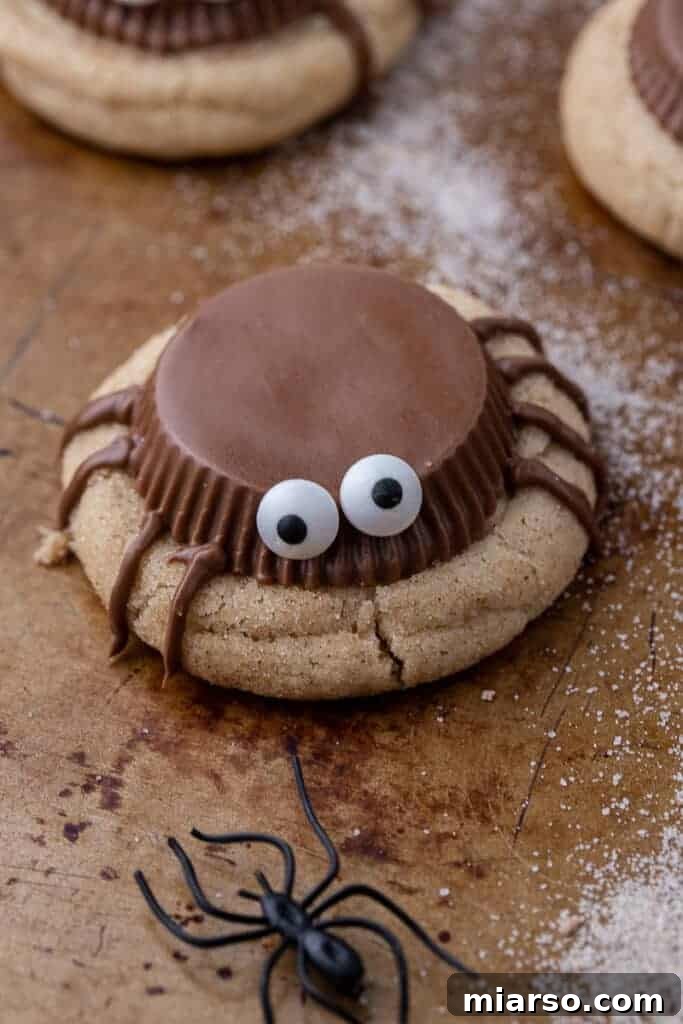
As Halloween approaches, the air fills with anticipation for everything eerie and enchanting. While the holiday often calls for elaborate costumes and decor, it’s the edible treats that truly bring the magic to life. And even if some festive desserts demand a touch more creativity, the joy they bring is absolutely worth it!
That’s precisely why we’re thrilled to share these delightfully fun Snickerdoodle Spider Cookies today. We know that many classic spider cookie recipes opt for a traditional peanut butter cookie base. However, we believe in embracing innovation and exploring new flavor profiles! Our unique twist uses a beloved snickerdoodle, providing a warm, cinnamon-spiced foundation that perfectly complements the rich chocolate and creamy peanut butter toppings. Prepare to surprise and delight your guests with a dessert that stands out from the crowd.
The Ultimate Halloween Spider Cookie Recipe You’ll Adore!
Get ready to elevate your Halloween dessert game to a spectacular new level! Our Snickerdoodle Spider Cookies artfully blend the comforting spice of cinnamon, the indulgence of chocolate, and the creamy richness of peanut butter into a single, sensational bite. These cookies are not just treats; they are edible masterpieces, guaranteed to be the show-stopper at any Halloween gathering.
Unlike some of the colossal cookies you might encounter, these snickerdoodle spiders are perfectly sized, offering a powerful punch of flavor without being overwhelming. Each cookie is a miniature celebration of texture and taste – soft, chewy, and irresistibly spiced. We’re confident you’ll fall in love with them! When you give this recipe a try, don’t hesitate to share your thoughts and experiences in the comments below. Your feedback truly makes our day!
Why These Spooky Snickerdoodle Spider Cookies Are a Must-Make
These aren’t just any Halloween cookies; they’re a delightful experience waiting to happen. Here’s why this recipe should be at the top of your fall baking list:
- Effortless One-Bowl Wonder: Say goodbye to mountains of dirty dishes! This recipe is designed for minimal cleanup, allowing you to focus more on the fun of baking and less on the aftermath. Less mess means more time to enjoy your delicious creations!
- A Perfect Activity for Little Hands: These cookies are ideal for involving your children in the kitchen. Once the warm cookies emerge from the oven, let your little ones take the lead in decorating them with Reese’s, candy eyeballs, and chocolate legs. It’s a fantastic way to create lasting memories and delicious treats together (just remember to supervise carefully as the baking sheet will be hot).
- Unbelievably Chewy Perfection: Prepare for a revelation in texture! The snickerdoodle base is incredibly soft and delightfully chewy, a hallmark of a truly great cookie. This isn’t just a cookie; it’s an experience that melts in your mouth with every bite.
- Ideal for Thoughtful Gifting: Spread the Halloween spirit by sharing these charming cookies. Arrange them in small, festive Halloween-themed bags or boxes and hand them out to friends, family, or neighbors. They make a perfect homemade gift that shows you care.
- Unique Flavor Combination: Move over, pumpkin spice! The classic cinnamon-sugar tang of the snickerdoodle base offers a refreshing and exciting contrast to the sweet peanut butter and chocolate toppings, creating a sophisticated yet fun flavor profile that sets these cookies apart.
- Visually Stunning and Festive: These cookies are not only delicious but also incredibly adorable and perfectly themed for Halloween. Their spooky-cute appearance makes them an instant hit and a conversation starter at any party.
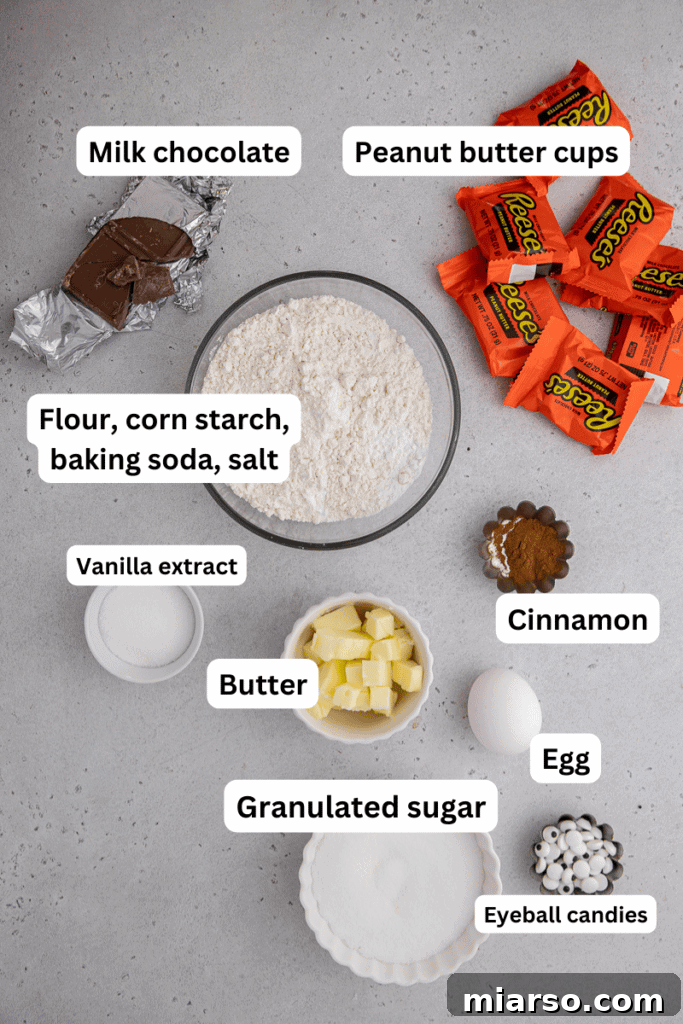
Essential Ingredients for These Spooktacular Snickerdoodle Halloween Spider Cookies
Crafting these delightful cookies requires a few simple, readily available ingredients. Each plays a crucial role in achieving the perfect flavor and texture. For precise measurements and detailed quantities, please refer to the comprehensive recipe card below.
- All-Purpose Flour: The foundation of our chewy cookie base. Standard AP flour works wonderfully to provide the ideal structure.
- Cream of Tartar: This is the secret ingredient that gives snickerdoodles their signature tangy flavor and creates that soft, pillowy, and uniquely chewy texture. Don’t skip it for an authentic snickerdoodle experience!
- Baking Soda: Our essential leavening agent, working in tandem with the cream of tartar to help the cookies rise beautifully and spread just enough.
- Ground Cinnamon: The heart of the snickerdoodle flavor, providing warm, aromatic notes that are perfectly comforting and festive for fall.
- Salt: A pinch of salt is crucial in all baking! It balances the sweetness of the sugars and enhances all the other flavors in the cookie, preventing them from tasting flat.
- Unsalted Butter: Ensure your butter is softened to room temperature. This is key for proper creaming with sugar, leading to a light and airy cookie dough. You can use salted butter, but you might want to slightly reduce the added salt.
- Granulated Sugar: Simple white sugar provides the sweetness and helps create that desirable crisp edge and soft center.
- Large Egg: Binds the ingredients together, adds moisture, and contributes to the rich, chewy texture of the cookies.
- Vanilla Extract: A touch of vanilla enhances the overall flavor profile, adding warmth and depth to the cinnamon.
For the Cinnamon Sugar Coating:
A simple blend of granulated sugar and ground cinnamon for rolling the cookie dough, creating that iconic snickerdoodle finish and extra burst of flavor.
For the Spooky Spider Topping:
- Reese’s Peanut Butter Cups: These are the perfect “bodies” for our spiders! You can use your favorite size (mini or standard) and type, though the classic milk chocolate Reese’s provide the most cohesive look and flavor.
- Milk Chocolate Chips or Chunks: Used for piping the spider legs. Milk chocolate is recommended to match the color and sweetness of the Reese’s cups, ensuring a uniform and appealing appearance. If you prefer a darker chocolate for a richer taste, feel free to use dark chocolate chips!
- Eyeball Candies (or Sprinkles): These adorable and spooky edible eyeballs bring our spiders to life! They are widely available at grocery stores, craft shops, or online retailers like Amazon, especially around Halloween. Alternatively, you can use regular sprinkles or even mini chocolate chips for the eyes.
Crafting These Spooky Halloween Cookies: A Step-by-Step Guide
Creating these fun and festive cookies is simpler than you might think! Follow these detailed instructions to bring your snickerdoodle spiders to life. Remember to refer to the full recipe card below for precise measurements and baking times.
- Prepare Your Workspace: Begin by preheating your oven to 350°F (175°C). Line a large baking sheet with parchment paper. This prevents sticking and ensures easy cleanup. Also, unwrap all your Reese’s Peanut Butter Cups beforehand to make the topping process smoother and quicker.
- Cream Butter and Sugar: In a large mixing bowl, using either a stand mixer fitted with the paddle attachment or an electric hand mixer, cream together the softened butter and granulated sugar. Beat on medium speed until the mixture is light, fluffy, and pale in color, typically 2-3 minutes. This step incorporates air, making your cookies soft and tender.
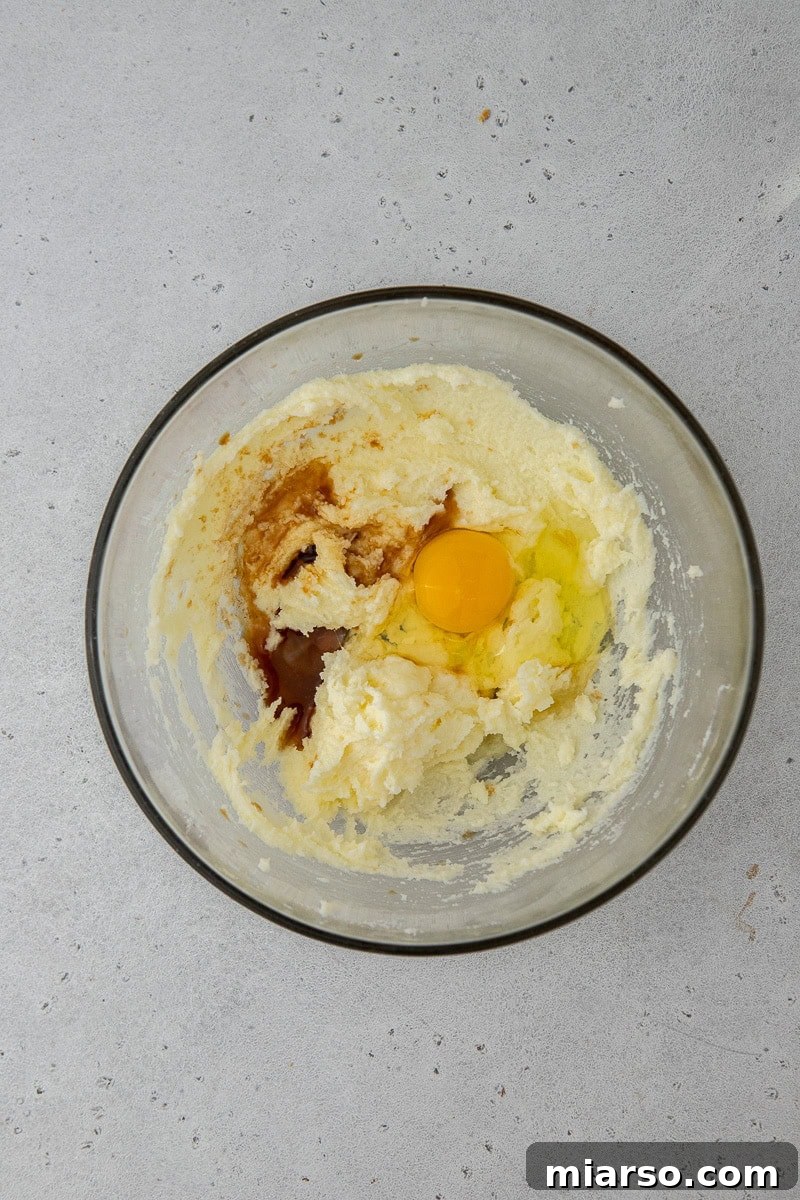
- Add Wet Ingredients: Introduce the egg and vanilla extract to the creamed butter and sugar. Mix on medium speed until thoroughly combined, scraping down the sides of the bowl as needed to ensure all ingredients are well incorporated.
- Combine Dry Ingredients: In a separate small bowl, whisk together the flour, baking soda, cream of tartar, salt, and cinnamon until evenly distributed.
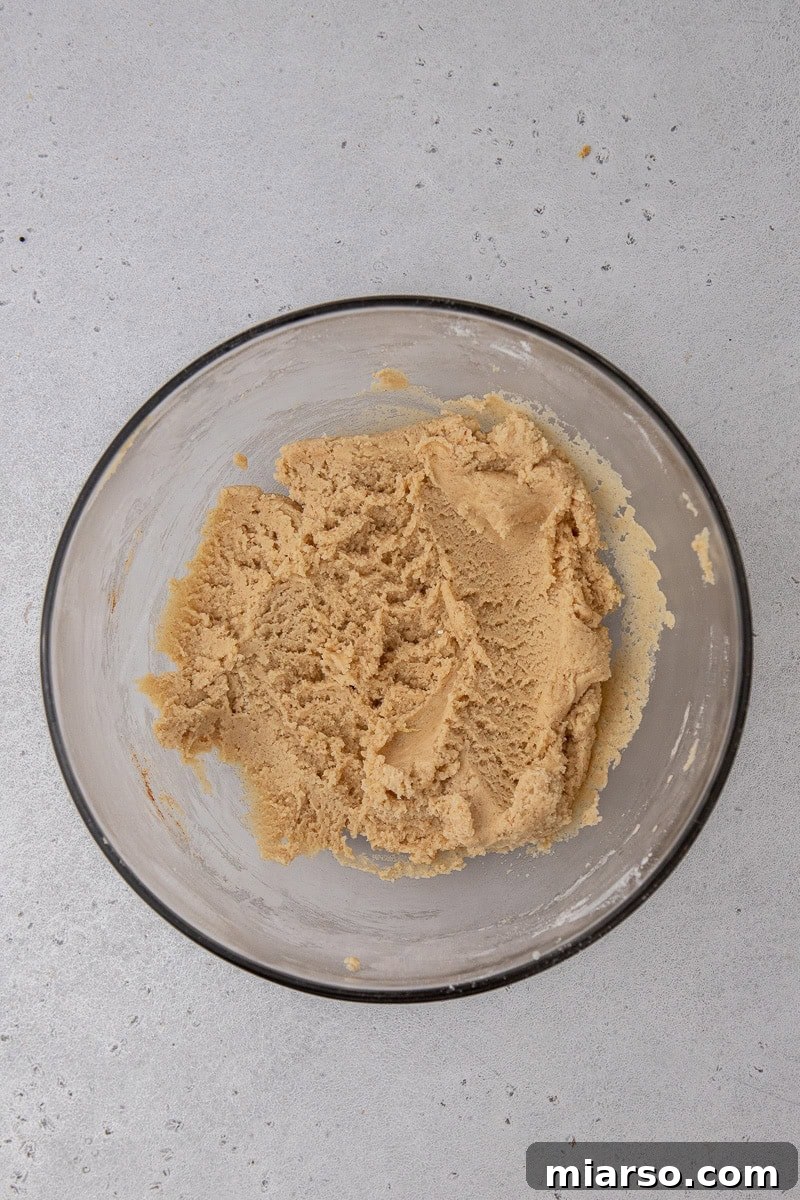
- Gently Fold Dry into Wet: Gradually add the dry ingredient mixture to the wet mixture, mixing on low speed until just combined. Be careful not to overmix; overmixing can lead to tough cookies. Stop as soon as no streaks of flour remain.
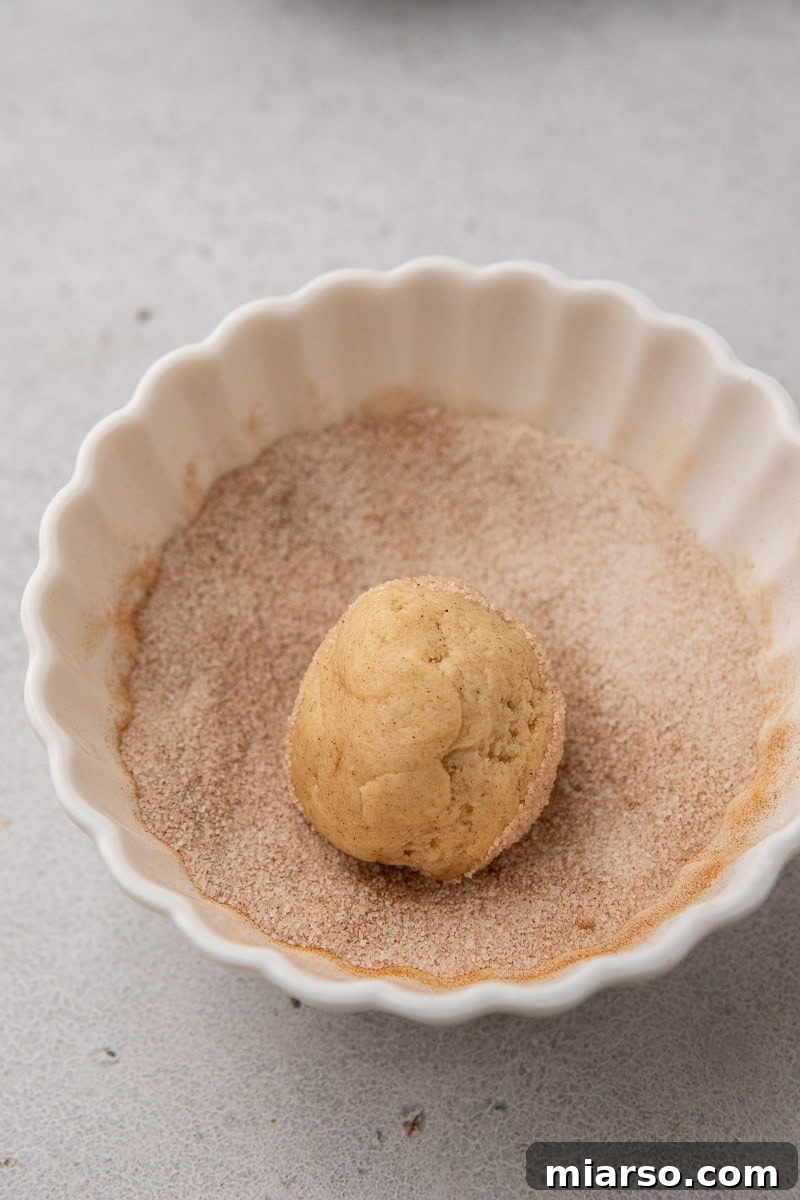
- Form and Coat the Cookies: Using a small cookie scoop (about 1.5 tablespoons), portion out 14 equally sized cookie dough balls. Roll each ball smoothly between the palms of your hands to create a uniform sphere. In a shallow bowl, combine the additional sugar and cinnamon for the coating. Roll each cookie dough ball generously in this cinnamon-sugar mixture, ensuring it’s fully coated.
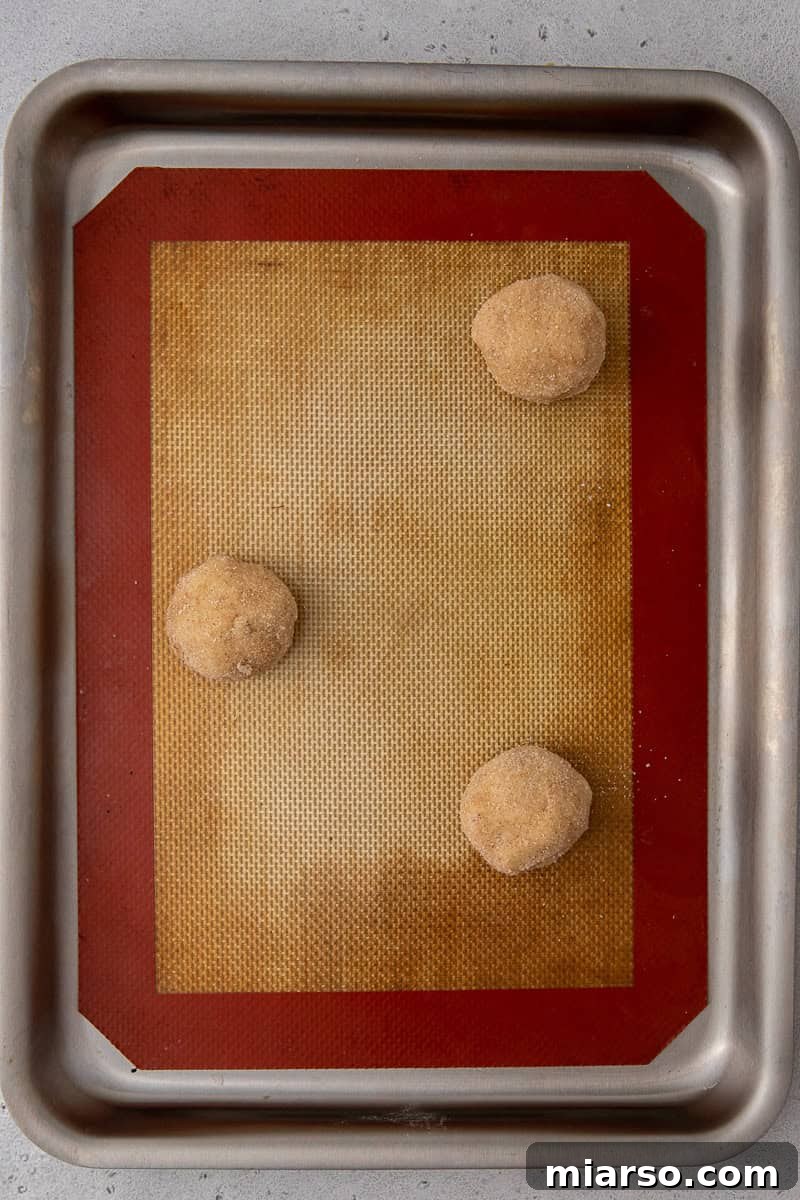
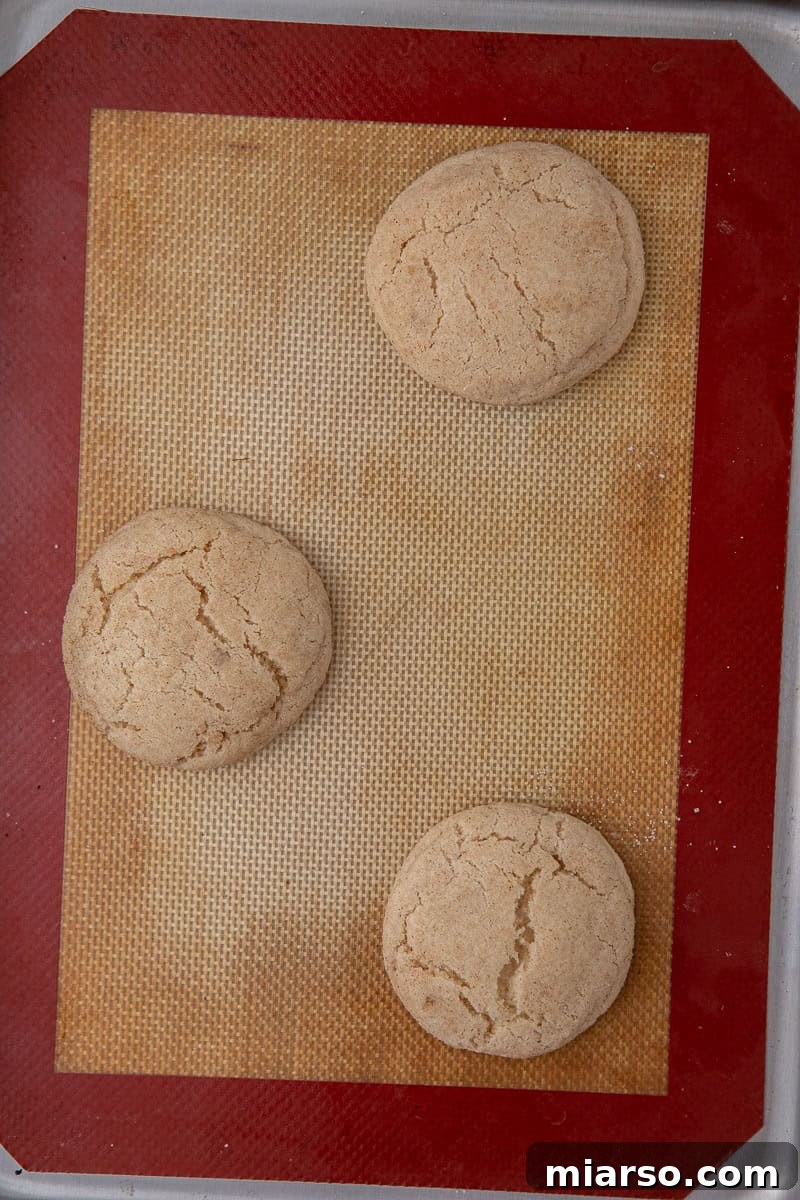
- Bake to Perfection: Place the coated cookie dough balls onto the prepared baking sheet, leaving about 2-3 inches of space between each one to allow for spreading. Bake in the preheated oven for 9-10 minutes. The cookies will appear puffy and quite soft when you remove them, but they will continue to set as they cool on the baking sheet.
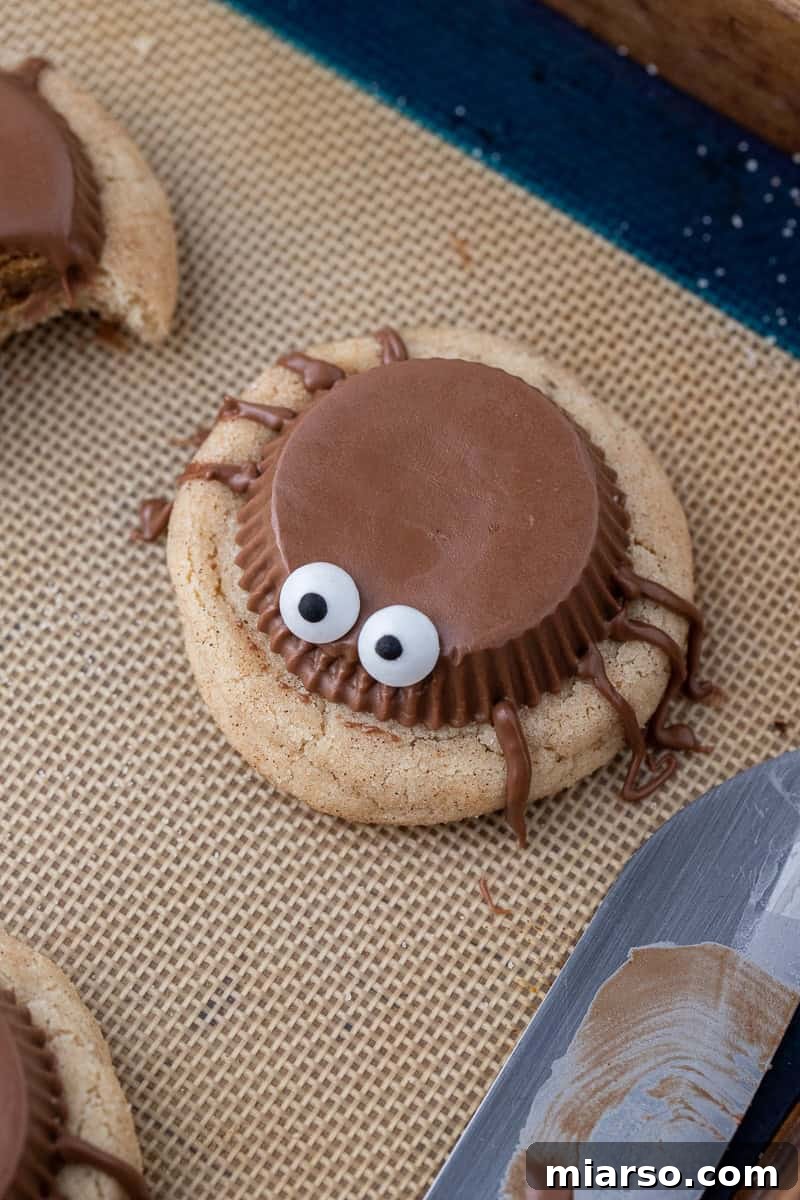
- Add the Spiders’ Bodies: Let the baked cookies cool on the baking sheet for about 5 minutes. While still warm, gently press an unwrapped Reese’s Peanut Butter Cup upside down onto the center of each cookie. The residual warmth of the cookie will slightly melt the Reese’s, helping it adhere perfectly.
- Bring the Spiders to Life: Once the peanut butter cups have slightly softened and settled, carefully place two candy eyeballs onto each Reese’s cup.
- Pipe the Legs: Melt the milk chocolate chips in a microwave-safe bowl in 30-second intervals, stirring until smooth. Transfer the melted chocolate to a small zip-top bag. Snip a tiny piece off one corner of the bag to create a fine piping tip. Carefully pipe eight thin spider legs onto each cookie, extending from the Reese’s cup body onto the cookie base.
- Allow Chocolate to Set: Let the chocolate legs fully set at room temperature or, for a quicker set, chill the cookies in the refrigerator for 10-15 minutes. Once the chocolate is firm, your spooky snickerdoodle spider cookies are ready to be devoured!
Frequently Asked Questions (FAQ) About Halloween Spider Cookies
Have questions about making or storing these delightful treats? We’ve got you covered!
How should I store these Snickerdoodle spider cookies?
To keep your snickerdoodle spider cookies fresh and charmingly spooky, store them in an airtight container at room temperature. They will remain delicious for up to 5 days. For best results, place a piece of parchment or wax paper between each layer of cookies to prevent them from sticking together or damaging their delicate spider legs and eyeballs. This ensures they maintain their cute appearance until the last bite!
Can I freeze Halloween spider cookies?
Absolutely! These cookies are excellent candidates for freezing. Once they are fully cooled and the chocolate has completely set, arrange them in a single layer on a baking sheet and flash freeze them for about 30 minutes until solid. Then, transfer the frozen cookies to an airtight freezer-safe container or a heavy-duty freezer bag, separating layers with parchment paper. They can be frozen for up to 2 months.
When you’re ready to enjoy them, simply let them thaw overnight in the refrigerator or for an hour or two on your kitchen countertop at room temperature. They’ll be just as soft and delicious as when they were freshly baked!

Do I have to use the original Reese’s Peanut Butter Cups?
Not at all! Feel free to get creative and use any type of peanut butter cup you enjoy. While the classic milk chocolate Reese’s offer a traditional look and flavor, there are plenty of exciting alternatives. You could experiment with white chocolate peanut butter cups for a different aesthetic, or even dark chocolate varieties for a richer, more intense flavor contrast with the snickerdoodle base.
If you opt for white chocolate peanut butter cups, they might not immediately scream “spooky spider,” but don’t let that limit your imagination! You could easily transform them into adorable little ghosts by drawing simple ghost faces with black edible marker or chocolate. Or, consider other small, round candies as a replacement for the Reese’s to create different Halloween creatures.
Top Tips and Tricks for Perfect Snickerdoodle Spider Cookies
While this recipe is straightforward, keeping a few key pointers in mind will ensure your Halloween spider cookies turn out perfectly every time – soft, chewy, and adorably spooky!
- Prep Ahead for Smooth Sailing: Before you even start mixing, take a few minutes to unwrap all the Reese’s Peanut Butter Cups. Trust us, trying to unwrap them with sticky hands later can be a bit of a challenge and will slow down your decorating process!
- Master the Cookie-to-Reese’s Temperature: This is crucial for a clean, stable spider body. You want the cookie to be warm enough to slightly soften the Reese’s cup so it adheres securely, but not so hot that the Reese’s turns into a melted puddle. Aim for about 5 minutes of cooling on the baking sheet after they come out of the oven. This sweet spot allows for just enough meld without the mess.
- Chilling for a Flawless Finish: After you’ve placed the Reese’s and added the candy eyeballs and piped the chocolate legs, you can give your cookies a quick chill in the refrigerator for 10-15 minutes. This helps the chocolate (both the Reese’s and the piped legs) to set much faster, making them easier to handle and preventing any smudges. However, remember that cookies are generally best served at room temperature, so pull them out a little while before serving to let them achieve their optimal soft, chewy texture.
- Don’t Overmix the Dough: For truly soft and chewy snickerdoodles, mix the dry ingredients into the wet ingredients only until just combined. Overmixing develops the gluten in the flour, which can lead to tough, dense cookies.
- Uniformity is Key: Using a cookie scoop helps ensure all your cookies are the same size, which means they’ll bake evenly. Plus, it makes the whole process faster and less messy!
- Get Creative with Decorating: While we suggest candy eyeballs and milk chocolate legs, feel free to let your imagination run wild! You could use different colored icing for the legs, add a sprinkle of glitter, or even draw tiny fangs with a food-safe marker.
- Room Temperature Ingredients: Always ensure your butter and egg are at room temperature. This allows them to emulsify properly, creating a smoother dough and a better cookie texture.

Spooky Snickerdoodle Halloween Spider Cookies Recipe
Snickerdoodle Halloween Spider Cookies
15
9
24
14 cookies
Print Recipe
Ingredients
- 1 & 1/2 cup all-purpose flour
- 1 tsp cream of tartar
- 1/2 tsp baking soda
- 3/4 tsp cinnamon
- 1/2 tsp salt
- 1/2 cup butter, softened
- 2/3 cup granulated sugar
- 1 large egg
- 1 tsp vanilla extract
For the Cinnamon Sugar Coating
- 2 tbsp granulated sugar
- 1/2 tsp cinnamon
For the Spider Topping
- 14 Reese’s Peanut Butter Cups, regular size, unwrapped
- 3 tbsp milk chocolate chips or chunks
- Eyeball candies or sprinkles
Instructions
-
1. Preheat oven to 350°F (175°C) and line a baking sheet with parchment paper. Unwrap all Reese’s Peanut Butter Cups.
-
2. In a large bowl, cream together the softened butter and sugar using a stand mixer or hand mixer until light and fluffy (2-3 minutes).
-
3. Add the egg and vanilla extract, mixing until just combined and scraping down the sides of the bowl.
-
4. In a separate bowl, whisk together the flour, baking soda, cream of tartar, salt, and cinnamon. Gradually add this dry mixture to the wet ingredients, mixing on low speed until just incorporated. Do not overmix.
-
5. In a shallow dish, combine 2 tbsp sugar and 1/2 tsp cinnamon for the coating. Scoop 14 cookie dough balls (about 1.5 tbsp each), roll them in your palms, then roll them generously in the cinnamon-sugar mixture. Place on the prepared baking sheet, leaving 2-3 inches between each cookie.
-
6. Bake for 9-10 minutes. Cookies will be puffy and soft. Let them cool on the baking sheet for 5 minutes, then press an unwrapped Reese’s Peanut Butter Cup upside down onto the center of each warm cookie.
-
7. Once the peanut butter cup starts melting slightly, carefully add two eyeball candies to each Reese’s cup for eyes.
-
8. Melt the milk chocolate chips. Transfer to a small zip-top bag, snip a tiny piece off one corner, and pipe eight spider legs onto each cookie, extending from the Reese’s cup. Let the chocolate set completely before serving. You can chill them in the fridge for 10-15 minutes to speed this up.
Nutrition
Carbohydrates: 32g |
Protein: 4g |
Fat: 12g |
Saturated Fat: 6g |
Polyunsaturated Fat: 1g |
Monounsaturated Fat: 4g |
Trans Fat: 0.3g |
Cholesterol: 31mg |
Sodium: 242mg |
Potassium: 121mg |
Fiber: 1g |
Sugar: 20g |
Vitamin A: 233IU |
Vitamin C: 0.1mg |
Calcium: 25mg |
Iron: 1mg
Nutrition information is automatically calculated, so should only be used as an approximation.
Like this? Leave a comment below!

Shop Ingredients & Tools for This Recipe
This post may contain affiliate links, meaning that at no additional cost to you, I will earn a small commission on purchases made through these links. Your support helps keep this blog running!
Loved this Halloween Snickerdoodle Spider Cookie Recipe? Don’t Forget to Pin it for Later!
If these adorable and delicious spider cookies have captured your heart (and your taste buds!), be sure to save this recipe for future Halloween celebrations. Pin it to your favorite holiday baking board so you can easily find it year after year. Share the spooky joy with friends and family, and make this Halloween season extra sweet!