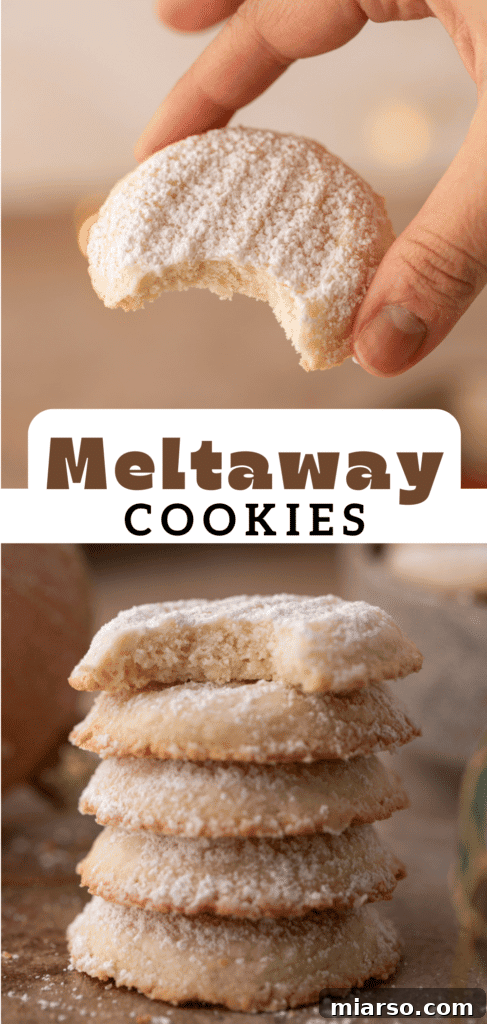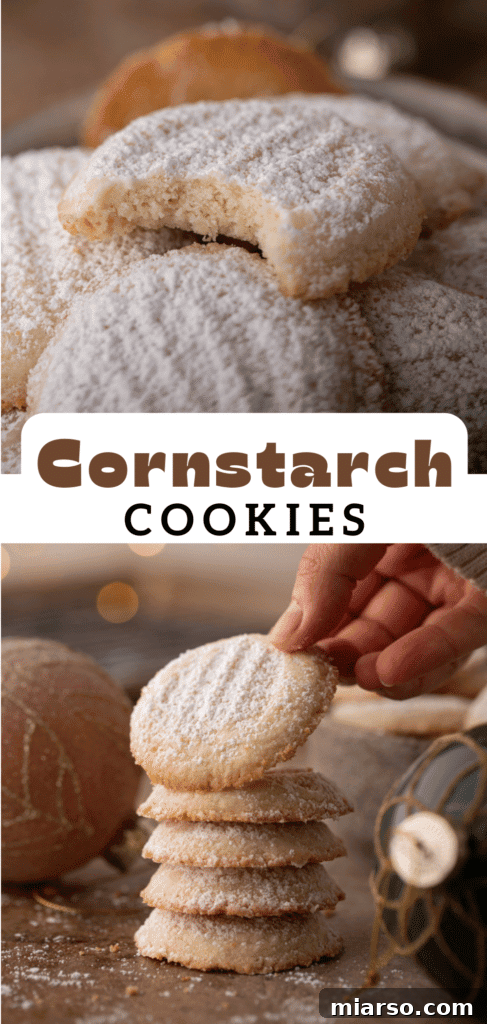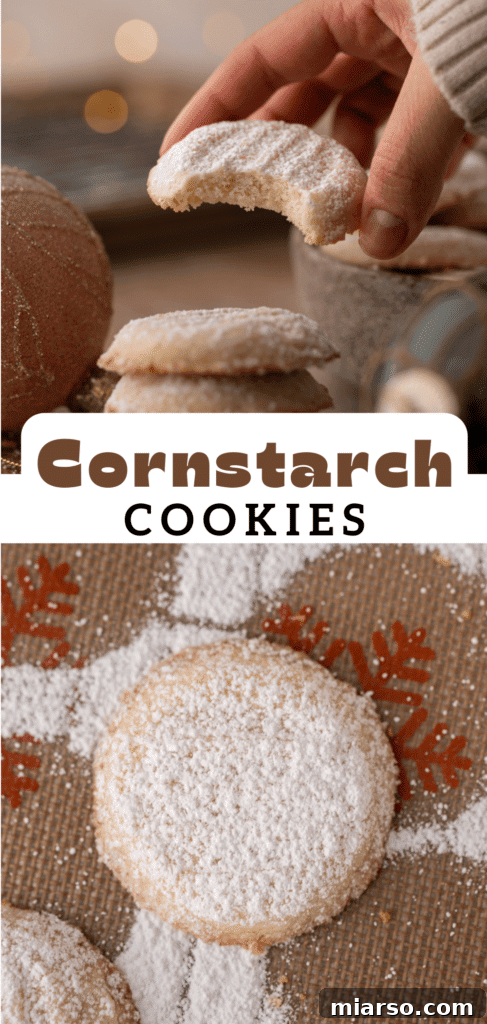
Delight your senses and elevate your dessert spread with these extraordinary Melting Moments Cookies. Their name isn’t just a charming descriptor; it’s a promise. With every bite, these delicate, buttery treats quite literally melt in your mouth, leaving behind a blissful sensation of rich flavor and crumbly perfection. They are the ideal addition to any occasion, especially cherished during the festive holiday season, offering a comforting warmth and an irresistible sweetness that guarantees you won’t stop at just one.
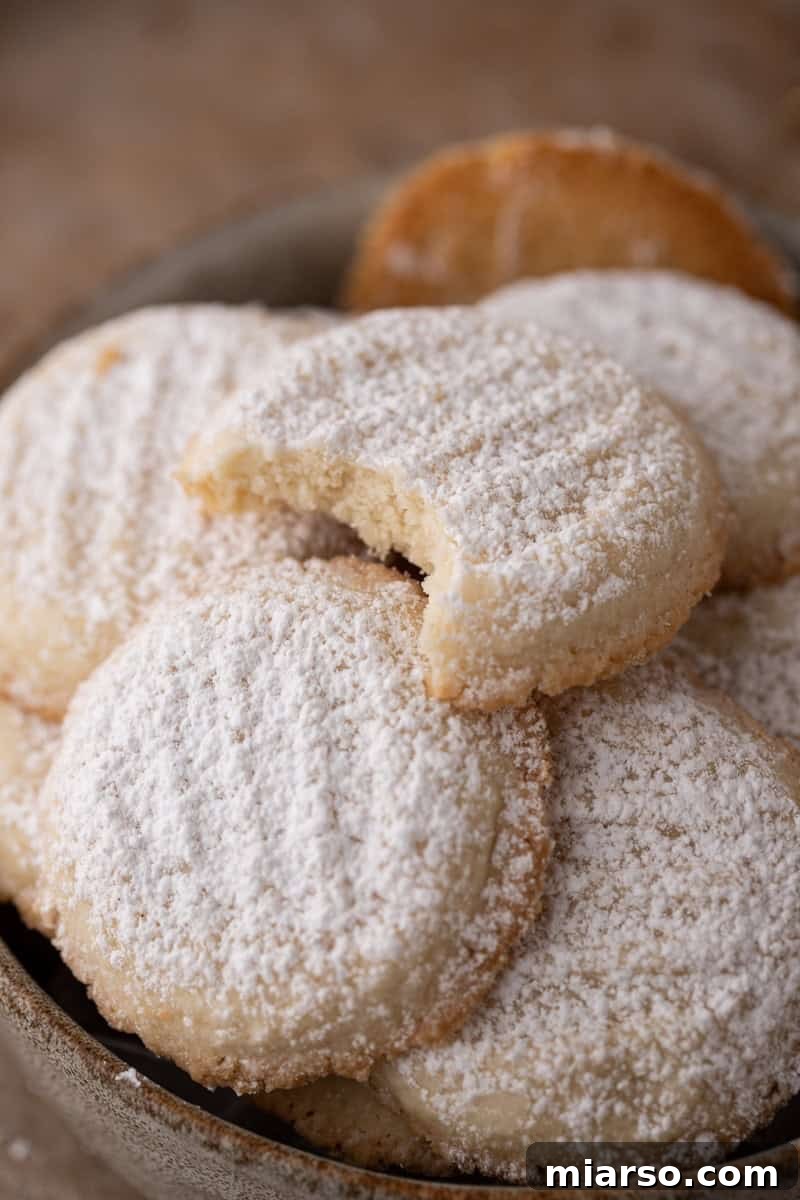
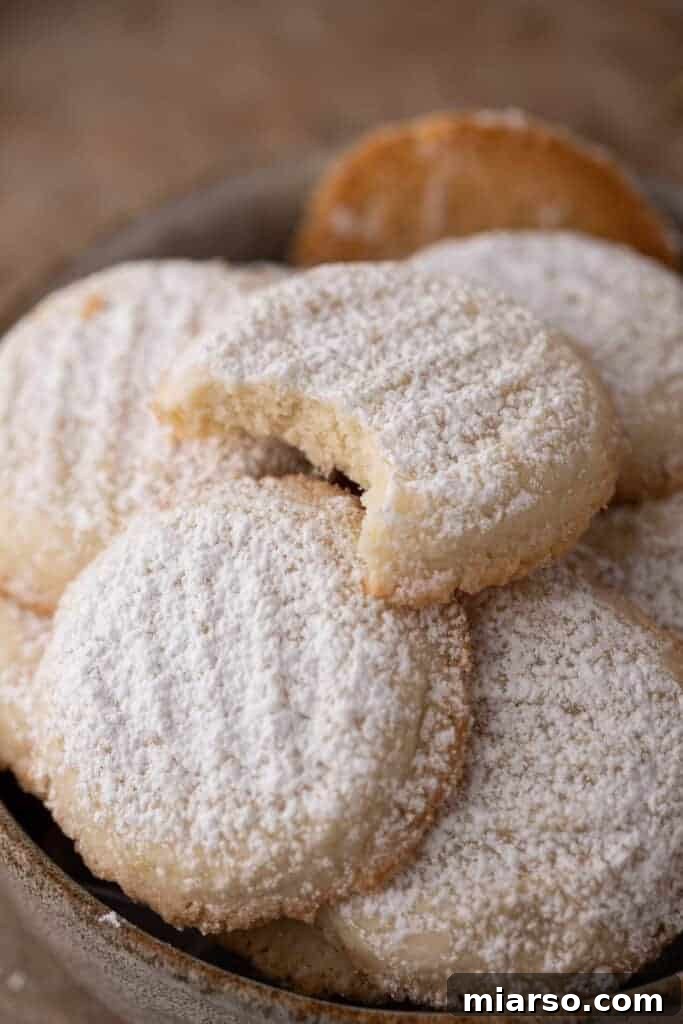
Beyond their exquisite taste, these cornstarch cookies boast an incredibly soft and tender texture, unlike anything you’ve experienced before. Dusted generously with a veil of powdered sugar, they don a beautiful, snowy appearance, making them a picturesque centerpiece for your holiday platters or a delightful surprise in a thoughtful gift box. Prepare to fall in love with their simple elegance and profound deliciousness.

Imagine cozy evenings, a crackling fire, and a plate of these heavenly cookies beside a tall glass of cold milk or a steaming cup of your favorite tea. They’re more than just a snack; they’re an experience, a moment of pure culinary joy. Make sure to prepare an ample batch, as these light and airy wonders tend to vanish surprisingly quickly – a testament to their captivating taste and delicate structure. They’re so good, you’ll want to hoard them, but sharing their magic is part of the fun!
If you’re a fellow cookie enthusiast always on the hunt for your next baking adventure, you’ll also adore these other irresistible recipes. Be sure to explore our Brown Butter Cherry Chocolate Chip Cookies, the comforting classic Original Quaker Oatmeal Cookie, our wonderfully Soft Honey Cookies recipe, or the delightfully chewy S’mores Cookie Bars. Each offers a unique flavor profile that promises to satisfy your sweet cravings.
What Exactly Are Melting Moments Cookies? The Secret Behind Their Name
Melting Moments Cookies, often affectionately known as cornstarch cookies, are a classic confectionery marvel. At their core, these treats are a sublime fusion of butter and cornstarch, creating a cookie with an unbelievably tender and crumbly consistency. If you’ve never had the pleasure of tasting one, their texture can be likened to a much softer, more delicate version of a pecan sandy, but without the nuts. The cornstarch is the true hero here, working its magic to inhibit gluten formation, which results in a cookie that literally dissolves in your mouth, hence the fitting name “Melting Moments.”
Originating from classic shortbread traditions, these cookies elevate the concept of buttery goodness to an entirely new level. They are simple yet sophisticated, demonstrating how a handful of basic pantry staples can be transformed into something truly extraordinary. This simplicity also makes them incredibly versatile, serving as a perfect canvas for various flavor additions and seasonal decorations. Whether it’s the holiday season or just a regular Tuesday, these cookies bring a touch of elegance and comfort to any moment.
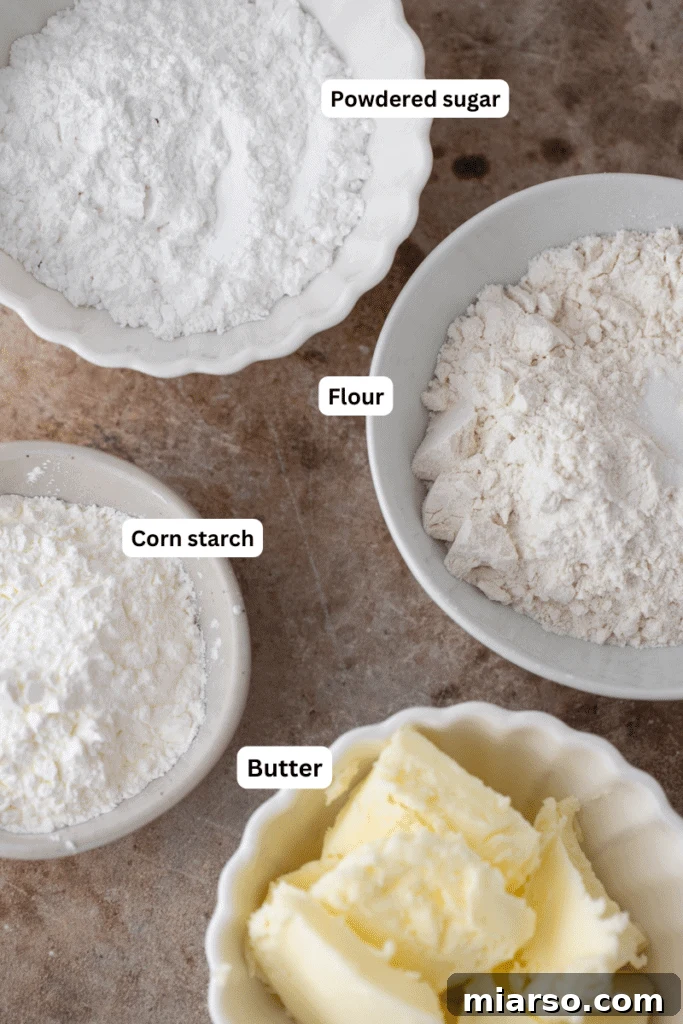
Essential Ingredients for Melting Moments Perfection
Crafting the perfect batch of melting moments cookies requires just a few key ingredients, each playing a crucial role in achieving that signature melt-in-your-mouth texture and rich flavor. The quality of your ingredients truly shines through in such a simple recipe, so opt for the best you can find. For precise measurements, please refer to the detailed recipe card conveniently located at the bottom of this page.
- Unsalted Butter: This is the foundation of your cookie’s flavor. Using unsalted butter allows you to control the salt content precisely. For the best results, choose a high-quality butter, as its pure flavor will define your cookies. It’s crucial for the butter to be thoroughly softened at room temperature (ideally for about an hour out of the fridge) so it creams smoothly with the sugar, creating a light and airy dough.
- Powdered Sugar (Confectioners’ Sugar): This ingredient is vital for achieving the cookies’ characteristic airiness and incredible softness. Unlike granulated sugar, powdered sugar dissolves more readily and contributes to a smoother, finer crumb structure, enhancing the “melting” quality.
- Pure Vanilla Extract: A staple in almost any cookie recipe, pure vanilla extract adds a layer of aromatic warmth and depth, complementing the buttery notes beautifully. Don’t skimp on quality here; a good vanilla extract makes a noticeable difference.
- All-Purpose Flour: While essential for structure, these cookies use less flour than traditional recipes, allowing the cornstarch to take center stage. Proper measurement (spooned and leveled) is key to preventing a dense cookie.
- Cornstarch: The true secret weapon of Melting Moments Cookies! Cornstarch is what gives these cookies their unparalleled delicate, crumbly, melt-in-your-mouth texture. It works by interfering with gluten development in the flour, resulting in a tender cookie that surpasses even classic shortbread in softness.
- Salt: A touch of salt is crucial for balancing the sweetness and enhancing all the other flavors. Adding it separately from unsalted butter gives you precise control over the overall taste.
- Optional Toppings: Feel free to customize! Before baking, you can add festive colored sprinkles for a pop of color. After baking, a generous dusting of extra powdered sugar creates that iconic “snowy” finish, perfect for holiday presentations.
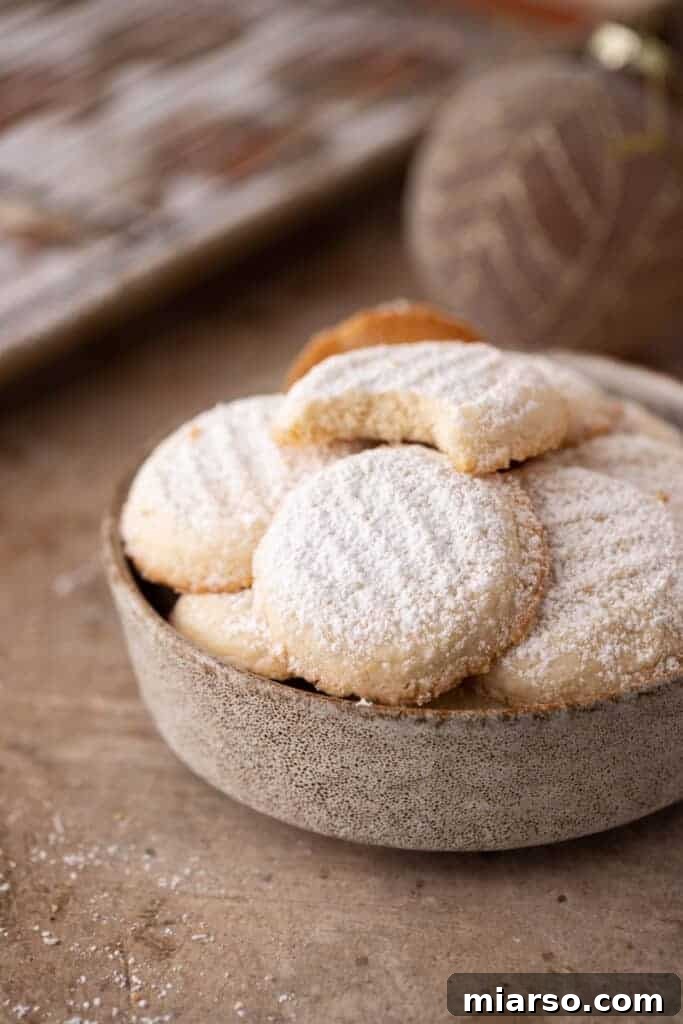
How to Master Melting Moments Cookies: A Step-by-Step Guide
Creating these delightful cookies is a straightforward and rewarding process. Follow these detailed instructions to achieve the perfect batch of melt-in-your-mouth goodness. Remember to scroll down to the recipe card at the bottom for the full list of ingredients and precise measurements.
- Prepare Your Workspace: Begin by preheating your oven to 350°F (175°C). Line your baking sheets with parchment paper. This simple step is vital for preventing sticking and ensuring your delicate cookies can be easily removed after baking, preserving their perfect shape.
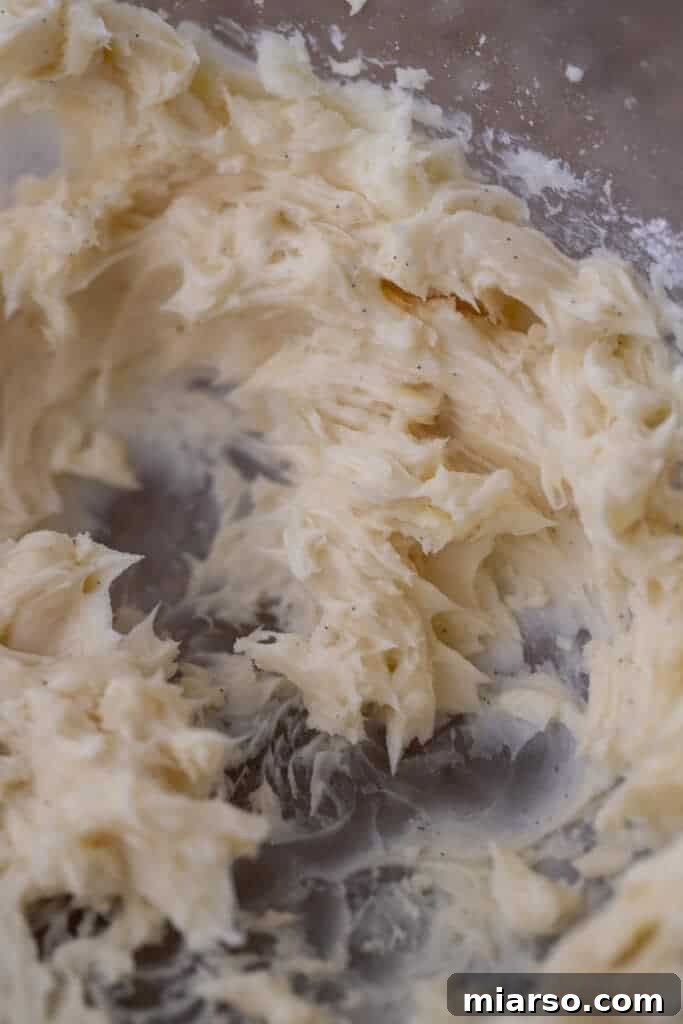
- Cream the Wet Ingredients: In a large mixing bowl, combine the softened unsalted butter and powdered sugar. Using an electric mixer, cream them together on medium speed until the mixture becomes light, fluffy, and pale in color. This process incorporates air, contributing to the cookies’ airy texture. Next, beat in the pure vanilla extract until just combined, ensuring its fragrant essence is evenly distributed.
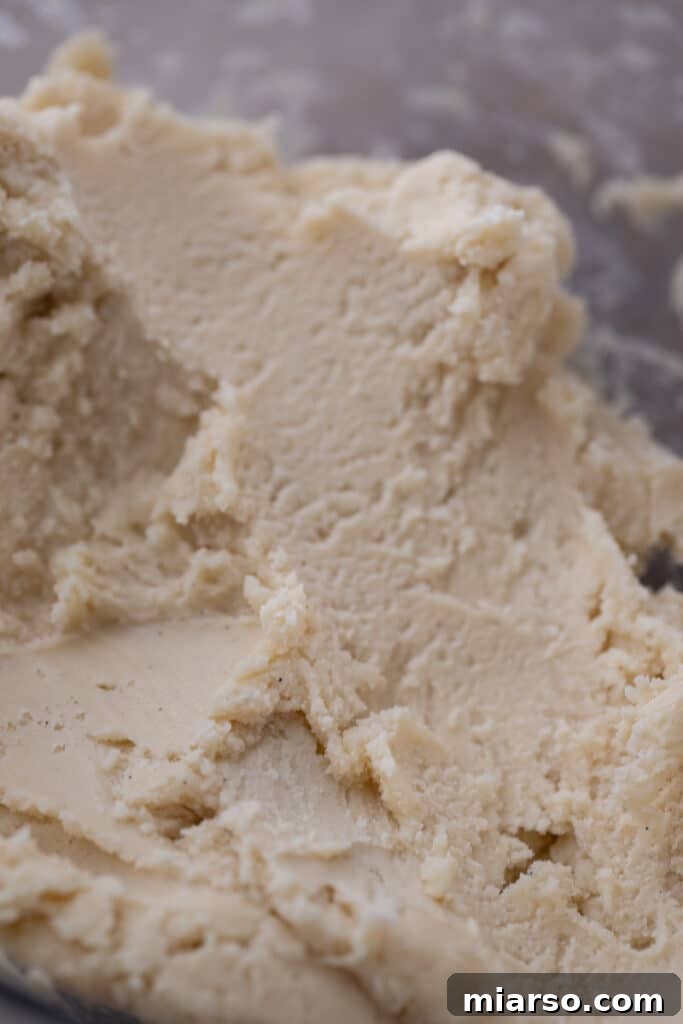
- Combine Dry and Wet Ingredients: In a separate bowl, whisk together the all-purpose flour, cornstarch, and salt until they are thoroughly combined. Gradually add this dry mixture to the butter mixture, mixing on low speed until just incorporated. The key here is to avoid overmixing. Overmixing develops gluten, which can lead to tough cookies, and we want these to be as tender as possible. Stop mixing as soon as no dry streaks of flour remain.
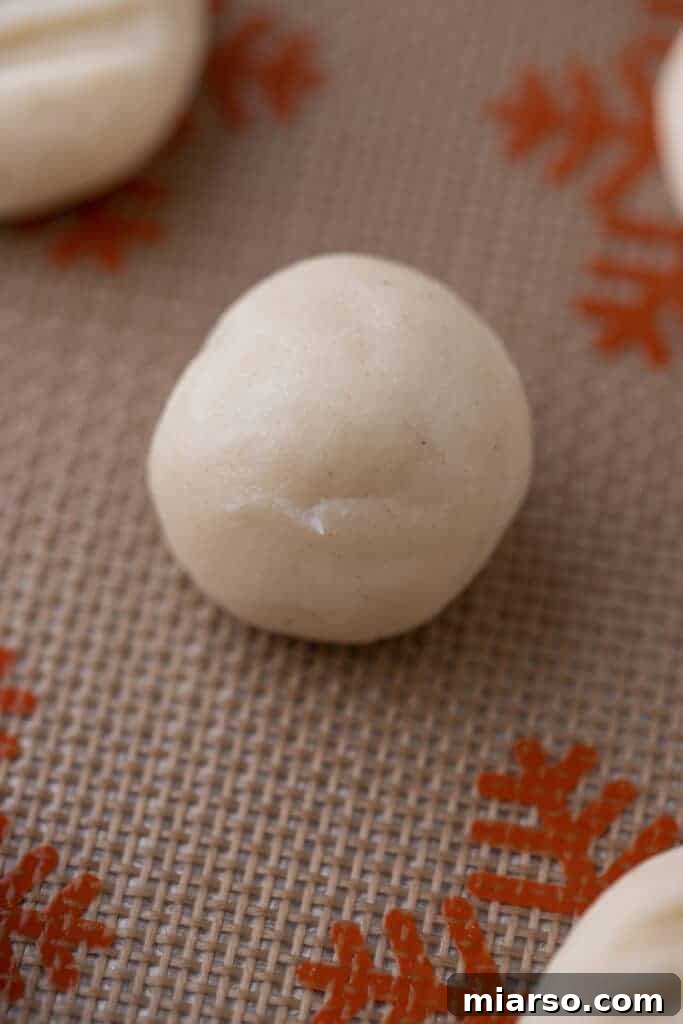
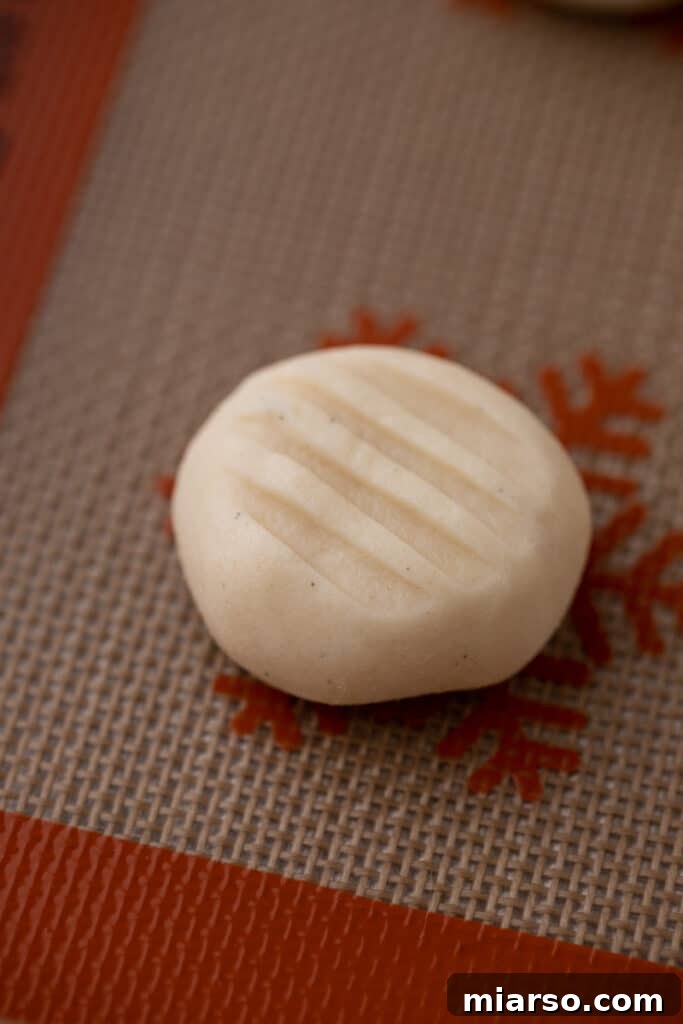
- Shape the Cookie Dough: Take portions of the soft dough and roll them into uniform 1-inch balls. A 1-tablespoon measuring spoon works perfectly for scooping, helping to ensure consistent cookie size for even baking. Place these dough balls onto your prepared baking sheets, leaving approximately 2 inches of space between each to allow for slight spreading. Gently press a fork into the center of each cookie to create a decorative indentation. Be careful not to press too firmly, as this could flatten the cookies excessively during baking.
- Bake to Golden Perfection: Place the baking sheets on the middle rack of your preheated oven. Bake for approximately 10-12 minutes, or until the edges are just barely golden and the centers appear set. The cookies will still be very soft when you remove them, which is exactly what we want.
- Cool with Care: Allow the baked cookies to cool on the baking sheet for at least 5 minutes. They are incredibly delicate when warm, so this cooling period helps them firm up slightly before handling. After 5 minutes, use a thin, flexible spatula to carefully transfer them to a wire rack to cool completely. Handle with the utmost gentleness to prevent breakage.
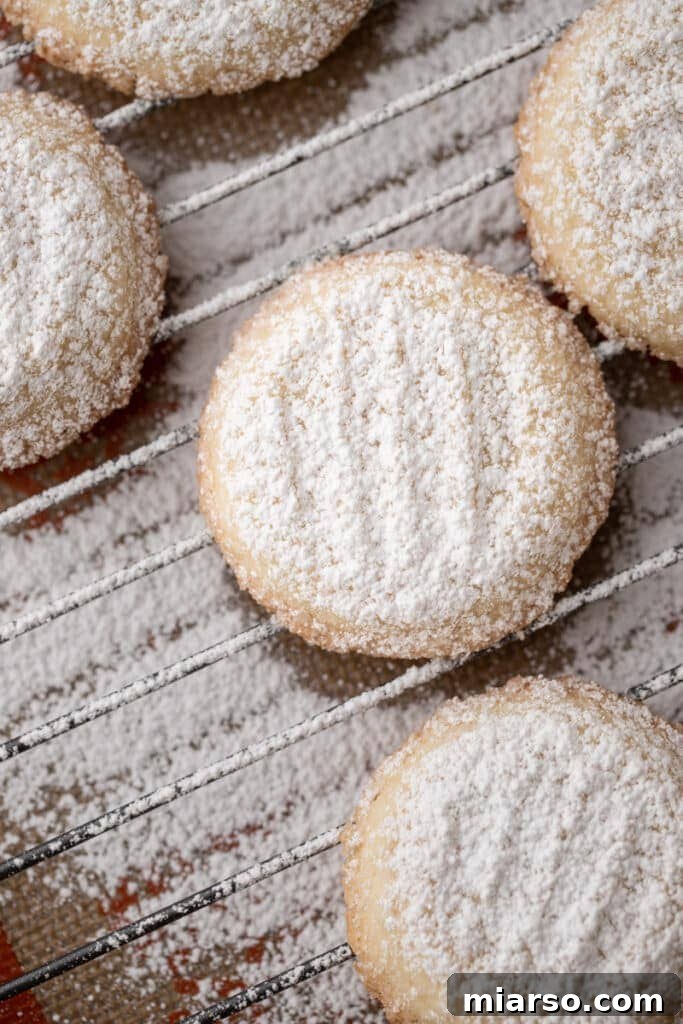
- Dust for a “Snowy” Finish: While the cookies are still warm on the cooling rack, dust them generously with additional powdered sugar. The warmth helps the sugar adhere. For an even more beautiful, snowy effect, if the initial dusting seems to melt (which can happen with warm cookies), add another light dusting of powdered sugar once the cookies have fully cooled to room temperature. This final touch is perfect for that iconic, festive appearance.
Pro Tips for Melting Moments Mastery
Achieving the perfect batch of Melting Moments is all about technique and a few insider secrets. Keep these expert tips in mind for consistently delightful results:
- Chill the Dough: To ensure your cookies maintain their ideal shape and thickness while baking, consider chilling the dough in the refrigerator for 30-60 minutes before baking. This helps solidify the butter, preventing the cookies from spreading too thinly in the oven and retaining their delicate form.
- Room Temperature Butter is Key: Don’t underestimate the importance of truly softened butter. It should be pliable enough to press an indentation with your finger, but not melted or greasy. Properly softened butter creams beautifully with sugar, incorporating air that leads to a lighter, more tender cookie.
- Measure Flour Accurately: For cookies, especially delicate ones like these, precise flour measurement is crucial. Avoid scooping flour directly from the bag with your measuring cup, as this compacts it. Instead, spoon the flour into your measuring cup and then level it off with a straight edge. This prevents adding too much flour, which can make your cookies dry and tough.
- Do Not Overmix: As mentioned in the instructions, overmixing the dough is the enemy of tender cookies. Once the dry ingredients are added, mix only until they are just combined and no streaks of flour remain. The less you work the dough, the more tender your Melting Moments will be.
- Uniformity for Even Baking: Strive for consistency when rolling your cookie dough balls. Cookies of similar size will bake more evenly, preventing some from being overdone while others are underbaked. A small cookie scoop or a tablespoon measure can be very helpful here.
- Oven Temperature Matters: Ovens can vary. If you find your cookies are consistently spreading too much or not baking evenly, consider investing in an oven thermometer to ensure your oven is accurately heating to the set temperature.
Why You Simply Must Make This Recipe
These Melting Moments Cookies aren’t just another cookie recipe; they’re an invitation to pure joy and simple baking pleasure. Here’s why they deserve a special place in your recipe repertoire:
- Create Cherished Memories: Baking these cookies is a wonderful activity to share with family and friends, especially during the holidays. The simple process and delicious outcome make for perfect bonding moments and traditions you’ll look forward to year after year.
- Experience Unparalleled Softness: Prepare yourself for the softest cookie you might ever taste. The unique blend of ingredients, particularly the cornstarch, creates an ethereal texture that genuinely melts in your mouth, offering a luxurious experience with every bite.
- Minimal Effort, Maximum Flavor: You only need a handful of readily available, simple ingredients to create these gourmet-quality cookies. The straightforward preparation means less time in the kitchen and more time enjoying your delectable creations.
- Versatile for Any Season: While perfect for Christmas, these delightful cookies can be enjoyed year-round. Pair them with a refreshing iced tea in the summer or a warm cup of coffee in the fall. They’re also wonderfully complemented by a dollop of strawberry jam or a side of fresh berries, making them adaptable to any season or occasion.
- Perfect for Gifting: Their elegant appearance and exquisite taste make them an ideal homemade gift. Package them in a pretty tin or box, and you have a thoughtful present that will be deeply appreciated by anyone lucky enough to receive them.

Frequently Asked Questions (FAQ)
How to Store Melting Moments Cookies?
To preserve their delicate texture and fresh taste, store your Melting Moments Cookies in an airtight container at room temperature. They will remain wonderfully fresh for up to a week. For extended freshness, especially in warmer climates, you can also store them in the refrigerator, which can keep them good for up to two weeks. Just make sure the container is truly airtight to prevent them from drying out or absorbing other odors.
Can I Freeze These Cookies?
Absolutely! Melting Moments Cookies freeze beautifully, making them an excellent candidate for make-ahead baking. You can store the finished, baked cookies in an airtight container or a freezer-safe storage bag, ensuring they are tightly sealed to prevent freezer burn. They will stay fresh in the freezer for up to 3 months. When you’re ready to enjoy them, simply thaw them at room temperature. You might want to give them another light dusting of powdered sugar after thawing to refresh their snowy appearance.

Can I Use Frosting or Icing?
Of course! While traditionally dusted with powdered sugar, a light glaze or simple icing can be a delightful addition to these Melting Moments Cookies. A lemon-flavored glaze, made by simply whisking lemon juice with powdered sugar, would provide a lovely tangy contrast to the buttery cookies. For an extra burst of citrus, you could even incorporate a tiny bit of lemon zest or a drop of lemon extract into your glaze. Just be mindful that glazes can introduce excess moisture, which might be absorbed by the cookies over a couple of days, potentially altering their signature delicate texture. It’s often best to glaze them just before serving or for shorter storage periods.
Can I Freeze Cornstarch Cookie Dough?
Yes, you can absolutely freeze the raw cornstarch cookie dough, which is a fantastic way to prepare ahead for future baking! You can either store it as one large log or ball, tightly wrapped in several layers of plastic wrap and then placed in a freezer-safe bag. Alternatively, you can pre-roll the dough into individual 1-inch balls, arrange them on a baking sheet, freeze until solid, and then transfer them to a freezer bag. This way, you can bake just a few at a time. Always ensure the dough is completely thawed in the refrigerator before baking to achieve the best texture and prevent uneven baking.
Delicious Variations to Try
One of the joys of Melting Moments Cookies is their versatility. Their simple, buttery base provides a perfect canvas for experimenting with different flavors. Here are a few ideas to inspire your next batch:
- Lemon Zest Melting Moments: Add 1-2 teaspoons of finely grated lemon zest to the butter and sugar mixture. The bright, tangy notes of lemon pair beautifully with the rich butter flavor, making for a refreshing twist.
- Almond Extract Delight: Substitute half of the vanilla extract with pure almond extract (or use all almond extract for a stronger flavor). This adds a wonderfully sophisticated, nutty aroma that complements the delicate cookie.
- Chocolate Dipped Elegance: After the cookies have cooled completely, dip half of each cookie into melted dark, milk, or white chocolate. You can sprinkle with sea salt, chopped nuts, or more powdered sugar before the chocolate sets for an extra touch.
- Jam Thumbprint Melting Moments: Instead of pressing with a fork, create a small indentation in the center of each dough ball with your thumb. Fill the indentation with your favorite fruit jam (raspberry, apricot, or strawberry work wonderfully) before baking.
- Matcha Green Tea Cookies: Sift 1-2 teaspoons of culinary-grade matcha powder with the dry ingredients for a subtle earthy flavor and beautiful green hue. These are particularly striking when dusted with powdered sugar.
The Best Melting Moments Cookies Recipe
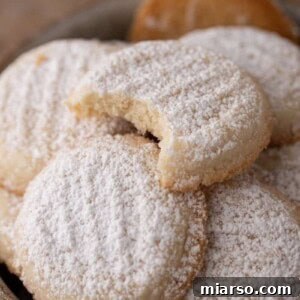
Melting Moments Cookies
Print Recipe
Ingredients
- 1 cup unsalted butter softened
- 2/3 cup powdered sugar
- 1 teaspoon pure vanilla extract
- 1 & 1/4 cups all-purpose flour
- 3/4 cup cornstarch
- 1/4 teaspoon salt
- Additional powdered sugar for dusting
Instructions
-
Preheat your oven to 350°F (175°C). Line baking sheets with parchment paper.
-
In a large mixing bowl, cream together the softened butter and powdered sugar until light and fluffy. Add in the vanilla extract and mix again until just combined.
-
In a separate bowl, whisk together the all-purpose flour, cornstarch, and salt. Slowly add the dry ingredients to the butter mixture. Mix on low speed until just combined, being careful not to overmix to ensure the cookies stay soft.
-
Take about 1 tablespoon worth of cookie dough and roll it into 1-inch balls. Place the balls on the prepared baking sheets, leaving about 2 inches of space between each. Gently press down with a fork in the center of each cookie, then place in the middle rack of the oven and bake for 10-12 minutes, or until edges are barely golden. Do not flatten the cookies too much when pressing with a fork to keep them from spreading excessively.
-
Allow the cookies to cool down on the baking sheet for 5 minutes before using a thin spatula to transfer them to a cooling rack. These cookies will be very soft, so proceed with caution and handle gently.
-
Dust them generously with more powdered sugar while they’re warm. If the sugar melts, add another dusting of powdered sugar after they’ve fully cooled to room temperature to give them that beautiful snowy look.
Nutrition
Nutrition information is automatically calculated and should be used as an approximation.
If you enjoyed this melting moments cookies recipe, make sure to pin it for later!