
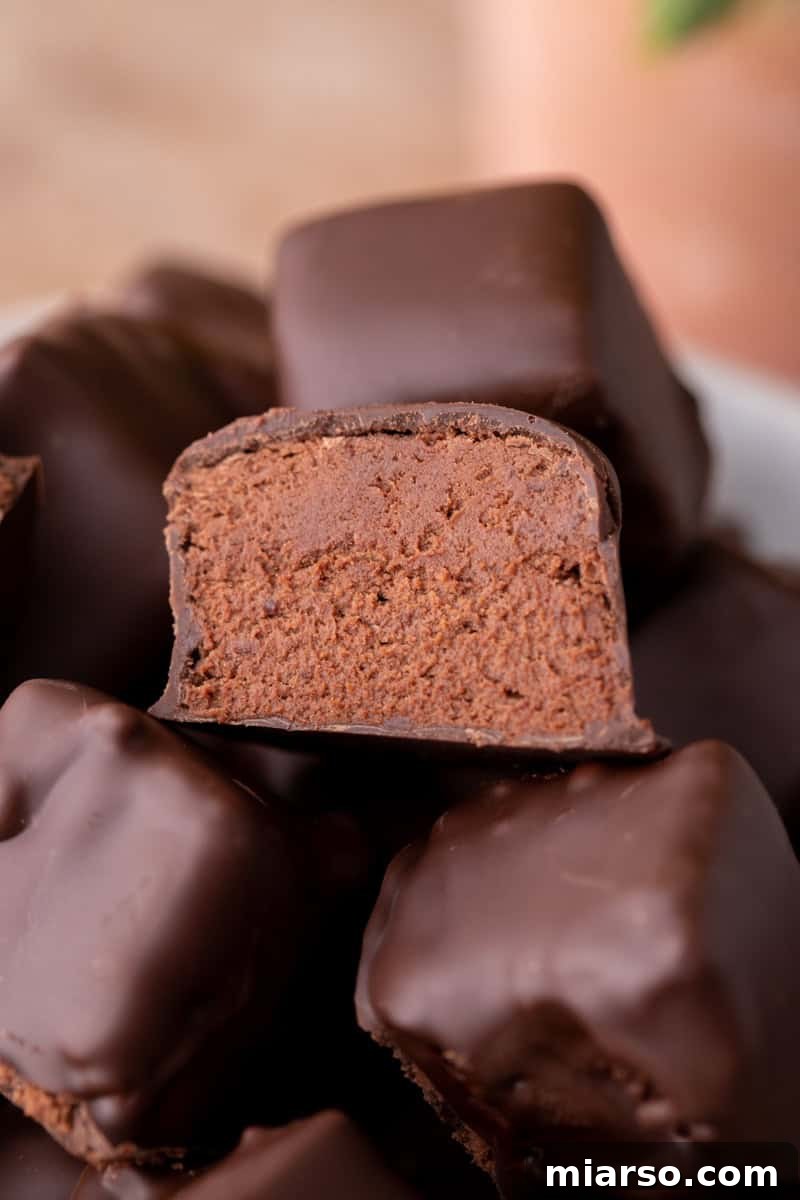
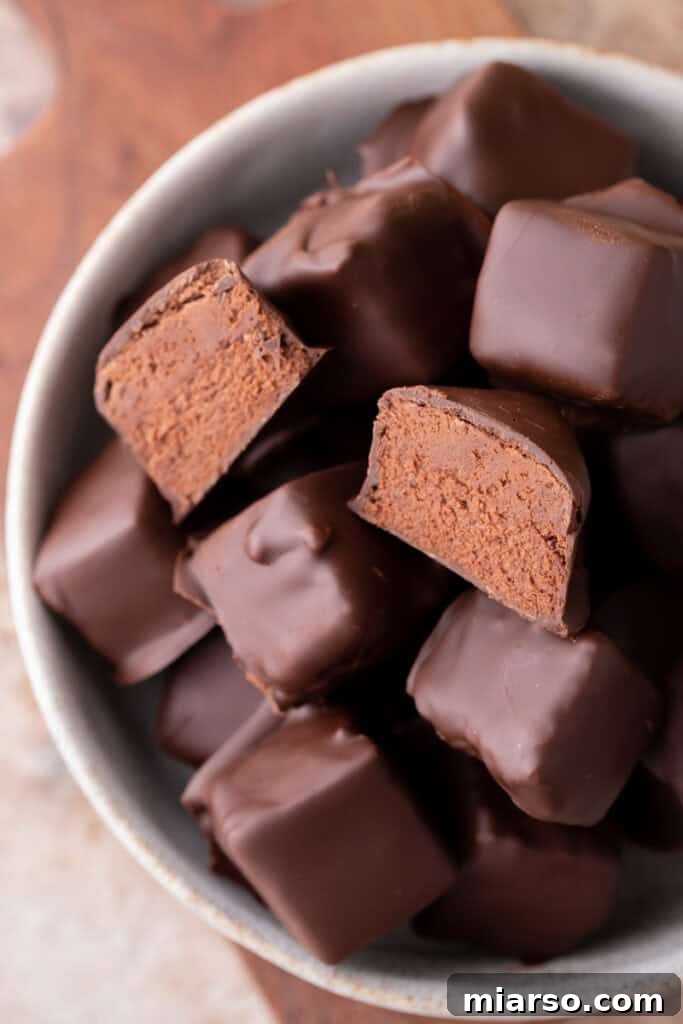
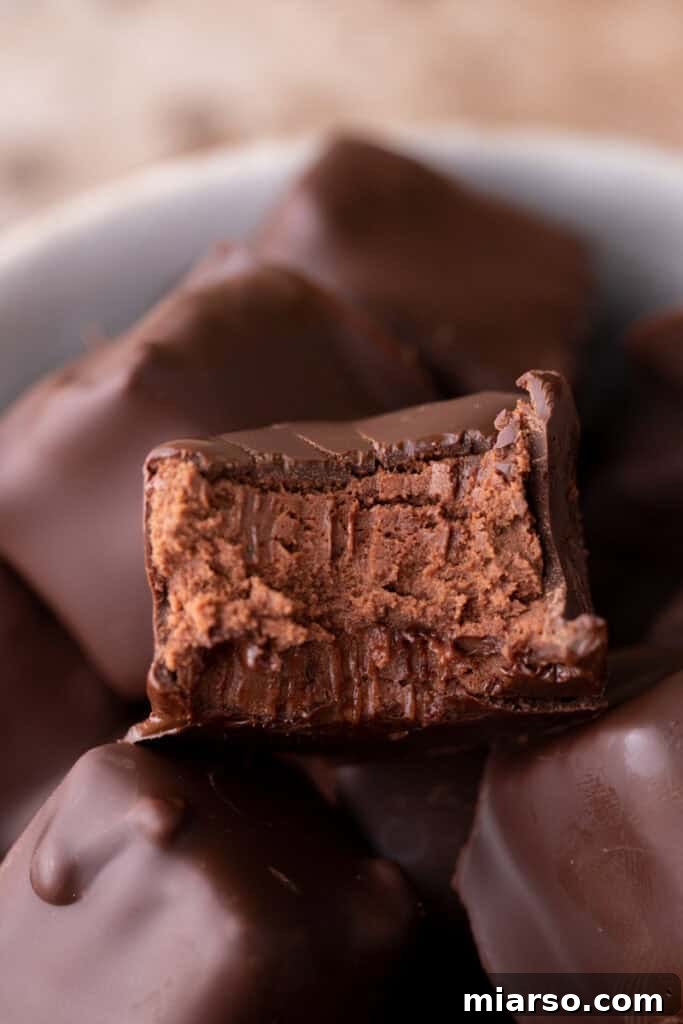
Cool Whip Candy stands out as one of the simplest no-bake treats you can whip up, especially as the festive holiday season approaches. It remarkably captures the essence and delightful taste of a homemade 3 Musketeers bar, offering a luxurious experience with minimal effort. Imagine a light, incredibly fluffy chocolate center that melts in your mouth, perfectly encased in a smooth, rich dark chocolate coating. Each bite delivers that satisfying snap, followed by a creamy, airy texture that is simply irresistible. This magical transformation from simple ingredients to a mousse-like confection is all thanks to the humble whipped topping, making this homemade candy both impressive and incredibly easy to achieve.
The holiday season can quickly become a whirlwind of activities, which is precisely why I gravitate towards sweets that require neither specialized candy-making skills nor an array of complicated tools. This particular Cool Whip Candy recipe is a true testament to simplicity. You only need a large mixing bowl, a microwave-safe bowl, a baking dish lined with parchment paper, and your freezer – that’s genuinely all it takes! It’s not only budget-friendly but also yields stunningly professional-looking pieces of candy that are ideal for holiday gifts or simply to treat yourself and your loved ones. Its affordability, ease, and impressive appearance make it a staple in any holiday baking repertoire.
If your taste buds are tingling for more candy-inspired creations, don’t miss out on my popular Rolo Pretzel Turtles and the festive Christmas Peanut Pretzel M&M’s Bark. These recipes are sure to add more sparkle to your dessert table, offering a variety of flavors and textures that everyone will adore. Each one offers a unique twist on classic favorites, perfect for sharing joy during the holidays.
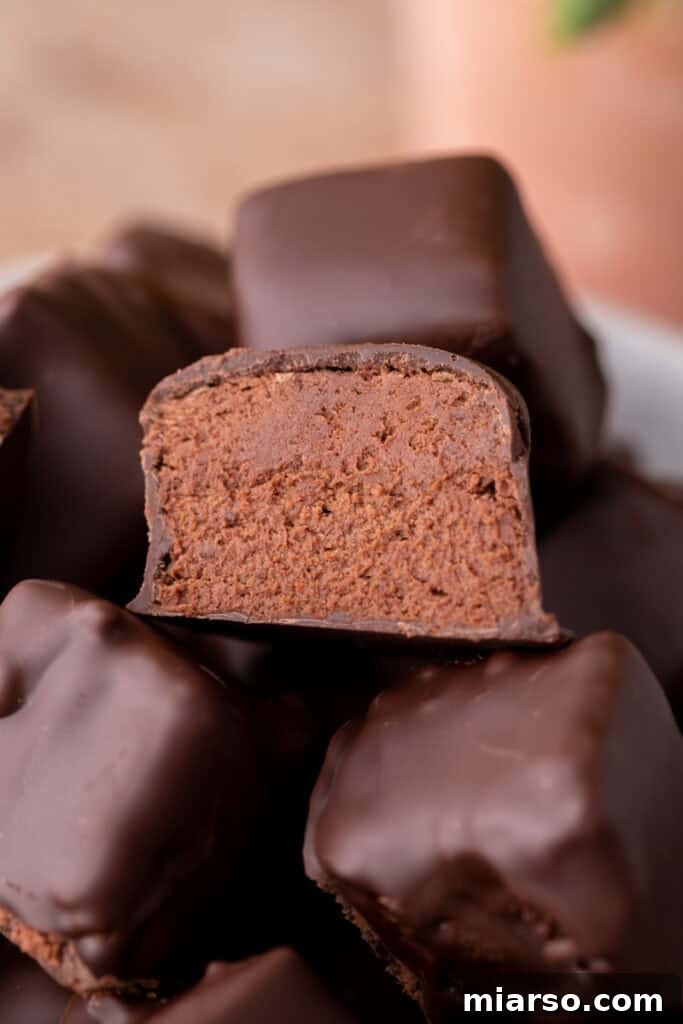
There’s a unique charm in recreating nostalgic candy favorites right in your own kitchen, especially when the homemade version surpasses the original in ease and flavor. This Cool Whip Candy recipe was an accidental discovery born out of curiosity: what if I simply folded melted chocolate into whipped topping? The moment the mixture set in the freezer, I knew I had stumbled upon something truly extraordinary and, frankly, unbelievably delicious! It perfectly mirrors the airy, mousse-like filling that we all cherish in a classic 3 Musketeers bar, yet it boasts a richer, more profound chocolate flavor and a remarkably cleaner ingredient list. The secret to its professional finish lies in just a little bit of patience while the mixture chills. Once firm, you simply slice it, dip each piece into a pool of silky dark chocolate, letting the excess drip away, and place them on a parchment-lined tray to set. The end result is a surprisingly elegant confection that looks like it came from a gourmet chocolatier, all without needing a single candy thermometer.
Why This Cool Whip Candy Will Become Your New Favorite
This delightful Cool Whip Candy isn’t just another dessert; it’s a game-changer for anyone looking for an effortless yet impressive treat. Here’s why you’ll fall head over heels for this recipe and find yourself making it again and again:
- Endlessly Customizable: The base recipe is fantastic on its own, but it also serves as a perfect canvas for your culinary creativity. Imagine adding a hint of peppermint extract for a festive twist, stirring in crushed nuts for an appealing crunch, or experimenting with white chocolate for a different flavor profile. The possibilities are truly limitless, allowing you to tailor this candy to any occasion or preference.
- Only 3 Main Ingredients: Yes, you read that right! With just milk chocolate chips, Cool Whip (or whipped topping), and dark chocolate for coating, you can create a confection that tastes far more complex than its ingredient list suggests. This simplicity makes it a go-to recipe for busy times.
- No Special Equipment or Skills Required: Forget candy thermometers, stovetop stirring, or intricate tempering techniques. This recipe is entirely no-bake and requires only basic kitchen tools like bowls and a spatula. It’s perfect for beginner bakers or anyone who wants a fuss-free dessert.
- Authentic 3 Musketeers Flavor: The secret weapon here is the whipped topping, which infuses the chocolate center with an incredibly light and airy texture. The result is a fluffy interior that is remarkably similar to the beloved 3 Musketeers bar, offering a nostalgic taste that’s hard to beat.
- Freezer-Friendly Perfection: This candy sets beautifully in the freezer, which is not only convenient for quick preparation but also makes it an excellent option for make-ahead desserts. The freezing process ensures a firm, easy-to-handle candy that maintains its shape and delightful texture.
- The Perfect Chocolate Snap: Dipping these airy centers in a generous coating of dark chocolate creates a delightful contrast. The crisp, firm outer shell provides a satisfying snap when you bite into it, perfectly complementing the soft, pillowy interior. This textural interplay elevates the candy from good to truly exceptional.
- Budget-Friendly and Gift-Ready: Made with common, affordable ingredients, this candy won’t break the bank. Yet, its elegant appearance and delicious taste make it an ideal candidate for homemade edible gifts during the holidays or for sharing at parties.
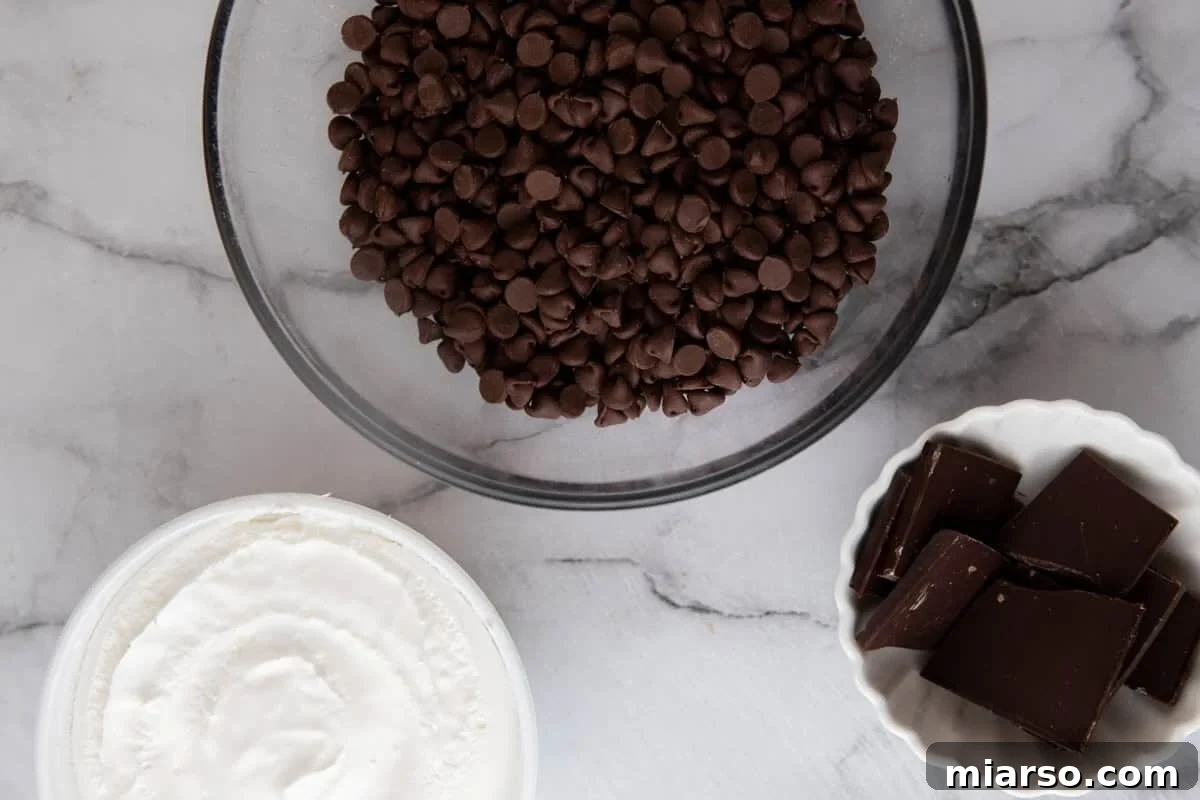
Essential Ingredients for Your Cool Whip Candy
Crafting these delectable Cool Whip Candies requires just a handful of straightforward ingredients, each playing a crucial role in achieving that signature fluffy texture and rich chocolate flavor. (You’ll find precise measurements and additional details in the comprehensive recipe card below.)
- Milk Chocolate Chips: These are the foundation of your candy’s indulgent, fluffy center. Once melted and then allowed to cool slightly, they provide the rich chocolate base that gives this candy its depth of flavor. Choose a good quality brand for the best results, as the chocolate flavor will truly shine through.
- Cool Whip or Whipped Topping: This is the star ingredient that creates the light, airy, mousse-like texture. It’s what transforms a dense chocolate mixture into a cloud-like confection, making the candy so unique and reminiscent of a 3 Musketeers bar. Ensure it’s thawed completely before use for easy folding and a smooth consistency.
- Dark Chocolate, White Chocolate Chips, or Wafers (for dipping): The outer coating provides that satisfying “snap” and seals in the fluffy center. Dark chocolate offers a sophisticated, slightly bitter contrast to the sweet interior, while white chocolate chips or candy wafers can create a sweeter, creamier shell. Melting wafers are particularly convenient as they often melt smoothly without requiring tempering.
- Optional Additions: These allow you to customize your candy to perfection. Consider a few drops of peppermint extract for a refreshing kick, crushed nuts (like pecans, almonds, or walnuts) for an added layer of texture and flavor, or mini chocolate chips folded into the center mixture for extra chocolatey bites.
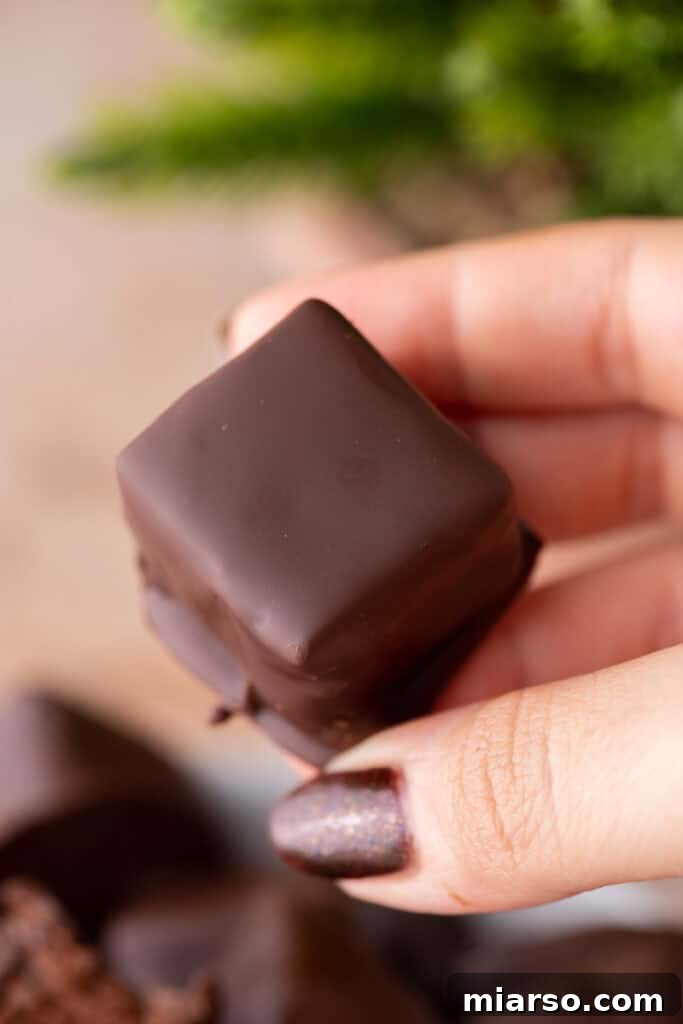
Crafting Your Cool Whip Candy: Step-by-Step Instructions
Making this delightful 3 Musketeers-style candy is surprisingly simple, designed for ease and minimal fuss. Follow these detailed steps to achieve perfect results every time. Remember to consult the full recipe card below for exact measurements and any additional notes.
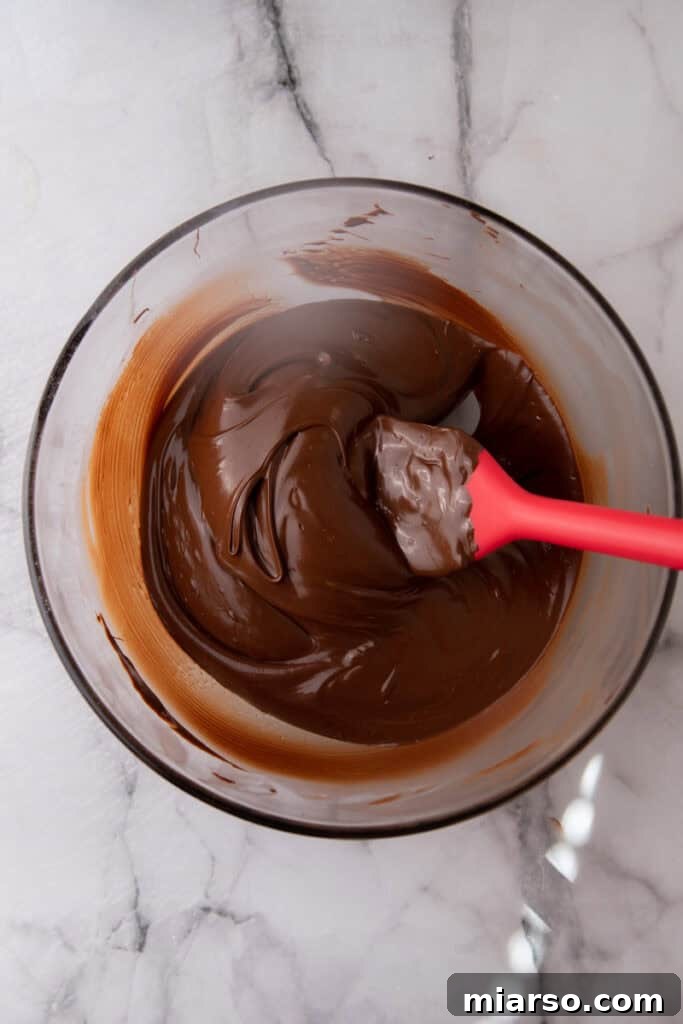
- Melt the Milk Chocolate Chips: Begin by placing your milk chocolate chips in a clean, microwave-safe bowl. Heat them in your microwave in short 30-second intervals. After each interval, stir the chocolate thoroughly with a spatula. Continue this process until the chocolate is completely melted and beautifully smooth, ensuring there are no lumps remaining.
- Cool the Melted Chocolate: This is a critical step for achieving the ideal fluffy texture. Once melted, set the chocolate aside and allow it to cool down to room temperature. This usually takes about 8 to 10 minutes. Cooling is essential to prevent the warm chocolate from melting the whipped topping when combined, which would result in a dense rather than airy center.
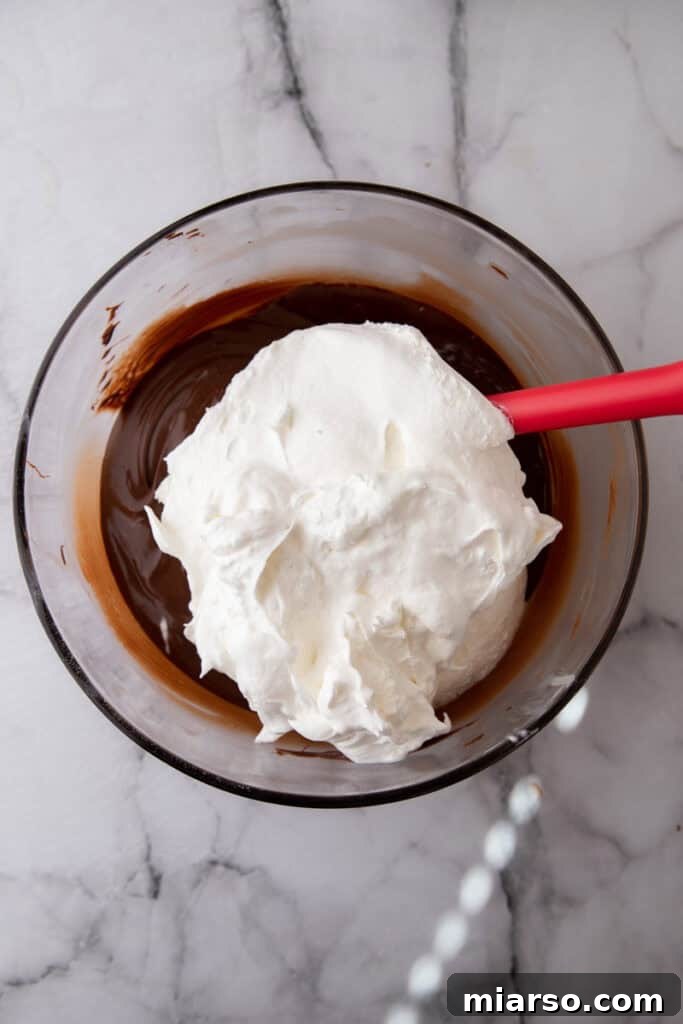
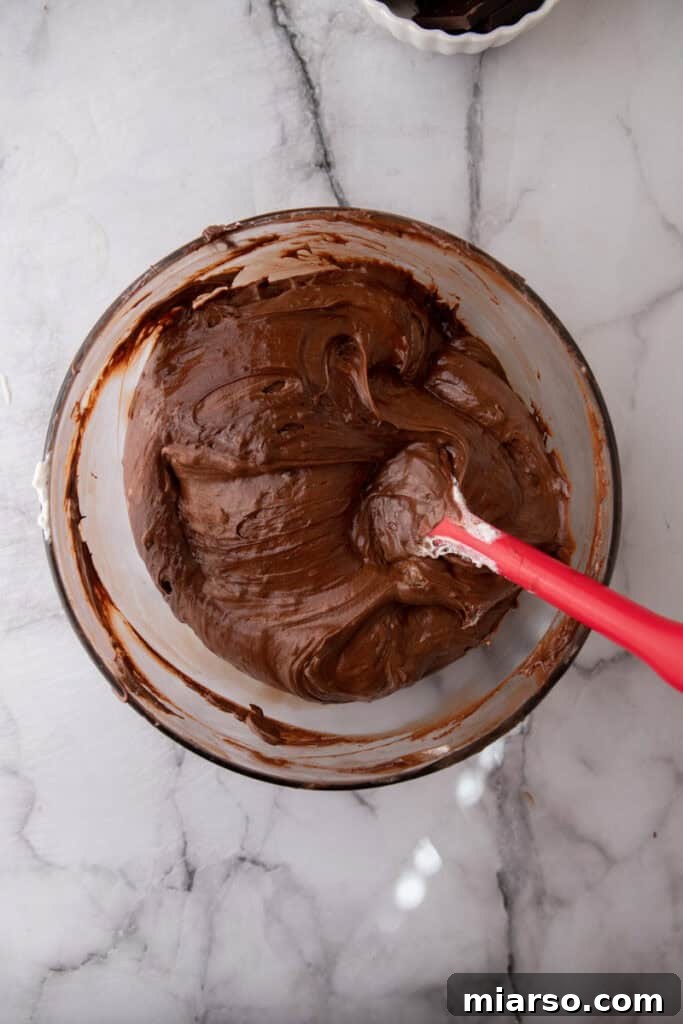
- Gently Fold in the Cool Whip: Once the melted chocolate has cooled sufficiently, add the thawed Cool Whip (or your chosen whipped topping) to the bowl. Using a spatula, gently fold the whipped topping into the chocolate mixture. Use a light hand and continue folding until the two ingredients are thoroughly combined and the mixture appears smooth, uniform, and wonderfully fluffy. Avoid overmixing, as this can deflate the whipped topping.
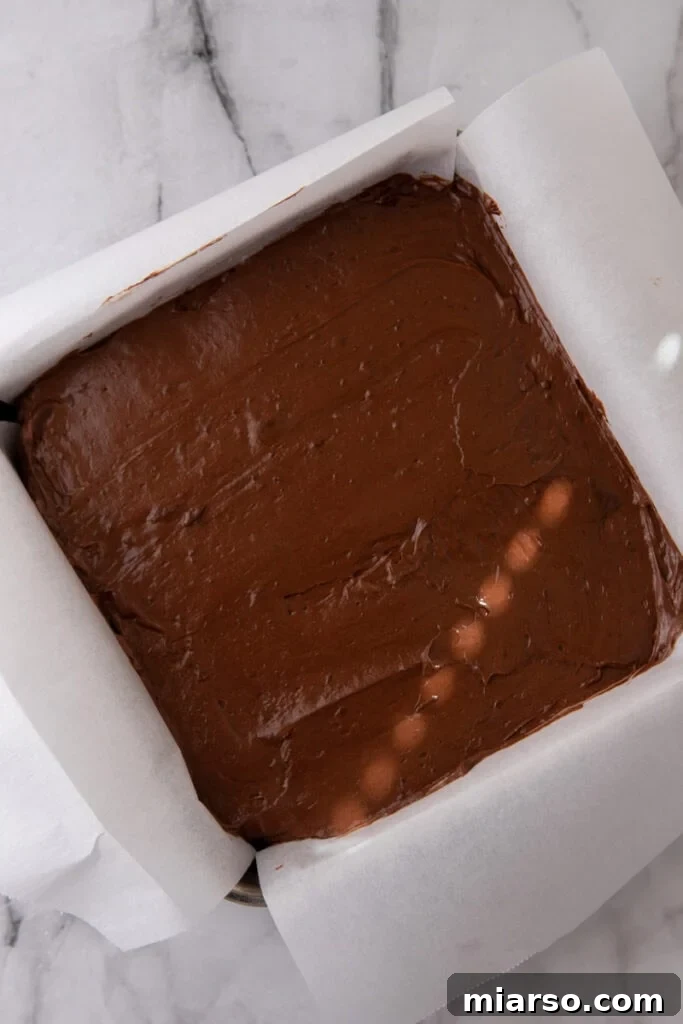
- Spread and Freeze the Mixture: Line a baking dish (an 8×8-inch pan works perfectly) with parchment paper, allowing some overhang on the sides. This overhang will serve as handles to easily lift the set candy later. Transfer the chocolate-whipped topping mixture into the prepared pan and spread it evenly using your spatula. Place the baking dish into the freezer for at least 30 minutes, or until the mixture is firm enough to be easily sliced without sticking.
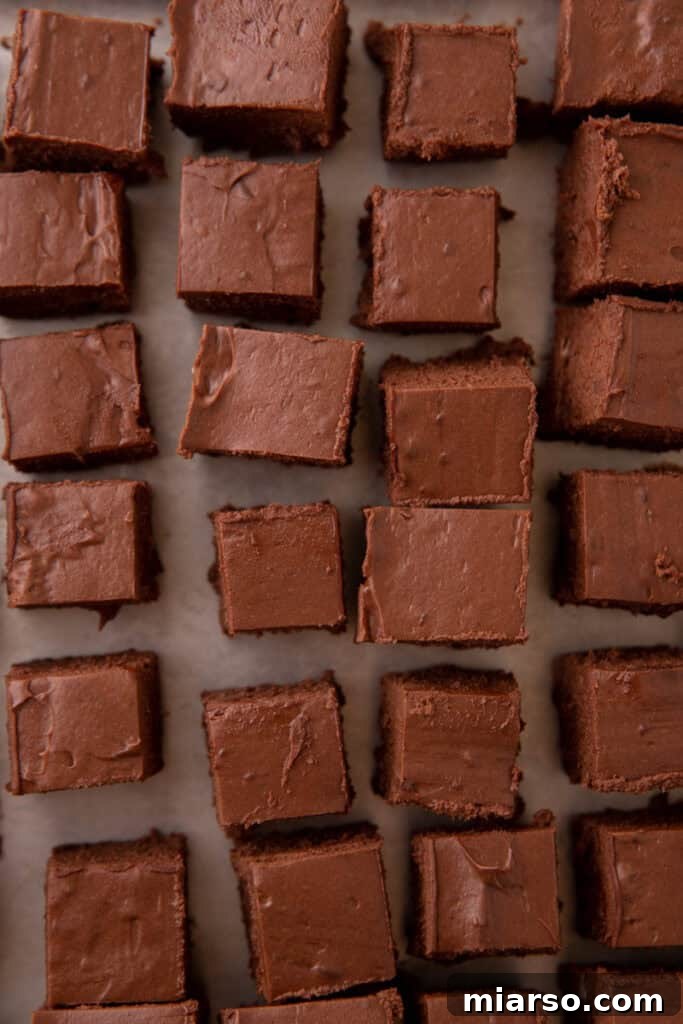
- Slice the Filling: Once the mixture is thoroughly firm, remove the baking dish from the freezer. Use the parchment paper overhang to lift the entire block of chocolate filling out of the pan. Carefully peel off the parchment paper. Place the firm block on a cutting board and use a sharp knife to slice it into desired shapes – squares, rectangles, or even charming bonbon shapes.
- Freeze Again for Dipping Prep: Arrange the freshly sliced candy pieces onto a clean parchment-lined tray. Place this tray back into the freezer for an additional 20-30 minutes. This extra chilling time is crucial as it ensures the candy pieces are very firm and cold, which will help them maintain their shape and prevent them from melting when dipped into the warm chocolate coating.
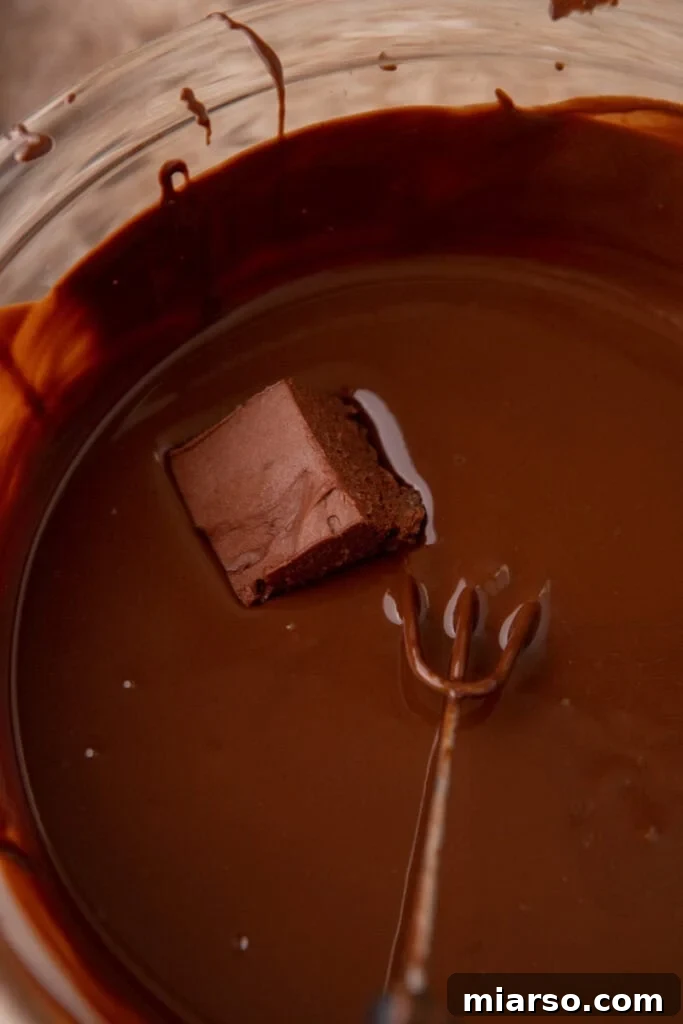
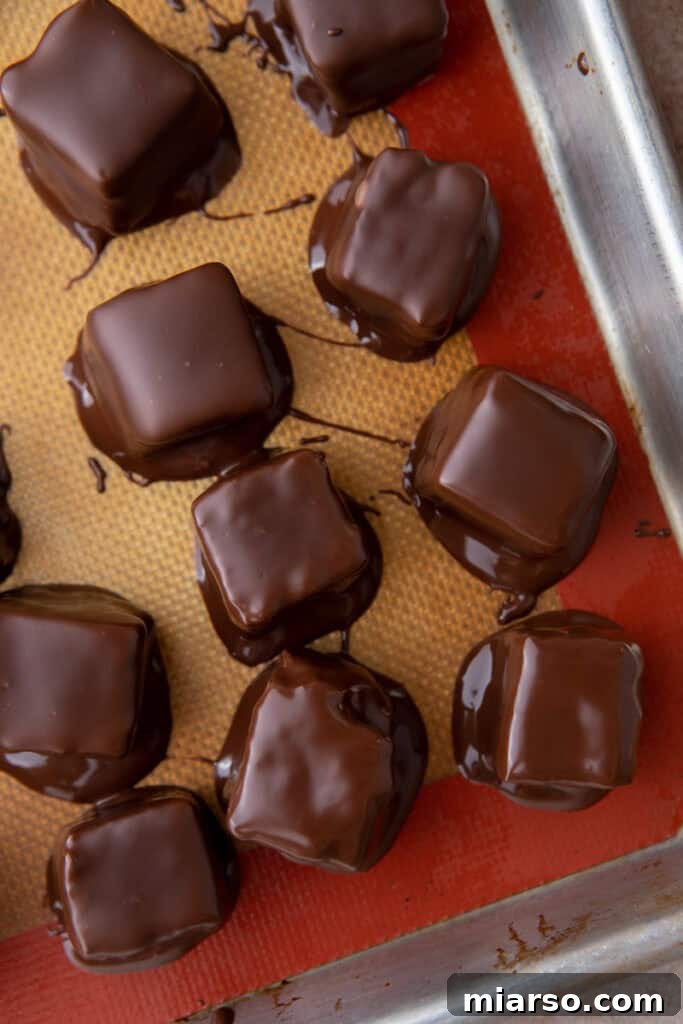
- Dip in Dark Chocolate: While the candy pieces are having their final chill, prepare your coating chocolate. Melt the dark chocolate (or white chocolate, or wafers) in a microwave-safe bowl, using the same 30-second interval method as before, stirring well after each. Ensure it’s smooth and fluid. Using candy dipping forks (or two regular forks), carefully dip each frozen candy piece into the melted chocolate. Allow any excess chocolate to drip off back into the bowl before placing the coated candy onto a fresh parchment-lined tray. Work quickly, as the cold candy will cause the chocolate to set relatively fast.
- Chill to Set: Once all the candies are coated, place the tray back into the refrigerator or freezer. Allow them to chill until the chocolate coating is completely set and firm to the touch. This step ensures a beautiful, hardened shell that protects the fluffy interior.
Exciting Variations to Elevate Your Cool Whip Candy
While the classic Cool Whip Candy is undoubtedly delicious, its simple nature makes it incredibly versatile for countless flavor and texture variations. Don’t hesitate to get creative and customize these treats to your liking:
- Peppermint Cool Whip Candy: For a refreshing holiday twist, add 1/8 to 1/4 teaspoon of pure peppermint extract to the chocolate-Cool Whip filling mixture. Start with a smaller amount and add more to taste, as peppermint can be quite potent. You can also crush candy canes and sprinkle them over the wet chocolate coating for an extra festive look and crunch.
- White Chocolate Bonbons: Instead of dark chocolate, dip your fluffy centers into melted white chocolate chips or high-quality white candy wafers. For an elegant touch, sprinkle with finely crushed nuts like pistachios or almonds, or even a dash of edible glitter before the white chocolate sets. This creates a visually stunning and distinctly different flavor profile.
- Crunchy Version: If you love a textural contrast, stir in about 1/4 to 1/2 cup of finely chopped nuts (such as pecans, walnuts, or almonds) or mini chocolate chips into the chocolate-Cool Whip mixture before spreading it into the pan. This adds a delightful crunch that complements the soft interior. Alternatively, you can roll the freshly coated candies in crushed nuts or toasted coconut.
- Truffle-Style Cool Whip Candies: For a more gourmet, hand-rolled look, modify the chilling process slightly. Instead of spreading the mixture into a pan and slicing, chill the chocolate-Cool Whip mixture in a bowl for about an hour until firm but still scoopable. Then, use a small tablespoon scoop or a cookie scoop to portion out the mixture and roll each portion into a smooth ball by hand. Freeze these balls before dipping them in melted chocolate, just like traditional truffles.
Troubleshooting Tips for Perfect Cool Whip Candy
Even with simple recipes, minor issues can sometimes arise. Here are some common troubleshooting tips to ensure your Cool Whip Candies turn out perfectly every time:
- My filling is too soft: If your chocolate-Cool Whip filling isn’t firm enough to slice cleanly, it likely needs more time in the freezer. Warm kitchen environments or particularly thick baking dishes can extend the chilling time required. Ensure your freezer is set to an adequate temperature and give it an extra 15-30 minutes, checking periodically until it’s solid enough to handle.
- My chocolate coating cracks: This common issue often occurs when there’s too great a temperature difference between the very cold candy center and the warm melted chocolate. To prevent cracking, remove your chilled candy pieces from the freezer and let them sit at room temperature for about 2 minutes before dipping. This slight temperature adjustment helps the coating adhere smoothly without fracturing.
- My melted chocolate seized: Chocolate seizes when even a tiny amount of water or steam comes into contact with it during melting, causing it to become thick, lumpy, and unusable. Always melt chocolate slowly in 30-second intervals in the microwave, stirring diligently between each. If using a double boiler, ensure the bottom of your bowl never touches the simmering water, and prevent any steam from escaping into your chocolate. If your chocolate does seize, sometimes stirring in a teaspoon of vegetable oil or melted shortening can salvage it, but it’s best to prevent it from happening.
Frequently Asked Questions (FAQ)
Here are answers to some of the most common questions about making and storing Cool Whip Candy:
For optimal freshness and to prevent melting, these candies should be stored in an airtight container or freezer bag in the freezer. They taste absolutely best when served cold, maintaining their firm coating and fluffy interior. Storing them in the freezer also prevents them from becoming messy or soft at room temperature.
Absolutely! The beauty of this recipe is its flexibility. You can use your favorite type of chocolate for the coating. Dark chocolate offers a rich, slightly bitter contrast, while milk chocolate chips provide a sweeter, more traditional flavor. White chocolate chips or melting wafers (like Ghirardelli or Wilton) are also excellent choices, often melting very smoothly and setting well. Experiment to find your preferred coating!
Yes, you can! If you prefer a homemade option or don’t have Cool Whip, you can use homemade whipped cream, whipped to stiff peaks. Alternatively, most non-dairy whipped toppings available in the frozen section can also be used as a substitute, offering a similar light and airy texture. Ensure whichever substitute you choose is fully thawed before incorporating.
No, you absolutely do not need any special or fancy equipment. The essentials include a microwave-safe bowl for melting chocolate, a sturdy spatula for mixing, a baking dish for setting the candy, and, of course, a freezer. While not strictly necessary, a chocolate dipping fork can make the dipping process much easier and cleaner, helping excess chocolate drip off perfectly. It’s a small investment that makes a big difference in presentation!
Yes, incorporating peppermint is a fantastic idea, especially for a festive holiday twist! Add a drop or two of peppermint extract to the chocolate-whipped topping mixture. Start with a small amount and adjust according to your taste preferences. You can also sprinkle crushed candy canes over the wet chocolate coating for an extra burst of peppermint flavor and visual appeal.
There are two primary reliable methods for melting chocolate for coating. The simplest is using a microwave: place your chopped chocolate or chips in a microwave-safe bowl and heat in 30-second intervals, stirring thoroughly after each. This prevents burning. Alternatively, you can use a double boiler method for more even melting: place your chocolate in a heat-proof bowl set over a saucepan of simmering water, ensuring the bottom of the bowl does not touch the water. Stir gently until melted and smooth. Crucially, in both methods, ensure no water or steam comes into contact with the chocolate, as this will cause it to seize and become unusable.

3-Ingredient Cool Whip Candies: Your Go-To 3 Musketeers Copycat Recipe
These Cool Whip Chocolate Candy Bites are the easiest, no-fuss treat! With just 3 ingredients, they’re light, fluffy, and full of rich chocolate flavor. Perfect for a quick snack or party treat, but be warned—they disappear fast!
Prep time: 20 mins
Total time: 1 hr 20 mins
Yields: 36 servings
Ingredients
- 24 oz milk chocolate chips
- 8 oz Cool Whip, thawed
- 24 oz dark chocolate, chopped (for coating)
- Optional: Festive sprinkles
Instructions
- Microwave milk chocolate chips in a microwave-safe bowl for 1 minute; stir and continue in 30-second intervals until melted. Cool to room temperature (about 10-15 minutes). This crucial step prevents the Cool Whip from melting prematurely.
- Line an 8×8-inch baking dish with parchment paper. Gently fold the cooled melted chocolate into the thawed Cool Whip until the mixture is uniform, light, and fluffy. Avoid overmixing.
- Spread the chocolate-Cool Whip mixture evenly into the prepared baking dish. Place the dish in the freezer for at least 30 minutes, or until the mixture is firm enough to cut.
- Once firm, remove the mixture from the freezer using the parchment paper overhang. Peel off the parchment and slice the block into 36 equal squares or desired bonbon shapes. Transfer these individual candy pieces onto a clean parchment-lined baking sheet and return to the freezer for another 20-30 minutes. This ensures they remain firm for dipping.
- While the candy squares chill, prepare the dark chocolate coating. Melt the chopped dark chocolate in a microwave-safe bowl in 30-second intervals, stirring thoroughly after each interval, until smooth and completely melted. Alternatively, use a double boiler for a gentler melting process, ensuring no water or steam comes into contact with the chocolate.
- Using a chocolate dipping fork or two regular forks, dip each frozen candy square into the melted dark chocolate, allowing any excess chocolate to drip off. Immediately place the coated candy onto a fresh parchment-lined baking sheet. If adding festive sprinkles or other toppings, do so now before the chocolate sets.
- Return the coated candies to the refrigerator or freezer until the chocolate shell is completely set and firm.
- Store these delightful Cool Whip candies in an airtight container in the freezer until ready to serve. They are best enjoyed cold.
Nutrition Information (Approximate per serving)
- Calories: 217
- Carbohydrates: 22g
- Protein: 2g
- Fat: 14g
- Saturated Fat: 8g
- Polyunsaturated Fat: 0.3g
- Monounsaturated Fat: 2g
- Trans Fat: 0.01g
- Cholesterol: 2mg
- Sodium: 8mg
- Potassium: 196mg
- Fiber: 2g
- Sugar: 16g
- Vitamin A: 18IU
- Calcium: 34mg
- Iron: 2mg
Nutrition information is automatically calculated, so should only be used as an approximation.
Love this recipe? We’d love to hear from you! Please consider leaving a comment below to share your experience or any delicious variations you’ve tried. Your feedback helps us and other readers discover new ways to enjoy these fantastic homemade treats!