
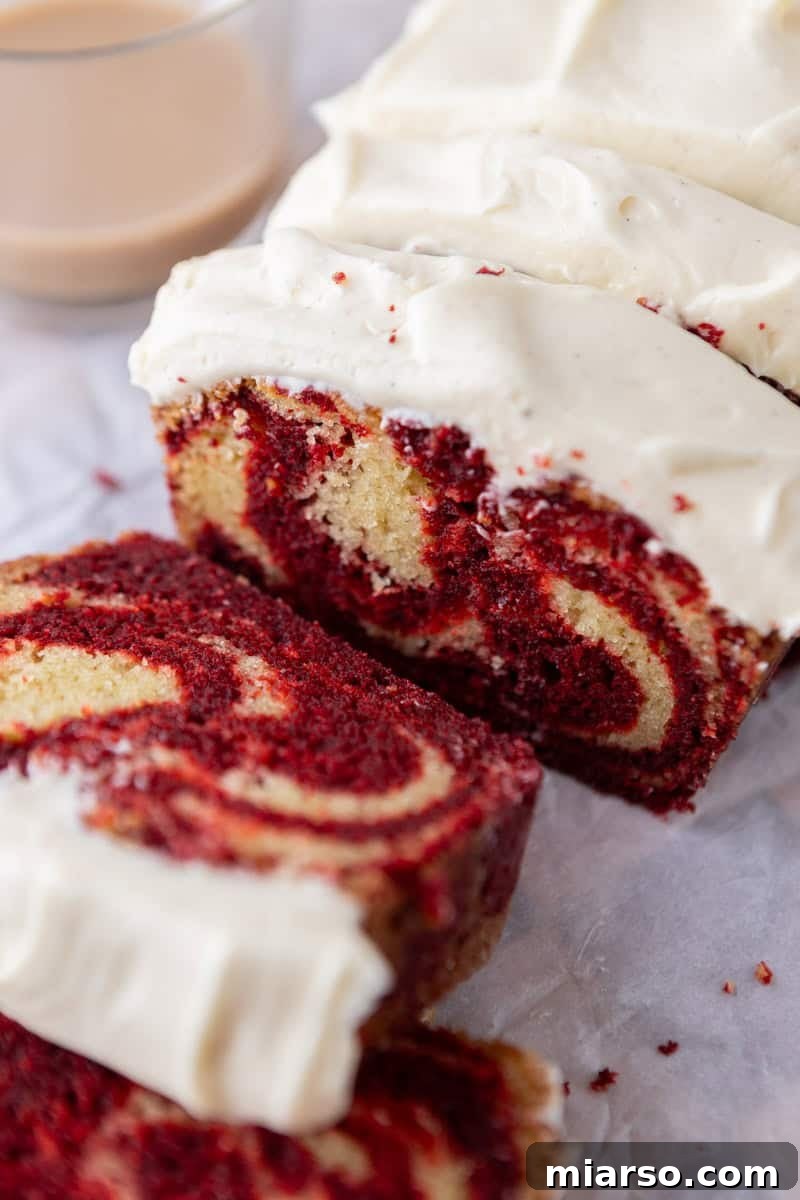
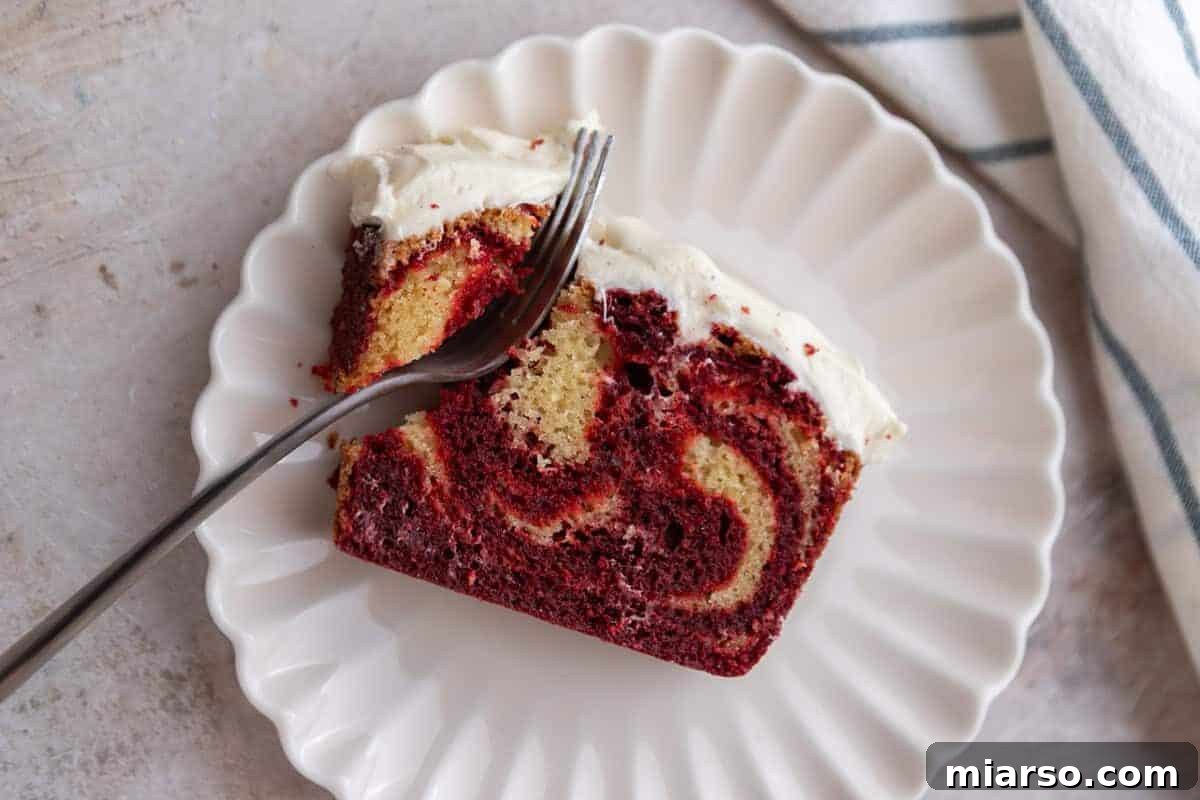
Prepare to fall in love with your new favorite baking project: this spectacular Red Velvet Marble Loaf Cake. If you cherish the rich, velvety taste of red velvet and the comforting, dense texture of a perfectly baked loaf, this recipe is crafted just for you. This loaf cake boasts a truly remarkable texture – dense, sumptuously buttery, and almost pudding-like in its tender center, mirroring the very best of what you’d find in a high-end New York-style bakery. Yet, it elevates the experience with captivating red and vanilla swirls that beautifully unfurl through every single slice, promising a visual and gastronomic delight.
But the indulgence doesn’t stop there. Each slice of this gorgeous loaf cake is crowned with a luscious, tangy cream cheese frosting. It’s whipped to thick, swoopy perfection, intentionally designed to be balanced and not overly sweet, ensuring it’s the ideal counterpart to the subtle cocoa notes inherent in the red velvet. This isn’t just a cake; it’s an edible work of art that appears as though it emerged from a pristine bakery display, yet is entirely achievable in your own kitchen with just a bowl and a whisk. Get ready to impress yourself and everyone lucky enough to share a slice.
For those who adore the classic red velvet flavor, you’ll be thrilled to explore more of our beloved recipes. Don’t miss out on these decadent red velvet brownies, our widely acclaimed and viral red velvet edible cookie dough, and this charming red velvet snack cake recipe.
The Irresistible Appeal of Loaf Cakes
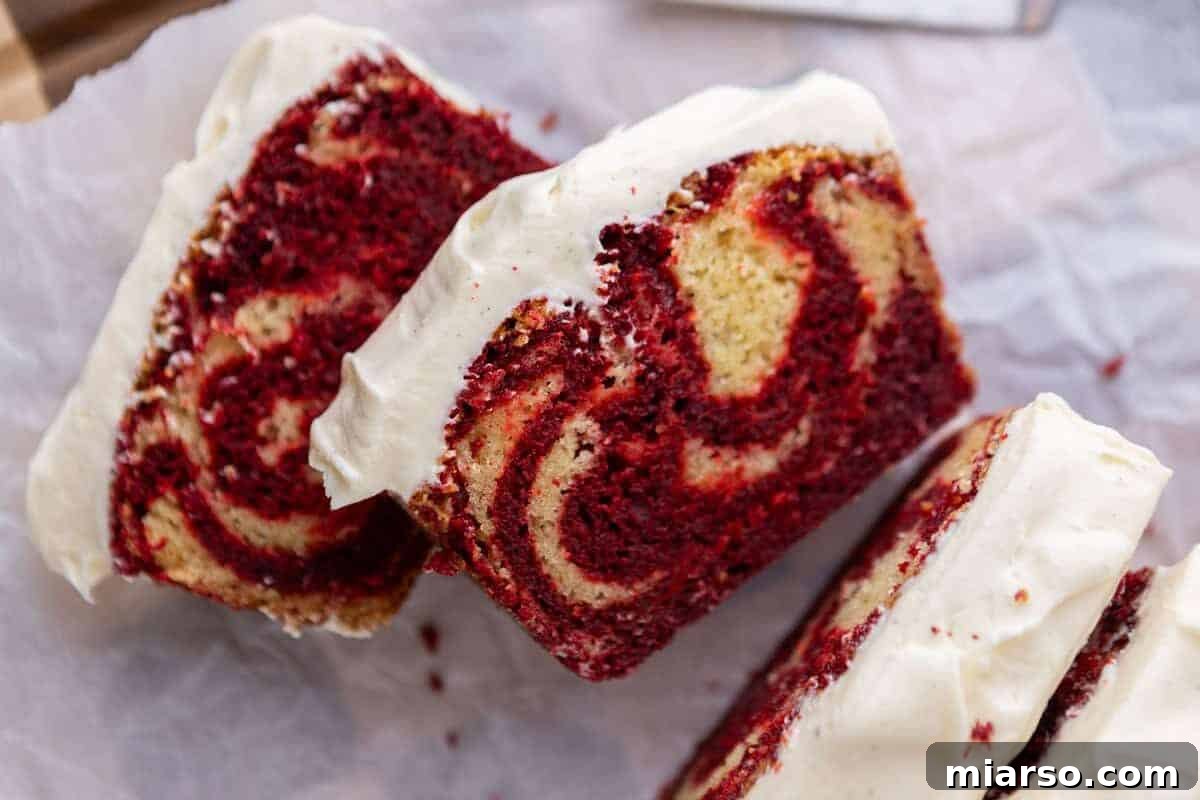
Lately, I’ve found myself completely captivated by loaf cakes, and honestly, I believe they are among the most underestimated and rewarding formats in the entire world of baking. There’s a certain magic to them – they are significantly less intimidating and demanding than their towering layer cake counterparts, making them perfect for both seasoned bakers and eager beginners. Furthermore, loaf cakes slice with unparalleled elegance, producing neat, uniformly beautiful portions that are ideal for sharing or savoring throughout the week.
There’s an undeniable comfort in a thick, hearty slab of dense cake that simply “hits different” compared to the lighter, airier texture of a classic layer cake slice. This Red Velvet Marble Loaf Cake truly embodies that philosophy. It was born from a desire to merge two distinct baking loves: the dramatic flair and rich flavor profile of red velvet with the comforting, buttery, and substantial characteristics of a pound-style loaf. Achieving that perfect harmony wasn’t a one-shot deal; this recipe underwent rigorous testing to pinpoint the precise fat ratio.
Initially, too much butter led to a cake that was incredibly heavy but surprisingly dry by the next day. Conversely, an excess of oil resulted in a texture that felt greasy and masked the delicate flavors. It was through persistent experimentation that the winning combination emerged: a blend of melted butter, neutral oil, and the creamy richness of sour cream. This trio is the secret to nailing that coveted bakery-quality texture – a crumb that’s incredibly moist, fine, and almost melts in your mouth.
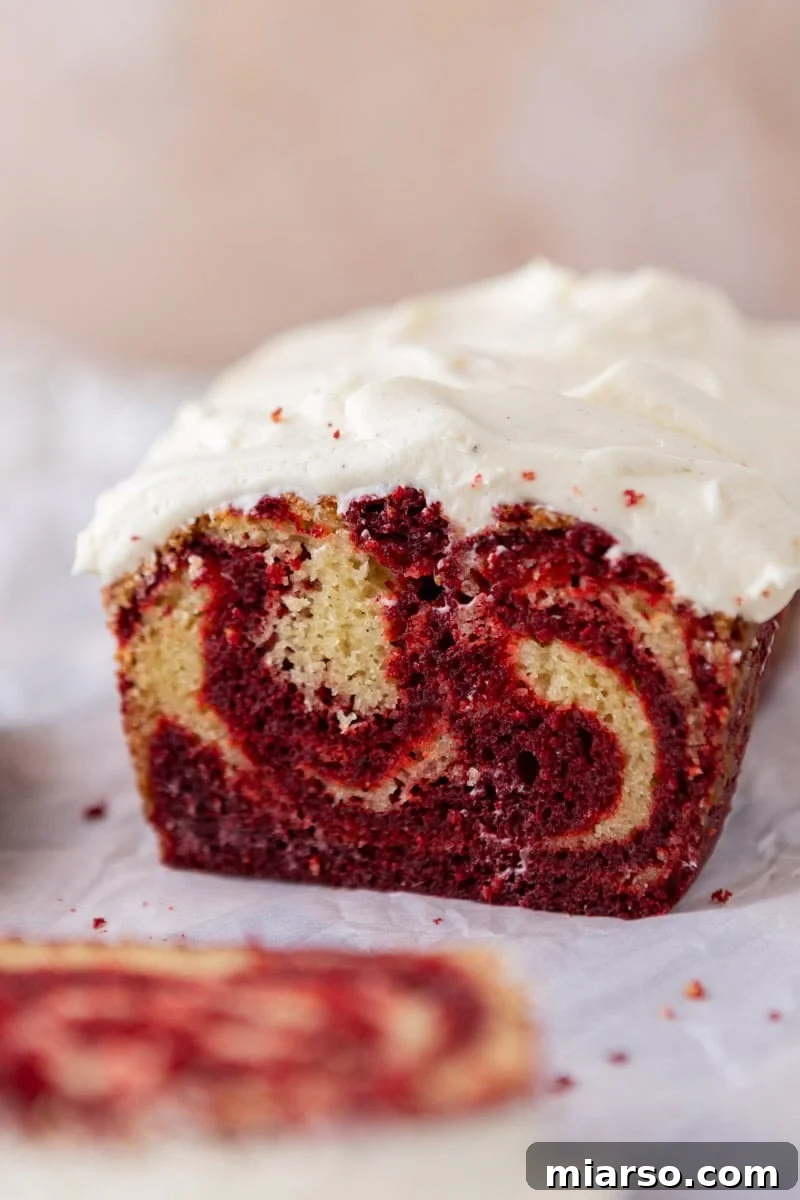
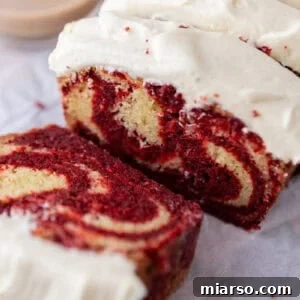
And then there’s the visual spectacle of the marbling. Each time you cut into this loaf, it’s a moment of pure satisfaction, as every slice reveals a unique, artistic tapestry of red and vanilla swirls. No two slices are ever exactly alike, adding to its charm. As for the luxurious sour cream cream cheese frosting? It’s legendary. I distinctly recall Kyle (my trusty taste-tester!) literally standing in the kitchen, sneakily eating frosting directly off the knife as I desperately tried to capture its beauty with my camera. That, my friends, is the unequivocal sign of a truly exceptional frosting.
The Secrets Behind an Exceptionally Moist Red Velvet Marble Loaf Cake
Creating a truly exceptional loaf cake isn’t a matter of chance; it’s a testament to thoughtful ingredient selection and precise technique. Every single component in this Red Velvet Marble Loaf Cake recipe serves a specific purpose, contributing to its signature dense, moist, and perfectly tender crumb. Here’s a deep dive into why this cake achieves such incredible moisture and texture:
- Melted Butter for a Dense Crumb: Unlike traditional cakes where butter is creamed with sugar to incorporate air and create a light, fluffy texture, here we opt for melted butter. Melting the butter changes its interaction with the flour proteins. Instead of aerating the batter, the melted fat coats the flour particles directly. This action inhibits excessive gluten development, resulting in a tighter, denser crumb that is incredibly moist and reminiscent of a classic pound cake, rather than the open, airy texture of a birthday cake. This is key for our desired NY-style density.
- The Power of Vegetable Oil: While butter provides unparalleled flavor, it solidifies when cooled, which can lead to an all-butter cake tasting drier the day after baking. The inclusion of neutral vegetable oil is a game-changer. Oil remains liquid at all temperatures, ensuring the cake stays wonderfully soft and moist, even when enjoyed straight from the refrigerator. By combining both melted butter and vegetable oil, we achieve the best of both worlds: the rich, nuanced flavor of butter perfectly paired with the enduring moistness and tender texture that oil provides.
- Sour Cream’s Triple-Threat Role: Full-fat sour cream is a true hero in this recipe, performing triple duty to elevate the cake’s texture and flavor. First, its high-fat content contributes significantly to the cake’s overall moisture and richness. Second, the acidity in sour cream actively reacts with the baking soda, generating carbon dioxide bubbles that provide essential lift and a tender crumb. Third, the proteins present in sour cream help to build and stabilize the cake’s structure, allowing it to hold together beautifully despite its generous fat content. The result is an impossibly tender crumb that practically melts in your mouth.
- The Magic of an Extra Egg Yolk: Eggs are vital for structure and moisture, but we take it a step further by adding an extra egg yolk. Egg yolks are primarily fat and natural emulsifiers. By incorporating an additional yolk without the white, we infuse the batter with extra richness and moisture. This amplifies the cake’s decadent quality without adding excess water or protein from the egg white, which would lighten the crumb – precisely what we want to avoid for that dense, bakery-style texture.
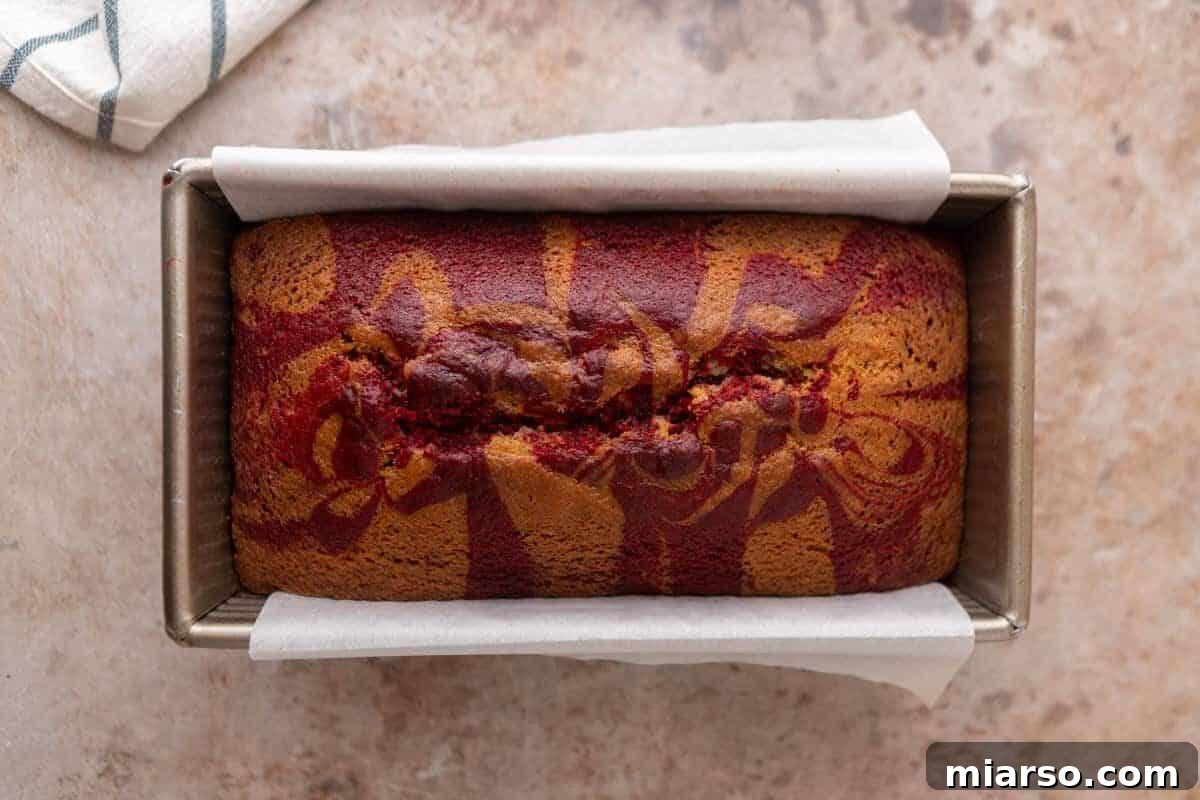
- Low and Slow Baking at 325°F: Loaf pans are inherently deep and narrow, which can pose a challenge for even baking. Baking at a higher temperature (350°F or above) causes the edges of the cake to set and form a crust too quickly, often before the center has a chance to bake through properly. This leads to common issues like a cracked top and a gummy, underbaked middle. By baking the loaf cake at a lower temperature of 325°F for a longer duration, we ensure the entire cake bakes evenly from the edges to the very center. This gentle heat allows the cake to rise gradually, resulting in a beautifully smooth, perfectly domed top rather than an unsightly crater.
Essential Ingredient Notes for Your Perfect Loaf Cake
Understanding the role of each ingredient is crucial for achieving baking perfection. Here’s a detailed look at the key components for your Red Velvet Marble Loaf Cake and why specific choices matter:
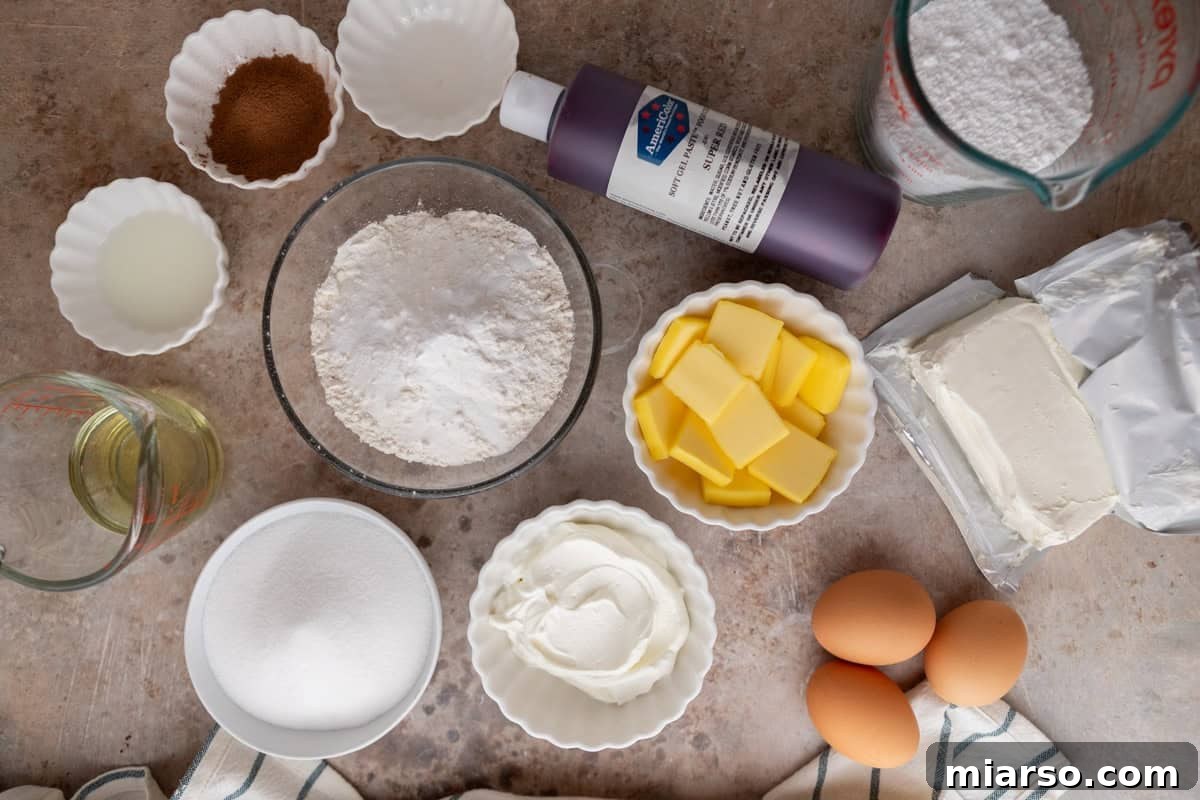
- All-purpose flour: For this specific loaf cake, all-purpose flour is your best friend. Resist the urge to substitute cake flour, as its lower protein content would result in a crumb that is too delicate and airy – precisely the opposite of the dense, slightly chewy structure we are aiming for in a true NY-style loaf. For unparalleled accuracy, we highly recommend weighing your flour using a kitchen scale. Cup measurements can notoriously vary by up to 30 grams (a significant difference!) depending on how aggressively you scoop, which can drastically alter your cake’s texture.
- Granulated sugar: Sugar in baking is far more than just a sweetener; it’s a critical structural ingredient. Granulated sugar is hygroscopic, meaning it has a remarkable ability to attract and retain moisture from the air and within the batter itself. More sugar generally translates to a more moist and tender cake. It also plays a role in tenderizing the crumb by competing with flour for water, which in turn limits gluten development, contributing to that desirable melt-in-your-mouth texture.
- Unsalted butter: This recipe specifically calls for melted butter, not merely softened butter. This distinction is crucial to the cake’s unique density. When you melt the butter, its fats coat the flour particles more directly, preventing air from being whipped into the mixture, which is what happens during the creaming method. This results in a tighter, more cohesive crumb structure that’s characteristic of a rich loaf cake. Ensure it’s slightly cooled after melting to avoid scrambling the eggs.
- Vegetable oil: Any neutral-flavored oil will work beautifully here, such as canola, avocado, or sunflower oil. The key is neutrality – avoid strong-flavored oils like olive oil, as their distinct taste would compete with and overpower the delicate vanilla and subtle cocoa notes that define red velvet. The oil ensures lasting moisture, as it remains liquid even when the cake cools, preventing a dry texture on subsequent days.
- Full-fat sour cream: Always opt for full-fat sour cream. Reduced-fat versions often contain added starches and gums that can unfavorably alter the texture of your cake, leading to a less desirable result. Ensure your sour cream is at room temperature before mixing. This allows it to blend seamlessly and smoothly into the batter, preventing lumps and ensuring even distribution of moisture and acidity.
- Eggs + extra yolk: You’ll need two whole large eggs and one additional egg yolk. Just like the sour cream, it’s imperative that all eggs are at room temperature. Cold eggs, when added to the melted butter mixture, can cause the butter to seize and coagulate, leading to a lumpy batter and an unevenly baked cake. The extra yolk specifically boosts richness and moisture without adding unnecessary protein or liquid that would make the cake lighter.
- Red gel food coloring: For vibrant color without compromising your batter, gel food coloring is non-negotiable. Liquid food coloring is predominantly water, meaning you would need a substantial amount to achieve a deep red hue. This excess liquid would disrupt the delicate moisture balance of your batter, potentially leading to a denser or tougher cake. Gel food coloring is highly concentrated, delivering rich, intense color with minimal added liquid.
- Unsweetened cocoa powder: The cocoa in red velvet isn’t meant to be overpowering; it provides that subtle, distinctive chocolate undertone that truly defines the flavor profile. It’s the whisper of chocolate that makes red velvet so unique. Use natural unsweetened cocoa powder, not Dutch-processed, as its natural acidity is crucial for reacting with the baking soda and vinegar in the recipe, contributing to both lift and color development.
- Distilled white vinegar: Don’t worry, you won’t taste it! The distilled white vinegar serves two important functions. Firstly, it reacts synergistically with the baking soda in the red velvet portion of the batter, providing an extra boost of leavening that contributes to the cake’s tender crumb. Secondly, its acidity helps to “bloom” the cocoa powder, intensifying its subtle chocolate flavor and deepening the red color.
Mastering the Marble: How to Create Dramatic Swirls (No Pink Blending!)
The stunning marble effect is truly the star of this Red Velvet Marble Loaf Cake, making the technique for achieving those distinct swirls absolutely essential. A common pitfall many bakers encounter is over-swirling the batter. While the instinct might be to create more swirls for a prettier effect, the reality is that excessive mixing causes the two batters to blend too much, resulting in a muted, muddy pink color rather than the striking contrast we’re aiming for. Fear not, with a few simple steps, you can achieve clean, dramatic, bakery-worthy marbling every time:
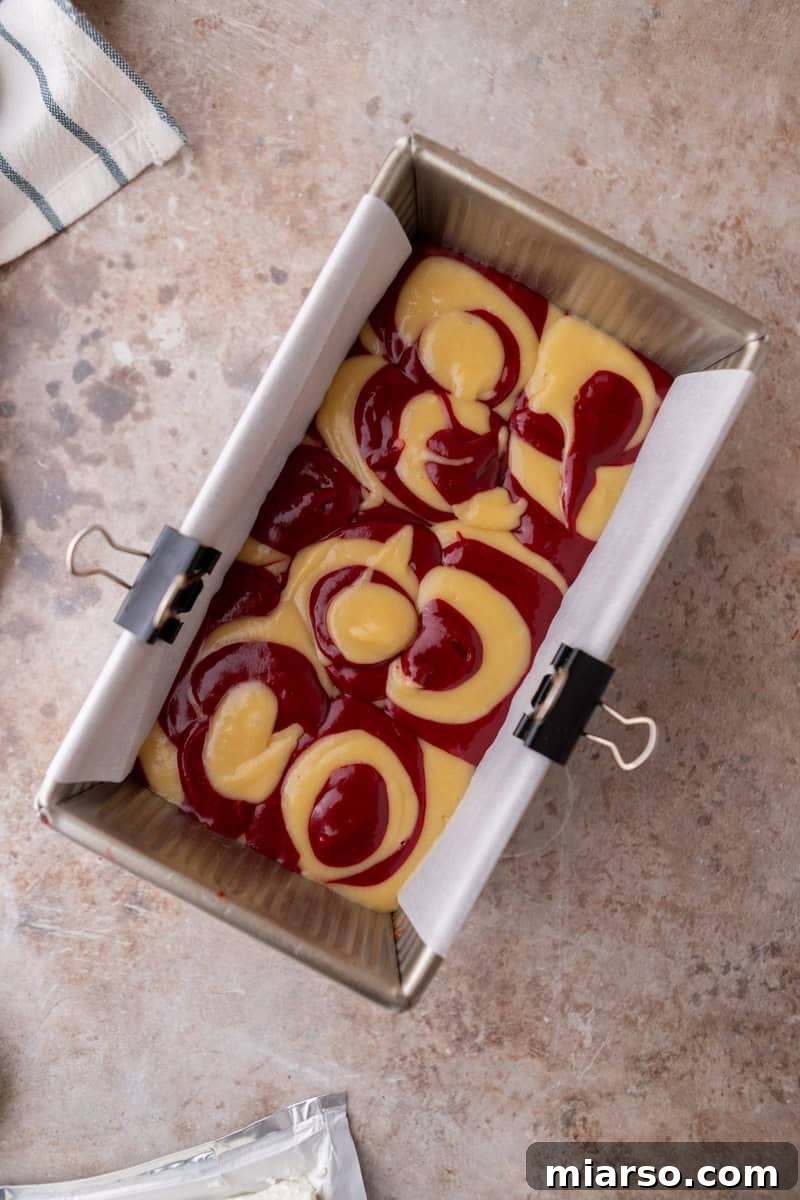
- Alternate Your Dollops Thoughtfully: Begin by spooning dollops of the vanilla batter onto the bottom of your prepared loaf pan. Follow with dollops of the red velvet batter, then back to vanilla, and so on. Continue this alternating pattern until both bowls of batter are completely empty. The key here is not to be overly precise or neat. Embrace a bit of randomness; this organic placement actually creates more interesting and beautiful marbling patterns in the finished cake.
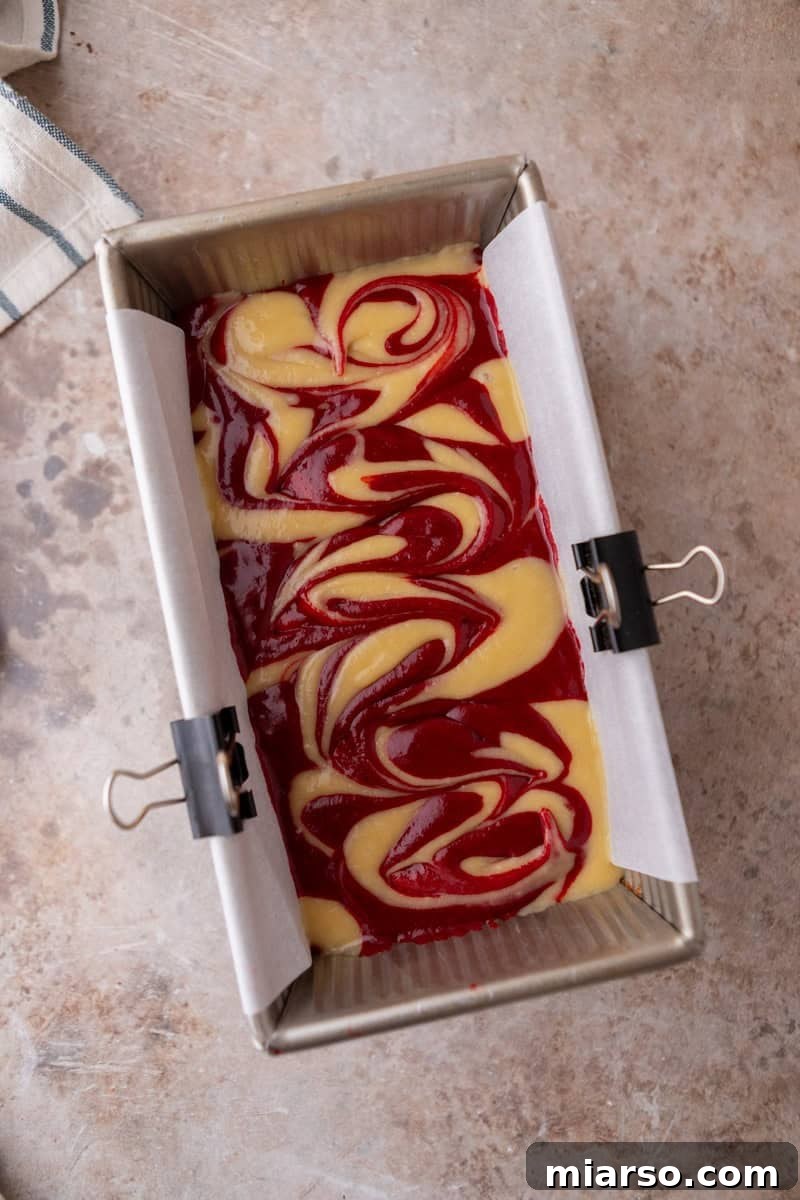
- Swirl Gently and Minimally: This is arguably the most critical step. Once all the batter is in the pan, take a butter knife or a thin skewer. Gently insert it into the batter and drag it lengthwise down the very center of the pan just once. Then, perform one or two gentle zigzag passes across the length of the loaf. That’s it – aim for a maximum of 2 to 3 passes in total. The goal is to create movement, not to fully combine the batters. Less is definitely more when it comes to marbling.
- Let the Oven Do the Rest: Don’t feel the need to perfect the swirls yourself. The two batters, subtly different in density due to the cocoa powder in the red velvet portion, will naturally shift and swirl a little further as they bake. The deep confines of the loaf pan also contribute to this natural movement. The gentle heat of the oven and the slight difference in batter consistency will work their magic, deepening and defining your marble pattern without any additional intervention from you.
Achieving a Perfect Dome: Say Goodbye to a Sunken Middle
There’s nothing more disheartening than pulling a beautiful loaf cake from the oven only to find a disappointing crater in its middle. A perfectly domed loaf with an even crumb is a hallmark of good baking. Here’s a comprehensive guide to prevent your Red Velvet Marble Loaf Cake from sinking and ensure it rises beautifully every time:
- Embrace a Lower Baking Temperature of 325°F: This is perhaps the most crucial tip. Baking at a standard 350°F or higher often causes the exterior of the loaf to bake and set into a rigid crust too quickly. Meanwhile, the center continues to rise from the leavening gases. Once these gases escape from a rapidly set crust, the still-liquid interior has nowhere to go but down, resulting in a dramatic collapse and a sunken middle. A consistent, lower temperature of 325°F allows the entire cake – from edges to center – to bake and set at a much more uniform rate, ensuring a gradual, even rise and a smooth, elegant dome.
- Avoid Overmixing the Batter at All Costs: Overmixing is a silent culprit for many baking woes. When flour is overmixed, it develops excessive gluten, which can lead to a tough, chewy texture and the formation of undesirable tunnels and cracks within the cake, rather than the desired smooth, uniform dome and tender crumb. Once you add the dry ingredients to the wet, fold them together gently and briefly – typically 30-40 strokes at most – just until no streaks of dry flour remain. A few small lumps are perfectly fine and preferable to an overmixed batter.
- Keep the Oven Door Closed for the First 40 Minutes: Patience is a virtue in baking, especially with loaf cakes. The initial phase of baking is when the cake’s structure is most fragile and still forming. A sudden drop in oven temperature, caused by opening the door too early, can shock the delicate, still-liquid center, causing it to collapse under its own weight. Resist the urge to peek during the first two-thirds of the baking time; let the cake establish its structure undisturbed.
- Cool in the Pan for 20 Minutes Before Unmolding: The center of a loaf cake is always the last part to fully set and solidify. If you’re too eager and attempt to flip the cake out of the pan immediately after removing it from the oven, the still-soft middle can compress under its own weight, leading to a noticeable dip or collapse. Allowing the cake to cool in its pan for a full 20 minutes provides critical time for the internal structure to firm up, making it robust enough to handle transfer without issue.
- Learn to Pull It Slightly Early: Understanding carry-over heat is essential for perfectly baked loaf cakes. Because loaf pans are deep and retain heat exceptionally well, the cake continues to cook even after it’s removed from the oven, especially in the very center. For this reason, it’s often best to pull your loaf cake from the oven when a toothpick inserted into the center emerges with a few moist crumbs attached, rather than being completely clean (which would indicate it’s already overbaked). Aim for an internal temperature of about 200-205°F for the ideal moist texture.
Crafting the Perfect Cream Cheese Frosting
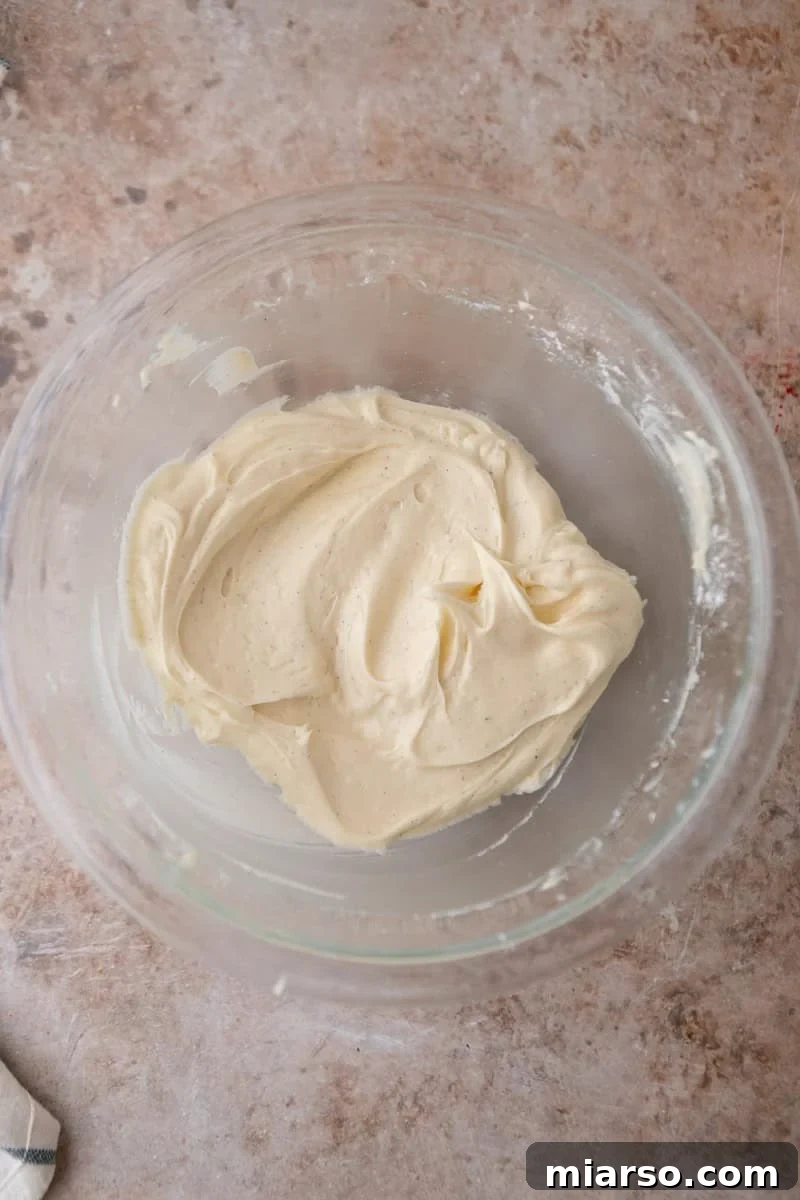
The cream cheese frosting for this Red Velvet Marble Loaf Cake is designed to be the ultimate companion – tangy, rich, and perfectly balanced. We deliberately keep the sweetness in check, ensuring it complements the cake’s inherent sweetness without overwhelming the palate. The goal is for the distinctive tang of the cream cheese to shine through, providing a refreshing counterpoint to the deep flavors of the cake. Here are the crucial steps to achieve a thick, swoopy, and utterly delicious frosting:
- Always Use Cold Cream Cheese: This is perhaps the most vital rule for perfect cream cheese frosting. Room temperature or softened cream cheese will quickly become runny and soupy when beaten, resulting in a frosting that lacks body and structure. Starting with cold cream cheese helps it maintain its firm consistency, allowing it to whip up thick and pipeable without becoming a sticky mess.
- Do Not Overbeat the Frosting: Once you add the cream cheese to the butter, mix just until it is smooth and fully combined, then stop. Overworking cream cheese shears its fat molecules apart and breaks the emulsion, leading to a loose, curdled, or soupy consistency. If, by chance, your frosting appears a bit too loose, don’t panic. Simply refrigerate it for about 20 minutes to allow the fats to firm up, then give it a gentle stir (don’t beat!) to restore its perfect texture.
- Frost Only the Top of the Loaf: For that authentic, sophisticated New York bakery aesthetic, we recommend frosting just the top surface of your Red Velvet Marble Loaf Cake. Apply a generous, rustic layer of frosting, creating beautiful swoops and peaks with an offset spatula. There’s no need to frost the sides; allowing the bare, beautifully marbled sides of the cake to show through celebrates its natural beauty and lets the cake speak for itself. This approach highlights the contrast between the vibrant cake and the creamy white frosting, creating an elegant visual appeal.
Optimal Storage for Your Red Velvet Marble Loaf Cake
One of the many delightful qualities of this Red Velvet Marble Loaf Cake is that it actually improves with age! The flavors have a chance to meld and deepen, and the fats within the cake redistribute overnight, resulting in an even more incredibly moist and tender crumb on the second day. To ensure your delicious creation stays fresh and retains its exquisite texture, proper storage is key.
Once your loaf cake has cooled completely and been frosted, wrap it tightly in plastic wrap. Alternatively, you can place it in an airtight container. Stored this way, the cake will keep beautifully in the refrigerator for up to 5 days. For the absolute best eating experience, allow the cake to come to room temperature for about 20-30 minutes before serving. This brief wait enhances its tender texture and allows the flavors to truly bloom.
For longer storage, the unfrosted loaf freezes exceptionally well. Once completely cooled, wrap it meticulously in several layers of plastic wrap, followed by a layer of aluminum foil. This double-layer protection guards against freezer burn. The unfrosted loaf can be stored in the freezer for up to 3 months. When you’re ready to enjoy it, simply thaw the loaf overnight in the refrigerator, then proceed with frosting it once it has fully thawed and come to room temperature.
Top Tips for Baking the Best Red Velvet Marble Loaf Cake
- Always Weigh Your Flour: Precision in baking is paramount, and flour measurement is often where inconsistencies arise. For the most accurate results, use a kitchen scale to weigh your flour. If you don’t have a scale, employ the spoon-and-level method: fluff the flour in its container, then spoon it gently into your measuring cup, and level the top with a straight edge (like a knife). Scooping flour directly from the bag can compact it significantly, adding up to 30 grams of extra flour per cup – an amount that can make your cake noticeably drier and denser than intended.
- Ensure All Ingredients Are at Room Temperature: This cannot be stressed enough for a harmonious batter. Ingredients like cold eggs or cold sour cream, when added to a melted butter mixture, can cause the butter to seize and form unpleasant lumps. This not only makes for a less uniform batter but can also lead to uneven baking. Plan ahead and take your refrigerated ingredients out at least 30-60 minutes before you begin mixing.
- Use a Parchment Paper Sling for Easy Release: To effortlessly remove your baked loaf from the pan without any sticking or damaging its beautiful dome, create a parchment paper sling. Cut a strip of parchment paper long enough to cover the bottom and extend up both long sides of your loaf pan, leaving a generous overhang on both ends. This allows you to simply lift the entire loaf out of the pan once it’s cooled, preventing the need to invert the pan and risk collapsing the dome.
- Tent with Foil if Browning Too Quickly: Keep an eye on your loaf cake around the 35-40 minute mark of baking. If you notice the top is browning more rapidly than you’d like, gently and loosely tent a piece of aluminum foil over the pan. This will shield the top from direct heat, allowing the interior to continue baking thoroughly without the crust becoming too dark or crisp.
- Opt for Gel Food Coloring Over Liquid: As mentioned in our ingredient notes, gel food coloring is essential for achieving that vibrant, deep red hue without compromising the cake’s texture. Liquid food coloring is primarily water, and you would need a large quantity to achieve the desired intensity, thereby introducing excess moisture that can throw off the delicate balance of the batter and result in a less-than-perfect crumb. Gel is concentrated and effective with just a small amount.
Frequently Asked Questions About Red Velvet Marble Loaf Cake
While you can substitute buttermilk for sour cream, be aware that the final cake texture will be noticeably different. Buttermilk has a thinner consistency and lower fat content compared to full-fat sour cream, meaning you’d be adding more liquid and less fat to the batter. This would result in a lighter, less dense cake, straying from our desired “NY-style” dense crumb. If you decide to make the swap, use ¾ cup of buttermilk and omit the 2 tablespoons of whole milk from the recipe to maintain a similar liquid balance.
Yes, absolutely! This recipe can be beautifully adapted for a standard 10-12 cup bundt pan. To do so, you will need to double the entire recipe. Bake the doubled batter at the same temperature of 325°F, but extend the baking time to approximately 55-70 minutes. The intricate marbling will look particularly stunning when revealed in the elegant shape of a bundt cake, making for a truly impressive presentation.
Certainly! If you prefer to omit the food coloring, you will still achieve a wonderfully delicious chocolate marble loaf cake. The subtle cocoa flavor is present and enjoyable on its own. While the visual drama of the red and vanilla swirls will naturally be less pronounced (you’ll have a blend of light and darker chocolate marble), the taste and texture will remain fantastic. It’s a great option if you’re looking for a simpler aesthetic or wish to avoid food dyes.
A sunken middle is a common baking frustration, often caused by a few key factors. The most frequent culprits include opening the oven door too early (which causes a sudden temperature drop), underbaking the cake (where the center hasn’t fully set), using too much leavening agent, or unmolding the cake before its structure has stabilized. To avoid this, resist the urge to open your oven for the first 40 minutes of baking. Ensure the cake is fully baked by checking with a toothpick – it should come out with just a few moist crumbs, not wet batter. Finally, allow the cake to cool in the pan for the full 20 minutes before attempting to remove it.
For this recipe, we strongly recommend sticking with natural unsweetened cocoa powder. Dutch-processed cocoa powder has been treated to reduce its acidity, which is crucial for its interaction with the baking soda and vinegar in our recipe. This acidic reaction contributes both to the cake’s rise and helps to enhance the red color. Using Dutch-processed cocoa might result in less lift and can also mute the vibrant red hue from the food coloring, so natural cocoa is the better choice for the intended results.
Achieving clean, picture-perfect slices is easy with a few tricks. First, ensure your frosted loaf is thoroughly chilled – refrigerating it for at least 30 minutes before slicing will help the frosting and cake firm up. Second, use a very sharp, thin-bladed knife. For the cleanest cuts, wipe your knife clean with a damp cloth between each slice to prevent crumbs and frosting from dragging. A warm knife, achieved by dipping it in hot water and wiping it completely dry, can also work wonders for smooth cuts.
This Red Velvet Marble Loaf Cake is an excellent make-ahead dessert, as its flavors and texture actually improve over time. You can bake the loaf up to 2 days in advance. Once completely cooled, wrap it tightly in plastic wrap and refrigerate. We recommend frosting the cake on the day you plan to serve it for the freshest appearance. The cake truly tastes better the next day because the fats have more time to redistribute, resulting in an even more moist and flavorful crumb. Just remember to bring it to room temperature for about 20-30 minutes before serving for optimal texture and flavor enjoyment.
Red Velvet Marble Loaf Cake with Cream Cheese Frosting
Print Recipe
Ingredients
Red Velvet Marble Loaf Cake
- 1 & 1/2 cup all-purpose flour
- 1 cup granulated sugar
- 1/2 teaspoons baking soda
- 1/4 teaspoons baking powder
- 1/2 teaspoons fine salt
- 6 tbsp butter salted or unsalted, melted and slightly cooled
- 1/4 cup vegetable oil
- 1/2 cup full-fat sour cream room temp
- 2 large eggs room temp
- 1 egg yolk room temp
- 1.5 teaspoons pure vanilla extract
- 2 tbsp whole milk room temp
- 1 tablespoon unsweetened cocoa powder
- 1/2 tablespoon red gel food coloring
- 1/2 teaspoon distilled white vinegar
Cream Cheese Frosting
- 4 ounces cream cheese
- 1/4 cup butter salted or unsalted, for frosting
- 1 cup powdered sugar
- 1/2 teaspoons vanilla extract for frosting
- 1 pinch pinch of salt for frosting
Instructions
Red Velvet Marble Loaf Cake
-
Preheat oven to 325°F (160°C). Grease and line a 9×5 inch loaf pan with parchment paper, leaving an overhang on the long sides to create a sling for easy removal.
-
In a large bowl, whisk together the all-purpose flour, granulated sugar, baking soda, baking powder, and fine salt until well combined. Set aside.1 & 1/2 cup all-purpose flour, 1 cup granulated sugar, 1/2 teaspoons baking soda, 1/4 teaspoons baking powder, 1/2 teaspoons fine salt
-
In a separate medium bowl, whisk together the melted and slightly cooled butter, vegetable oil, room temperature full-fat sour cream, whole milk, pure vanilla extract, large eggs, and extra egg yolk until the mixture is smooth and evenly combined.6 tbsp butter, 1/4 cup vegetable oil, 1/2 cup full-fat sour cream, 2 large eggs, 1 egg yolk, 1.5 teaspoons pure vanilla extract, 2 tbsp whole milk
-
Pour the wet ingredients into the dry ingredients. Using a whisk or rubber spatula, fold the mixture gently just until no streaks of dry flour remain. Be careful not to overmix, as this can lead to a tough cake.
-
Divide the batter evenly into two separate bowls. Into one of the bowls, mix in the unsweetened cocoa powder, red gel food coloring, and distilled white vinegar. Stir gently until the color is uniform and deep red.1 tablespoon unsweetened cocoa powder, 1/2 tablespoon red gel food coloring, 1/2 teaspoon distilled white vinegar
-
To marble, spoon alternating dollops of the vanilla batter and red velvet batter into the prepared loaf pan. Once all batter is in the pan, take a butter knife or skewer and gently drag it lengthwise down the center of the pan once, then make one or two gentle zigzag passes across the length. Do not overswirl to prevent the colors from blending into a uniform pink.
-
Bake for approximately 50-60 minutes, or until a wooden skewer or toothpick inserted into the center of the loaf comes out with a few moist crumbs attached (not wet batter). If the top begins to brown too quickly, loosely tent the pan with aluminum foil for the remaining bake time.
-
Allow the loaf cake to cool in the pan for 20 minutes before carefully using the parchment sling to lift it out. Transfer the cake to a wire rack to cool completely before frosting.
Cream Cheese Frosting
-
In a medium bowl, using an electric mixer, beat the cold cream cheese and butter together until fluffy and smooth. Ensure the cream cheese is cold to prevent a runny frosting.4 ounces cream cheese, 1/4 cup butter
-
Gradually add the powdered sugar, vanilla extract, and pinch of salt. Mix on low speed just until all ingredients are combined and the frosting is smooth. Do not overbeat.1 cup powdered sugar, 1/2 teaspoons vanilla extract for frosting, 1 pinch pinch of salt for frosting
-
Once the loaf cake is completely cool, spread the cream cheese frosting generously over the top of the loaf using an offset spatula, creating rustic swoops. For easier slicing and optimal texture, chill the frosted loaf in the refrigerator for at least 30 minutes before cutting and serving.
Video
Nutrition
Nutrition information is automatically calculated, so should only be used as an approximation.