
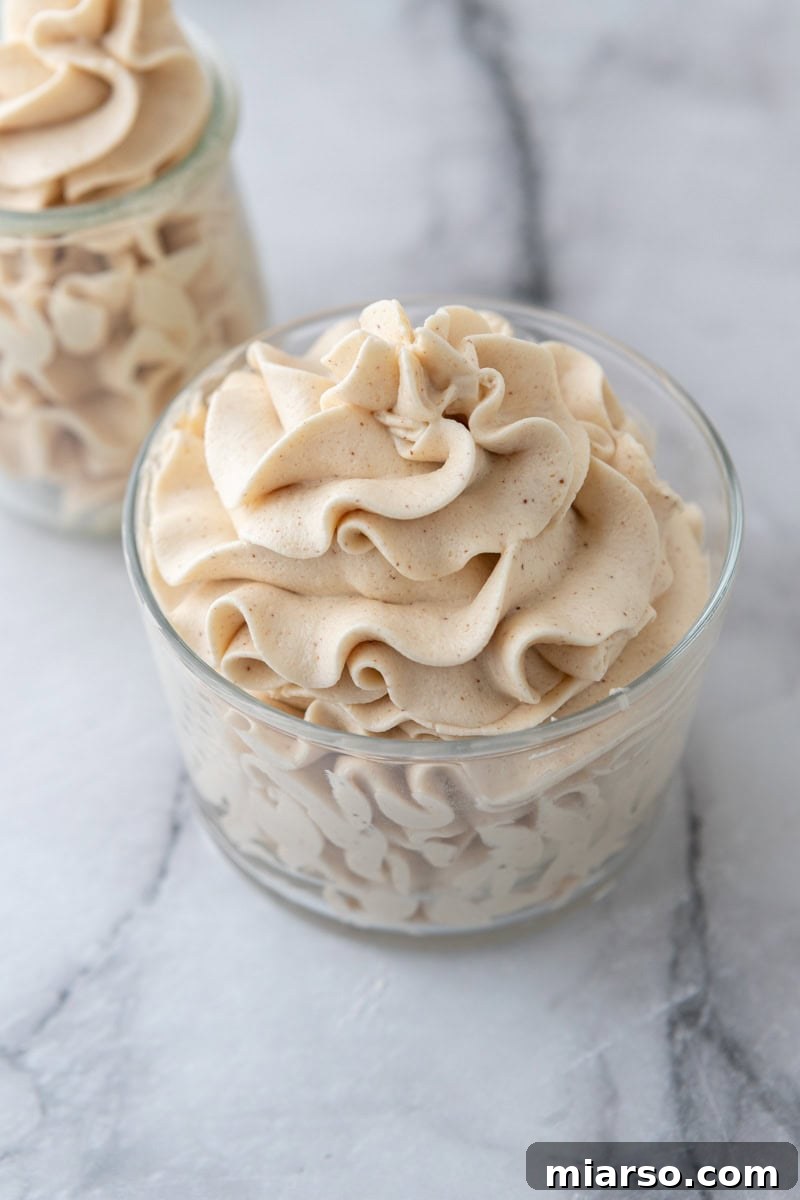
Are you ready to transform your ordinary desserts into extraordinary culinary delights? This Brown Butter Frosting recipe is your secret weapon, guaranteed to elevate your baking to an entirely new level! Imagine a buttercream so uniquely flavorful, so exquisitely rich, and so perfectly balanced that it becomes the star of any sweet treat. That’s precisely what you’ll achieve with this incredible brown butter icing.
Crafted by browning pure butter to a golden perfection, then expertly mixed and whipped until irresistibly fluffy, this frosting delivers a distinctively toasty, nutty, and subtly caramel-like flavor that is simply unparalleled. It’s a sophisticated twist on classic buttercream that will leave everyone craving more. Whether you’re topping classic chocolate cakes, delicate cupcakes, or even rich brownies, this brown butter frosting promises a truly delectable experience. It pairs exceptionally well with fall favorites like pumpkin bread or a moist carrot cake, enhancing their natural sweetness with its deep, complex notes.
In a world of standard vanilla and chocolate, this brown butter frosting stands out, offering an individual touch that separates your creations from the rest. Many home bakers haven’t explored the magic of browned butter, let alone incorporated it into a homemade buttercream. But once you do, there’s no going back. Imagine serving this on a sheet cake, individual cupcakes, or even your beloved cinnamon rolls for a bake sale or family gathering. We guarantee your guests will be raving about it, asking for your secret recipe!
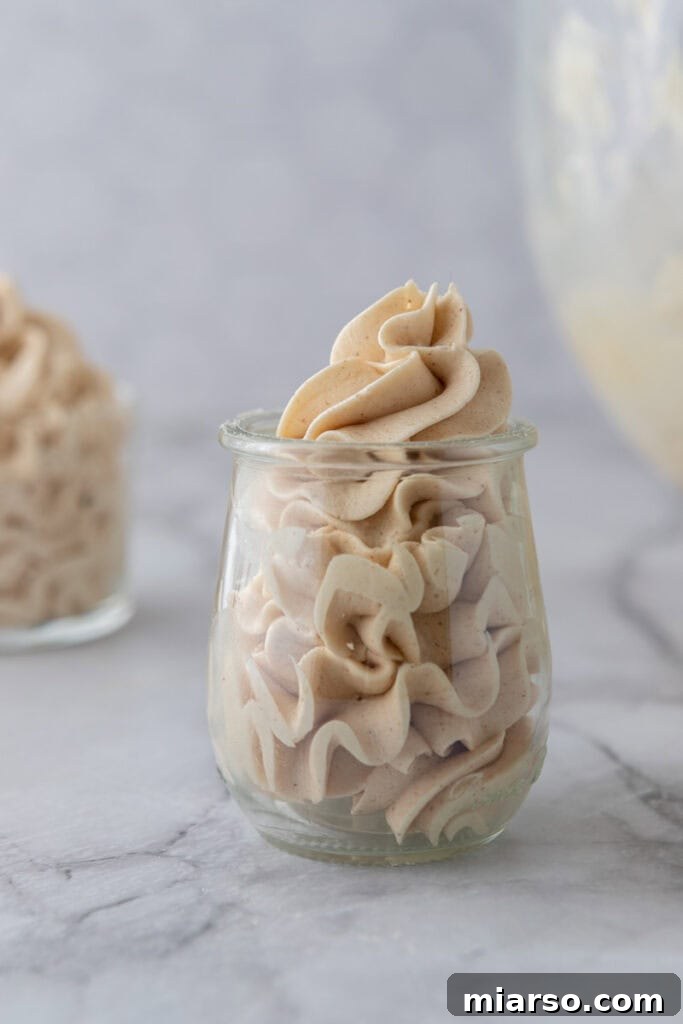
As you embark on this flavorful journey, don’t miss out on other incredible brown butter recipes that truly highlight this ingredient’s versatility. Explore these delightful Brown Butter Chocolate Chip Cookies, indulge in the chewy goodness of these Brown Butter Blondies, or try the unique combination in these Brown Butter Pistachio Cookies. Each recipe showcases how browned butter can infuse ordinary treats with extraordinary depth.
Understanding the Magic: What is Brown Butter?
Browned butter, also known as beurre noisette, is simply regular unsalted butter that has undergone a remarkable transformation through controlled cooking. While it might sound intimidating, the process is straightforward and yields a profoundly delicious result. As butter gently melts and cooks over medium heat, its water content evaporates, and its milk solids separate and begin to caramelize. This is where the Maillard reaction, a complex chemical process responsible for the browning and flavor development in many foods, comes into play.
The milk solids, initially a creamy white, gradually change color, turning into deep golden-brown flecks that settle at the bottom of the pan. During this process, the butter will foam and sizzle, indicating the water is cooking off. As it progresses, a warm, nutty aroma will fill your kitchen, a clear sign that the desired transformation is occurring. This browning process doesn’t just change the color; it fundamentally alters the flavor profile of the butter, adding incredible complexity, a distinct toasty nuttiness, and subtle notes of caramel. This rich, aromatic foundation is what makes our brown butter frosting truly exceptional, providing a depth of flavor that cannot be replicated with plain butter.
Essential Ingredients for the Perfect Brown Butter Frosting
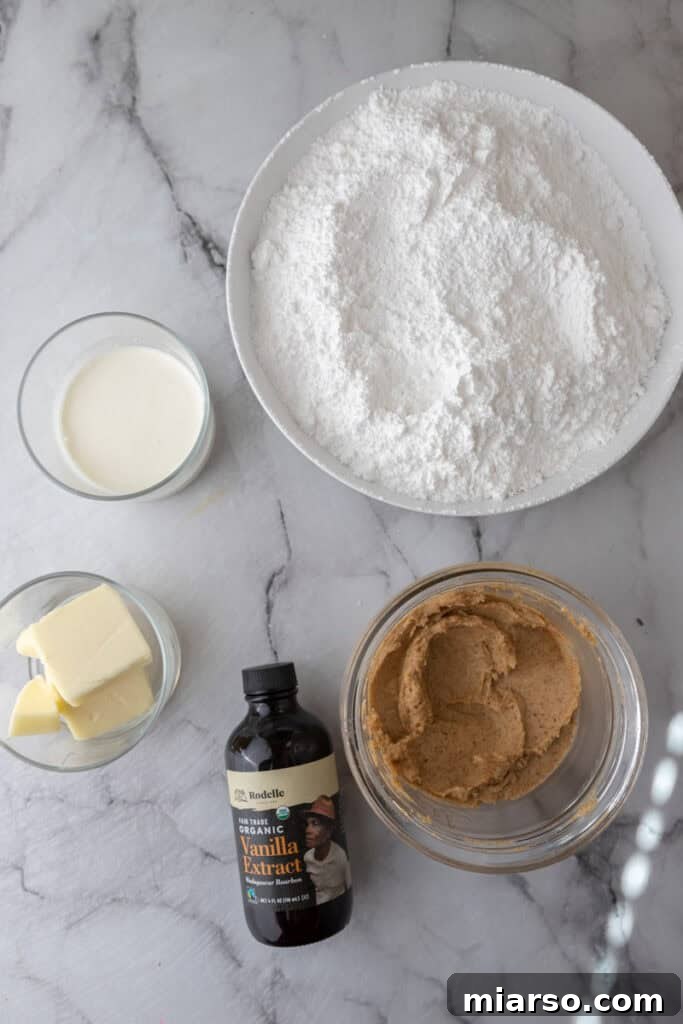
Creating this rich and flavorful brown butter buttercream frosting requires just a handful of common ingredients, each playing a crucial role in achieving its perfect texture and unforgettable taste. While the full, detailed measurements are provided in the recipe card below, here’s a closer look at what you’ll need and why:
- Unsalted Butter: This is the undeniable star of our frosting. We use unsalted butter specifically because it allows us to control the exact amount of salt in the recipe, ensuring a balanced flavor. You will need two separate quantities of butter: one portion will be browned to create the signature nutty flavor, and the other will remain softened for whipping, contributing to the frosting’s creamy structure. This combination ensures maximum flavor without compromising consistency.
- Powdered Sugar (Confectioners’ Sugar): Essential for both sweetening the frosting and providing its smooth, pipeable structure. Sifting the powdered sugar before use is a critical step to prevent any lumps, guaranteeing an ultra-smooth and professional-looking finish for your buttercream.
- Cold Heavy Cream: This ingredient is key to achieving the desired creaminess and helping thin the frosting to your preferred consistency. Using cold heavy cream is important as it aids in stabilizing the butter during the whipping process, contributing to a light and airy texture. You’ll add it gradually, adjusting the amount to reach your ideal spreadability.
- Vanilla Extract: A touch of high-quality vanilla extract enhances the overall depth of flavor and beautifully complements the nutty notes of the browned butter. It adds a subtle warmth that ties all the flavors together, elevating the frosting’s aromatic profile.
- Salt: Just a small amount of salt is vital for balancing the sweetness of the powdered sugar and accentuating the rich, complex flavors of the brown butter. Since we start with unsalted butter, we have precise control over the seasoning, which makes a significant difference in the final taste.
Crafting the Ultimate Brown Butter Frosting: A Step-by-Step Guide
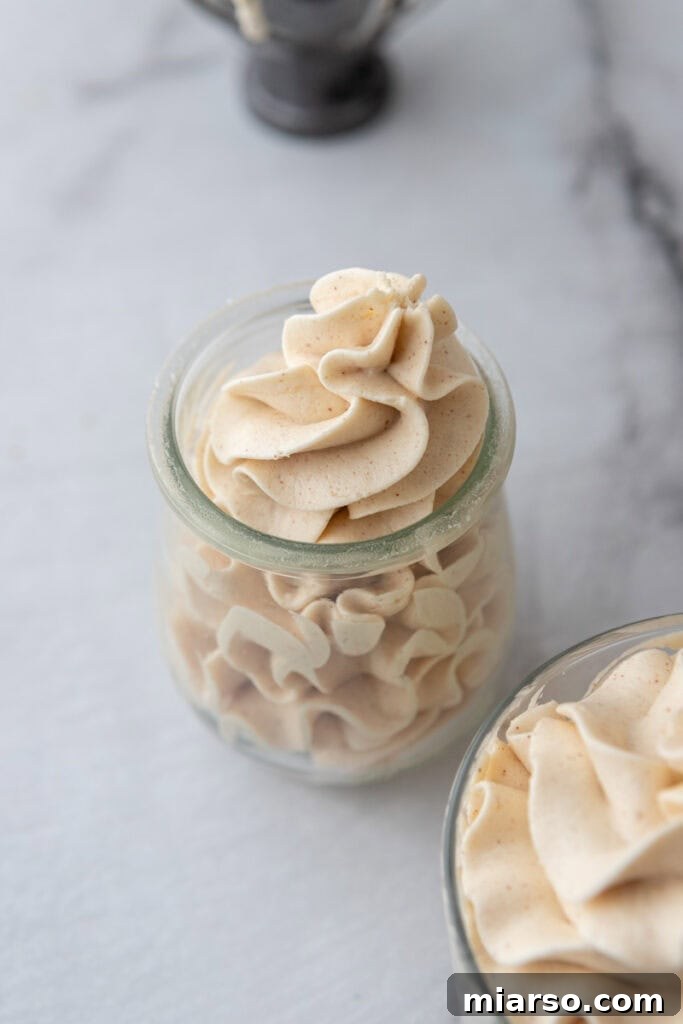
Making this irresistible brown butter buttercream icing is a rewarding process that comes together easily with a few key steps. For complete prep and total times, along with full ingredient measurements, please refer to the detailed recipe card at the end of this post. Here’s how to create this rich, flavorful frosting:
- Brown the Butter: Begin by melting ¾ cup of unsalted butter in a small, light-colored saucepan over medium heat. A light-colored pan is crucial as it allows you to easily observe the butter’s color change. Stir the butter frequently as it melts and begins to foam. Continue cooking, stirring constantly, until the foam subsides slightly, and tiny golden-brown flecks appear at the bottom of the pan, emitting a distinct nutty aroma. This usually takes about 5-8 minutes. As soon as you notice this change, immediately remove the pan from the heat to prevent burning. Promptly transfer the browned butter, including all the delightful brown bits, into a heat-safe bowl to stop the cooking process. Allow the butter to cool completely at room temperature, then refrigerate it until it firms up to a soft, spreadable consistency, similar to softened butter. This typically takes about 1 hour. As an alternative cooling method, you can place the heat-safe bowl of browned butter into a larger bowl filled with ice water, stirring continuously for 5-10 minutes until it solidifies. This faster method requires constant attention.
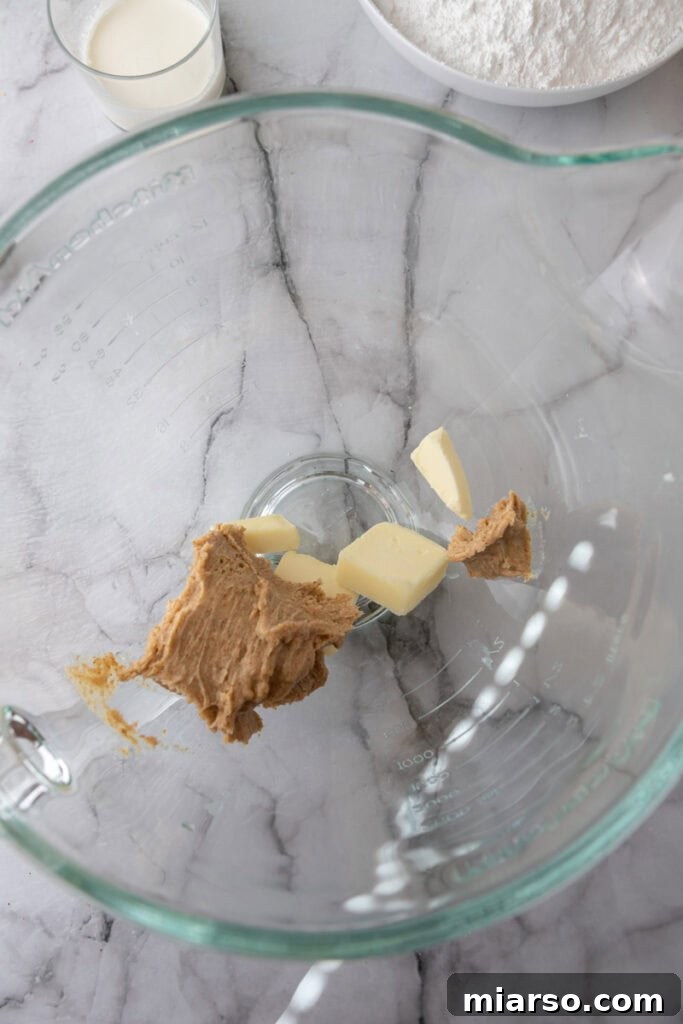
- Combine and Cream the Butters: Once your browned butter is firm but still soft, combine it in a large mixing bowl with the remaining ¼ cup of softened regular unsalted butter. Using a hand mixer or a stand mixer fitted with a paddle attachment, beat the two types of butter together on medium-high speed. Continue beating for about 2 minutes, or until the mixture becomes wonderfully light, fluffy, and perfectly smooth. This step incorporates air, giving the frosting its desired texture.
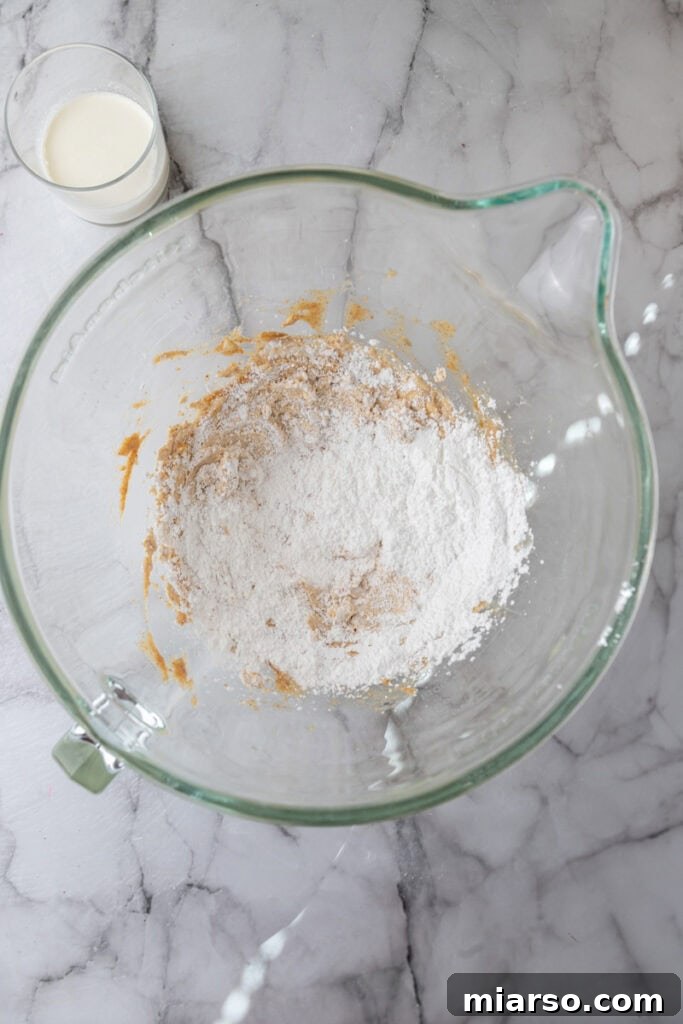
- Sweeten and Flavor: With the electric mixer on low speed, slowly add the sifted powdered sugar to the butter mixture, a cup at a time, until it is fully incorporated and no dry streaks remain. Once all the sugar is blended, stir in the vanilla extract and salt. Increase the mixer speed to medium and beat for another minute to ensure everything is well combined and the frosting is smooth.
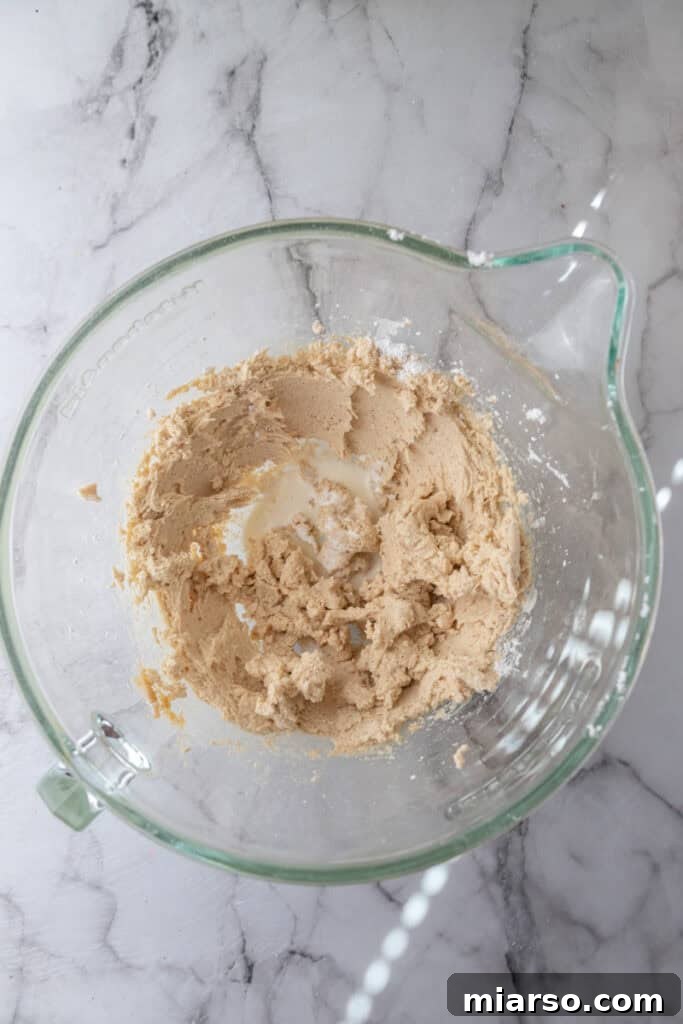
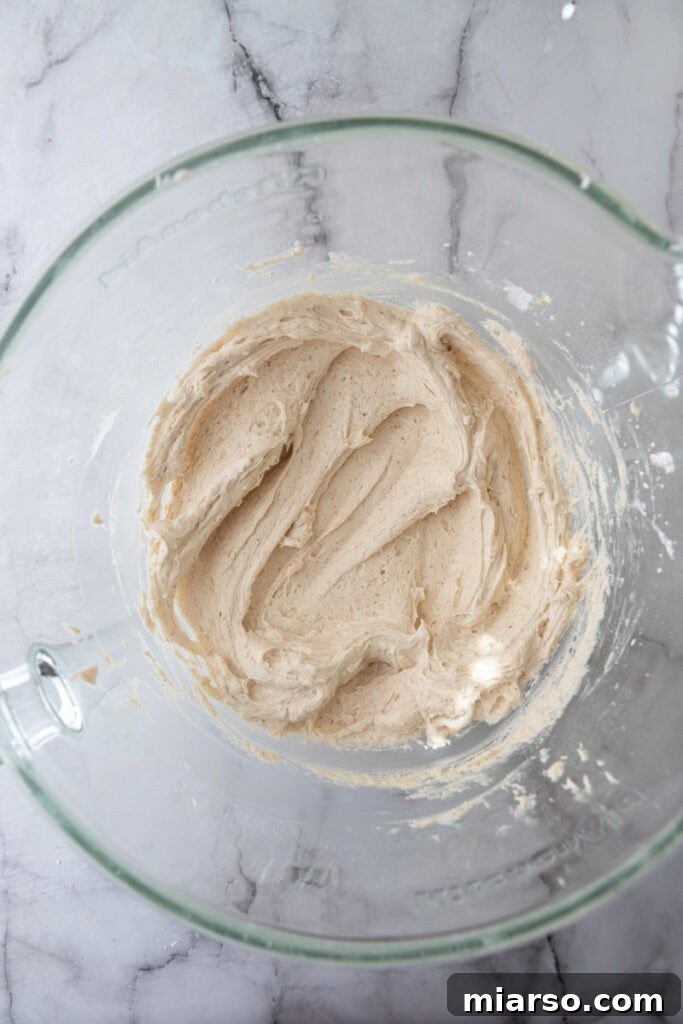
- Achieve Perfect Consistency: Now, it’s time to add the cold heavy cream. Pour the cream into the large bowl a tablespoon at a time, whipping at medium speed after each addition. Continue this process until your frosting reaches a smooth, fluffy, and easily spreadable or pipeable consistency. If the frosting feels too thick, simply add a bit more cream, a half tablespoon at a time, until you reach your desired texture. Conversely, if you find the frosting is too thin, mix in a bit more sifted powdered sugar until it thickens. For an exceptionally smooth frosting with fewer air bubbles, consider using a flat beater with a silicone scraper attachment, which continuously scrapes down the bowl.
Pro Tips and Expert Tricks for the Best Brown Butter Frosting
- Sift Your Powdered Sugar: This step is non-negotiable for achieving a truly smooth, lump-free frosting. Fine powdered sugar dissolves more evenly into the butter, ensuring a silky, professional finish. Use a fine-mesh sieve to catch any stubborn clumps.
- Keep Heavy Cream Cold: The temperature of your heavy whipping cream is crucial. Cold cream helps maintain the stability of the butter emulsion during mixing, preventing the frosting from becoming greasy or runny. It contributes to a light, airy texture that holds its shape beautifully.
- Master the Browning Process: Brown butter can transition from perfectly nutty to burnt very quickly. It’s essential to watch it vigilantly throughout the cooking process. Use a light-bottomed pan to easily see the color change. Stir constantly to ensure even browning and prevent scorching. The moment you detect a rich, nutty aroma and see those beautiful golden-brown flecks, remove the pan from the heat immediately and transfer the butter to a separate bowl to stop residual cooking. Trust your nose – the fragrant nuttiness is your cue!
- Chill Browned Butter Adequately: Don’t rush the cooling process. The browned butter needs to be solid enough to whip but still soft, similar to room-temperature butter. If it’s too warm, it will melt the softened butter and create a greasy, unstable frosting. If it’s too hard, it won’t cream properly. Plan ahead and give it ample time to chill.
- Adjust Consistency Gradually: When adding heavy cream, do so one tablespoon at a time. The amount needed can vary slightly based on humidity and the butter’s fat content. Adding it slowly gives you precise control over the final texture, ensuring your frosting is perfect for spreading or piping.
Why This Brown Butter Frosting Recipe Belongs in Your Repertoire
- Simplicity Meets Sophistication: This easy recipe relies on basic, readily available ingredients found at any grocery store. Despite its simple components, the brown butter transformation elevates it to a gourmet level, making it accessible for bakers of all skill levels to create something truly extraordinary.
- Unforgettable Flavor Profile: The rich, complex nuttiness and subtle caramel notes of brown butter provide a distinct flavor boost that no other frosting can match. It adds an incredible depth and warmth to any dessert, turning everyday treats into memorable culinary experiences that will impress even the most discerning palates.
- Your New Go-To Frosting: Once you experience the unparalleled taste and velvety texture of this brown butter frosting, you’ll wonder how you ever baked without it. It’s so versatile and universally loved that it’s destined to become your absolute favorite and only frosting recipe, forever changing the way you think about dessert toppings.
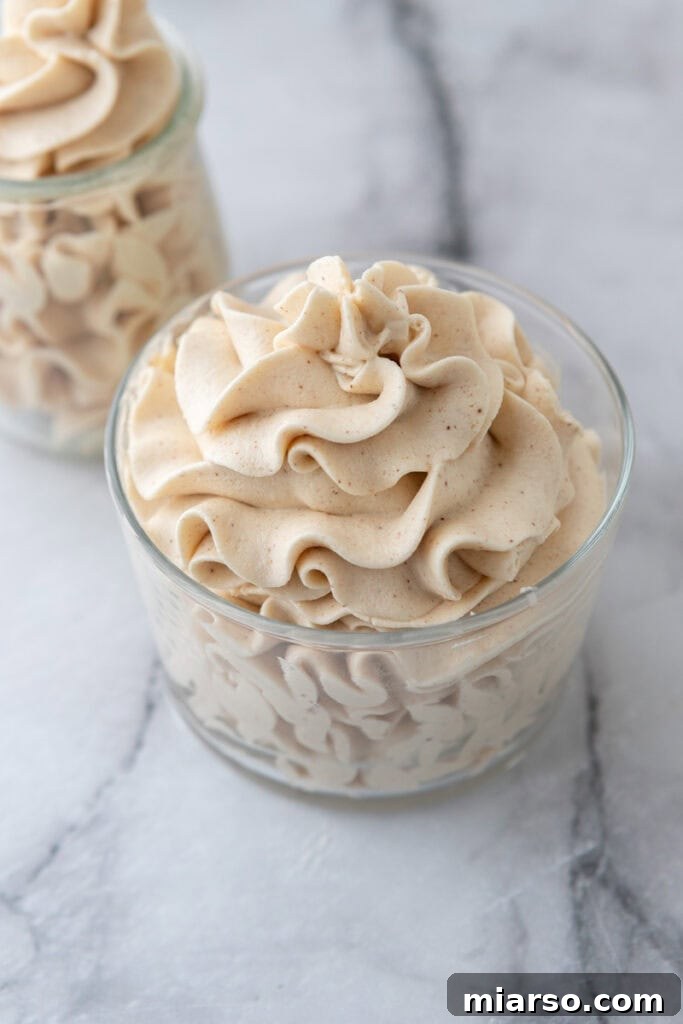
Frequently Asked Questions (FAQ) About Brown Butter Frosting
What desserts can I put this brown butter frosting on?
This brown butter frosting is incredibly versatile and complements a vast array of flavors, making it suitable for almost any dessert. Its rich, nutty profile beautifully enhances both simple and complex treats. For classic desserts, try it on a moist chocolate cake or fluffy vanilla cupcakes to add an unexpected depth. It’s an absolute game-changer for fall desserts; imagine this luscious frosting crowning a spiced pumpkin cupcake, a grand pumpkin bundt cake, or even enriching a classic apple pie. Carrot cake, with its earthy spices, and banana cake, with its natural sweetness, are also fantastic canvases for this frosting. Don’t be afraid to experiment! Seriously, try it with any flavor of cake batter you can envision – from red velvet to lemon – and you’re sure to discover a delicious pairing. My husband’s ultimate favorite, however, is this decadent frosting slathered generously over a warm, homemade batch of fudgy brownies. It’s pure bliss!
How do I store my leftover brown butter frosting?
Proper storage ensures your delicious brown butter frosting remains fresh and ready for future use. To store, simply transfer the leftover icing into an airtight container. Place the container in the refrigerator, where it will keep well for up to 3 days. When you’re ready to use chilled frosting, allow it to come to room temperature for about 30-60 minutes. This softens the butter and cream. Once softened, give it a brief re-whip with your electric mixer. This quick whip will restore its fluffy, creamy texture, making it perfectly spreadable or pipeable again.
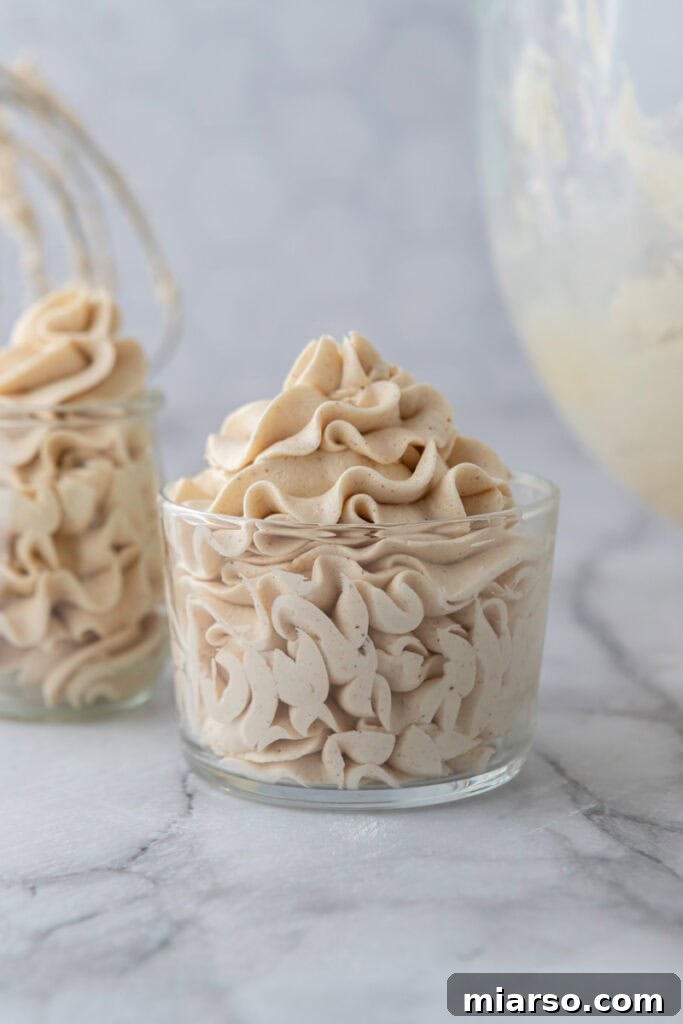
Can I freeze brown butter frosting?
Absolutely, you can freeze this delightful brown butter frosting for longer storage! To do so, transfer the frosting into an airtight container or a heavy-duty freezer bag, ensuring as much air as possible is removed to prevent freezer burn. It will maintain its quality in the freezer for up to 3 months. When you’re ready to enjoy it, simply thaw the frozen frosting in the refrigerator overnight. Once thawed, let it sit at room temperature for a while to soften. It’s important to note that freezing and thawing can alter the texture slightly, so you will definitely need to re-whip it thoroughly with an electric mixer to restore its original fluffy, smooth consistency before using.
Can I brown the butter ahead of time?
Yes, browning the butter in advance is a fantastic time-saving tip! You can brown the butter and store it in an airtight container in the refrigerator for up to a week. This allows you to prepare the base of your frosting well before you need it. When you’re ready to make the frosting, simply take the browned butter out of the fridge and let it soften to room temperature. It should be pliable but still cool, similar to the consistency of softened butter. This way, the flavor is developed and ready to be incorporated into your delicious frosting without any last-minute rush.
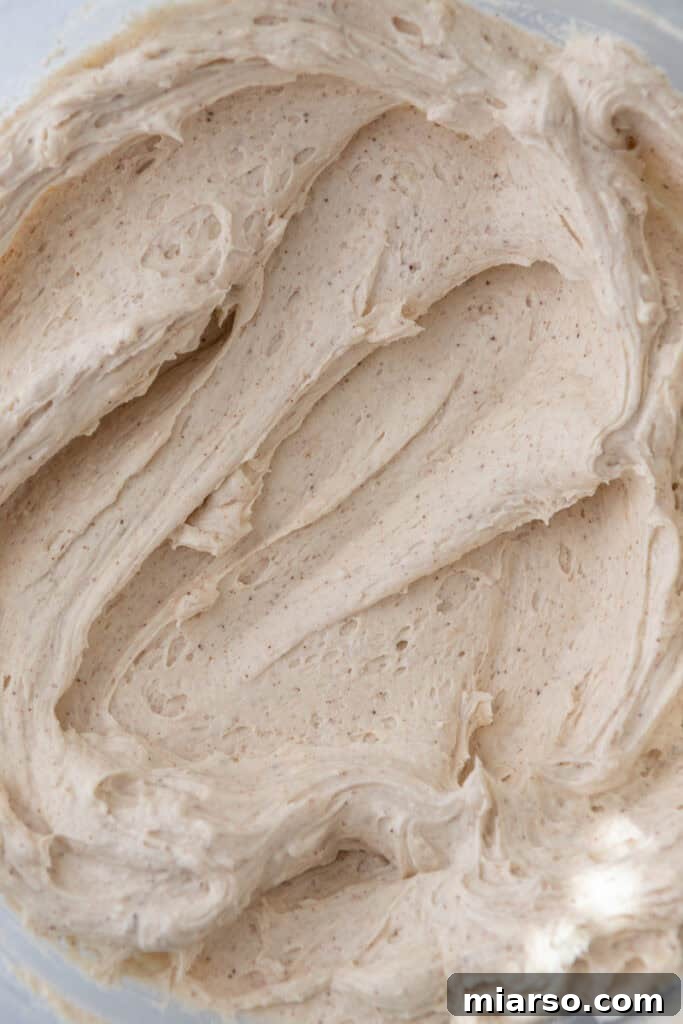
What if I accidentally over-brown or burn the butter?
Unfortunately, if the butter turns too dark, develops black specks, or emits a distinctly burnt smell, it’s best to discard it and start over. While brown butter offers a wonderful nutty and toasty flavor, burnt butter will impart a bitter, unpleasant taste to your frosting, ruining the entire batch. The key is vigilance and removing it from the heat as soon as those golden-brown flecks appear and the nutty aroma is prominent. Don’t worry, even experienced bakers sometimes over-brown butter, so don’t be discouraged if it happens!
Can I brown vegan butter for this recipe?
Browning vegan butter can be a bit tricky, and the results can vary significantly depending on the brand and its specific formulation. Traditional dairy butter browns because of the milk solids within it that undergo the Maillard reaction. Many vegan butters are primarily oil-based and may not contain sufficient plant-based proteins or solids to achieve a true browning effect. Some vegan butters might simply melt and sizzle, while others, particularly those formulated with added plant proteins, might brown slightly and develop some flavor. However, it’s important to manage expectations, as the complex nutty flavor of browned dairy butter is often difficult to replicate precisely with a vegan alternative.
After extensive research, it has been noted that Violife Vegan butter tends to brown fairly well, making it a good option if you require a dairy-free alternative for this recipe. When making a vegan version, substitute the heavy cream with cold coconut cream (the thick part from a can of full-fat coconut milk, chilled) to achieve a light and fluffy consistency for your dairy-free brown butter frosting.
Brown Butter Frosting Recipe
A fluffy, nutty Brown Butter Frosting made by whipping browned butter with sugar, cream, and vanilla. Perfect for cakes, cupcakes, or brownies, this easy recipe will be your new go-to icing.
Prep Time: 10 mins | Total Time: 10 mins
Equipment
- Flat beater with silicone scraper (optional, for smoother frosting)
Ingredients
- ¾ cup unsalted butter, browned and cooled to solid
- ¼ cup unsalted butter, softened
- 3 cups powdered sugar, sifted
- 5-6 tbsp cold heavy cream (adjust for desired consistency)
- 1 tsp vanilla extract
- ¼ tsp salt
Instructions
- In a saucepan over medium heat, melt ¾ cup unsalted butter and cook, stirring, until it turns golden brown and smells nutty. Remove from heat and pour into a heatproof bowl. Let it cool at room temperature, then chill until solid but still soft (about 1 hour). Alternatively, place the bowl of brown butter in an ice bath, stirring continuously until it solidifies (about 10 minutes).
- Using a hand mixer or a stand mixer with a paddle attachment, beat the chilled browned butter and the softened ¼ cup unsalted butter together on medium-high speed until light and creamy (about 2 minutes).
- Gradually add the sifted powdered sugar, beating on low speed until fully combined. Stir in the vanilla extract and salt.
- Add the cold heavy cream, 1 tablespoon at a time, beating on medium-high speed until the frosting is smooth, fluffy, and pipeable. If the frosting is too thick, add a little more cream; if too thin, add more powdered sugar. Using a flat beater with a silicone attachment can help reduce bubbles in the icing.
- Use immediately or store in the fridge for up to 3 days. If chilled, let it soften slightly and re-whip before using.
Notes
Yields about 2 ½ – 3 cups of icing.
This amount is typically sufficient for:
- 12–18 cupcakes
- One 9×13-inch sheet cake
- One 2-layer 8 or 9-inch cake (for a lightly frosted finish)
Nutrition
Please note: Nutritional information is automatically calculated and should be used as an approximation. Per serving (total frosting calories divided by a typical number of servings):
- Calories: 3295
- Carbohydrates: 362g
- Protein: 4g
- Fat: 211g (Saturated Fat: 134g, Polyunsaturated Fat: 8g, Monounsaturated Fat: 55g, Trans Fat: 7g)
- Cholesterol: 573mg
- Sodium: 993mg
- Potassium: 139mg
- Sugar: 355g
- Vitamin A: 6775IU
- Vitamin C: 0.5mg
- Calcium: 108mg
- Iron: 0.3mg
Liked this recipe? We’d love to hear from you! Leave a comment below and share your thoughts and creations!