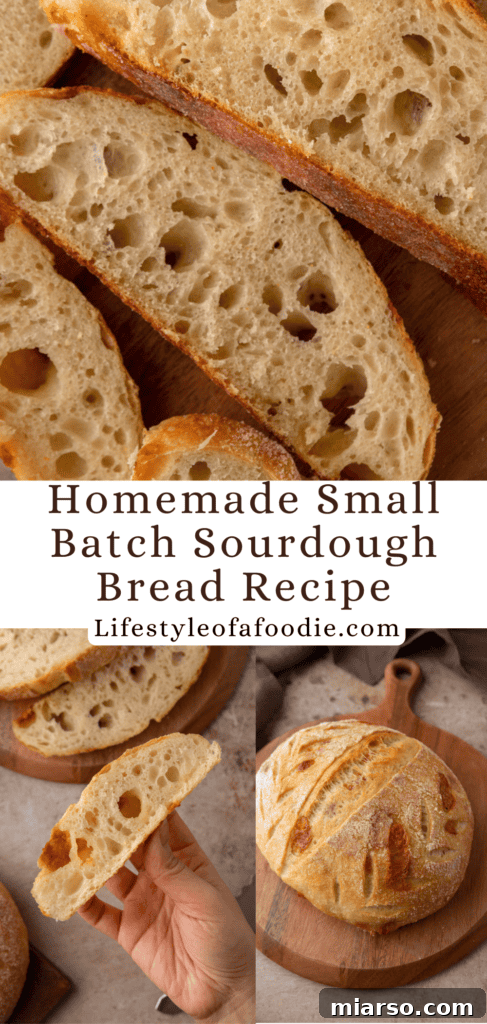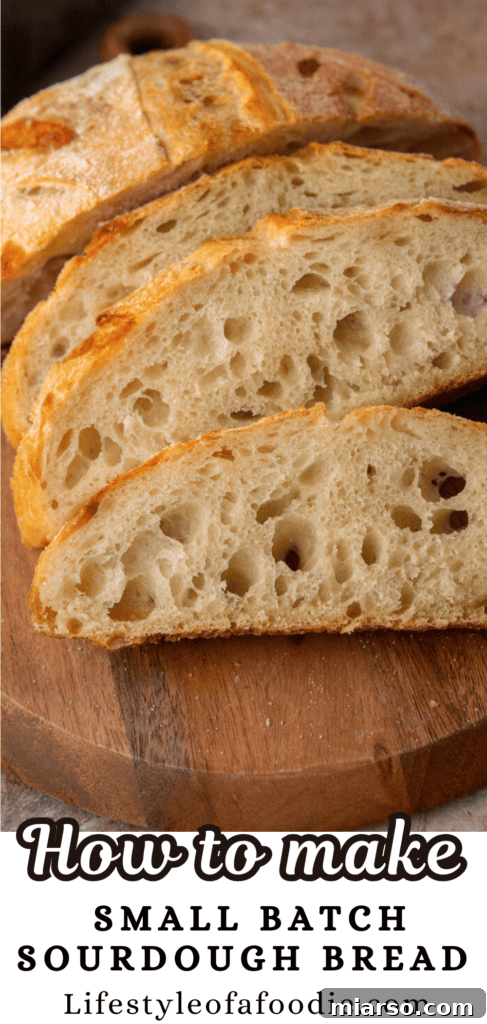
Welcome to the ultimate guide for crafting the perfect small batch sourdough bread! This recipe is meticulously designed for baking enthusiasts who crave the unparalleled taste and texture of freshly baked artisan bread without the typical commitment of a large loaf. Say goodbye to leftovers and embrace the joy of a warm, homemade sourdough anytime.
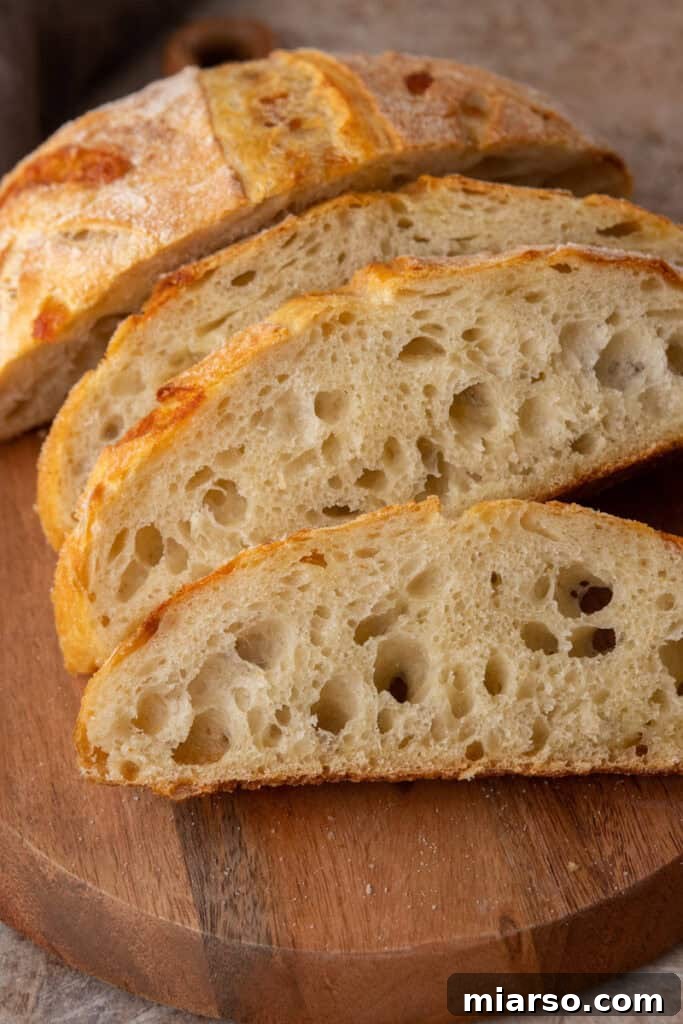
Small Batch Sourdough Bread: Your Guide to Perfect Artisan Loaves
There’s an undeniable magic in creating bread from scratch, especially when it involves the ancient art of sourdough. It’s a process that deeply resonates with our human instinct, connecting us to age-old culinary traditions. For many, including myself, with roots in Algeria, memories of grandmothers nurturing their sourdough starters are vivid – a practice that continues to thrive across cultures, even here in America.
And for excellent reason! The enchanting combination of a crisp, golden crust giving way to a soft, tangy interior makes every single bite utterly irresistible. Sourdough boasts a unique flavor profile that truly sets it apart from any other bread. What makes it even more appealing is its reliance on just a few minimalist ingredients, making it an accessible baking project for anyone, regardless of their experience level. Whether you’re a seasoned sourdough baker or embarking on this rewarding journey for the first time, this small batch recipe is incredibly manageable, exceptionally rewarding, and consistently yields the perfect amount for immediate enjoyment without waste.
Imagine starting a leisurely weekend morning with a slice of this fresh, warm sourdough, generously slathered with French strawberry preserves for an exquisite breakfast toast. Or perhaps you bake it in the afternoon, ready to complement a comforting bowl of soup, a vibrant salad, or a hearty main course. Its compact size ensures it’s easily finished, often leaving you eager to bake another loaf – an ideal scenario for honing your sourdough skills! No matter where you are in your baking journey, this small batch sourdough bread recipe is an indispensable addition to your culinary repertoire. Personally, I adore it with a spread of garlic herb butter for an extra layer of savory delight.
Since you’re here seeking the finest sourdough recipes, don’t miss exploring these other fantastic resources: our Simple Sourdough Starter Recipe for Beginners, the delightful Sourdough Discard Cinnamon Rolls Recipe, or the incredibly easy Sourdough Discard Drop Biscuits Recipe. Each offers a unique way to utilize your active starter or discard, ensuring no precious leaven goes to waste.
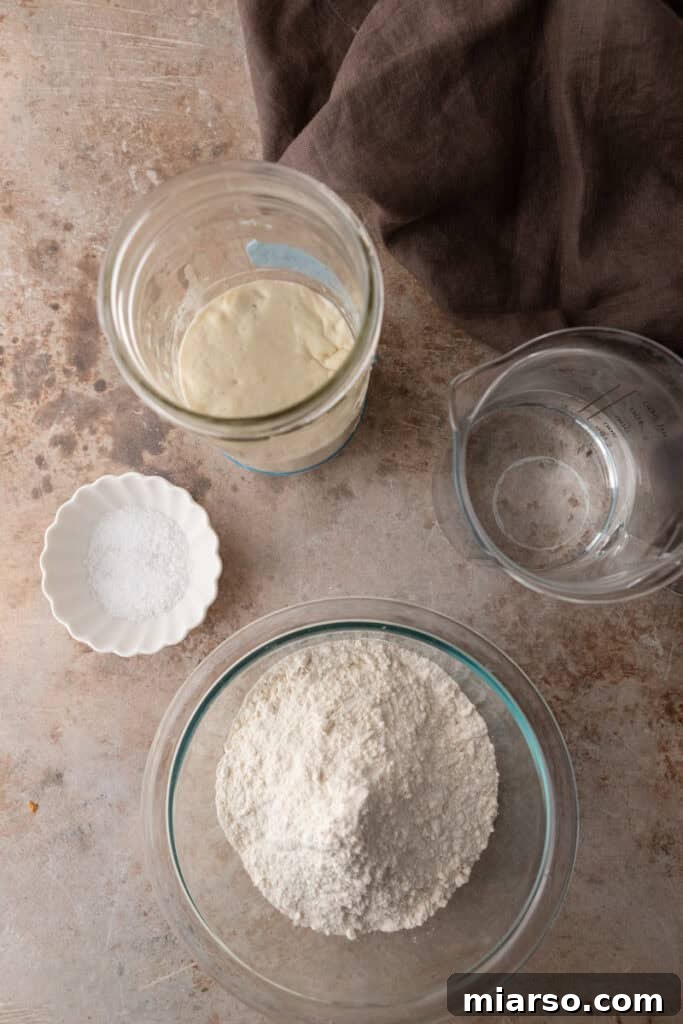
Key Ingredients for Your Small Batch Sourdough
Crafting exceptional sourdough bread begins with understanding the role of each ingredient. This recipe relies on just four fundamental components, ensuring a pure and authentic flavor profile. For precise measurements, please refer to the detailed recipe card at the bottom of this page. Accuracy is paramount in sourdough baking, so using a kitchen scale is highly recommended to achieve consistent and perfect results.
- Unbleached Bread Flour: This forms the very foundation of your bread, providing the essential protein content (gluten) necessary to develop a strong, elastic structure. Bread flour, with its higher protein, creates a robust network that traps gases produced during fermentation, leading to that coveted open, airy crumb. Using unbleached flour is crucial as bleached flour can contain agents that negatively impact the delicate wild yeast in your starter.
- Water: More than just a liquid, water hydrates the flour and your sourdough starter, transforming them into a soft, pliable dough. The temperature of your water can influence fermentation speed; lukewarm water is generally preferred to encourage starter activity without shocking it.
- Salt: Far from being just a flavor enhancer, salt plays a vital role in sourdough. It strengthens the dough’s gluten structure, contributing to better texture and rise. Furthermore, salt helps to regulate the fermentation rate, preventing the dough from over-proofing too quickly and allowing deeper flavors to develop.
- Active Sourdough Starter: This is the heart of your sourdough bread. An active starter, brimming with wild yeast and beneficial bacteria, acts as the primary leavening agent. It’s responsible for the dough’s rise, its complex flavor, and the signature sourdough tang that comes from the fermentation process. Unlike commercial yeast used in many traditional bread recipes, a sourdough starter provides a more nuanced flavor and a healthier bread with improved digestibility.
- Cheese (optional): For an extra layer of flavor and indulgence, consider adding your favorite hard cheese. Cubed cheddar, Gruyère, or Parmesan can be delightful additions, infusing savory notes throughout your loaf.
To ensure your results are as close to perfection as possible, a kitchen scale is an invaluable tool. I personally use this kitchen scale. Please note that if you choose to purchase through this link, I may earn a small commission at no additional cost to you.
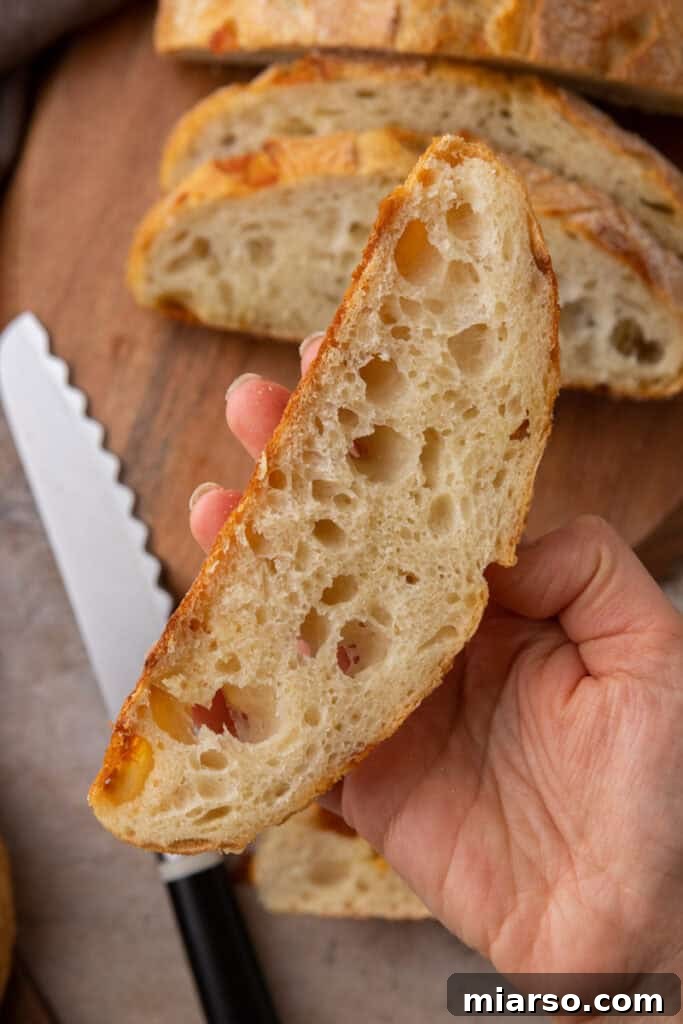
How to Master This Small Batch Sourdough Bread Recipe
Creating these delightful mini sourdough loaves is a journey of patience and technique. Follow these steps carefully, and you’ll be rewarded with artisan-quality bread. For comprehensive, step-by-step instructions with exact measurements, please refer to the recipe card at the end of this post.
Preparing Your Active Sourdough Starter
The success of your sourdough begins with a vigorous, active starter. Before you start mixing the dough, ensure your starter is bubbly, lively, and ready to work its magic as a leavening agent.
How to Feed Your Sourdough Starter
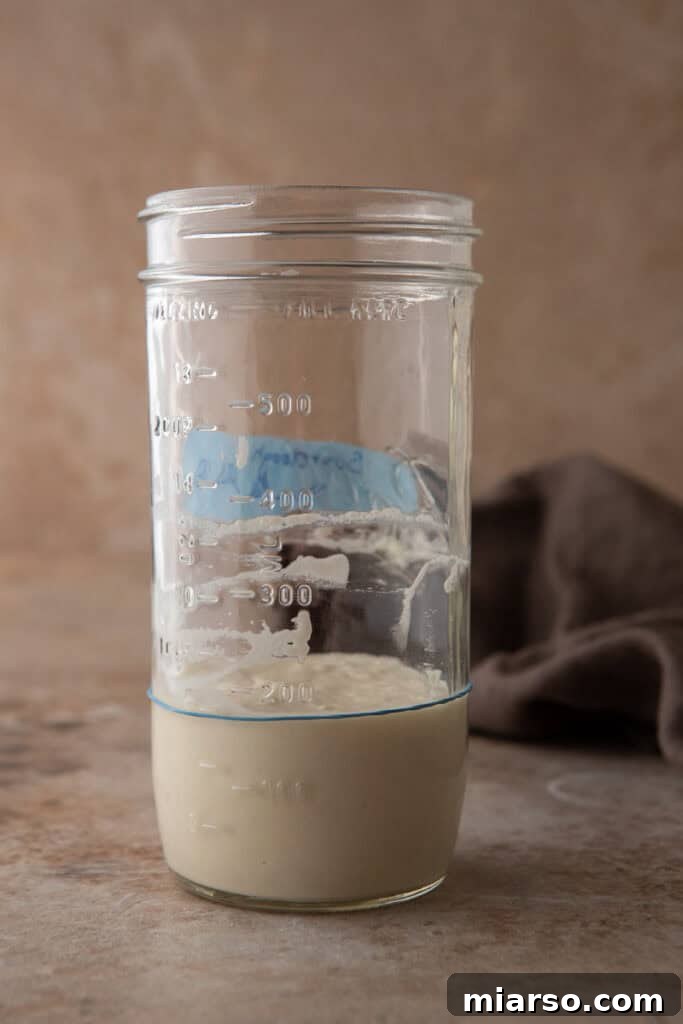
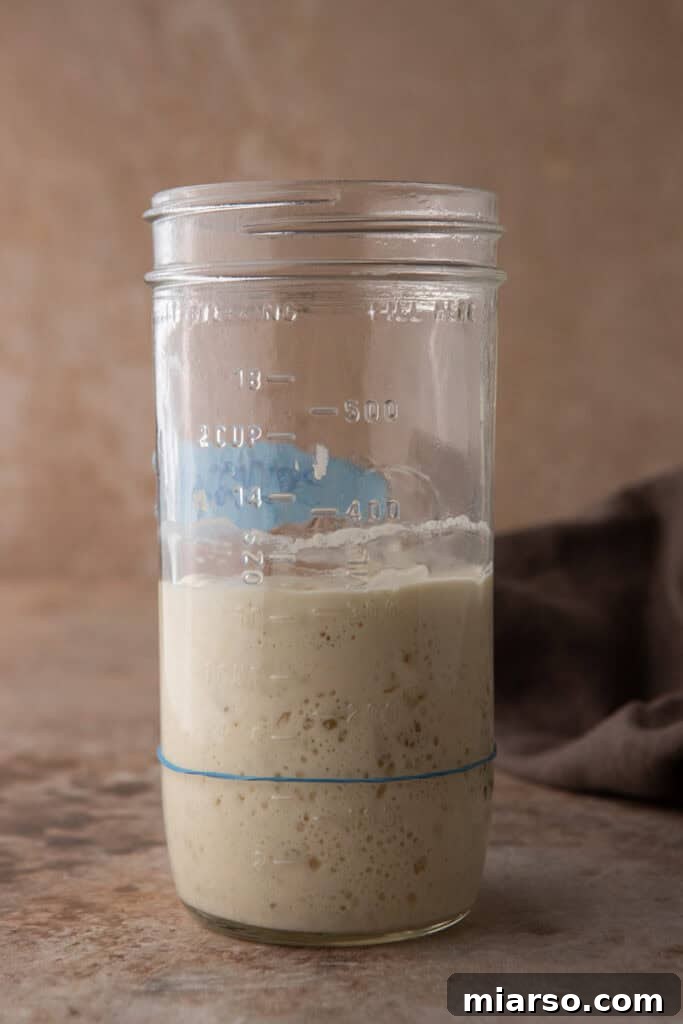
You will need **60g of active starter** for this recipe. Here’s a quick guide to ensure it’s perfectly ready for baking:
The Night Before or Morning of Baking:
- Discard: Begin by discarding all but 20g of your mature sourdough starter from its jar. This makes room for fresh feed and maintains an optimal balance of yeast and bacteria.
- Feed: Nourish your remaining starter with a precise ratio of 1:2:2 (starter:flour:water) to generate enough active starter for your bread and a small amount for future use. For instance, combine 20g starter with 40g unbleached bread flour and 40g lukewarm water.
- Mix Thoroughly: Stir the mixture until all ingredients are fully combined, ensuring there are no dry pockets of flour. The mixture should have a smooth, paste-like consistency.
- Wait for Activity: Cover your starter and let it sit at room temperature. Over the next 4-8 hours (this timeframe can vary based on your room temperature and starter’s vigor), it should become significantly bubbly, show clear signs of activity, and ideally double in volume.
Tips for Success with Your Starter:
- Room Temperature Matters: A warmer environment will accelerate fermentation, meaning your starter will become active faster. Conversely, a cooler room may require a longer activation period. Aim for a consistent room temperature between 70-75°F (21-24°C) if possible.
- Use a Clear Jar: Storing your starter in a transparent glass jar allows you to easily observe its rise, fall, and the formation of bubbles, which are key indicators of its activity.
- Perform the Float Test: A reliable indicator that your starter is ready is the float test. Drop a small spoonful of your active starter into a glass of water. If it floats to the surface, it’s vibrant and ready to use. If it sinks, it may need more time to activate or a fresh feeding.
By diligently adhering to precise ratios and feeding your starter properly, you lay the groundwork for consistent, exceptional sourdough baking outcomes every single time.
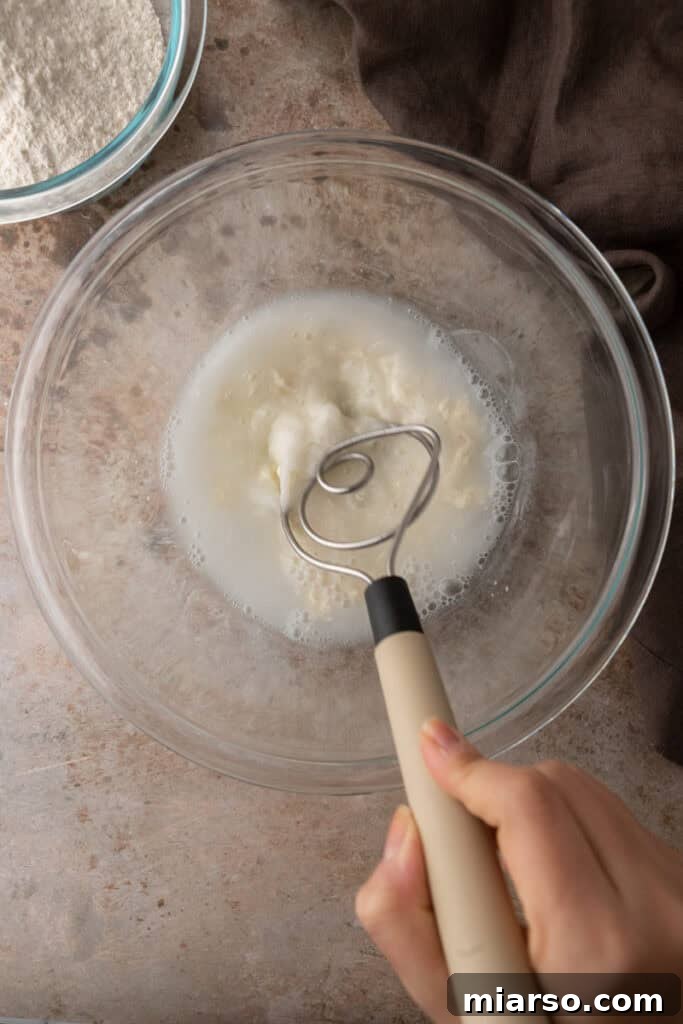
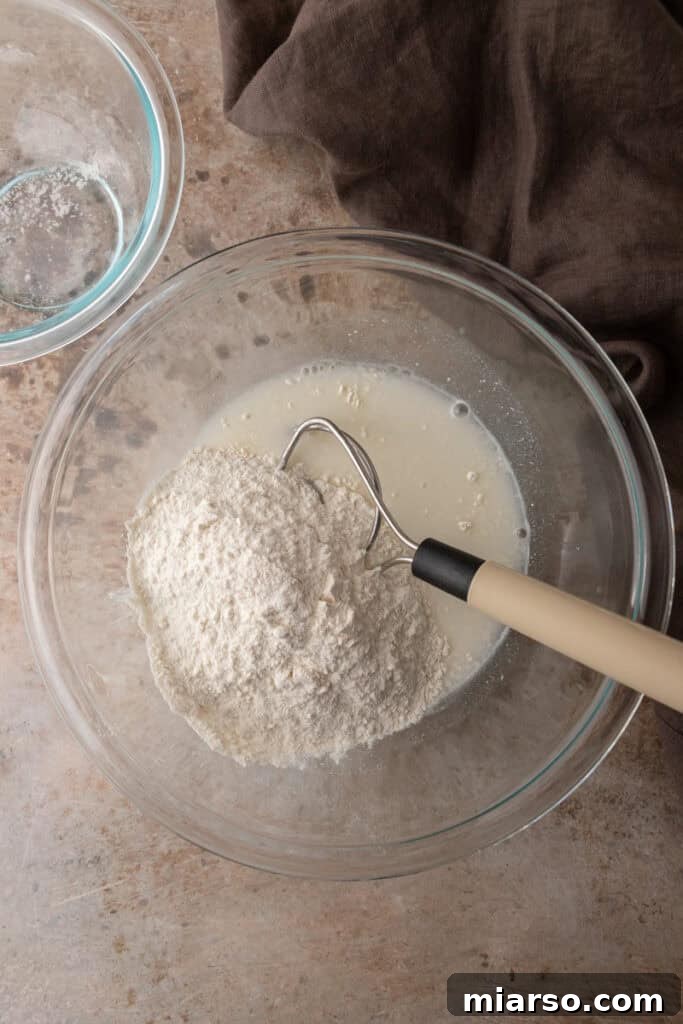
- Prepare the Dough (Autolyse): In a large mixing bowl, gently combine the lukewarm water and your active sourdough starter. Stir them together until well integrated. Next, add the unbleached bread flour and salt. Stir these ingredients until a rough, shaggy dough forms, and no dry flour remains. This initial mixing, often called an autolyse, allows the flour to fully hydrate and gluten development to begin naturally. Cover the bowl with a damp tea towel to prevent drying, and let the dough rest for 45-60 minutes. This resting period is crucial for the dough to relax and absorb moisture, making it easier to work with.
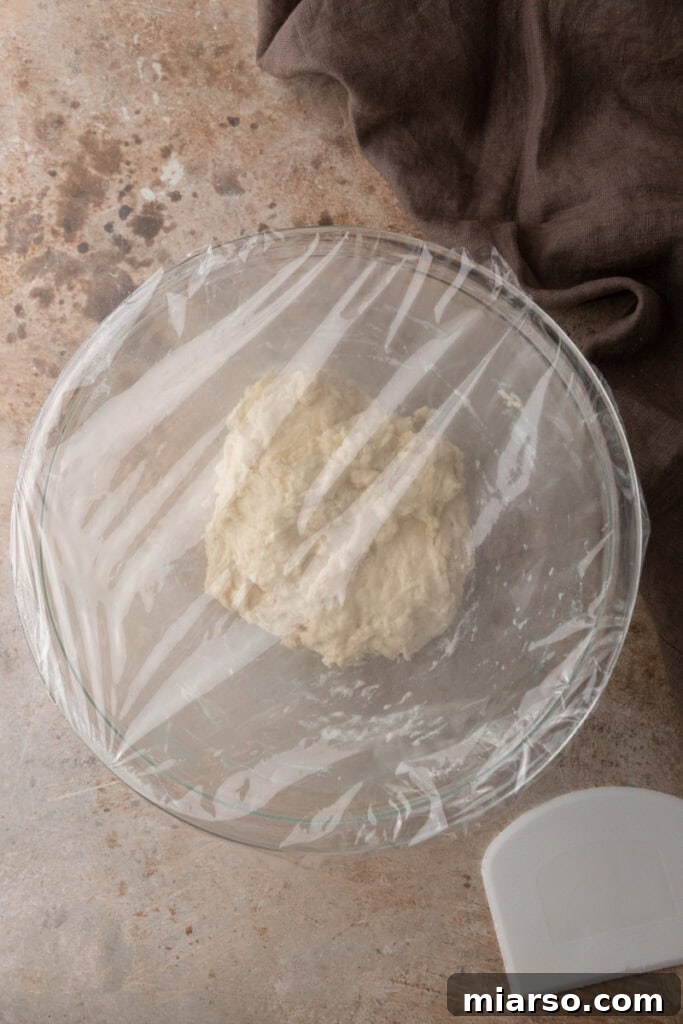
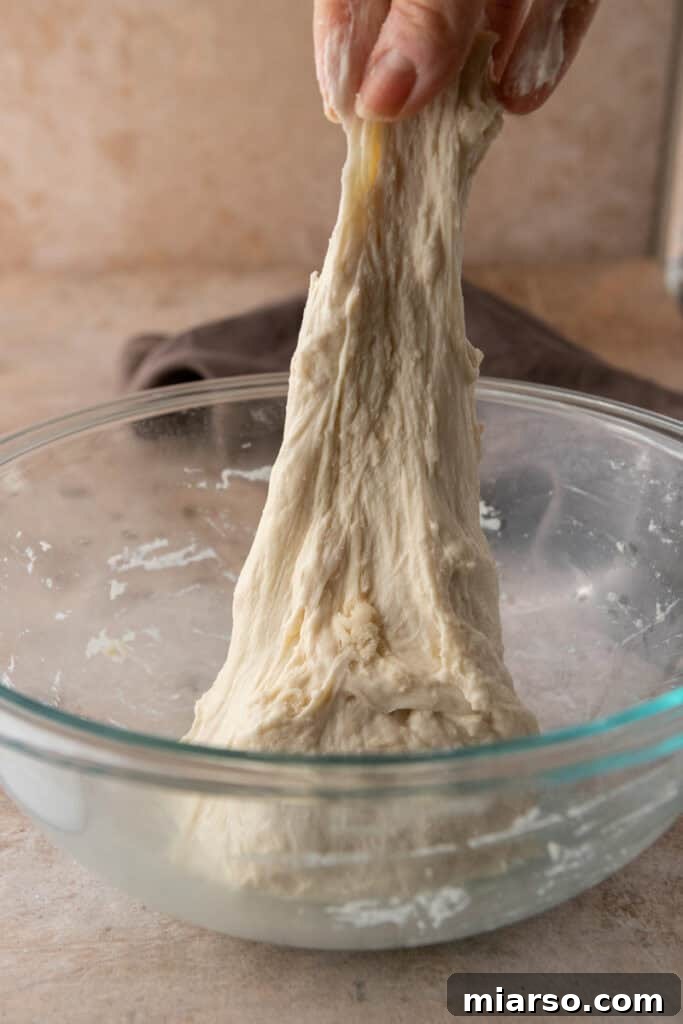
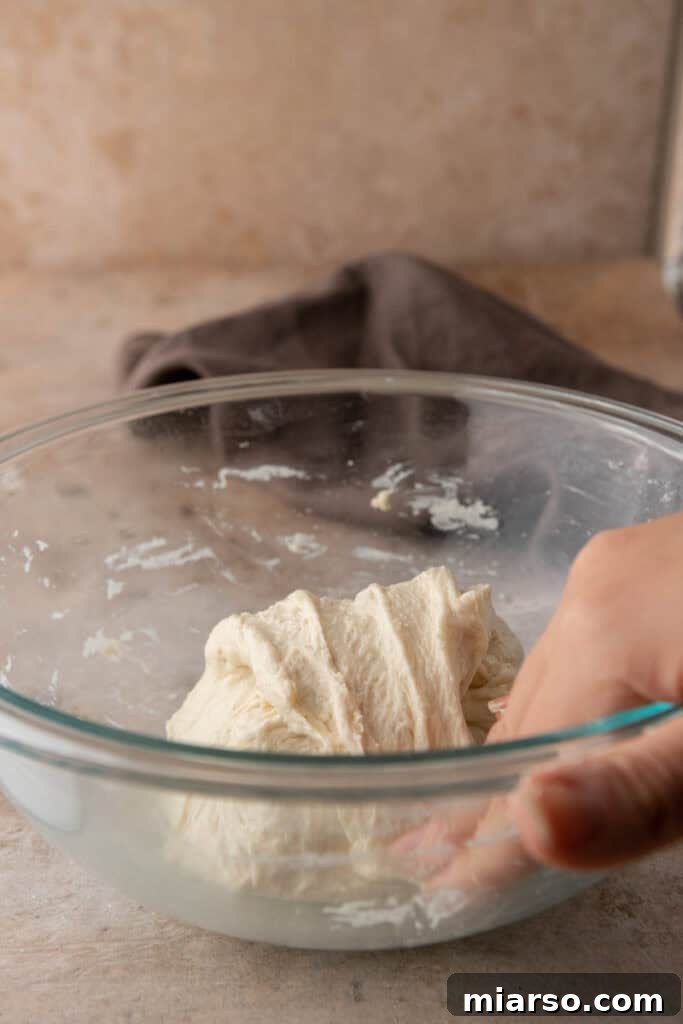
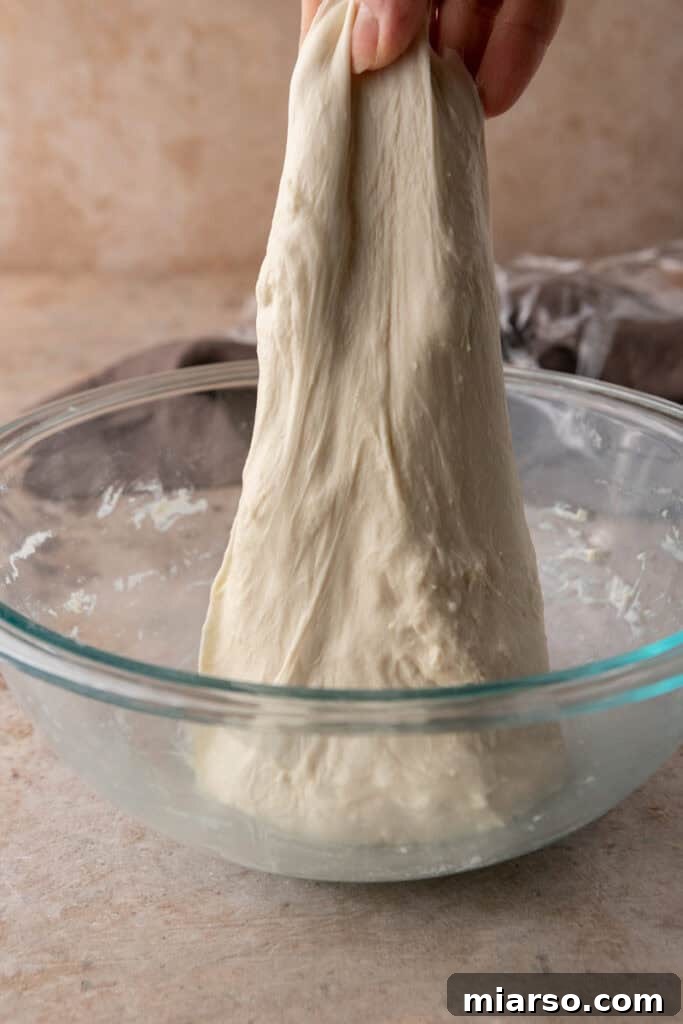
- Develop Gluten (Stretch & Folds, Coil Folds): After the initial rest, you will begin the process of building strength and elasticity in your dough. First, perform 3 sets of stretch and folds, spaced every 30 minutes over the first hour and a half. To do this, gently wet your hands, grab a portion of the dough from one side, stretch it upwards, and fold it over to the opposite side of the bowl. Rotate the bowl and repeat this action 3-4 times per set. After this, you will proceed with 3 sets of coil folds, also spaced every 30 minutes for the next hour and a half. For coil folds, gently lift the dough from the center with both hands, letting the edges coil underneath. Place it back gently. Ensure you cover the dough with a moist kitchen towel after each set of folds to prevent it from drying out.
Initially, the dough may feel a little sticky and unstructured, but with each set of folds, you will notice it becoming progressively smoother, more elastic, and easier to handle. This repetitive gentle handling is crucial for developing the gluten network without overworking the dough.
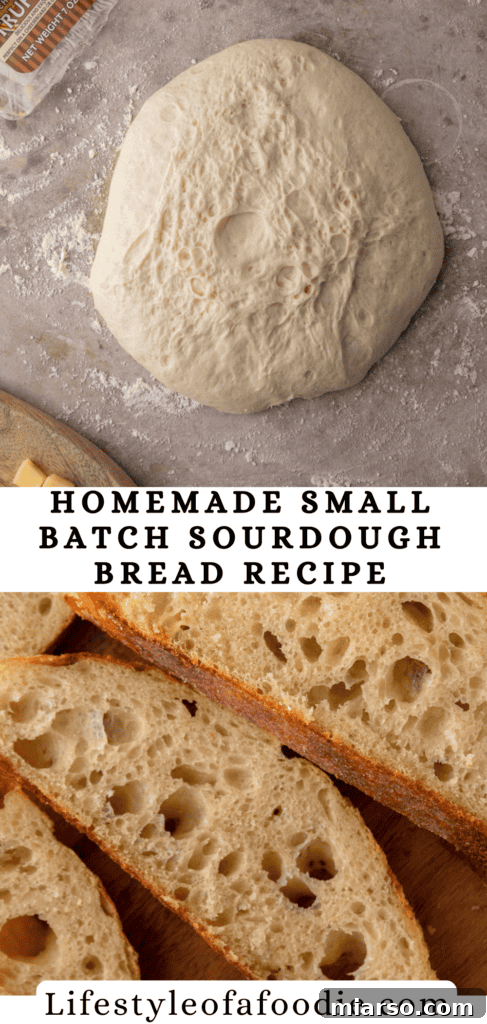
After the final set of coil folds, allow the dough to undergo its **bulk fermentation** (also known as the first rise) at room temperature. This critical stage typically takes about 3–4 hours, or until the dough has noticeably doubled in size. During bulk fermentation, the wild yeasts and bacteria in your starter consume sugars and produce gases, creating air pockets. The dough should feel airy, light, and puffy, with small bubbles slightly visible on its surface and along the bottom of your glass bowl, indicating successful fermentation.
Shaping and Cold Proofing Your Sourdough Bread
Shaping and cold-proofing are not merely steps; they are crucial techniques in sourdough baking that profoundly influence both the final texture and the complex flavor development of your artisan loaf. Mastering these stages ensures your bread achieves a beautiful structure and a delightful crust every time.
Shaping Your Dough: Building Surface Tension
Shaping is the process where you skillfully form your dough into its intended final form, whether it be a classic round boule or an elegant oval bâtard. This step is fundamental for creating the necessary surface tension that allows the bread to rise uniformly in the oven and maintain its magnificent shape throughout the baking process.
Pre-Shape: Relaxing the Dough
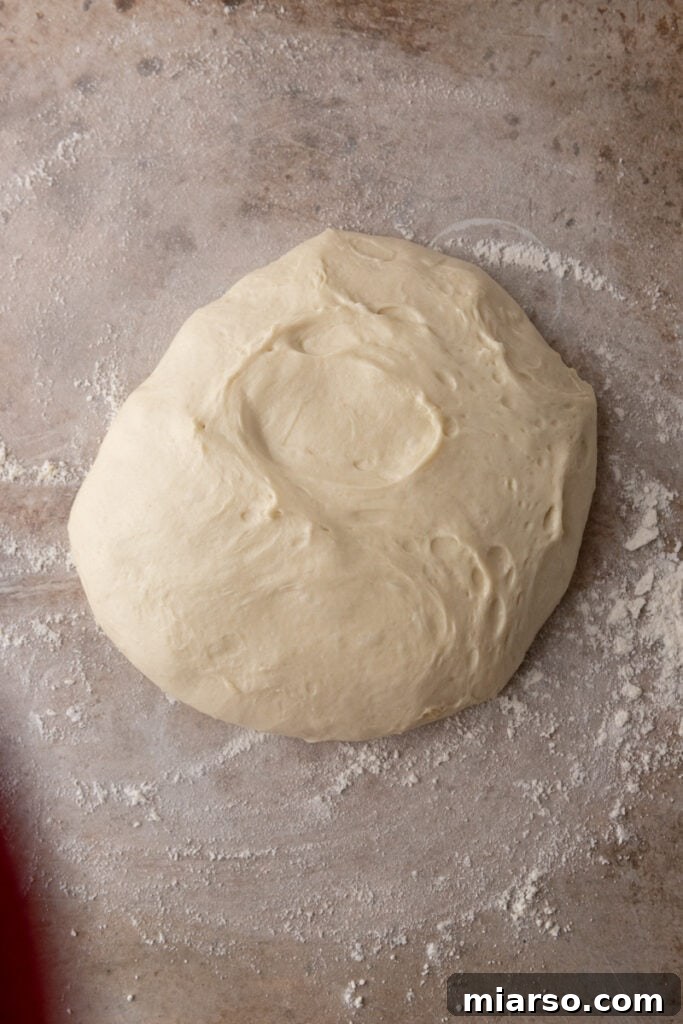
- Gently turn the dough out onto a lightly floured work surface. Handle it delicately to preserve the precious air bubbles developed during bulk fermentation.
- Carefully fold the edges of the dough into the center, forming a rough ball. This initial shaping helps to organize the gluten structure.
- Flip the dough over so that the seam is on the bottom. Allow it to rest, uncovered, for 10-15 minutes. This vital resting period, known as bench rest, allows the gluten to relax, making the dough much easier and more cooperative for the final shaping.
Final Shaping: Creating Structure and Form
For a Boule (Round Loaf):
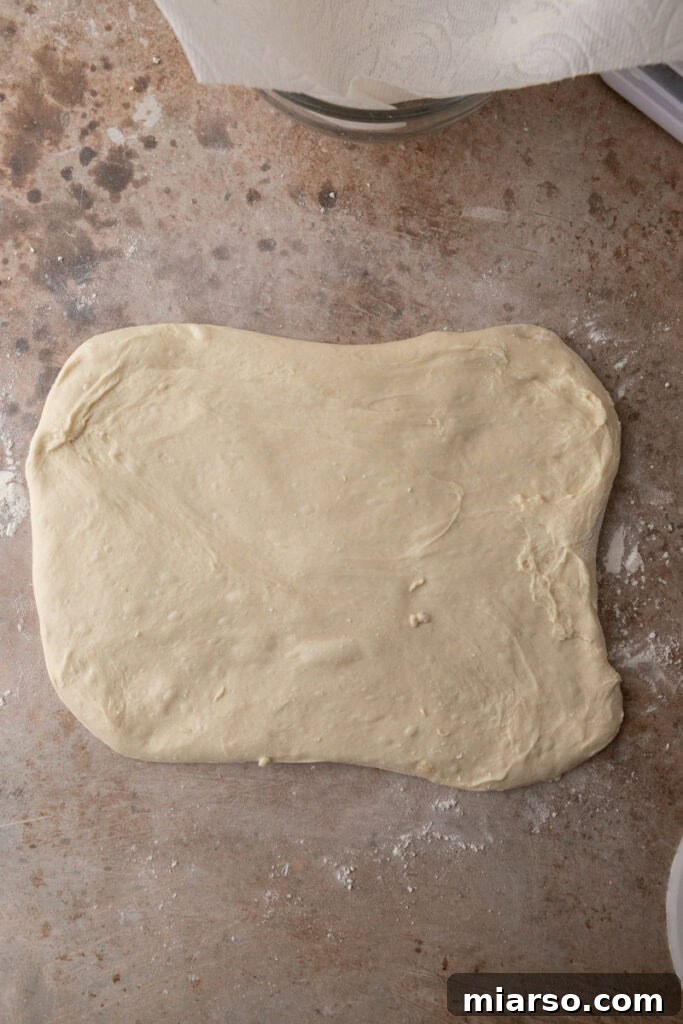
- After the bench rest, gently flatten the dough into a rough rectangle using your hands or a bench scraper. Avoid pressing out all the air.
- Perform a series of folds to build internal structure:
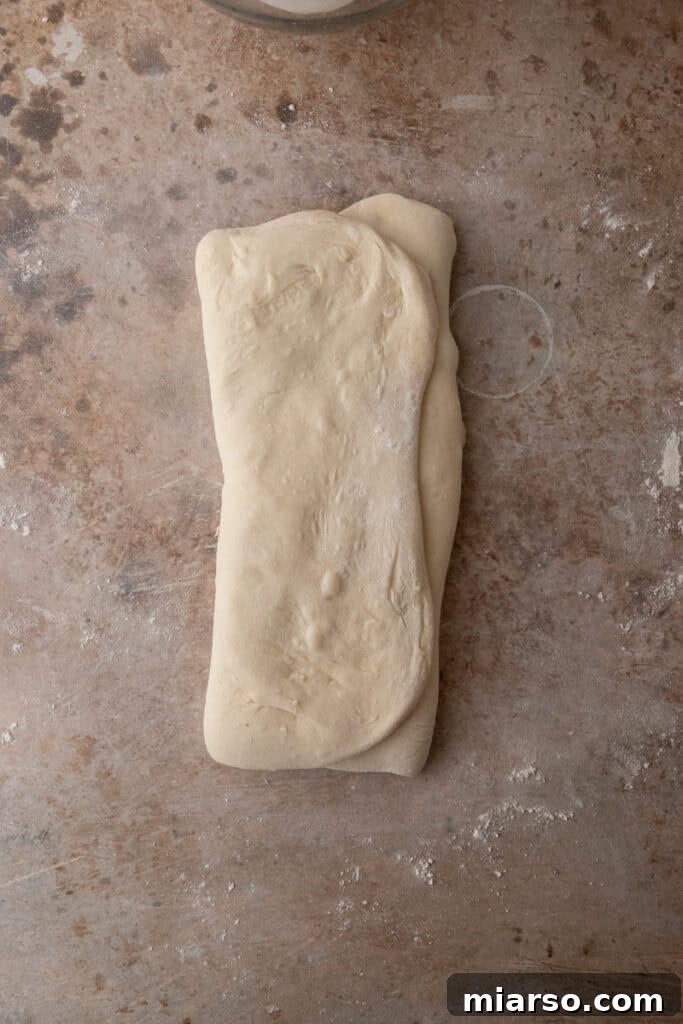
- Fold the top third of the rectangle down towards the center.
- Fold the bottom third up and over the center, completely covering the first fold, as if folding a letter.
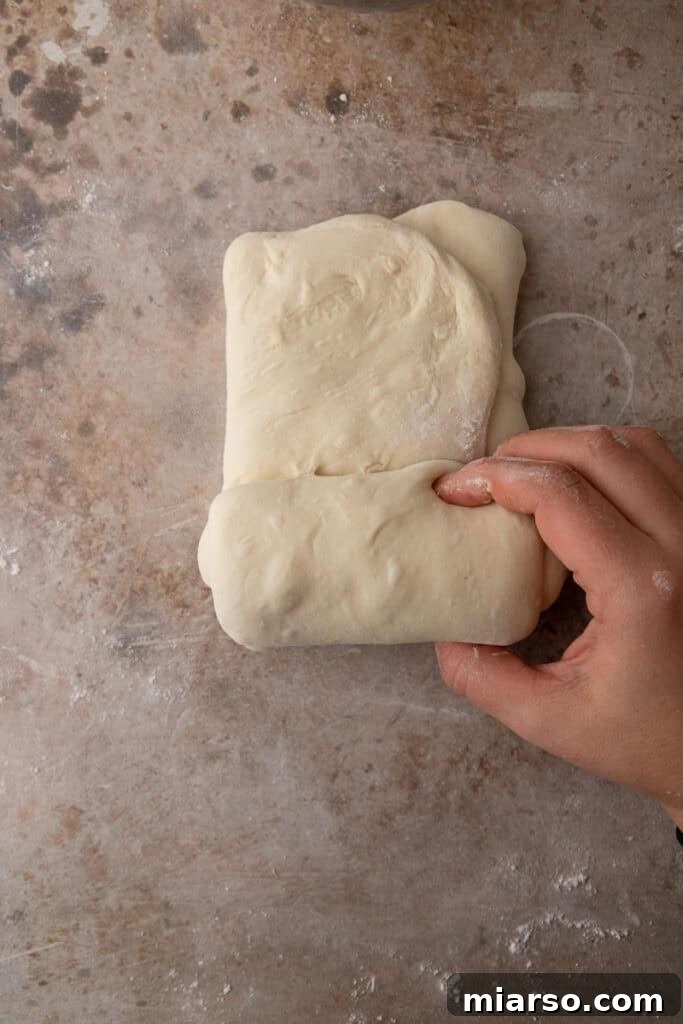
- Rotate the dough 90 degrees. Starting from the top edge, roll the dough tightly downward towards you, forming a smooth, compact log. As you roll, gently seal the edges with the heels of your hands at each turn, building tension.
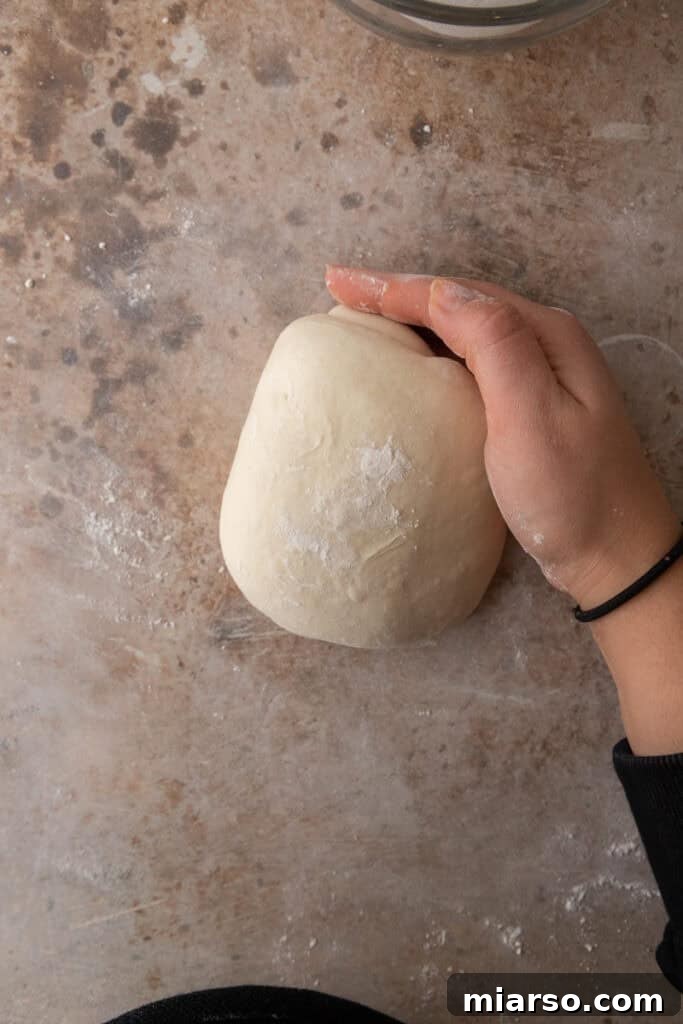
- To perfect the boule shape, place the rolled dough seam-side down. Cup your hands around the dough and gently roll it towards you while applying light, even pressure. Move your hands in a “C” shape motion around the base of the dough, rotating it slightly as you go. This action creates significant surface tension, resulting in a smooth, taut, and round loaf.
- Carefully transfer the shaped boule, seam-side down, into a well-floured proofing basket (banneton) or a bowl generously lined with a floured kitchen towel.
- Pinch and press the seam edges together tightly to ensure a secure seal and further enhance the surface tension. Cover the proofing basket with the towel overhang or plastic wrap and place it in the refrigerator overnight for cold proofing.
For a Bâtard (Oval Loaf):
- Similar to the boule, flatten the dough slightly after the bench rest. Fold the top third down to the center, then fold the bottom third up and over.
- Then, roll the dough from one end to the other, forming a tight oval shape. Use your hands to gently taper the ends and ensure an even, taut surface.
- Transfer to a Proofing Basket or Bowl: Place the shaped bâtard into a floured proofing basket or a bowl lined with a floured kitchen towel, with the seam-side facing upwards. Pinch the edges together to seal the seam. Cover with the towel overhang or plastic wrap and place in the fridge overnight.
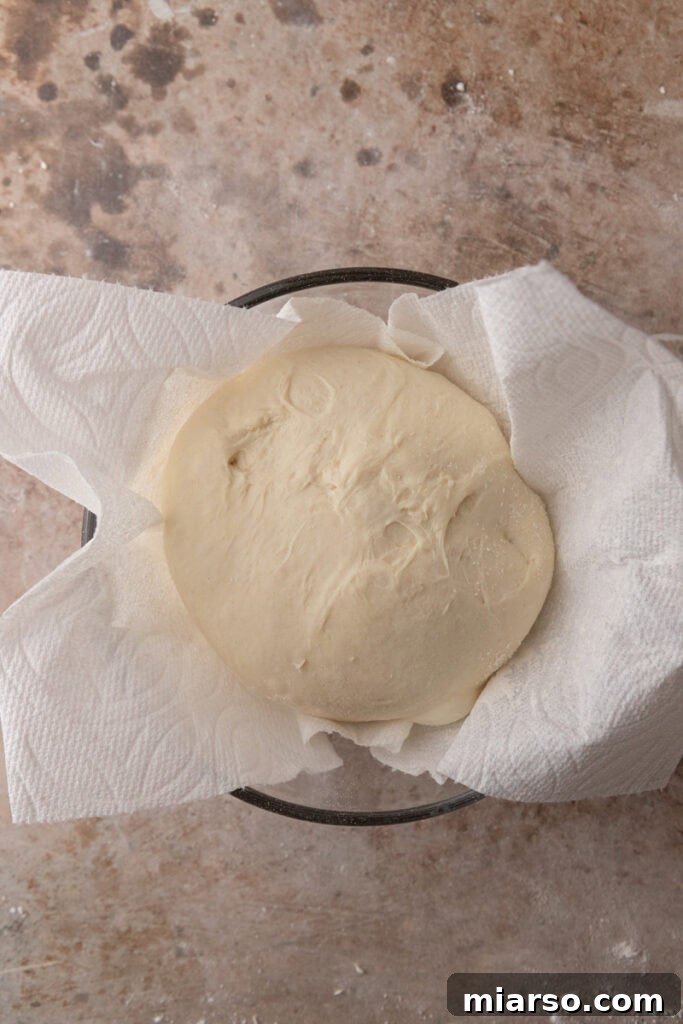
Cold Proofing Your Dough: Flavor and Texture Enhancement
Cold proofing, also commonly referred to as retarding, is a crucial step that involves refrigerating your shaped dough. This significantly slows down the fermentation process, offering a multitude of benefits that elevate the quality of your finished bread.
Steps for Cold Proofing:
Refrigerate: Once shaped and placed in its proofing basket, cover the dough securely with plastic wrap or a reusable cover to prevent its surface from drying out. Transfer it to the refrigerator for an extended period, typically 8-12 hours, or conveniently overnight. You can even leave it in the fridge for up to 36 hours for a more pronounced flavor development.
Why Cold Proofing Works: The extended, slow fermentation in a cold environment allows for the development of highly complex flavors within the dough. The natural yeast and bacteria continue to work, albeit at a much reduced pace, creating organic acids that contribute to sourdough’s characteristic tang. Furthermore, cold proofing firms up the dough, making it much easier to handle and score cleanly before baking. This improved dough structure also contributes to a superior oven spring, resulting in a taller, more voluminous loaf with a beautiful open crumb.
Before Baking: There’s no need to bring your dough back to room temperature. Remove the cold dough directly from the refrigerator when your oven is thoroughly preheated and you are ready to bake. The stark temperature difference between the cold dough and the hot oven is actually beneficial, as it encourages a more dramatic “oven spring” – the rapid expansion of the dough during the initial phase of baking – leading to a taller, more impressive loaf.
Tips for Shaping and Cold Proofing:
- Flour Your Basket or Towel Generously: To prevent your precious dough from sticking, generously dust your proofing basket or linen liner. A mixture of all-purpose flour and rice flour is highly effective, as rice flour is less absorbent and creates a barrier.
- Pay Attention to Timing: Do not skip or rush the cold proofing stage. It is integral to both the bread’s nuanced flavor and its robust structure. The longer the cold proof, the more developed the flavors will be.
- Use a Dutch Oven: Baking your cold-proofed dough in a preheated Dutch oven is highly recommended. The enclosed environment traps steam released by the dough, which is crucial for creating a crisp, thin crust and promoting excellent oven spring.
Mastering these pivotal steps will consistently ensure your sourdough bread emerges from the oven with a beautifully structured crumb, a delightfully tangy flavor, and a golden, crackling crust that truly sings of artisan quality!
Sourdough Bread Baking Time: Achieving the Perfect Crust and Crumb
- Preheat Your Oven and Dutch Oven: Place your Dutch oven (with its lid) inside your cold oven. Preheat the oven to a scorching 475°F (245°C). It’s essential to place the Dutch oven in a cold oven to prevent thermal shock, which could cause it to crack. Allow the oven and Dutch oven to preheat for a minimum of 30 minutes, but ideally for a full hour, to ensure they are thoroughly heated and radiating consistent high heat.
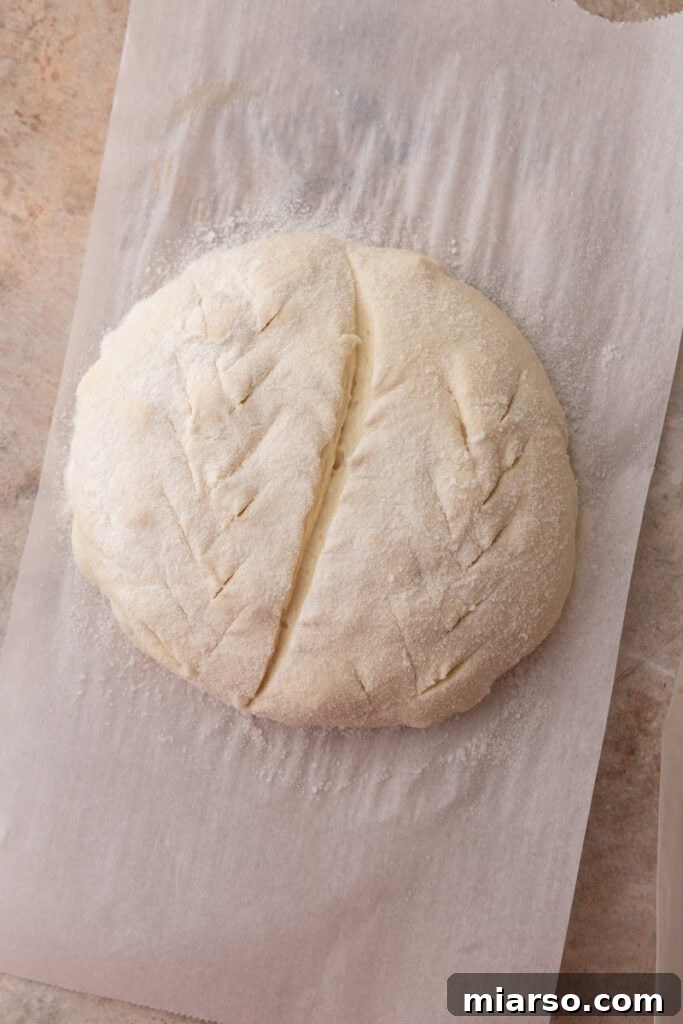
- Prepare the Dough for Baking: Once your oven and Dutch oven are fully preheated, carefully remove the cold dough from the refrigerator. Gently invert it onto a piece of parchment paper. The coldness of the dough will make it much easier to handle.
- Score the Dough: Using a bread lame, a very sharp knife, or a clean razor blade, make a decisive score (a cut) on the top surface of the dough ball. This score isn’t just for aesthetics; it guides the bread’s expansion during baking, allowing steam to escape and creating a beautiful “ear” on your loaf.
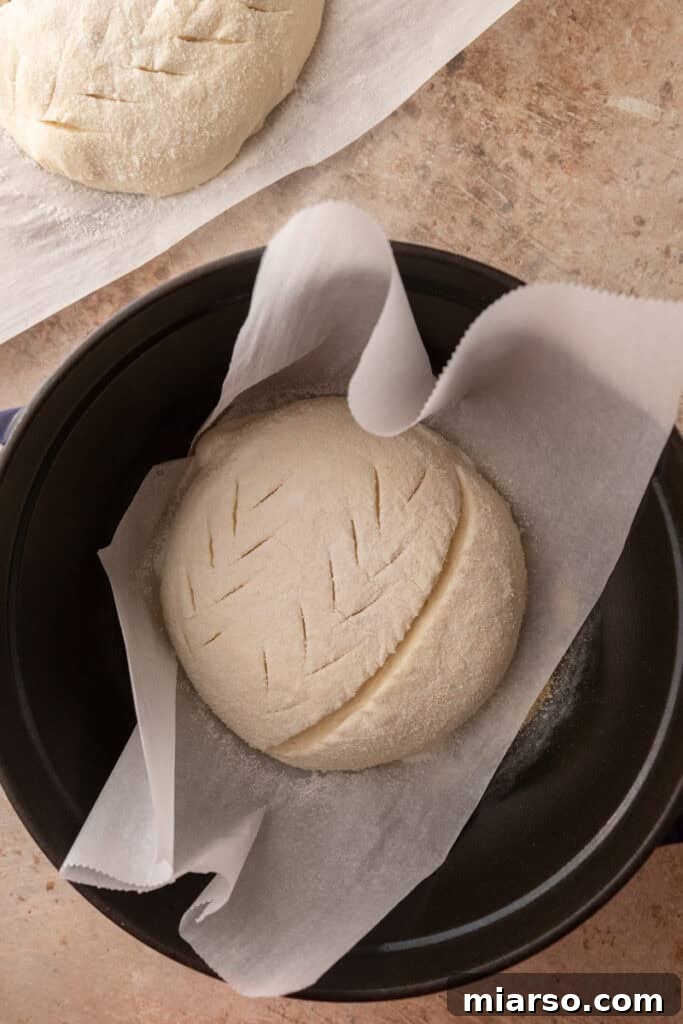
- Baking with a Dutch Oven: Carefully transfer the parchment paper with the dough into the preheated Dutch oven. Place the lid back on the Dutch oven. Bake for 25 minutes with the lid on. The trapped steam inside the Dutch oven during this initial phase is crucial for developing a thin, crisp crust and maximizing oven spring.
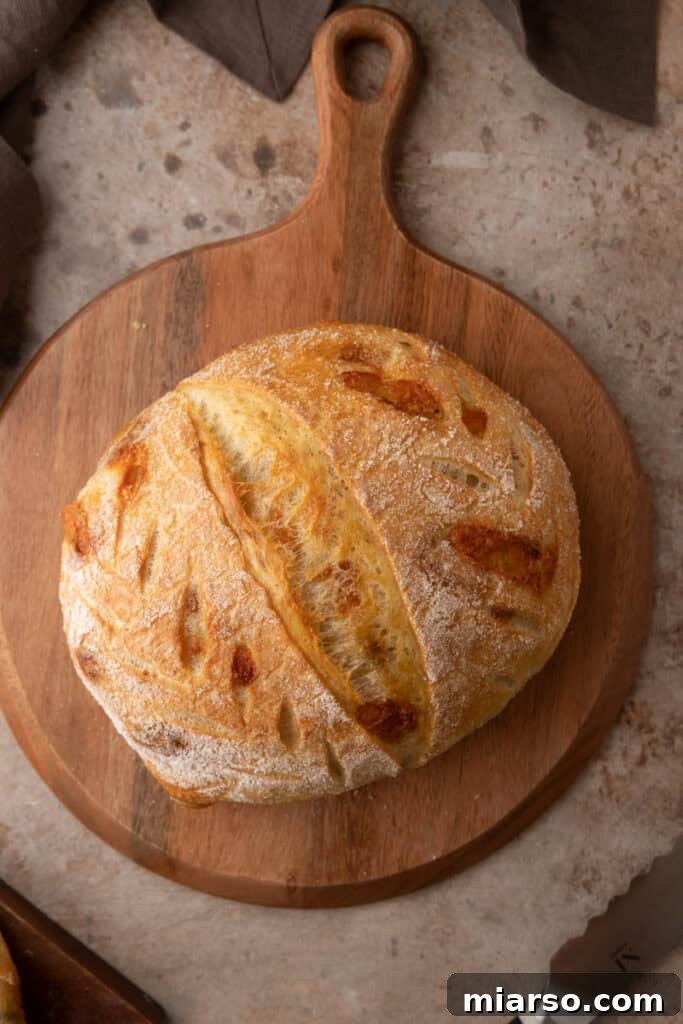
- Uncover and Finish Baking: After 25 minutes, remove the lid from the Dutch oven. Lower the oven temperature to 425°F (220°C). Continue to bake for an additional 10-15 minutes, or until the crust reaches a deep golden-brown color and the internal temperature of the bread reads between 205°F and 210°F (96°C-99°C) when checked with an instant-read thermometer.
- Cooling: Once baked to perfection, carefully transfer the bread from the Dutch oven onto a wire rack. This is crucial to prevent the bottom crust from becoming overly dark or soggy due to retained heat.
- Patience is Key: Allow the bread to cool completely on the wire rack for at least 1 hour before slicing into it. While it’s tempting to cut into a warm loaf, cooling allows the internal structure of the bread to set and the flavors to fully develop. (I confess, I often cheat and wait about 30 minutes, and the bread is still wonderful!)
Advanced Tips and Tricks for the Best Sourdough Results
To truly elevate your small batch sourdough baking, consider these additional tips and techniques that can make a significant difference in your final product:
- Embrace a Digital Scale: Precision is not just a suggestion; it’s the golden rule in bread making, especially with sourdough. Ingredients are measured by weight (grams) rather than volume (cups) because flour density can vary wildly. A digital scale ensures you have the exact ratios needed for optimal hydration and gluten development, leading to consistent, flawless loaves every time.
- Become a Temperature Monitor: The ambient temperature of your kitchen profoundly impacts dough fermentation. In warmer environments, dough will rise and ferment faster, potentially requiring shorter bulk fermentation times. Conversely, a cooler kitchen will slow down the process, meaning your sourdough loaves will need more time to double in size. Learn to read your dough, not just the clock. Look for visual cues like increased volume, bubbling, and a domed surface rather than strictly adhering to timeframes.
- Prioritize Cold-Proofing for Flavor and Texture: Most outstanding sourdough bread recipes incorporate an overnight proofing period in the refrigerator. This extended cold fermentation not only deepens the complex, tangy flavor profile of your bread by allowing more time for organic acids to develop, but it also significantly improves the texture. The cold firms up the dough, making it much easier to score cleanly, which in turn leads to better oven spring and a more open, airy crumb. Don’t underestimate this step; it’s a game-changer!
- Understand Hydration: This recipe uses a relatively high hydration, which can make the dough a bit sticky initially. Don’t be discouraged! This higher water content contributes to a more open crumb and a crispier crust. Learn to work with wet dough by lightly wetting your hands or using a bench scraper rather than adding excessive flour, which can change the hydration ratio.
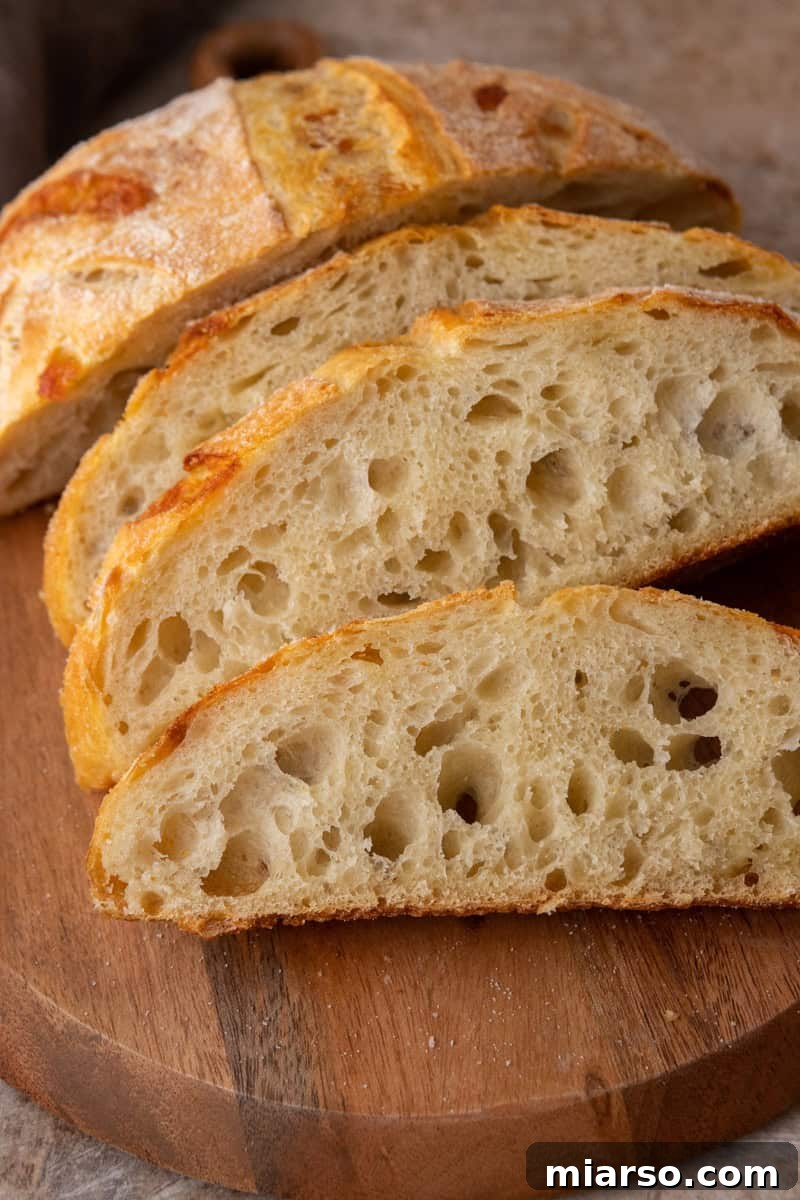
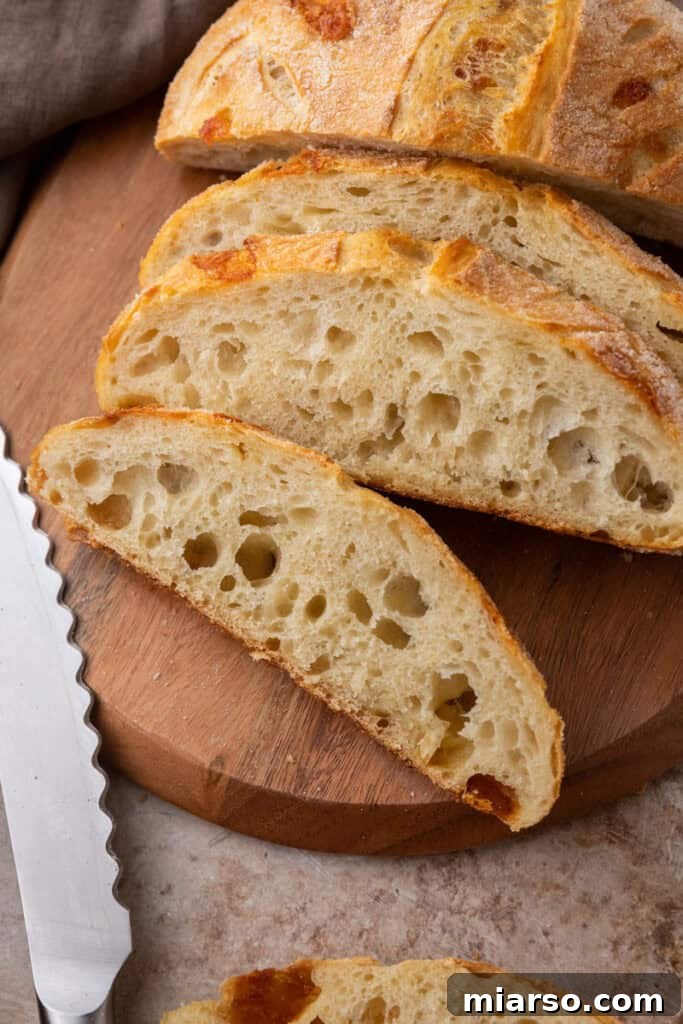
- Crumb Assessment: After cooling and slicing, observe the crumb (the interior). An ideal sourdough crumb is open and irregular, with varying sizes of air pockets, indicating good gluten development and fermentation. A dense crumb might suggest under-proofing or insufficient gluten development.
Why This Small Batch Sourdough Recipe is a Must-Make
This small batch sourdough bread recipe isn’t just about baking; it’s about smart, enjoyable, and rewarding baking. Here’s why it stands out:
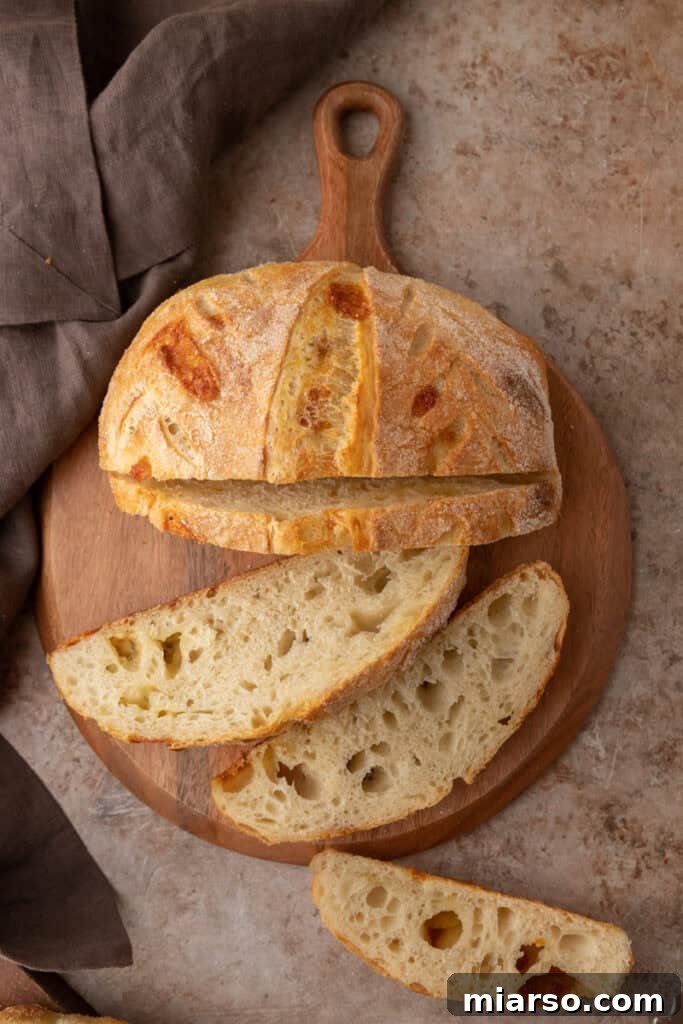
- Less Waste, Always Fresh: The beauty of a small batch means no more worrying about stale leftovers. You get to enjoy a perfectly sized, freshly baked loaf every single time, ensuring maximum flavor and minimal food waste.
- Endlessly Customizable: This recipe serves as a fantastic base for culinary creativity. It’s incredibly versatile, allowing you to infuse a myriad of flavors such as savory cheeses, various seeds, aromatic spices, or even a spicy kick with jalapeños. Personalize each loaf to suit your mood or meal!
- Perfect for Thoughtful Gifting: The smaller size makes these loaves ideal for sharing. During the holidays or for special occasions, these artisanal breads make heartwarming and impressive gifts for friends and family. I’ve personally made five of these mini loaves and gifted them for Christmas, and the joy they brought was truly wonderful!
This recipe is meticulously crafted for busy bakers who appreciate efficiency, eco-conscious home cooks striving to reduce waste, and passionate bread enthusiasts seeking a simple yet profoundly rewarding baking experience. With just four core ingredients, you’ll consistently create exquisite artisan bread that’s perfect for any occasion, proving that great things truly do come in small packages!
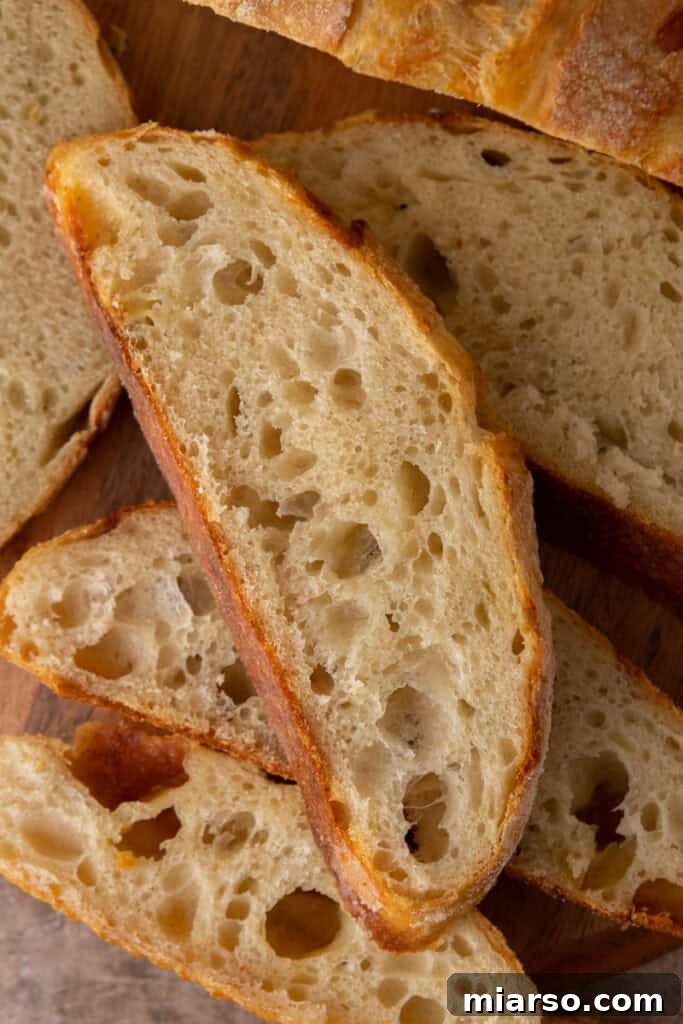
What Types of Different Flours Can I Use?
While unbleached bread flour is the recommended standard base for its excellent gluten-forming properties, the world of flours offers exciting avenues for experimentation and flavor development. You could try whole wheat flour for a heartier, nuttier taste and increased nutritional value, or explore ancient grains like spelt or rye flour, which impart distinct flavors and denser textures. Semolina flour can also be used, lending a slightly yellowish tint and a unique chewiness. All of these alternatives will give you a robust texture and a different flavor profile to explore.
However, it’s important to avoid gluten-free flours like cornmeal or rice flour, as they lack the necessary gluten structure to create the characteristic elasticity and open crumb of sourdough bread. Additionally, refrain from using all-purpose flour, especially bleached varieties, as the bleaching agents can negatively impact or even kill the delicate active microorganisms in your sourdough starter, hindering its ability to leaven the bread effectively.
What Types of Flavors Can I Add?
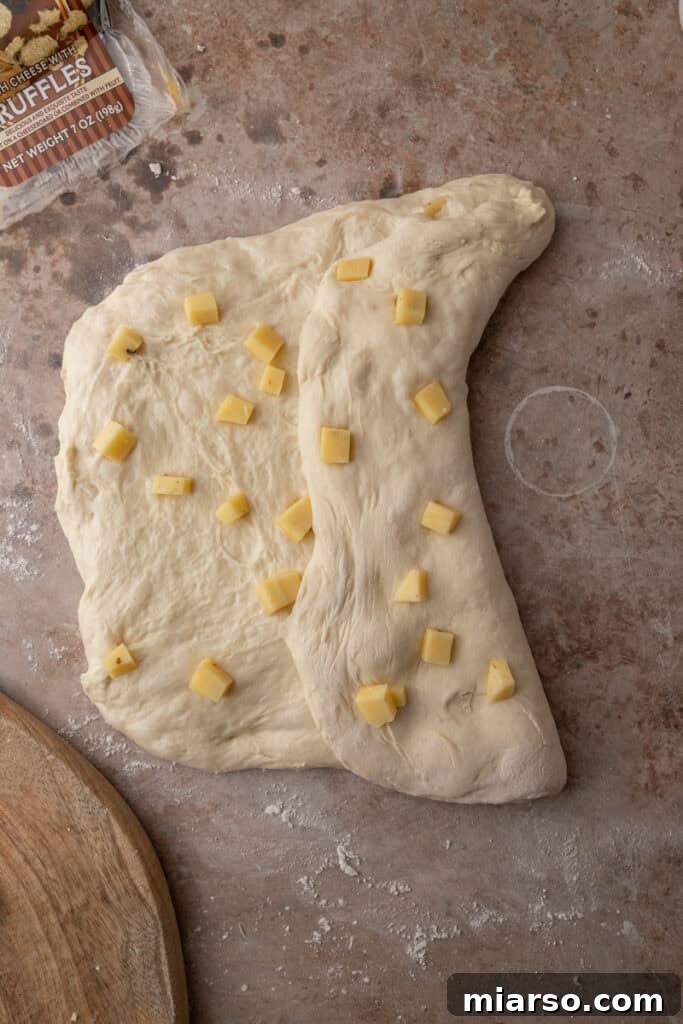
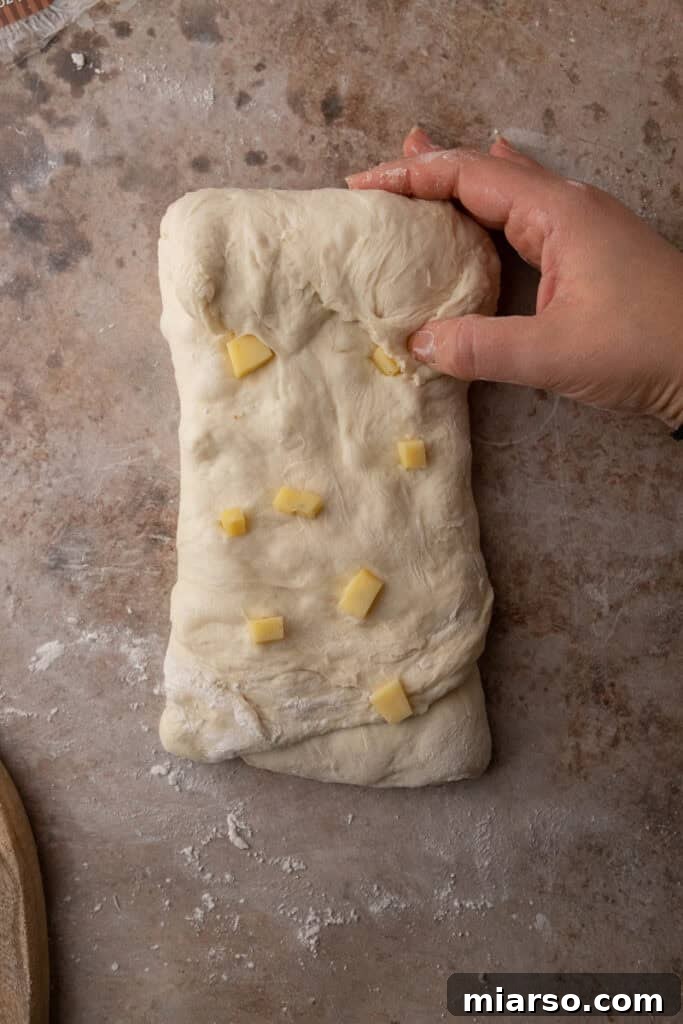
This is truly one of the most exciting aspects of sourdough baking – the creative freedom to infuse your loaves with diverse and delicious flavors! Experimenting with different mix-ins is the most delightful way to enjoy sourdough baking time and time again. For optimal results, add your mix-ins during the shaping process, specifically during the initial folding stages, to avoid disrupting the delicate fermentation and rising of the dough. Here are some fantastic ideas to spark your culinary imagination:
- Cheese: This has recently become a family favorite. I recommend slicing a block of your preferred hard cheese (like sharp cheddar, Gruyère, or Monterey Jack) into quarter-inch cubes. The cheese melts beautifully into pockets of savory goodness throughout the bread.
- Nuts: For an elevated and sophisticated touch, incorporate chopped toasted pecans, walnuts, or pistachios. These add a wonderful crunch and rich, earthy notes that impress any guest.
- Seeds: Similar to nuts but offering a broader range of textures and flavors. You could use pumpkin seeds for a subtle sweetness, sesame seeds for a classic aroma, sunflower seeds for a wholesome crunch, or even poppy seeds for a delicate visual and textural element.
- Spices: A dash of spice can transform your sourdough. Cinnamon powder offers a warm, inviting aroma, while chili powder can provide a fantastic, subtle kick, especially when paired with cheese. Keep in mind that some spices, like cinnamon, can have anti-fungal properties and may slightly slow down the rising process, so adjust fermentation times if needed.
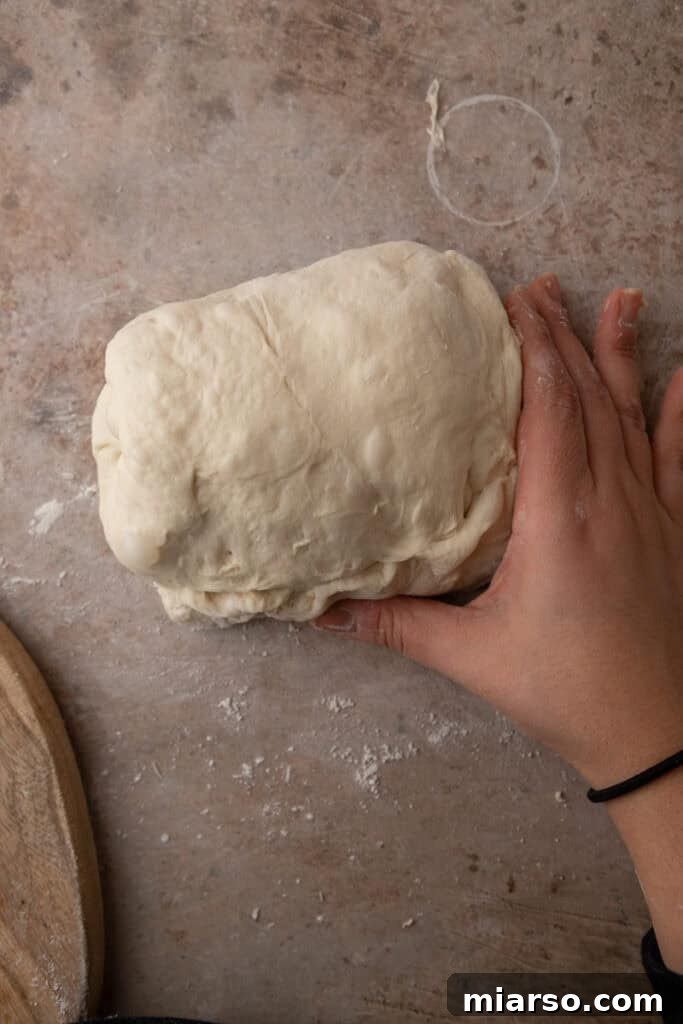
My Sourdough Bread Bottom is Too Dark, How Can I Fix It?
It’s a common occurrence for the bottom crust of sourdough baked in a cast iron Dutch oven to brown a little more aggressively than desired, sometimes even becoming overly dark. This is because cast iron retains and transfers heat exceptionally well, making the bottom of the Dutch oven extremely hot.
One highly effective way to prevent this from happening and ensure a perfectly golden brown bottom crust is to place a large baking sheet or a pizza stone on the oven rack positioned directly beneath your Dutch oven. This additional layer acts as a heat diffuser, shielding the bottom of the Dutch oven from direct, intense heat and promoting more even browning.
Common Sourdough Bread Fails and How to Fix Them
Sourdough baking is an art that comes with its share of challenges. Don’t be discouraged by setbacks; they are learning opportunities! Here’s a guide to common issues and practical solutions:
1. Flat or Dense Loaf:
- Why It Happens: This is often a sign of either under-fermentation (your starter wasn’t active enough, or the dough didn’t proof long enough) or, conversely, over-fermentation, where the gluten structure breaks down and loses its ability to hold gas. Insufficient tension during shaping can also lead to a flat loaf.
- How to Fix It:
- Always ensure your sourdough starter is robustly bubbly and passes the float test before incorporating it into your dough.
- Allow the dough ample time for bulk fermentation until it visibly doubles in size and passes the poke test (gently poke the dough; if it springs back slowly, it’s ready).
- Practice creating strong surface tension during the shaping phase to give the loaf structure and encourage upward rise.
2. Tough Crust:
- Why It Happens: A crust that’s too tough or thick usually results from over-baking or baking at too high a temperature without sufficient steam. Steam is crucial for keeping the crust pliable during the initial bake, allowing it to expand before crisping up.
- How to Fix It:
- Always use a Dutch oven with the lid on for the initial phase of baking. This traps steam and creates a perfect humid environment for crust development.
- If your crust is still too tough, consider slightly lowering your oven temperature for the uncovered baking phase or reducing the overall baking time.
3. Sticky Dough That’s Hard to Work With:
- Why It Happens: High hydration doughs, which this recipe leans towards slightly, tend to be stickier, especially for beginners. Insufficient kneading (or stretch and folds) or an improper flour-to-water ratio can also contribute to excessive stickiness.
- How to Fix It:
- Practice proper stretch and fold techniques diligently to develop the gluten network, which will make the dough less sticky and more manageable over time.
- Use a plastic bench scraper to help you regain control and manipulate the dough when it’s particularly sticky, minimizing direct contact with your hands.
- Lightly flour your hands and work surface, but be cautious not to overdo it, as adding too much flour can alter the dough’s hydration.
4. Uneven Crumb (Large, irregular holes or dense spots):
- Why It Happens: This issue often stems from insufficient stretch and folds or coil folds during bulk fermentation, leading to a weak gluten structure that can’t evenly hold gas. Over-handling during shaping can also degas the dough unevenly.
- How to Fix It:
- Be consistent and thorough with your stretch and folds to ensure even gluten development and dough strength.
- Handle the dough gently during shaping to avoid unnecessarily degassing it, preserving the air pockets you’ve worked so hard to create.
5. Too Sour or Bland Flavor:
- Why It Happens: The tanginess of sourdough is directly related to fermentation time and temperature. Longer fermentation times, especially during cold proofing, generally create a tangier loaf. Shorter fermentation times, particularly at warmer temperatures, result in a milder flavor.
- How to Fix It:
- For a less sour loaf, reduce the cold proofing period to only 8-12 hours, or proof primarily at a slightly warmer room temperature for a shorter duration.
- For a tangier bread, extend the cold proofing period up to 36 hours. The extended chill allows more time for lactic and acetic acids to develop, intensifying the characteristic sourdough flavor.
6. Cracked or Poorly Scored Crust:
- Why It Happens: This can be due to insufficient surface tension created during shaping, which prevents the dough from expanding predictably. Improper scoring, or scoring too shallowly, also restricts the dough’s controlled expansion in the oven.
- How to Fix It:
- Practice creating a taut surface tension during the shaping process. This provides a “skin” that can be effectively scored.
- Use a very sharp bread lame or razor blade to make decisive, deep cuts. The goal is to provide a clear path for the dough to expand.
7. Bread Sticks to the Proofing Basket:
- Why It Happens: The most common cause is insufficient flour in the proofing basket or directly on the dough, allowing moisture to create a sticky bond.
- How to Fix It:
- Generously dust your proofing basket (banneton) with a mix of rice flour and all-purpose flour. Rice flour is particularly effective as it absorbs less moisture than wheat flour alone.
- Gently release the dough from the basket by inverting it onto parchment paper with a confident, quick motion right before baking.
8. Pale Crust:
- Why It Happens: A pale crust typically indicates insufficient baking time or the oven temperature wasn’t high enough to promote good browning and caramelization of the crust.
- How to Fix It:
- Ensure your oven is thoroughly preheated to the specified 475°F (245°C) before placing the dough inside.
- During the final baking stage (after removing the Dutch oven lid), allow the bread to bake longer until it achieves a rich, deep golden-brown color.
9. Bread Doesn’t Rise in the Oven (No Oven Spring):
- Why It Happens: A lack of oven spring can result from over-proofed dough (where the yeast has consumed all its food and run out of gas before baking) or dough that is too warm when it enters the oven, causing it to relax prematurely.
- How to Fix It:
- Proof the dough until it is visibly puffy and airy but still retains its structure. It shouldn’t be overly slack or spread out.
- Bake cold-proofed dough directly from the refrigerator. The sudden temperature change provides the best conditions for a dramatic oven spring.
The Best Small Batch Sourdough Bread Recipe
Small Batch Sourdough Bread Recipe
Print Recipe
Ingredients
- 250 g unbleached bread flour
- 180 g Water, lukewarm
- 5 g Salt
- 60 g Active Sourdough Starter, bubbly and doubled in size
Optional Mix-ins: Cheese, seeds, nuts, or spices
Instructions
Prepare Your Sourdough Starter
-
Feed Starter – Discard all but 20g of your sourdough starter. Feed it a ratio of 1:2:2 (starter:flour:water). For example: 20g starter, 40g flour, 40g water.
-
Let the starter sit at room temperature for 4-8 hours until it doubles in size and is bubbly. Perform the float test to ensure it’s ready.
Make the Dough
-
In a large bowl, combine the water and sourdough starter and mix until combined. Add the flour and salt, stirring until a shaggy dough forms.
-
Cover the bowl with a damp towel and let it rest for 45-60 minutes.
Stretch and Fold, and Coil Folds
-
Perform 3 sets of stretch and folds every 30 minutes over 1.5 hours. The dough will become smoother and less sticky as you work it.
-
Follow with 3 sets of coil folds, every 30 minutes for another 1.5 hours. Cover the dough between sets.
Bulk Rise:
-
After the final set of coil folds, allow the dough to bulk ferment at room temperature. This should take about 3–4 hours, or until the dough has doubled in size. The dough should feel airy, with bubbles slightly visible on the surface as well as on the bottom of your glass bowl.
Shape the Dough:
-
Turn the dough onto a lightly floured surface, fold the edges into the center, and flip to create a loose ball. Rest for 10-15 minutes.
Final Shape:
-
After the pre-shaping rest, gently turn the dough onto a lightly floured surface. Handle it carefully to retain the air bubbles developed during fermentation.
-
Using your hands or a bench scraper, gently pat and stretch the dough into a rough rectangle. Aim for an even thickness without pressing too hard.
-
Take the top edge of the rectangle and fold it down toward the center, pressing lightly to seal the edge. Then, take the bottom edge and fold it upward to overlap the first fold, creating a tri-fold, similar to folding a letter.
-
Rotate the dough so the long side is facing you. Begin rolling the dough from the top edge downward, tucking it tightly as you go to create surface tension. As you roll, use the heel of your hands to gently seal the edge with each tuck, ensuring the dough holds its structure.
-
To form a boule, place the dough seam-side down. Cup your hands around the dough and roll it gently toward you while applying light pressure, moving your hands in a C-shape motion. Rotate the dough slightly and repeat to create a smooth, round shape with tension on the surface.
-
Place the shaped boule seam-side down into a floured proofing basket or a bowl lined with a floured kitchen towel.
-
Pinch and press the edges together tightly to seal the seam, creating additional surface tension on the dough. Cover with the towel overhang or plastic wrap and place in the fridge overnight.
Bake the Bread
-
Place a Dutch oven in the cold oven and preheat to 475°F for a minimum of 30 minutes but preferably for an hour.
-
Remove the dough from the fridge and place it on parchment paper. Dust it with rice flour then, use a sharp knife or bread lame to score the top.
Bake:
-
Place the dough into the preheated Dutch oven. Cover and bake for 25 minutes.
-
Remove the lid, reduce the heat to 425°F, and bake for another 10-15 minutes until golden brown or until the internal temperature reads 205F-210F.
-
Transfer to a wire rack and cool for at least 1 hour before slicing.
Notes
Tips for Success
• Use a digital scale for precise measurements.
• Monitor room temperature: Warmer rooms speed up fermentation; colder rooms slow it down.
• Cold-proofing enhances flavor and texture, so don’t skip the overnight chilling!
• Use a mix of all-purpose and rice flour to prevent sticking in the proofing basket.
Optional Add-ins
• Cheese: Add during shaping for melty pockets of flavor.
• Nuts/Seeds: Incorporate toasted pecans, walnuts, or sesame seeds.
• Spices: Try cinnamon or chili powder for a twist. Keep in mind that cinnamon is an anti-fungal which will slow down the rise of your bread.
Storage
• Short-Term: Store in a paper bag at room temperature for up to 3 days.
• Long-Term: Slice, wrap, and freeze. Toast before serving for best results.
Nutrition
Calories: 166Calories | Carbohydrates: 35g | Protein: 5g | Fat: 0.4g | Saturated Fat: 0.1g | Polyunsaturated Fat: 0.2g | Monounsaturated Fat: 0.04g | Sodium: 244mg | Potassium: 47mg | Fiber: 1g | Sugar: 0.1g | Calcium: 7mg | Iron: 2mg
Nutrition information is automatically calculated, so should only be used as an approximation.
If you enjoyed this Small Batch Sourdough Bread Recipe, make sure to pin it for later!