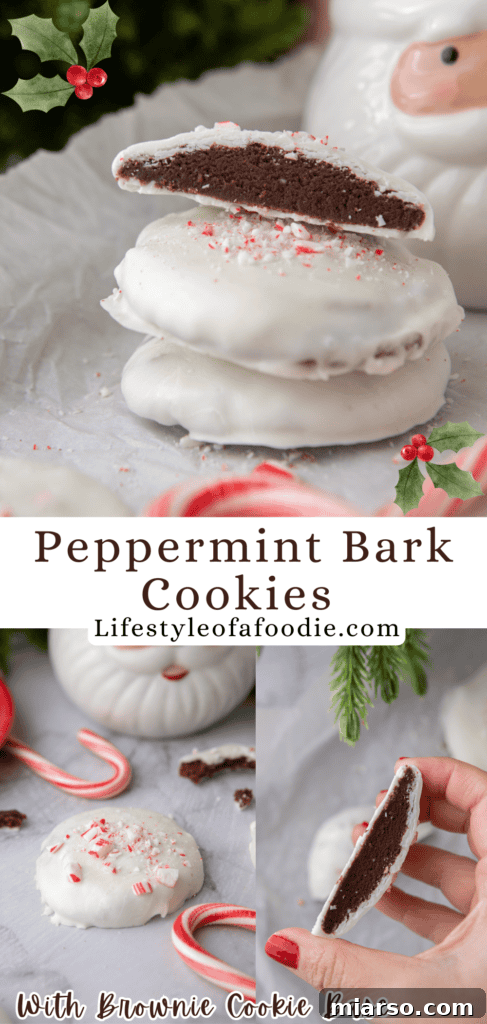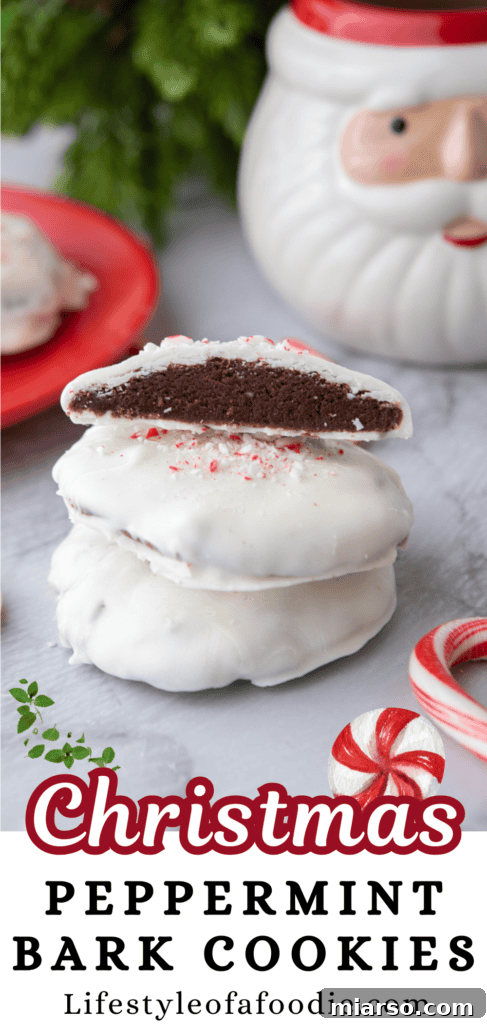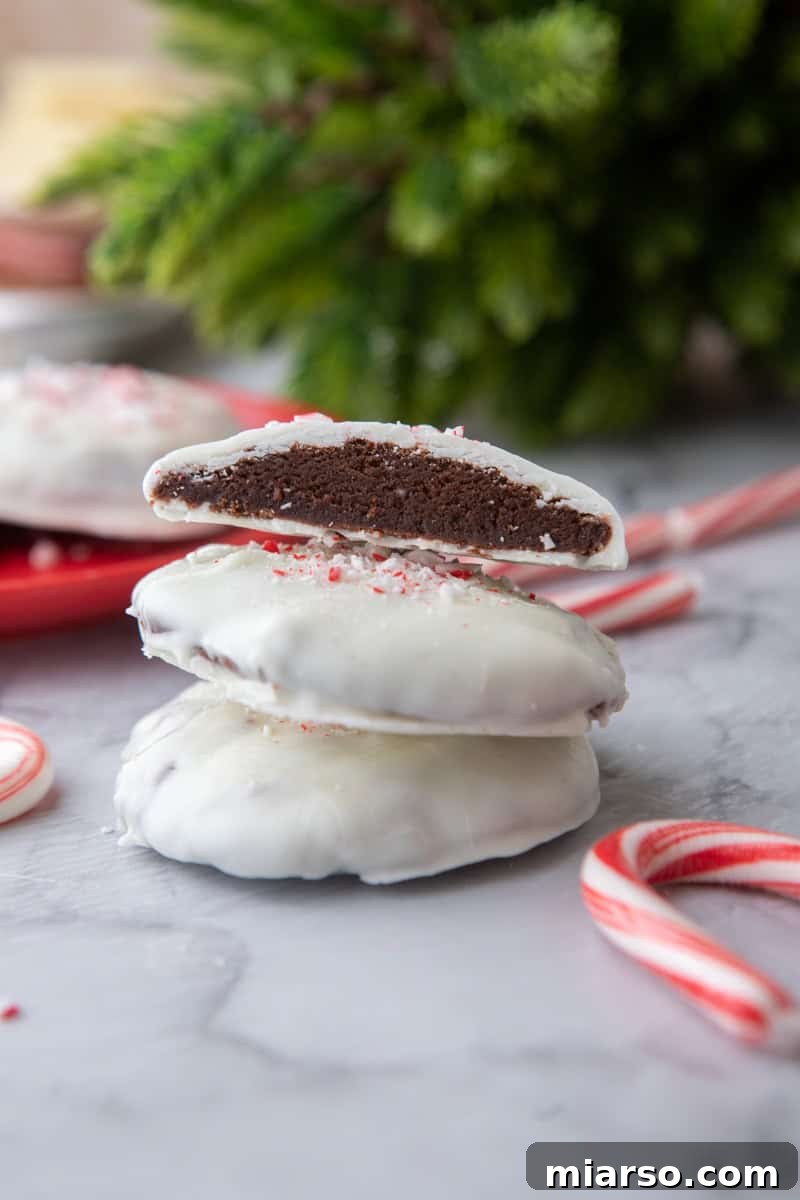
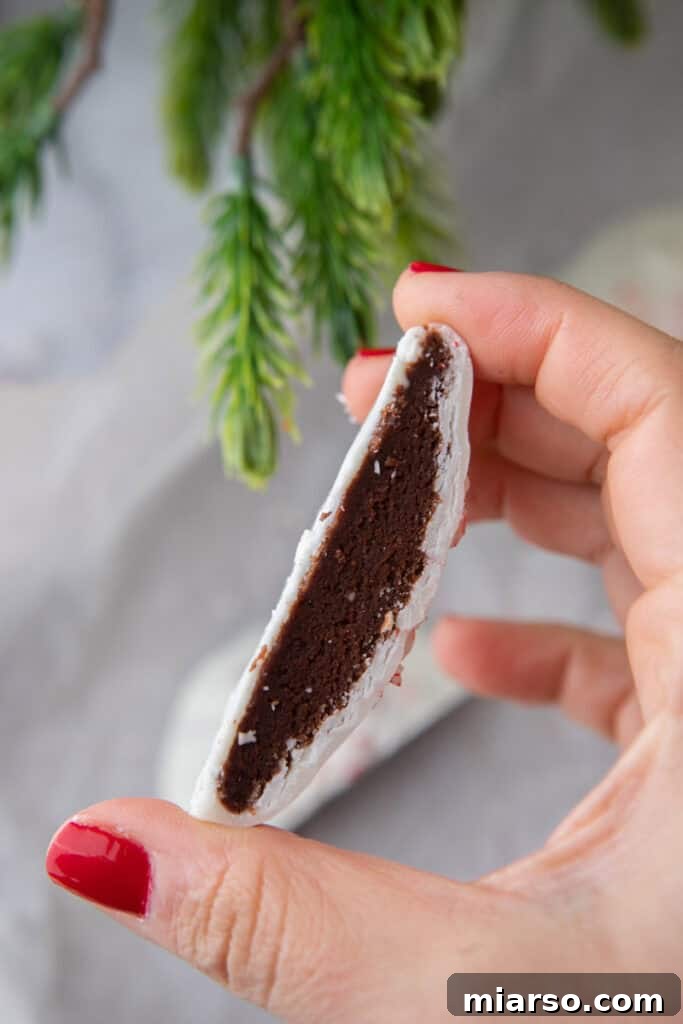
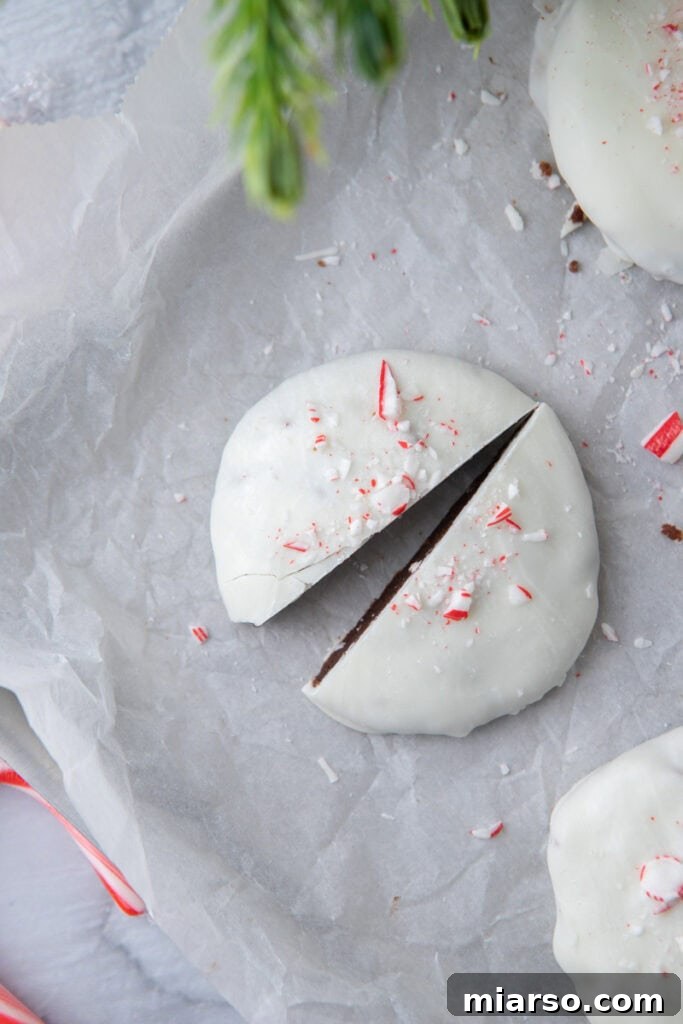
These irresistible Peppermint Bark Cookies are the ultimate holiday indulgence, masterfully blending the rich, fudgy essence of a dark chocolate cookie with the exhilarating crunch and cool refreshment of peppermint candy. Crafted with care, this recipe features a luxurious dark chocolate cookie base, crowned with a smooth, creamy white chocolate topping, and generously sprinkled with vibrant crushed candy canes. It’s a symphony of textures and flavors, making it the quintessential festive treat for anyone with a sweet tooth looking for a touch of seasonal magic.
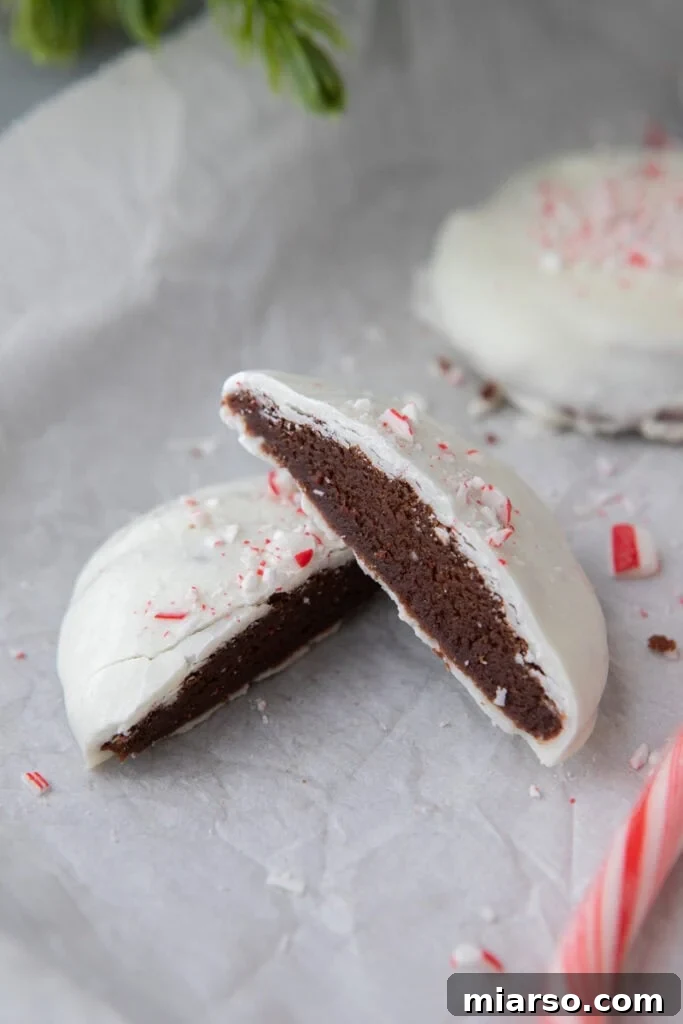
If you’re searching for a cookie that truly encapsulates the spirit of the holiday season, look no further. These Peppermint Bark Cookies are a showstopper, not just visually stunning with their brilliant peppermint topping but also delivering an unforgettable combination of rich chocolate and refreshing mint in every single bite. They elevate the classic chocolate cookie to an entirely new level, infusing it with elegance and a distinct festive charm that makes them perfect for any celebration. Imagine the delight on faces as they bite into these beautiful, flavorful treats.
These homemade Peppermint Bark Cookies are ideal for a myriad of holiday occasions. Bake a batch for your festive parties, bring them as a thoughtful host gift to cozy family gatherings, or simply enjoy them as a delightful weekend baking project with loved ones. They are perfect for sharing with friends and family, and undeniably exquisite when savored alongside a warm mug of hot cocoa by a crackling fire. With their captivating appearance and irresistible flavor, these chocolate peppermint cookies are destined to make your holiday season exceptionally sweeter and more memorable.
Since you appreciate delightful cookie recipes, we highly recommend exploring some other festive favorites. You might enjoy this Marbled Christmas Sugar Cookie Recipe for its artistic flair, these Chewy Ginger Molasses Cookies for a taste of comforting spice, or these delightful Snowball Cookies for a delicate, melt-in-your-mouth experience. Each recipe offers a unique way to celebrate the joy of baking during the holidays.
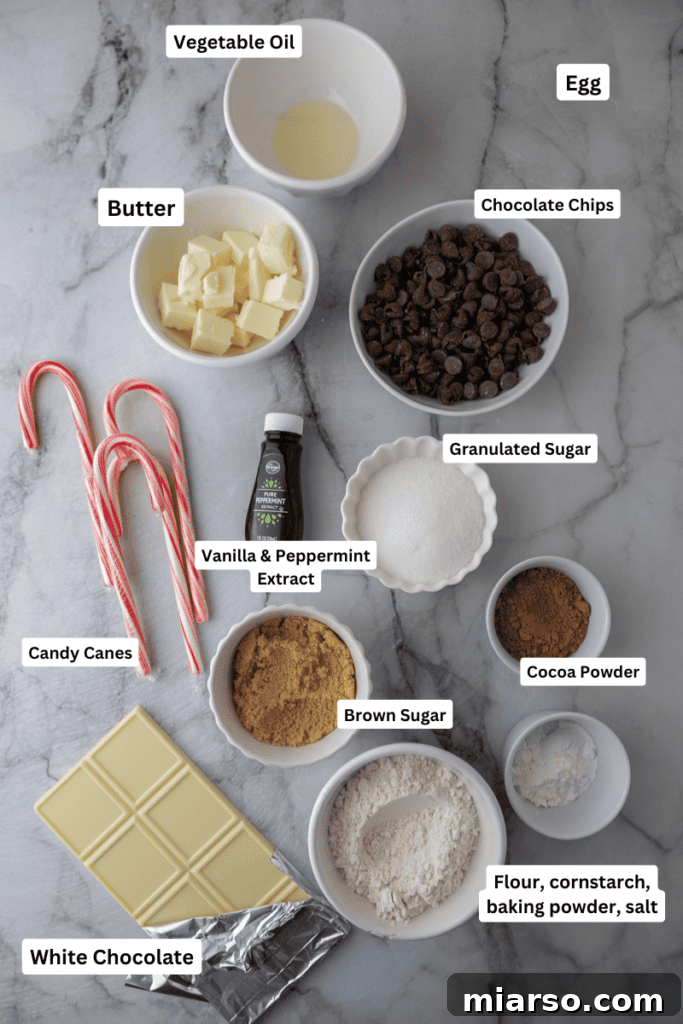
Essential Ingredients for Decadent Chocolate Peppermint Bark Cookies
Crafting the perfect batch of these Christmas Peppermint Bark Cookies begins with selecting the right ingredients. Each component plays a vital role in achieving that signature fudgy texture and vibrant flavor combination. Below is a comprehensive list of what you’ll need to create these holiday masterpieces. For precise measurements and detailed steps, be sure to refer to the complete recipe card found at the very bottom of this page.
For the Fudgy Chocolate Cookies
- All-purpose Flour: This is the fundamental building block of our cookie, providing the necessary structure and body. It ensures the cookies hold their shape while maintaining a soft and chewy interior.
- Cocoa Powder: Essential for imparting that deep, rich, and intense chocolate flavor that forms the heart of our cookie base. Choose a high-quality unsweetened cocoa powder for the best results.
- Cornstarch: A secret weapon for tenderness! Cornstarch contributes to an incredibly soft, melt-in-your-mouth texture, ensuring your cookies are never dry or crumbly.
- Baking Powder: Provides a gentle lift and creates a slightly airy, yet still dense, crumb. It helps the cookies spread just enough without becoming flat.
- Salt: A crucial flavor enhancer. Salt balances the sweetness of the sugars and intensifies the chocolate notes, bringing out a richer, more complex taste.
- Unsalted Butter: Adds luxurious moisture and richness, resulting in a truly decadent and soft cookie. Using unsalted butter allows you to control the exact amount of salt in the recipe.
- Dark Chocolate Chips: These chips are melted into the dough, infusing every fiber with intense chocolate flavor and ensuring a wonderfully gooey, almost brownie-like texture in the finished cookies. You can also use good quality dark chocolate chunks.
- Large Egg: Acts as a primary binding agent, holding all the ingredients together. It also contributes significantly to the cookie’s overall structure, chewiness, and fudgy consistency. Ensure your egg is at room temperature for optimal emulsification.
- Brown Sugar: Provides moisture and a delightful caramel-like depth of flavor, thanks to its molasses content. It also contributes to the signature chewiness that makes these cookies so addictive.
- Granulated Sugar: Sweetens the peppermint bark cookies and helps create a slightly crisp edge while maintaining a soft center.
- Vanilla Extract: Enhances the entire flavor profile, adding a subtle warmth and aroma that complements the rich chocolate and bright peppermint perfectly. Use pure vanilla extract for the best flavor.
For the Refreshing Peppermint Bark Topping
- White Chocolate Chips or Chopped White Chocolate Bar: Forms the creamy, vibrant base layer of our peppermint bark topping. Opt for high-quality white chocolate for the best melting consistency and flavor.
- Peppermint Extract: The star of the topping, infusing it with a bright, refreshing mint flavor. A little goes a long way; we use a precise 1/4 teaspoon to ensure a potent minty kick without overwhelming the chocolate or causing the white chocolate to seize.
- Neutral Oil: A touch of neutral oil, such as vegetable, canola, or refined coconut oil, is crucial for thinning out the melted white chocolate. This ensures a smoother, more even spread over the cookies and provides a beautiful glossy finish.
- Crushed Peppermint Candies: These festive bits add a delightful crunch and burst of intense peppermint flavor, creating the classic peppermint bark experience. They also provide a beautiful visual contrast against the white chocolate.
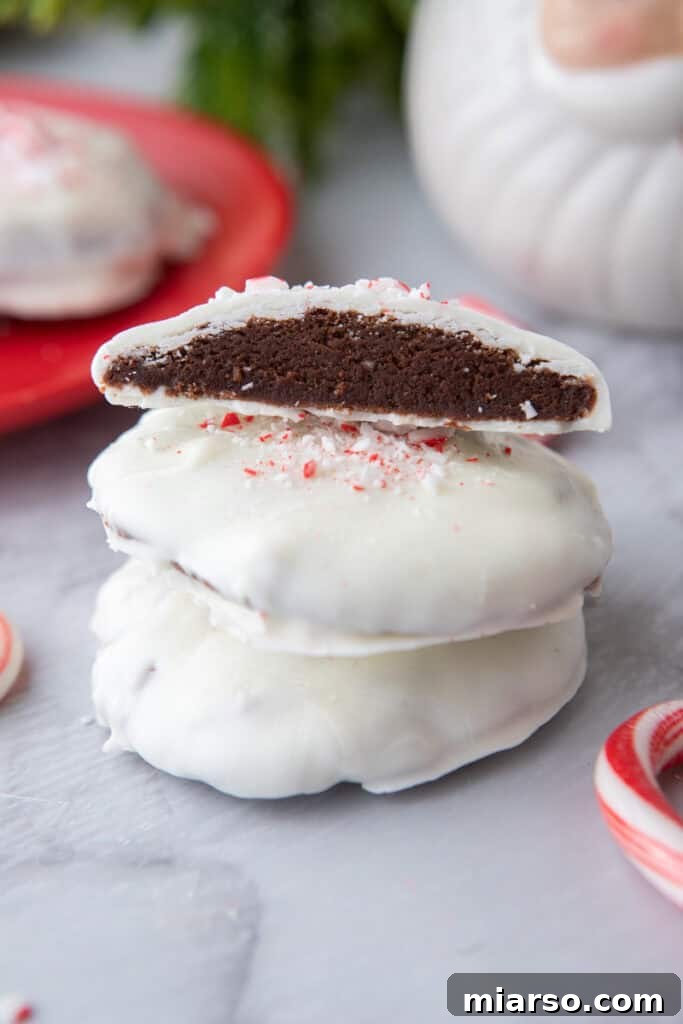
Step-by-Step Guide to Crafting Homemade Peppermint Bark Cookies
Creating these delightful chocolate peppermint cookies is a straightforward and rewarding baking experience. Follow these detailed instructions to achieve perfect, fudgy cookies crowned with a vibrant peppermint bark topping. For precise oven temperatures, exact baking times, and a full checklist of ingredients, make sure to refer to the comprehensive recipe card located at the very end of this post.
- Prepare Your Workspace and Dry Ingredients: Begin by preheating your oven to the specified temperature (check the recipe card for details). Line a large cookie sheet or two smaller ones with parchment paper or a silicone baking mat to prevent sticking and ensure even baking. In a medium-sized mixing bowl, meticulously whisk together the all-purpose flour, cocoa powder, cornstarch, baking powder, and salt. Sifting the cocoa powder first can prevent clumps and ensure a smoother cookie dough. Set this perfectly combined dry mixture aside.
- Melt Chocolate and Butter: In a separate microwave-safe bowl, combine the unsalted butter and dark chocolate chips. Heat this mixture in short 30-second bursts in the microwave, stirring thoroughly after each interval. Continue this process until the mixture is completely smooth and glossy, being careful not to overheat the chocolate. Once melted, stir in an additional tablespoon of cocoa powder until it’s fully incorporated. This extra cocoa will enhance the fudgy flavor. Allow this rich chocolate mixture to cool slightly to avoid cooking the eggs in the next step.
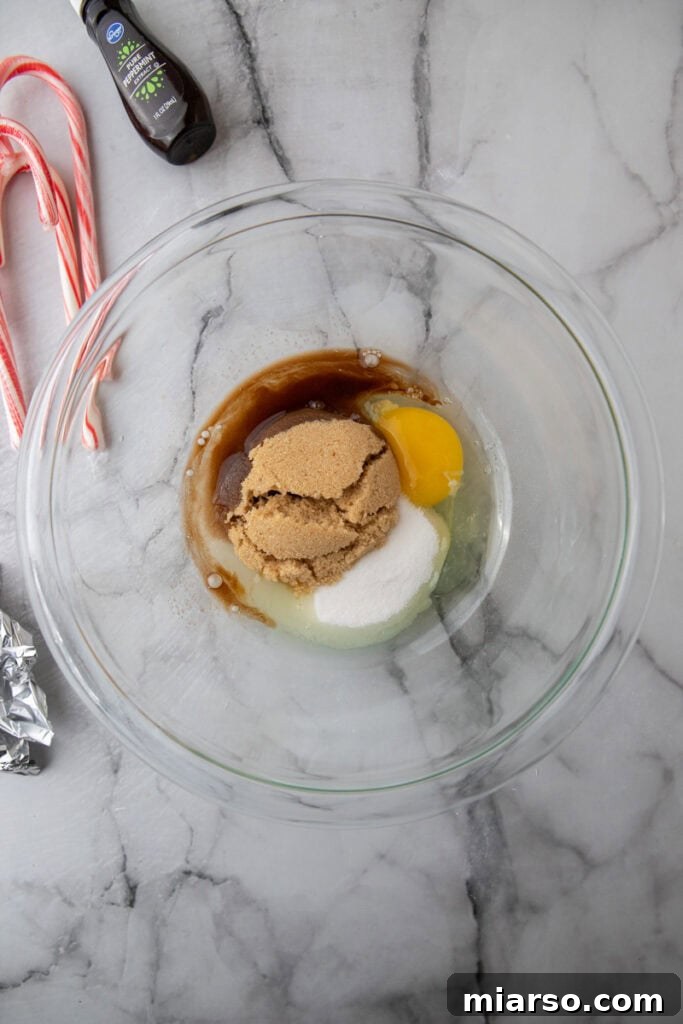
- Whip Eggs and Sugars: In the bowl of an electric mixer fitted with the whisk attachment (or using a hand mixer), combine the room-temperature large egg, brown sugar, and granulated sugar. Beat this mixture at medium-high speed for an impressive 5 minutes. The goal is to achieve a light, fluffy, and significantly doubled-in-volume consistency. This aeration is key to the cookies’ texture. Once whipped, mix in the vanilla extract until just combined, ensuring its fragrant notes are evenly distributed.
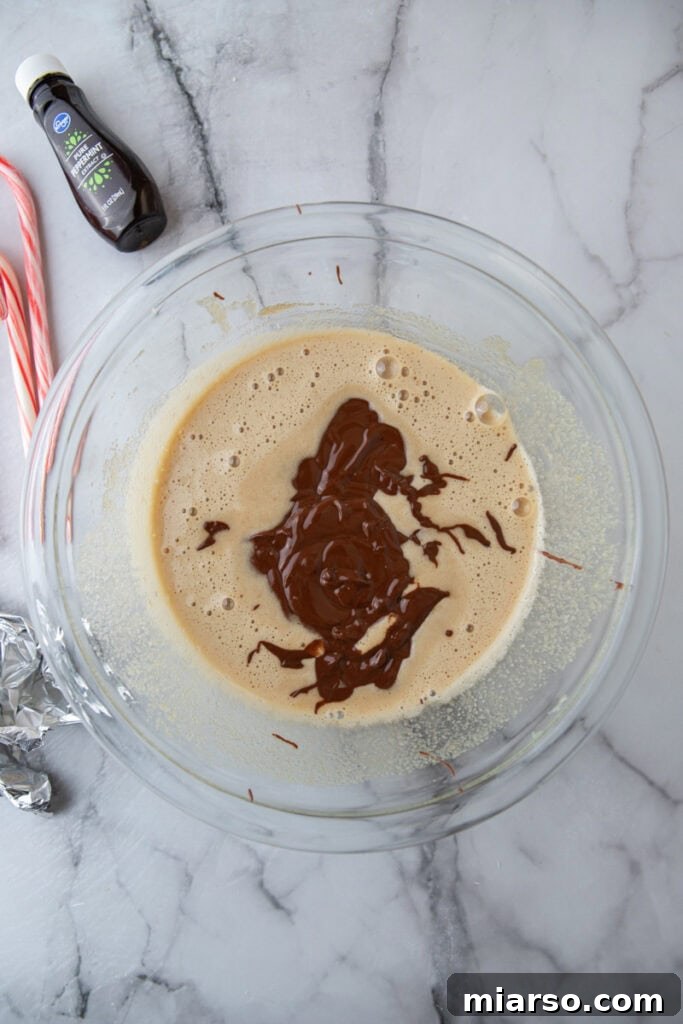
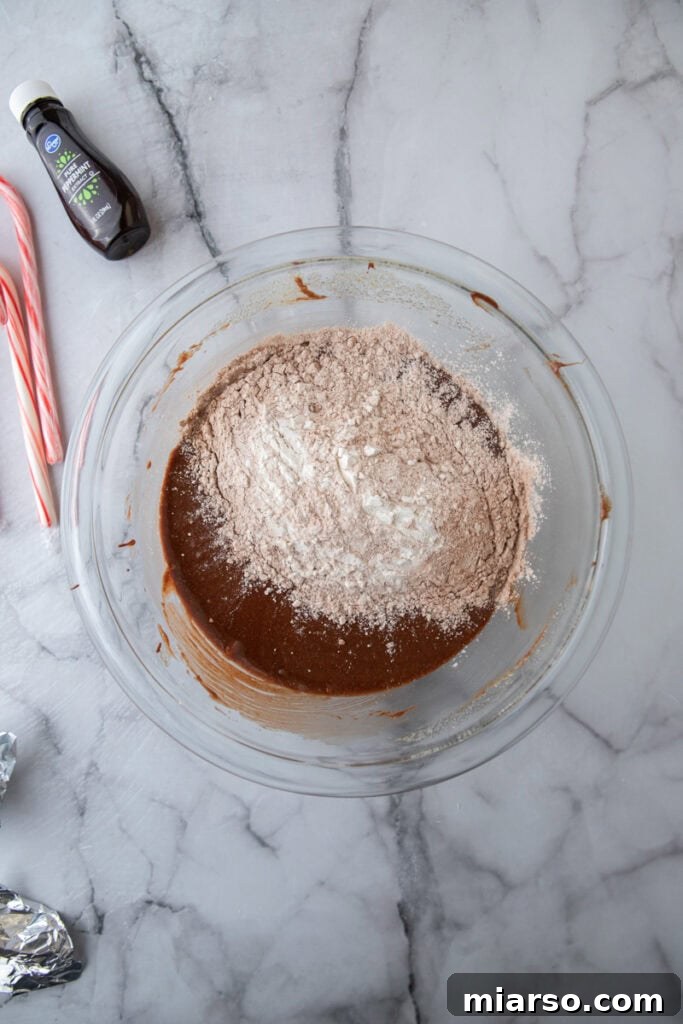
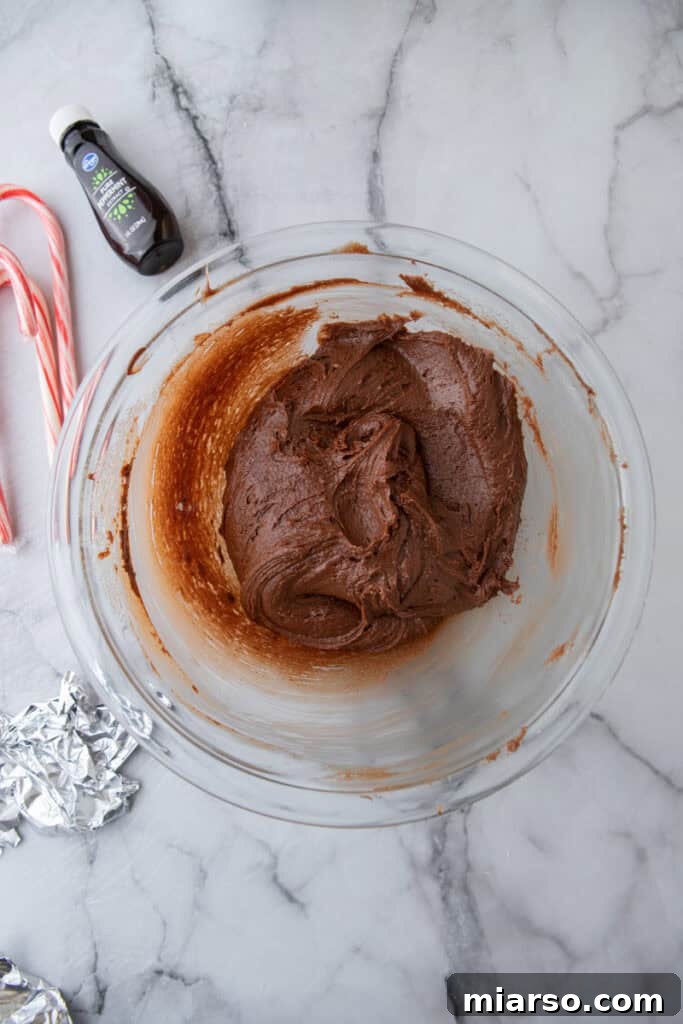
- Combine Wet and Dry Ingredients: With utmost care, gently fold the slightly cooled melted chocolate mixture into the airy whipped egg mixture. Use a spatula to combine them, preserving the volume you’ve created. Next, gradually incorporate the reserved dry ingredients into the wet mixture. Fold until just combined, taking care not to overmix, as this can lead to tough cookies. Make sure to scrape down the sides of the bowl to ensure all ingredients are well incorporated without excessive stirring.
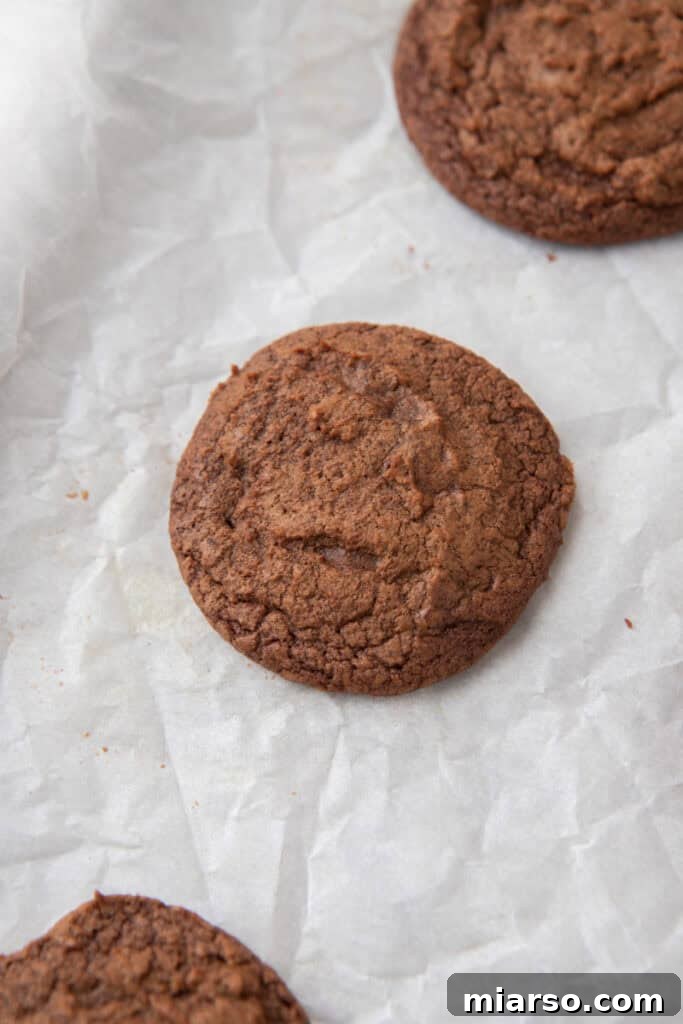
- Scoop and Bake the Cookies: Using a cookie scoop (approximately 2 tablespoons in size), portion the dough into even balls. Place these dough balls onto your prepared baking sheets, ensuring they are spaced about 2 inches apart to allow for proper spreading. Bake the cookies in your preheated oven for the time specified in the recipe card (typically around 9 minutes). The cookies will look slightly soft in the center when done, and will firm up as they cool.
- Cool the Cookies: Once baked, remove the cookies from the oven and allow them to cool on the baking sheet for a crucial 5 minutes. This resting period helps them set and prevents them from breaking. After 5 minutes, carefully transfer the warm cookies to a wire rack to cool completely. It’s essential that the cookies are fully cooled before proceeding to the topping step, otherwise, the white chocolate will melt.
- Prepare the Peppermint Bark Topping – Melt White Chocolate: In another microwave-safe bowl, melt the white chocolate chips. Heat them in short 20-second increments, stirring thoroughly between each burst, until the white chocolate is entirely smooth and beautifully melted. This gradual approach prevents scorching and ensures a silky consistency.
- Infuse with Peppermint and Thin with Oil: Once the white chocolate is perfectly melted, stir in the peppermint extract. Remember, only a small amount is needed for a potent flavor. Then, add the neutral oil. This oil serves to thin out the white chocolate slightly, making it much easier to spread evenly over the cooled cookies and giving it a lovely sheen.
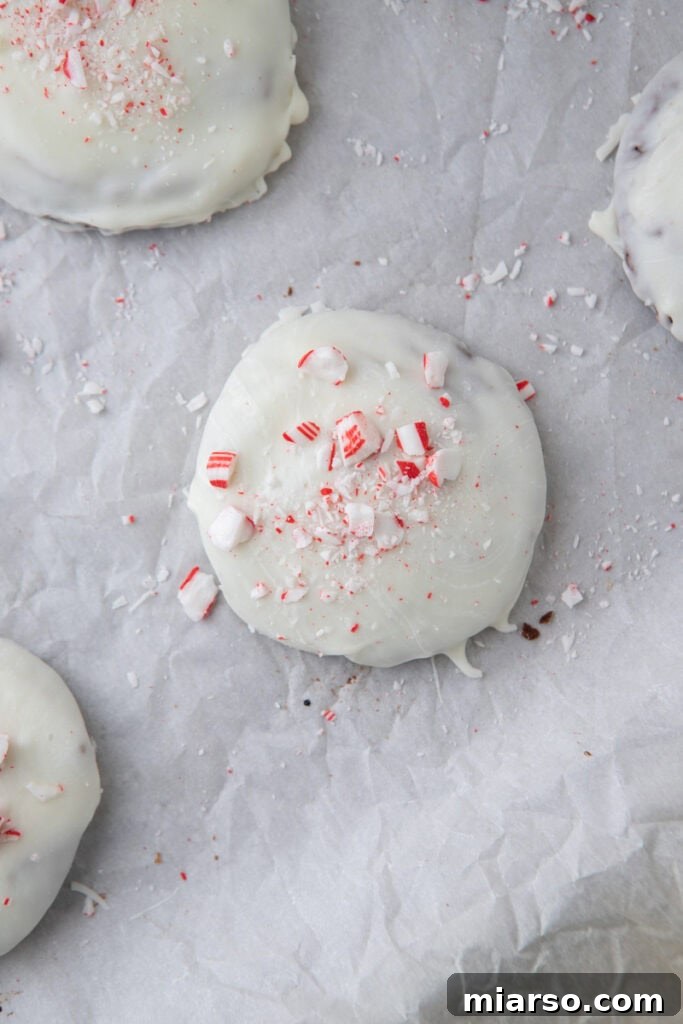
- Apply Topping and Candy Canes: When the chocolate cookies are completely cooled to room temperature, spoon a generous amount of the melted white chocolate peppermint topping over the top of each cookie. Using the back of the spoon or a small offset spatula, spread the topping evenly to the edges. Immediately, before the white chocolate has a chance to set, generously sprinkle the crushed candy cane pieces over the wet topping. The vibrant red and white bits will adhere perfectly.
- Set the Bark: Allow the finished Peppermint Bark Cookies to sit at room temperature until the white chocolate topping is fully hardened. For a quicker set, especially if you’re in a hurry or in a warm environment, you can carefully transfer them to the refrigerator until the white chocolate is firm to the touch. Once set, these festive treats are ready to be enjoyed!

Peppermint Bark Cookies: Expert Tips and Tricks for Perfection
Achieving bakery-quality Peppermint Bark Cookies at home is simpler than you might think with a few key strategies. These tips and tricks will help you navigate common baking challenges and ensure your cookies are perfectly fudgy, beautifully topped, and utterly delicious every time. Pay close attention to these details for a truly successful holiday baking experience.
- Avoid Overmixing the Dough: This is a golden rule for many cookie recipes, and especially crucial for these fudgy chocolate cookies. Once you add the dry ingredients to the wet mixture, mix only until they are just combined and no streaks of flour remain. Overmixing develops the gluten in the flour, leading to dense, tough, and chewy cookies rather than the desired soft and fudgy texture. Use a gentle hand or a low speed on your mixer.
- Sift Dry Ingredients for Best Texture: Cocoa powder, like many finely milled flours, can often be clumpy straight out of the container. To guarantee your cookies have the smoothest, most uniform texture without any pockets of unmixed powder, take an extra moment to sift the cocoa powder along with the flour, cornstarch, baking powder, and salt before incorporating them into the wet ingredients. This simple step makes a noticeable difference.
- Melt Chocolate with Care and Precision: Whether you’re melting dark chocolate for the cookie base or white chocolate for the topping, patience is key. Use short microwave intervals (30 seconds for dark, 20 seconds for white) and stir thoroughly after each burst. This gentle approach prevents the chocolate from overheating, burning, or seizing (becoming thick and grainy), ensuring a smooth, glossy, and workable consistency every time.
- Work Quickly When Spreading White Chocolate: Once the white chocolate topping is melted and mixed with the peppermint extract and neutral oil, it will begin to set relatively quickly, especially if your kitchen is cool. Be prepared to work swiftly to spoon and spread the white chocolate evenly over the cooled cookies. Have your crushed candy canes ready to sprinkle immediately after topping each cookie to ensure they adhere before the chocolate firms up.
- Ensure Cookies are Completely Cooled: This cannot be stressed enough! Before applying the white chocolate topping, your chocolate cookies must be *completely* cool to the touch. Even slightly warm cookies will cause the white chocolate to melt, creating a messy, inconsistent topping. Allow ample time for cooling on a wire rack, or even pop them in the refrigerator for a few minutes if you’re short on time.
- Room Temperature Egg and Butter: For the cookie dough, ensure your egg and unsalted butter are at room temperature. This allows them to emulsify properly with the sugars and melted chocolate, creating a smoother, more uniform dough and contributing to the optimal fudgy texture.
Why You Absolutely Must Make This Peppermint Bark Cookies Recipe
Beyond their stunning appearance and delightful taste, these Peppermint Bark Cookies offer compelling reasons to become your next favorite holiday baking project. This recipe is more than just a sweet treat; it’s an experience that brings joy and festive cheer to any setting. Here’s why these cookies deserve a prime spot in your holiday repertoire this year:
- Simplicity with Stunning Results: This fun and festive recipe requires only a handful of common, simple ingredients that are readily available at any local grocery store. You don’t need obscure specialty items to create these showstoppers. Despite their sophisticated look and complex flavor, the process is surprisingly straightforward, making them accessible even for novice bakers.
- The Perfect Holiday Cookie Tray Addition: Their vibrant colors and distinct holiday flavor profile make them an exceptional addition to any holiday cookie tray or dessert platter. They stand out beautifully amongst other festive treats, adding a pop of color and a burst of refreshing taste that everyone will appreciate. They are sure to be the first to disappear!
- A Mint-Chocolate Convert’s Dream: For those who might be skeptical about the combination of mint and chocolate flavors, these cookies are a revelation. The rich, deep chocolate base perfectly complements the bright, cool burst of peppermint without being overwhelming. Many who previously disliked mint-chocolate pairings have found themselves completely won over by the balanced and harmonious flavors of these cookies.
- Irresistibly Delicious from the Oven: The hardest part of making these cookies isn’t the baking process itself, but rather resisting the urge to devour them all as soon as they emerge from the oven! Their fudgy texture and aromatic scent are incredibly tempting, promising a delightful reward for your baking efforts.
- Ideal for Gifting and Sharing: Packaged in pretty boxes or bags, these Peppermint Bark Cookies make thoughtful and impressive homemade gifts for friends, neighbors, teachers, and colleagues. They show you’ve put care and effort into creating something truly special for the holiday season.
- A Crowd-Pleaser for All Ages: Both children and adults are captivated by the festive look and delicious taste of these cookies. They are a guaranteed hit at any gathering, sparking joy and conversations around the dessert table.
Frequently Asked Questions – Peppermint Bark Cookies
Here are answers to some of the most common questions about making, storing, and enjoying your Peppermint Bark Cookies. These tips will help you maximize freshness, troubleshoot issues, and customize the recipe to your liking, ensuring a perfect baking experience every time.
How do I store my leftover peppermint bark cookies?
To keep your delicious Peppermint Bark Cookies fresh, place any leftovers in an airtight container. You can store them at room temperature for up to 3-4 days, especially if your home is cool. For extended freshness, or if your home is warmer, storing them in the refrigerator will keep them delightful for about a week. These cookies also freeze beautifully! Once the white chocolate topping has fully set and hardened, layer the cookies in an airtight freezer-safe container or a heavy-duty freezer bag, separating layers with parchment paper to prevent sticking. They will stay fresh in the freezer for up to 3 months, ready for a quick thaw and enjoyable treat whenever a craving strikes.
Can I make these cookies ahead of time for holiday gifting?
Absolutely! These Peppermint Bark Cookies are excellent for making ahead, which is a huge advantage during the busy holiday season. I highly recommend preparing them up to 3 days in advance. Store them in an airtight container in the refrigerator to maintain their optimal freshness and prevent the chocolate from blooming. For ultimate convenience, you can even make a large batch of the cookie dough ahead of time and freeze it. Simply scoop the dough into balls, freeze them on a baking sheet, then transfer the frozen dough balls to a freezer bag. When you’re ready to bake, there’s no need to thaw – just bake from frozen, adding a couple of extra minutes to the baking time. This method is perfect for filling up your Christmas cookie boxes with freshly baked treats!
How do I keep the white chocolate from hardening too quickly when making the bark topping?
Keeping the white chocolate topping smooth and workable is crucial for an even spread. The key is to add a small amount of neutral oil, such as vegetable shortening or refined coconut oil, to the melted white chocolate. This acts as a thinning agent and helps to stabilize the chocolate, preventing it from hardening prematurely. Start with 1 teaspoon, as indicated in the recipe, and if it still seems too thick, you can add another half teaspoon. Stir it in thoroughly, and you’ll find it much easier to achieve that perfect, smooth coating over your cookies, giving you ample time to sprinkle the candy canes.
Can I use pre-made cookie dough for the base to save time?
While using store-bought chocolate cookie dough logs can certainly save time, especially during a busy holiday season, the homemade cookie base in this recipe is specifically designed to deliver a richer, more intensely fudgy flavor and a wonderfully soft texture that perfectly complements the peppermint bark topping. This scratch-made base truly elevates the overall experience. However, if time is of the essence, you absolutely can use pre-made chocolate cookie dough. Just be aware that the final taste and texture might vary slightly from the intended recipe. For the best result with store-bought dough, choose a high-quality chocolate variety that’s ready to be baked into individual cookies.
What’s the best way to crush candy canes without making a mess?
Crushing candy canes can indeed be a sticky and somewhat messy affair if not done correctly. The easiest and most efficient method is to use a food processor. Simply break the candy canes into smaller pieces and pulse until you reach your desired consistency – from fine crumbs to slightly larger, crunchy bits. If you don’t have a food processor, a reliable alternative is to place the candy canes in a sturdy, freezer-safe ziplock bag. Lay the bag flat on a kitchen counter, ideally on a cutting board to protect your surface. Gently but firmly tap the candy canes with a rolling pin, a meat mallet, or even the bottom of a heavy pan. This method helps contain the candy pieces within the bag, preventing them from scattering across your kitchen and making cleanup much simpler.

The Best Peppermint Bark Cookies Recipe

Peppermint Bark Cookies Recipe
Take your love for fudgy chocolate and holiday treats to the next level with these festive Peppermint Bark Cookies! This delightful recipe starts with a rich, chewy chocolate cookie base, then gets lavishly topped with a layer of creamy peppermint white chocolate and a festive sprinkle of crunchy crushed candy canes. The result is a decadent, irresistible dessert that perfectly captures the magic of the holiday season, making it a must-try for cookie swaps, family gatherings, or a cozy treat by the fire.
Print Recipe
Save this recipe!
Get this sent to your inbox, plus receive new recipes from us every week!
Ingredients
For the Fudgy Chocolate Cookies:
- ½ cup all-purpose flour
- 3 tablespoon cocoa powder
- ½ tablespoon cornstarch
- ½ teaspoon baking powder
- ¼ teaspoon salt
- ¼ cup unsalted butter
- ¾ cup dark chocolate chips or chunks
- 1 large egg (at room temperature)
- ¼ cup brown sugar
- ¼ cup granulated sugar
- ½ teaspoon vanilla extract
For the Peppermint Bark Topping:
- 10 oz white chocolate chips or chopped white chocolate bar
- ¼ teaspoon peppermint extract
- 1 teaspoon neutral oil (vegetable or refined coconut oil, to thin out)
- ¼ cup crushed candy canes
Instructions
- Prepare the Cookie Base: Preheat your oven to 350°F (175°C) and line a baking sheet with parchment paper or a silicone baking mat.
- In a small bowl, whisk together the flour, cocoa powder, cornstarch, baking powder, and salt. Set this dry mixture aside.
- In a microwave-safe bowl, melt the butter and dark chocolate chips in 30-second intervals, stirring thoroughly between each, until smooth. Mix in the cocoa powder until fully combined, then set aside to cool slightly.
- Using an electric mixer or stand mixer, whisk the room-temperature egg, brown sugar, and granulated sugar on medium-high speed for about 5 minutes, until the mixture is light, fluffy, and has doubled in volume. Stir in the vanilla extract.
- Gently fold the cooled melted chocolate mixture into the whipped egg mixture, being careful not to deflate the mixture. Then, gradually fold in the dry ingredients until just combined. Do not overmix.
- Scoop the dough into balls, approximately 2 tablespoons each, and place them about 2 inches apart on the prepared baking sheets.
- Bake for 9 minutes. Let the cookies cool on the baking sheet for 5 minutes before transferring them to a wire rack to cool completely.
- Prepare the Peppermint Bark Topping: Once cookies are fully cooled, melt the white chocolate chips in a microwave-safe bowl. Heat in 20-second increments, stirring between each, until completely smooth and melted.
- Stir in the peppermint extract and neutral oil to achieve a smooth, spreadable consistency for the white chocolate.
- Once the cookies are completely cooled, dip the top of each cookie into the melted white chocolate, ensuring an even coat, or spoon the topping over and spread it. Place them back onto the baking sheet.
- Generously sprinkle crushed candy cane pieces on top of the white chocolate immediately, before it has a chance to set.
- Let the peppermint bark cookies sit at room temperature or chill them in the refrigerator until the white chocolate topping is firm.
Notes
Tips for Success:
- Thin Chocolate Topping: If your white chocolate seems too thick to spread easily, add another half teaspoon of neutral oil and stir until smooth.
- Crushed Candy Canes: You can crush candy canes finely for a uniform look or leave some larger pieces for added texture and visual appeal.
- Storage: Store these cookies in an airtight container at room temperature for up to 4 days, or refrigerate for up to 1 week for longer freshness. They can also be frozen for up to 3 months.
These Peppermint Bark Cookies are the ultimate mashup of fudgy chocolate cookies and festive holiday bark! They are perfect for cookie swaps, thoughtful gift-giving, or simply enjoying with a cozy cup of hot cocoa during the holiday season.
Nutrition information is automatically calculated and should only be used as an approximation. Actual nutritional values may vary based on specific ingredient brands and preparation methods.
Loved this Peppermint Bark Cookies Recipe? Make sure to save it for later!
If you’ve enjoyed crafting and tasting these delightful Peppermint Bark Cookies, don’t let this recipe get lost! Pin it to your favorite holiday baking board on Pinterest so you can easily find it for future festive seasons. Share the joy of these fudgy, minty treats with your friends and followers, and inspire others to add a touch of peppermint magic to their holiday baking.