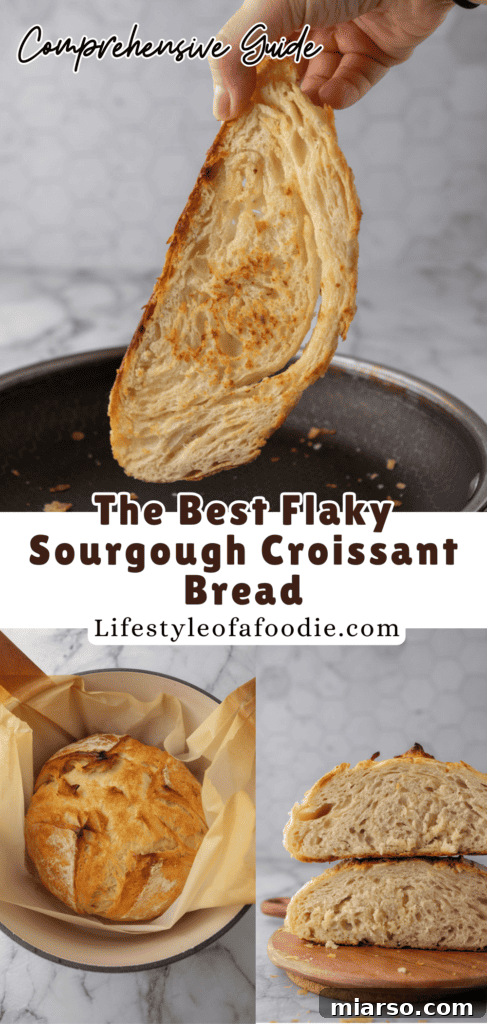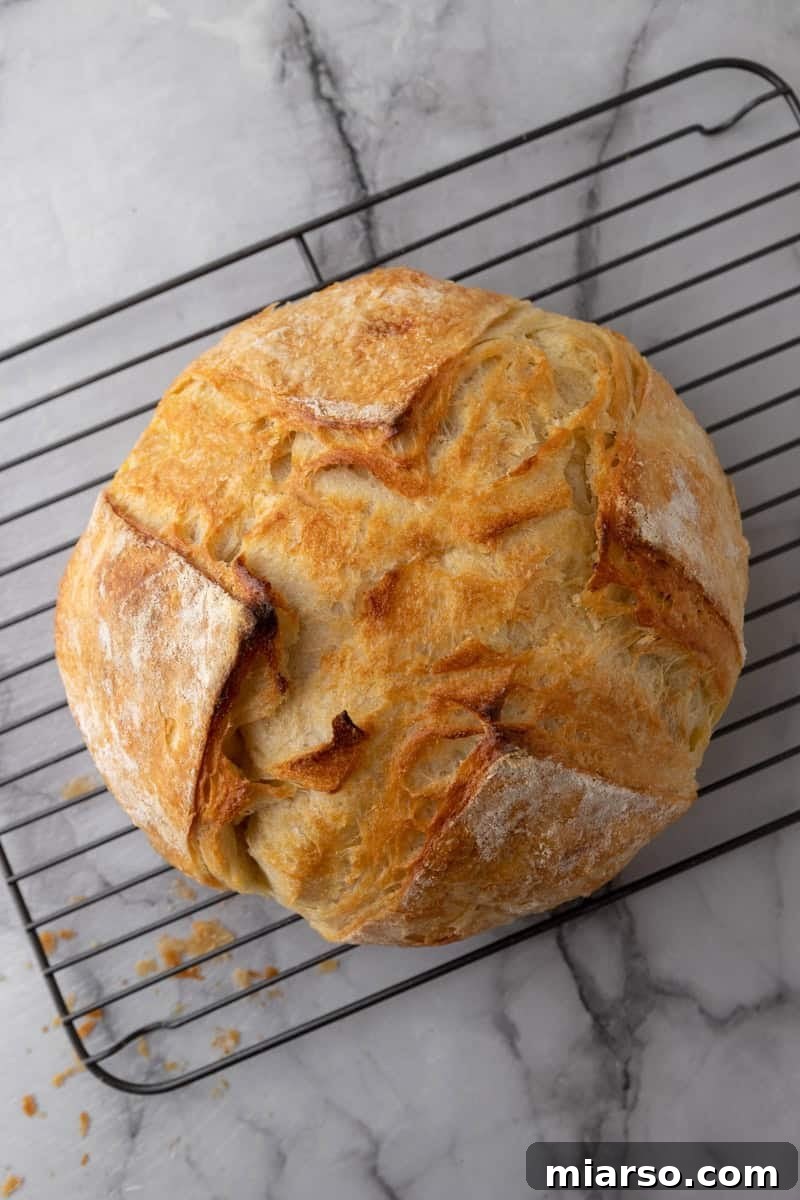
This Sourdough Croissant Bread Recipe is the newest addition to every baker’s repertoire. Made with just a few basic ingredients combined with love and patience, this loaf has layers of butter that will melt in your mouth with every bite.

Imagine starting your day with a warm, flaky slice of bread, or crafting the perfect lunch sandwich that elevates simple ingredients to gourmet status. If you dream of bread with a delicate crisp exterior, a tender, buttery interior, and that unmistakable tangy depth of sourdough, then this Sourdough Croissant Bread is about to become your new obsession. It’s more than just bread; it’s a culinary experience that blends the best characteristics of two beloved baked goods into one irresistible loaf. This unique hybrid offers the intricate, melt-in-your-mouth layers of a classic French croissant with the complex flavor profile and superior digestibility of a slow-fermented sourdough.
You might be thinking that such an exquisite creation sounds intimidating, requiring advanced baking skills and countless hours. Rest assured, this recipe is designed to be approachable. The secrets to success lie in two fundamental principles: patience and maintaining cold ingredients. By committing to these two aspects, you will unlock a bread that not only impresses friends and family but also makes you feel like a true artisan in your own kitchen. Forget the fear of complex techniques; with a bit of dedication, you’ll master the art of creating a loaf that is both beautiful and utterly delicious.
For those who have already fallen in love with sourdough baking, you might also enjoy exploring other delightful recipes like this Simple Sourdough Starter Recipe for Beginners, this Small Batch Sourdough Bread Recipe, or these Sourdough Bagels Recipe.
The Unforgettable Flavor and Texture of Sourdough Croissant Bread
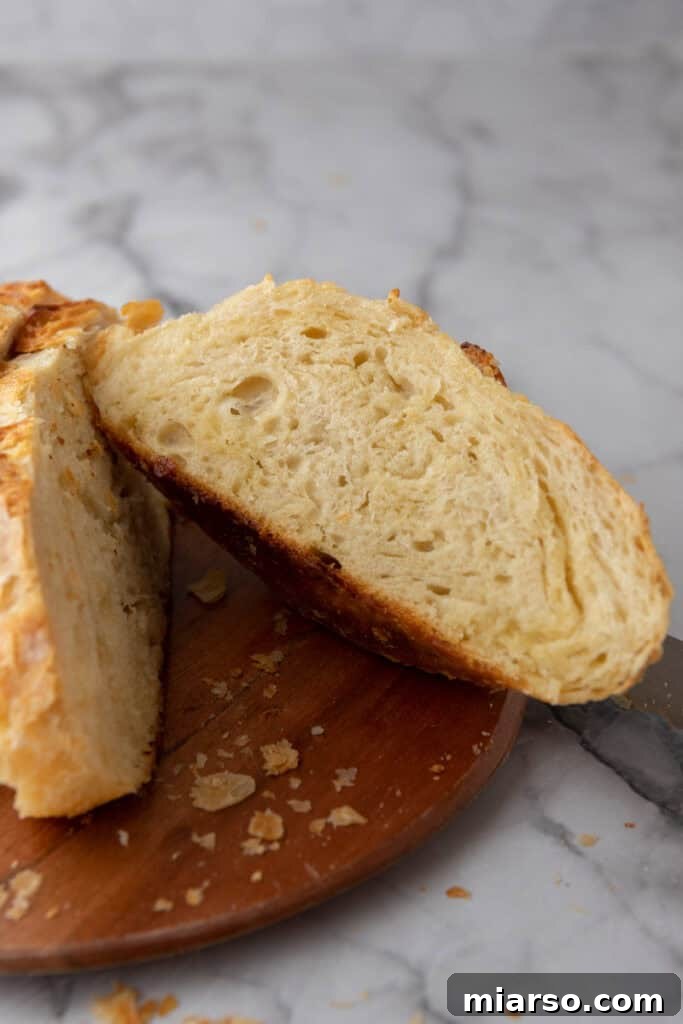
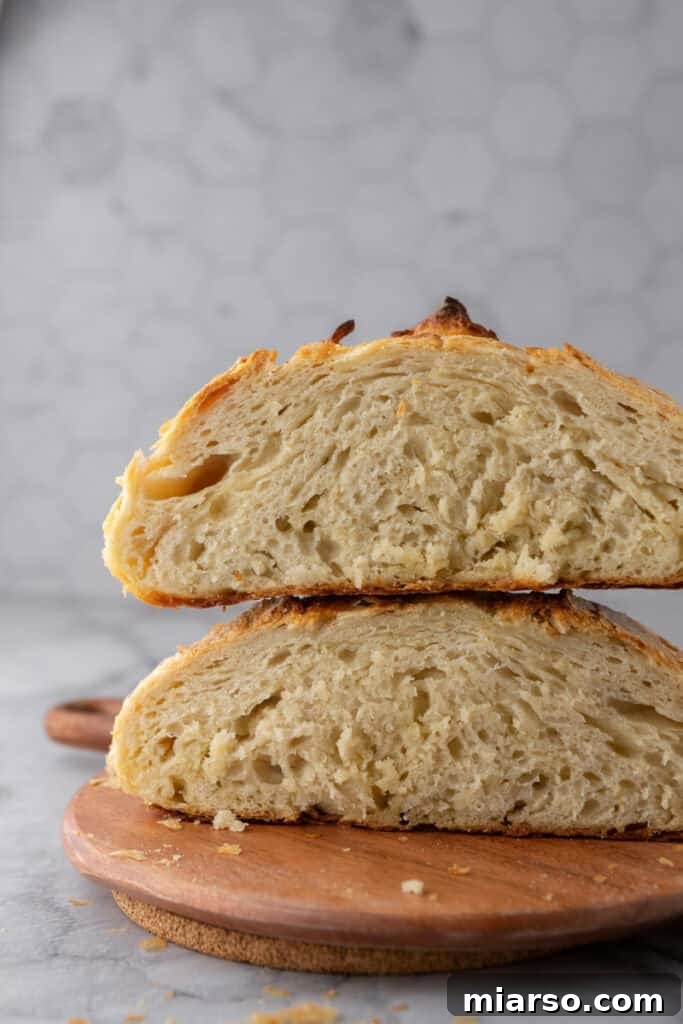
Prepare your senses for an unparalleled treat. This bread truly delivers on its promise of tasting like a croissant in loaf form. The moment you slice into it, you’ll hear the satisfying crunch of its incredibly flaky crust, a testament to the meticulous lamination process. Yet, beneath that delicate exterior lies a soft, airy crumb, rich with the luxurious taste of butter. The lamination technique, akin to that used for traditional croissants, infuses every layer with deep buttery notes, creating a flavor profile reminiscent of your favorite bakery croissant, but with an elevated, homemade touch.
What truly sets this bread apart is the harmonious marriage between the rich butteriness of a croissant and the distinctive sour tang of a long-fermented sourdough. The subtle acidity from the sourdough starter cuts through the richness of the butter, creating a perfectly balanced flavor that is complex and utterly addictive. This isn’t just a fusion; it’s a masterful blend of textures and tastes, offering a truly unique culinary experience you can proudly create right in your own kitchen.
Essential Ingredients for Your Croissant Sourdough Bread
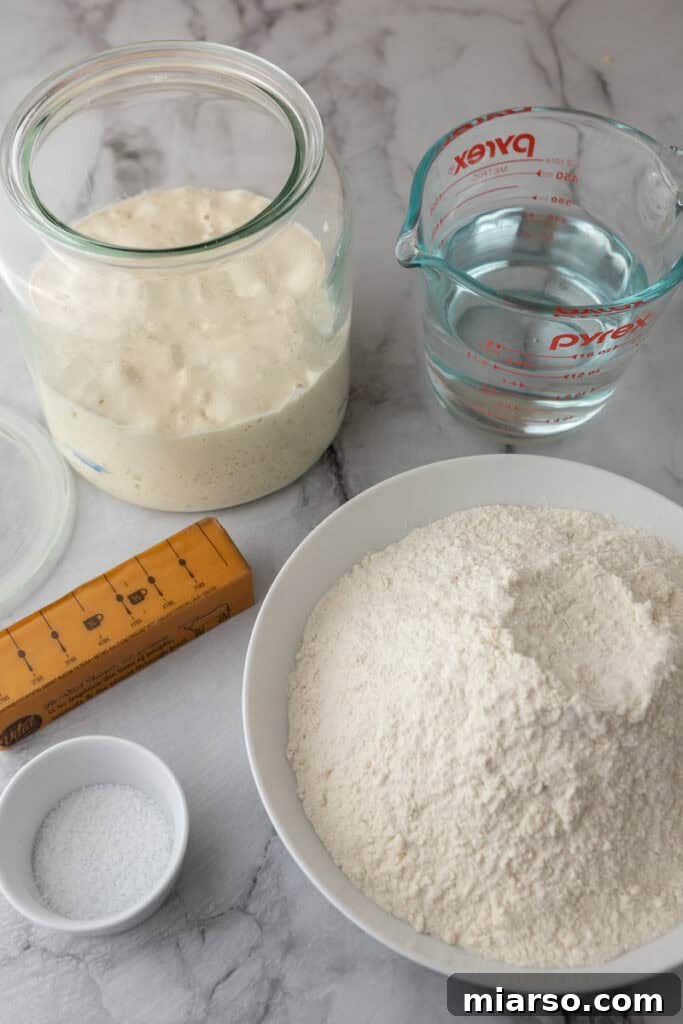
Crafting this exceptional sourdough croissant loaf requires a handful of quality ingredients. Each component plays a vital role in achieving the desired texture, flavor, and rise. Below is a detailed look at what you’ll need. For precise measurements, please refer to the comprehensive recipe card located at the bottom of this page.
- Water: Essential for hydrating the flour and initiating gluten development. The right amount of water ensures a workable dough and contributes to the bread’s open, airy crumb.
- Active Sourdough Starter: The heart of this recipe, providing natural leavening and imparting the characteristic tangy flavor. Ensure your starter is active and bubbly, doubling in size after feeding, for optimal rise and a robust flavor profile. This eliminates the need for commercial yeast, embracing traditional baking methods.
- Bread Flour: Chosen for its higher protein content compared to all-purpose flour. This higher protein level is crucial for developing strong gluten networks, which are necessary to trap the steam and butter layers, resulting in the desired flaky, chewy texture.
- Salt: More than just a flavor enhancer, salt regulates the fermentation activity of the sourdough starter, preventing it from over-proofing. It also significantly strengthens the gluten structure, contributing to a more resilient and elastic dough.
- Unsalted Butter: The star of the “croissant” aspect, high-quality unsalted butter is paramount. When laminated into the dough, these cold butter layers create the distinctive flaky texture that melts beautifully in your mouth. Using unsalted butter gives you full control over the overall salt content of your bread.

Crafting Your Sourdough Croissant Bread: A Step-by-Step Guide
Embark on the journey of creating this magnificent sourdough loaf with buttery layers. Follow these detailed steps, and remember that precision and patience are your best friends in achieving a truly remarkable bake. For exact oven temperatures, bake times, and full ingredient measurements, consult the recipe card at the conclusion of this post.
Step 1: Mix the Dough Ingredients for Autolyse
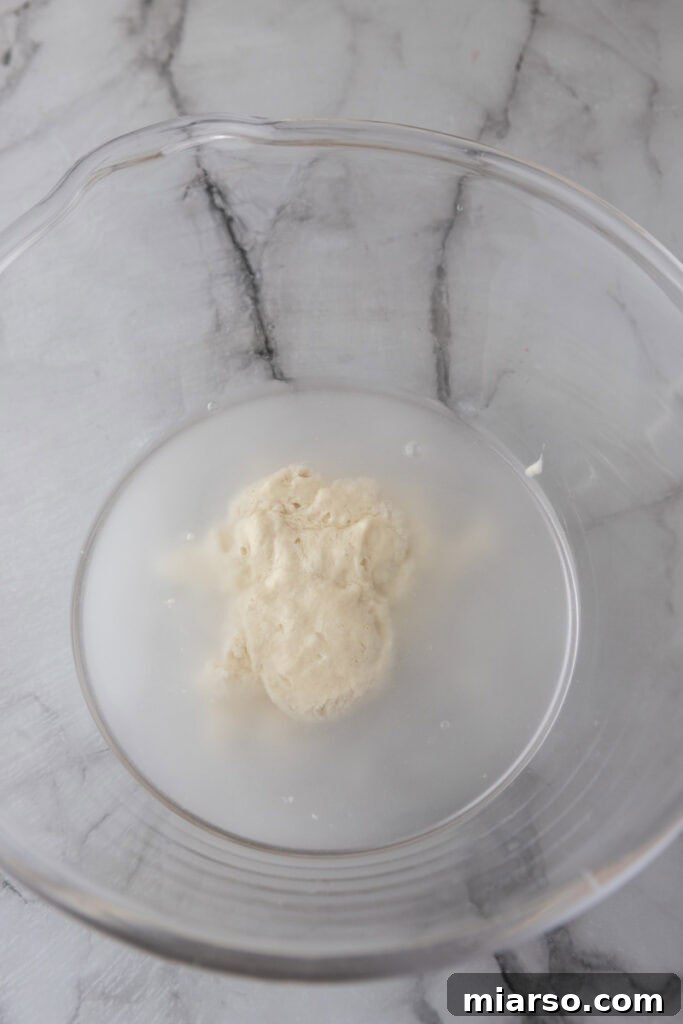
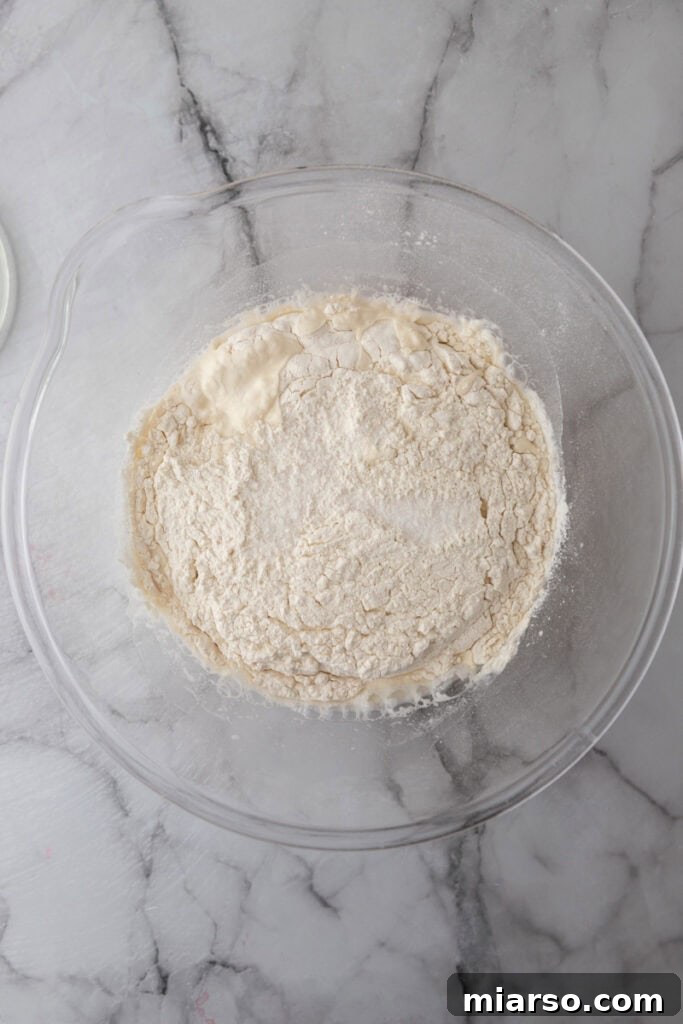
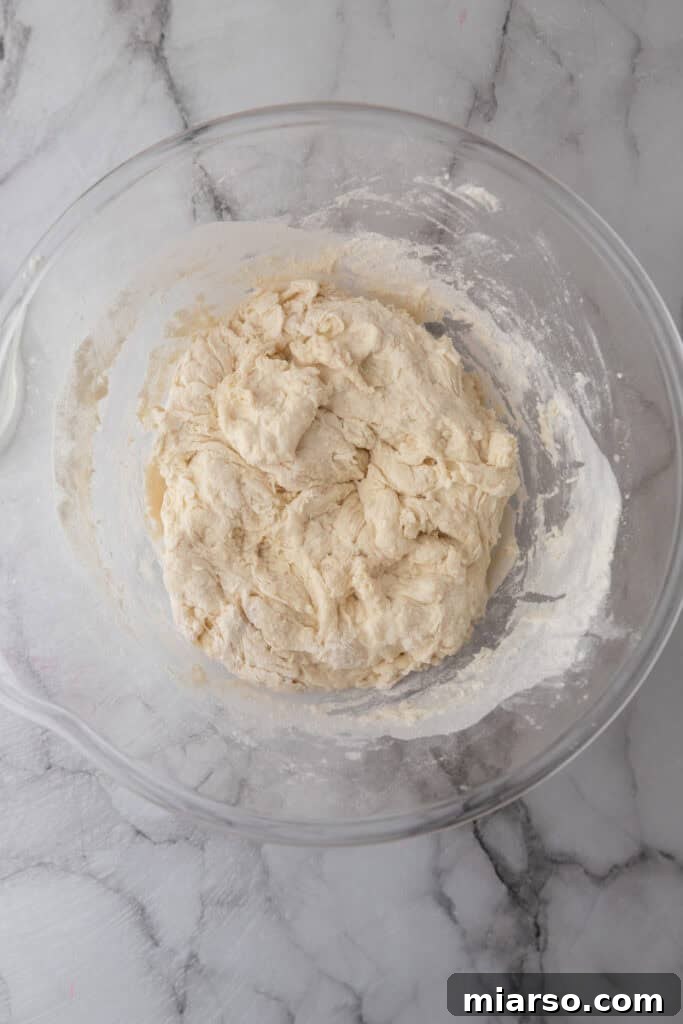
- In a spacious mixing bowl, combine the bread flour, 320g of water, and your active sourdough starter. Stir these ingredients thoroughly until no dry flour remains and a shaggy dough forms. This initial mix is crucial for beginning the hydration process of the flour.
- Cover the bowl with a damp cloth or plastic wrap and allow the dough to rest for 30 minutes. This resting period, known as “autolyse,” allows the flour to fully absorb the moisture, beginning the gluten development without any kneading.
- After the autolyse, add the salt and the remaining 30g of water to the dough. Knead gently for a few minutes until the salt is fully incorporated and the dough begins to feel more cohesive.
Recipe Tip: For an even better texture and improved elasticity, consider extending the initial autolyse phase (flour, 320g water, and sourdough starter) to 60 minutes before adding the salt and the final 30g of water. This longer hydration period will significantly enhance the dough’s workability and the final crumb structure.

Step 2: Stretch, Fold & Incorporate Butter for Lamination
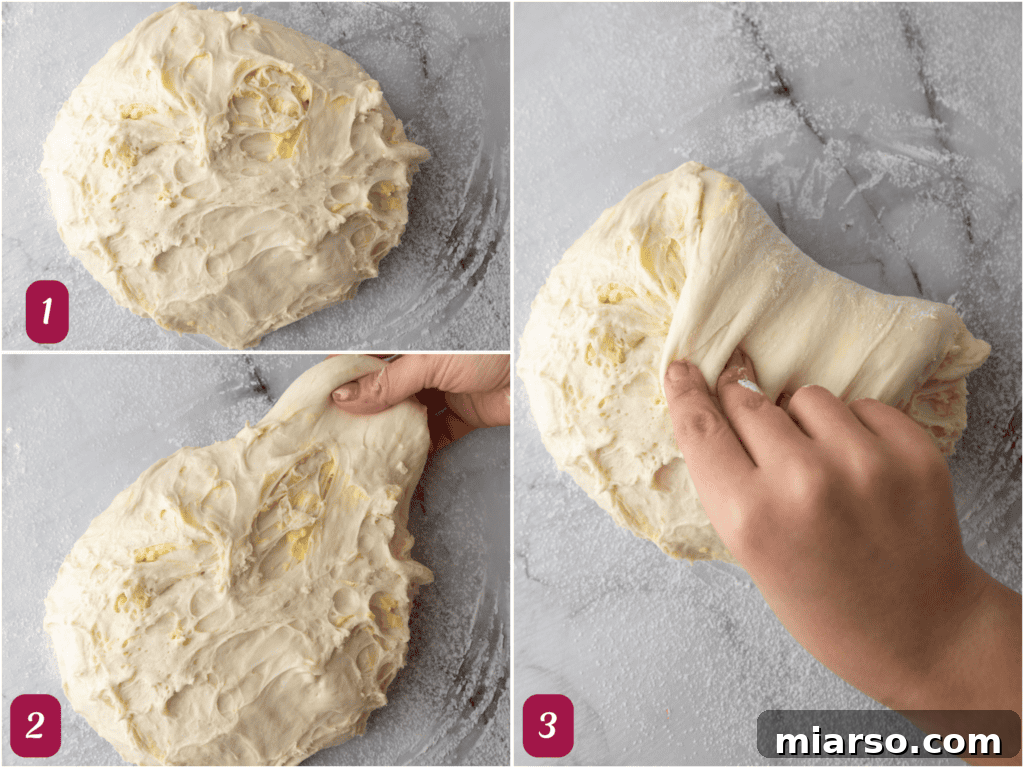
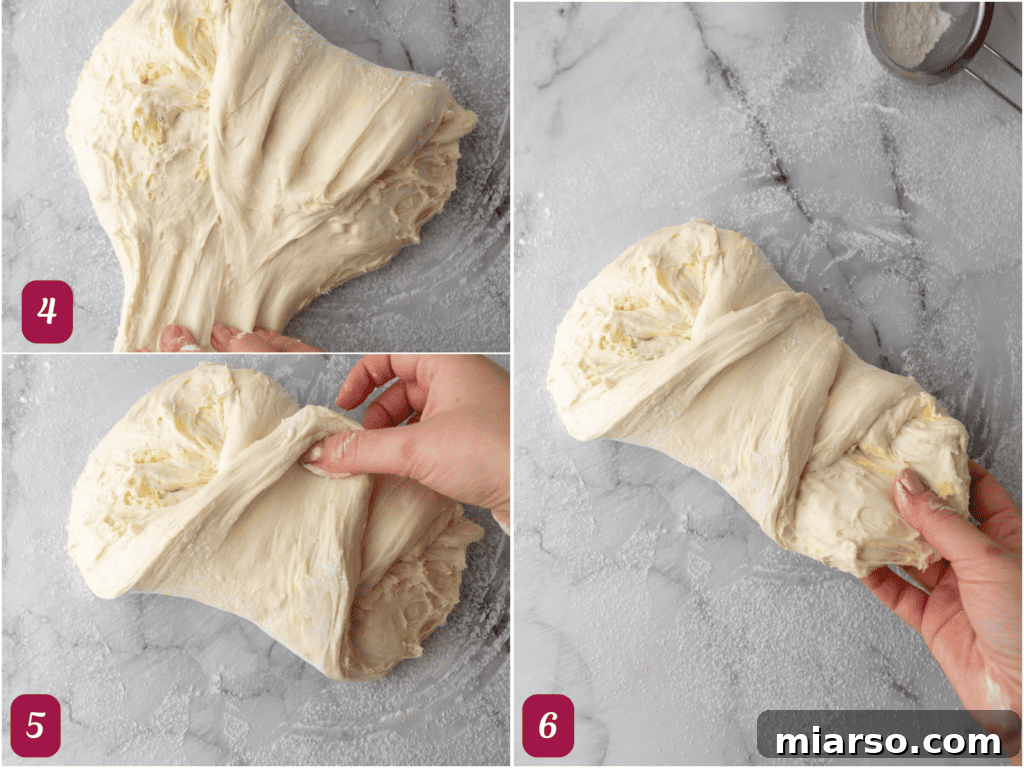
This is where the magic happens, building those beautiful, buttery layers. You will perform a series of four stretch-and-folds, with crucial butter additions in between.
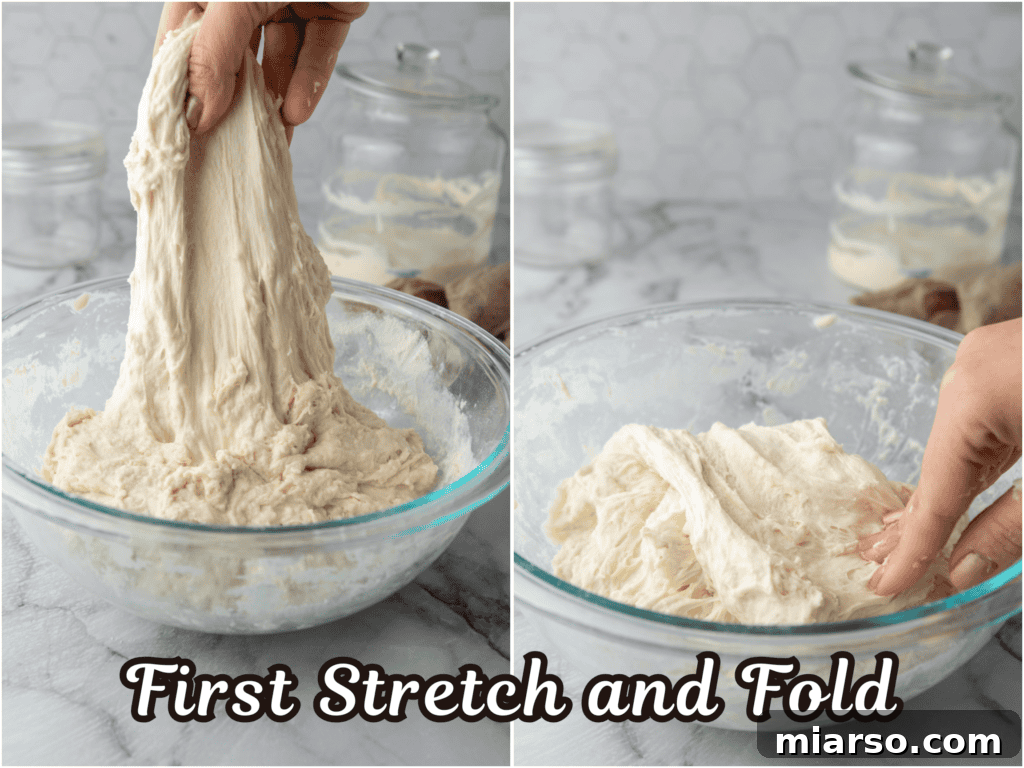
- First Stretch and Fold: Gently stretch and fold the dough without any added butter. This initial set helps to further develop gluten and makes the dough smoother and more elastic, preparing it for the butter incorporation. Cover and let rest for 30 minutes.
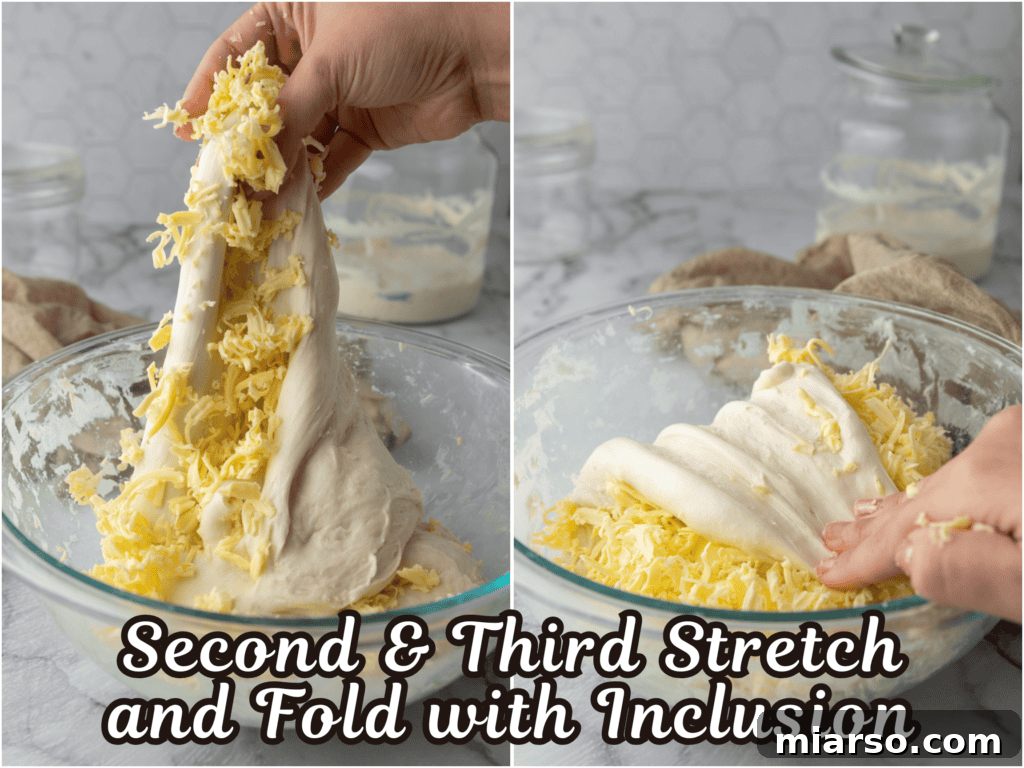
- Second Stretch and Fold with Butter: After the rest, gently stretch the dough. Grate half of your *very cold* butter directly over the surface of the dough. Fold the dough over itself to enclose the butter, then perform your usual stretch and folds. Ensure the butter is well distributed within the folds. Cover and allow it to rest for another 30 minutes. Remember to place the remaining butter back in the freezer to keep it perfectly chilled.
- Third Stretch and Fold with Remaining Butter: Repeat the process. Stretch the dough, grate the remaining cold butter over it, and fold it in. Continue gently folding until the butter is mostly incorporated into the dough, creating visible streaks and pockets. Cover and rest for 30 minutes.
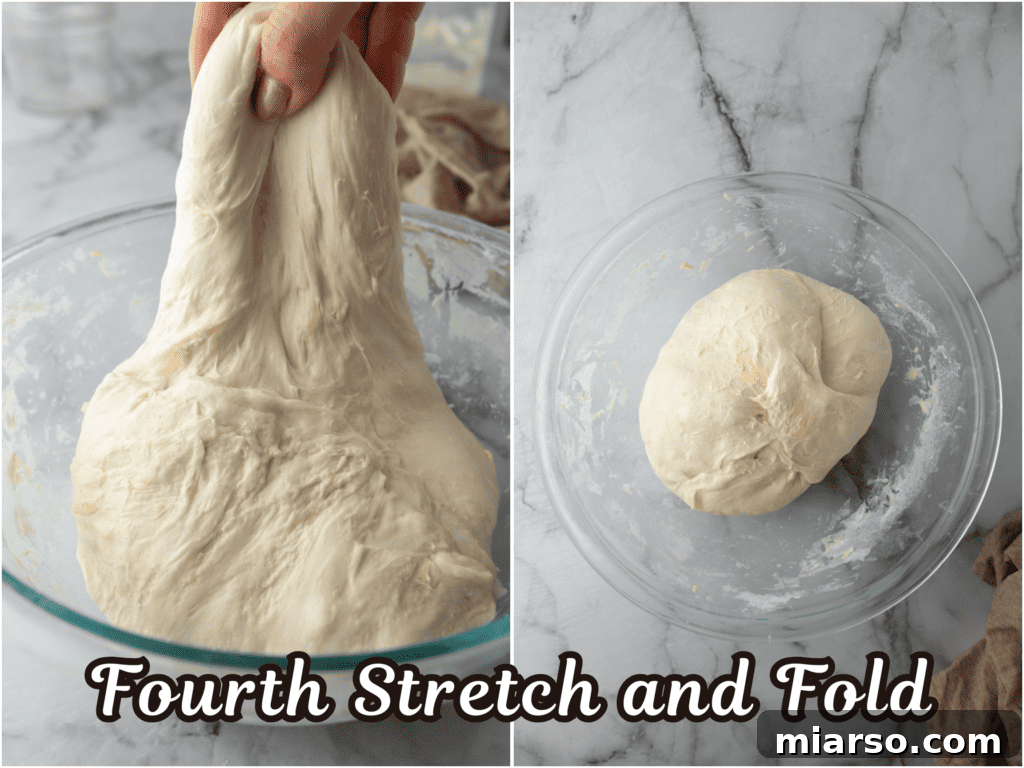
- Fourth Stretch and Fold (No Butter): For the final stretch and fold, follow the same motion as before, focusing on building tension and smoothing the dough, but without adding any additional butter. This helps unify the dough and butter layers.
Recipe Tip: The key to successful lamination is keeping the butter as cold as possible. If at any point during the stretch and fold process the dough or butter feels too warm or starts to melt, immediately place the bowl in the refrigerator for 15-20 minutes to chill before resuming. This prevents the butter from fully mixing into the dough, preserving those distinct layers.
Step 3: Bulk Fermentation – The Slow Rise
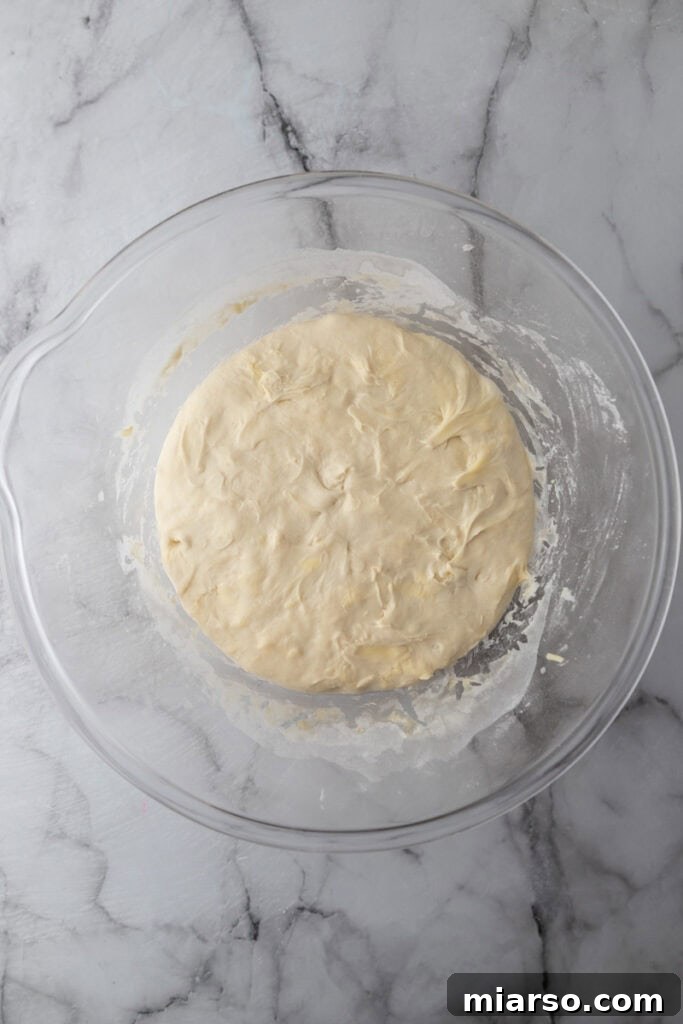
- After your final stretch and fold, cover the dough and allow it to undergo bulk fermentation at a consistent room temperature, ideally between 70-72°F (21-22°C). This process typically takes 6-7 hours.
- During this time, monitor the dough’s progress; it should expand by about two-thirds of its original volume, and you should observe visible bubbles forming at the bottom and sides of your glass bowl, indicating active fermentation.
- It is crucial to periodically check the dough’s temperature using a thermometer to ensure it stays within the optimal range. If your kitchen is warmer, the dough might ferment faster; if it’s cooler, it will take longer.
Recipe Tip: Environmental control is vital for successful bulk fermentation, especially with butter-laminated dough. If your home tends to be on the cooler side, consider adjusting your thermostat to around 72°F during these hours. You might even need to extend the bulk fermentation to 8-9 hours to achieve the desired rise and a deeper sourdough tang. Conversely, in a warmer kitchen, check your dough at 5-6 hours, and if it has doubled in size sooner, move it to the fridge earlier to prevent over-fermentation and butter melting.
Step 4: Pre-Shaping & Cold Proofing for Flavor Development
This stage prepares your dough for its final form and allows for a slow, overnight fermentation that greatly enhances flavor and texture.
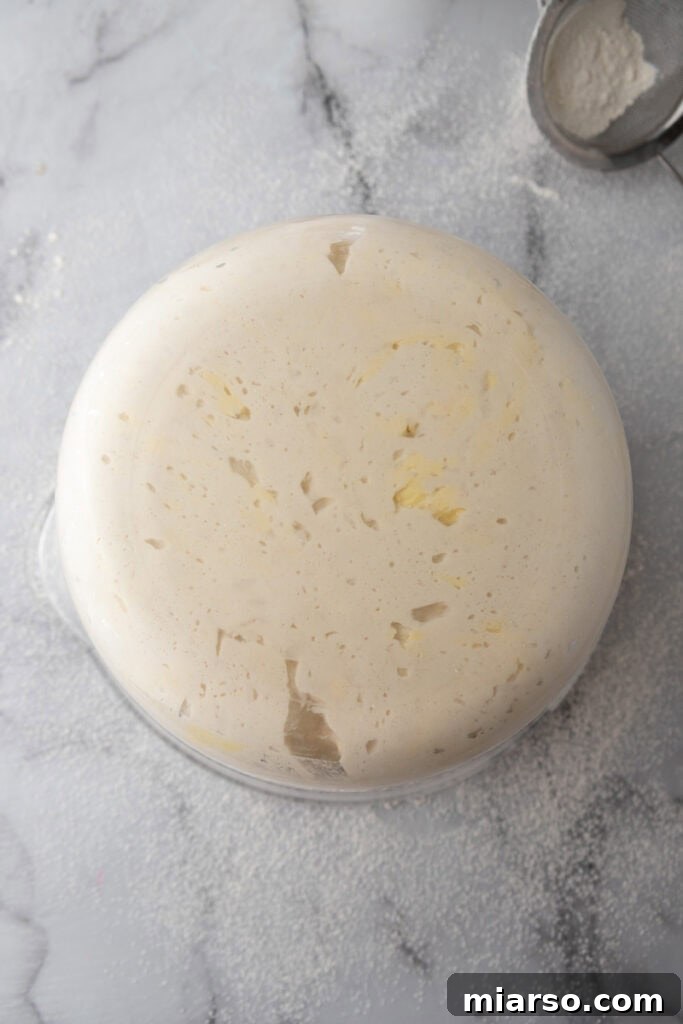
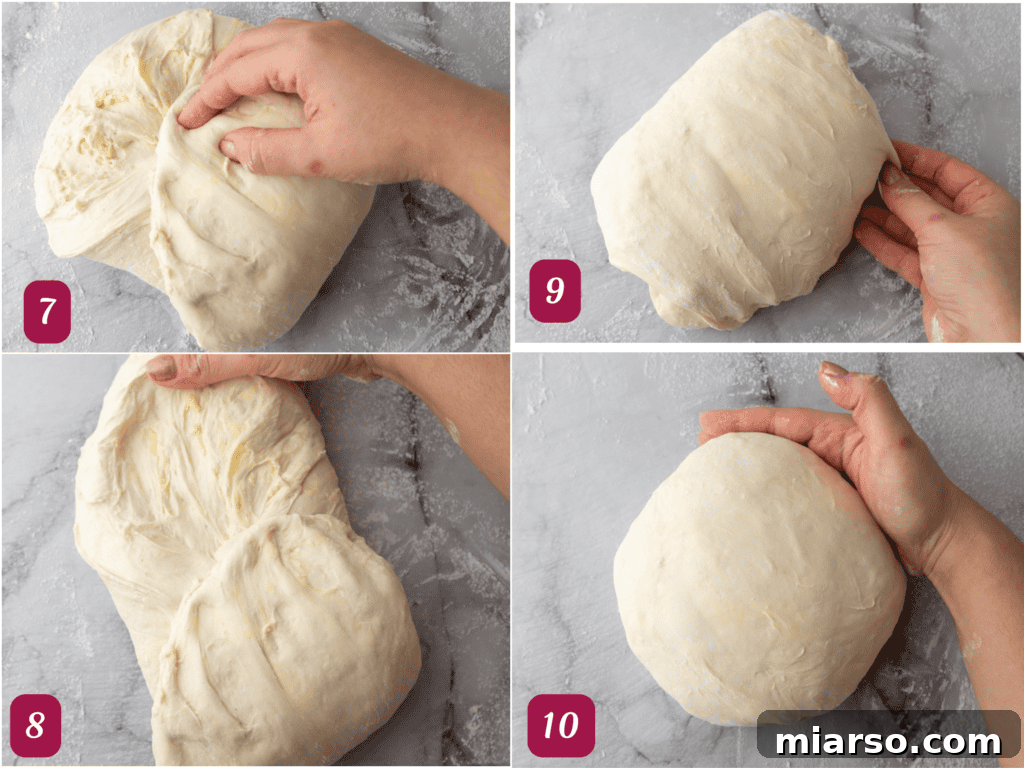
- Lightly dust your clean work surface with just enough flour to prevent sticking. Be mindful not to use too much flour, as excessive flour can hinder the dough from sealing properly during shaping.
- Gently turn the dough out of its bowl onto the floured surface, placing it upside down. Handle the dough with care to avoid deflating the precious air bubbles that have formed during bulk fermentation.
- Carefully flatten the dough into a rough rectangle. Again, avoid pressing too hard to preserve those internal air pockets.
- Perform a letter fold: Fold the top third of the dough down towards the center, then fold the bottom third up over the previous fold. This builds structure and tension.
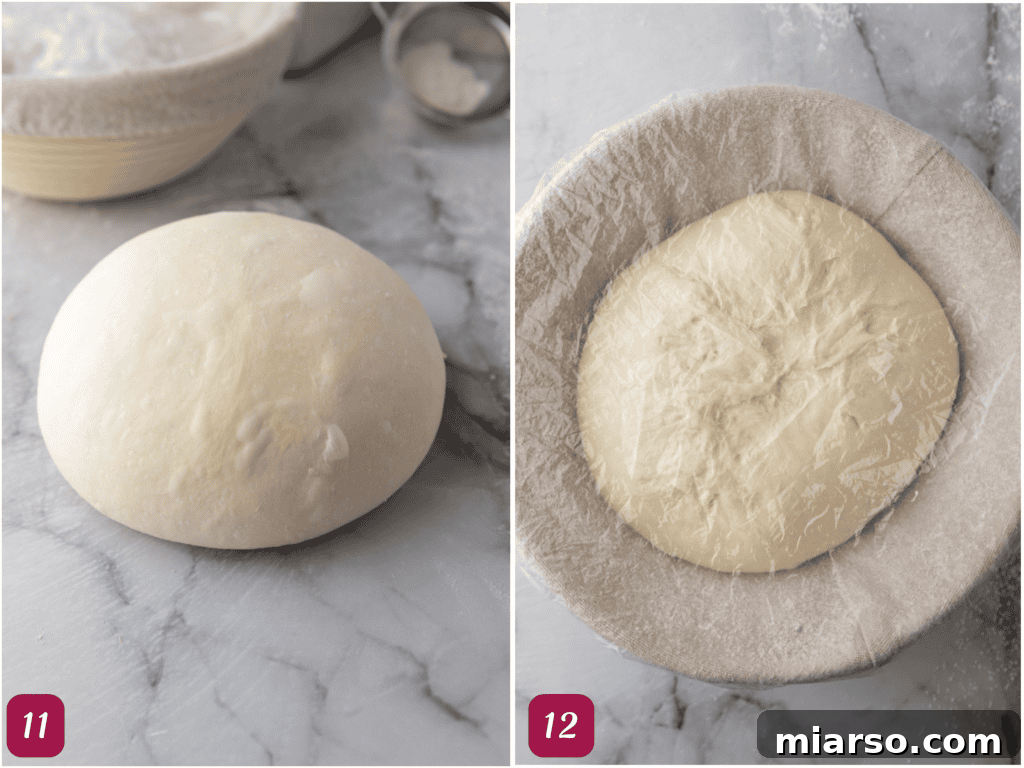
- Rotate the dough 90 degrees. Gently pull the edges towards the center, tucking them underneath to create surface tension, shaping it into a round boule. Keep moving your hands in a ‘C’ shape to create a tight, uniform ball.
- Using a bench scraper, carefully transfer the dough, smooth side down, into a lightly floured banneton basket. This will support its shape during proofing.
- Allow the dough to rest for 10-20 minutes at room temperature, then gently seal the top edges if needed. Cover the banneton tightly with plastic wrap to prevent a skin from forming and refrigerate overnight for 8-12 hours. This cold proofing period is crucial for developing complex flavors and makes the dough easier to handle and score the following day.
Step 5: Scoring & Baking for a Perfect Crust
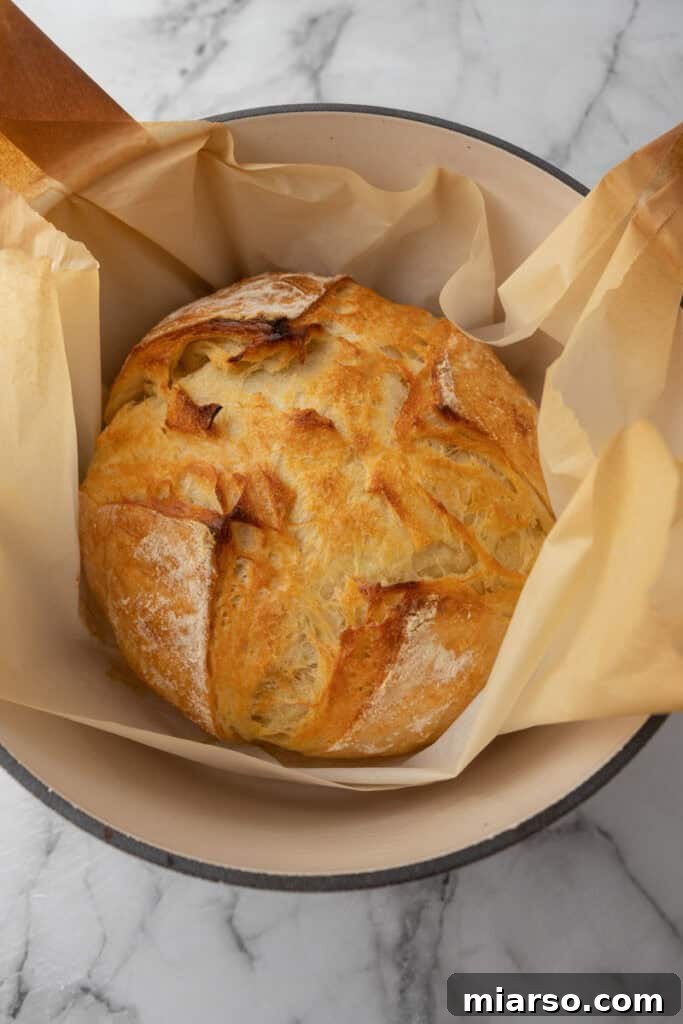
- The next day, preheat your oven to 450°F (230°C) with a Dutch oven inside for at least 30-45 minutes. This ensures the Dutch oven is scorching hot, which is key for a great oven spring and crust.
- Carefully remove the cold dough from the refrigerator. Gently invert it onto a sheet of parchment paper. Using a sharp blade or lame, score the top of the dough with your desired pattern. A single, deep score or a more intricate design will allow the bread to expand beautifully.
- With caution, transfer the chilled dough (on its parchment paper) into the preheated Dutch oven. To create steam for an extra crispy crust, you can place a few ice cubes on the outside of the parchment paper, between the paper and the Dutch oven wall. Cover the Dutch oven with its lid and bake for 30 minutes.
- After 30 minutes, remove the lid from the Dutch oven and reduce the oven temperature to 390°F (198°C). Continue baking uncovered for another 15-20 minutes, or until the crust develops a deep, golden-brown hue and the internal temperature reaches 200-205°F (93-96°C) when measured with an instant-read thermometer.
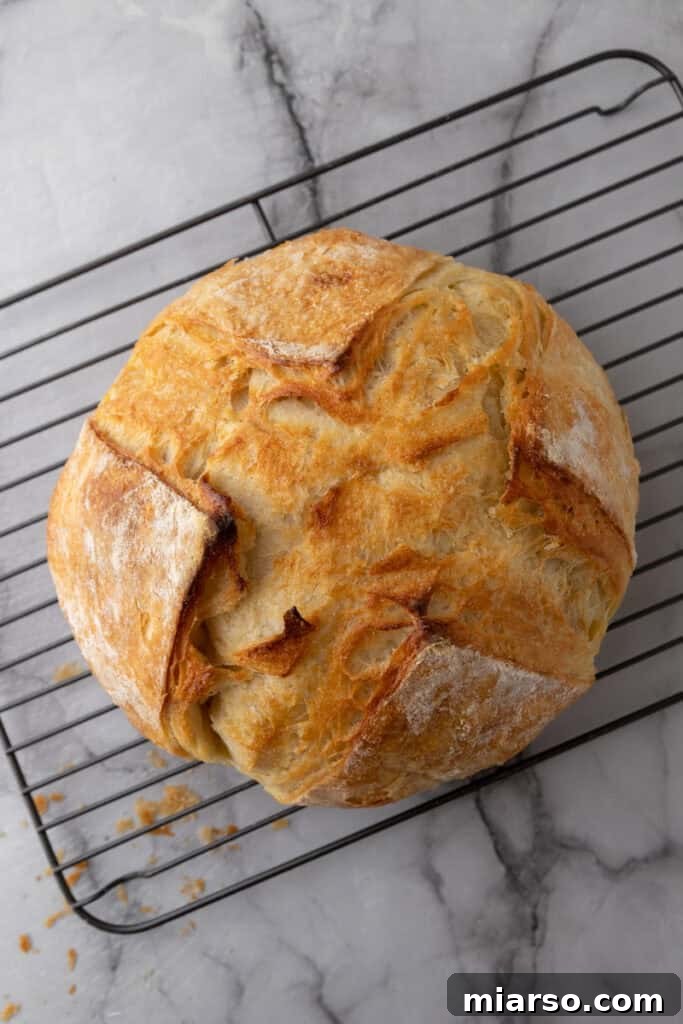
- Once baked, carefully remove the bread from the Dutch oven and transfer it to a wire cooling rack. Allow it to cool completely before slicing. This crucial cooling period allows the internal crumb structure to set fully, preventing a gummy texture. Waiting at least one hour is highly recommended, though patience will be rewarded!
Recipe Tip: If you notice your crust browning too rapidly during the final uncovered baking phase, gently lower the oven temperature by 10-15°F for the last 10 minutes. Furthermore, resist the temptation to slice into your beautiful loaf immediately after baking. Cooling is not just about temperature; it’s about the internal structure stabilizing. Slicing too soon can result in a gummy texture that detracts from the bread’s flakiness. An hour is a minimum, but 2-3 hours is ideal for the perfect crumb.

Expert Tips and Tricks for the Best Croissant Sourdough Bread Results
- Prioritize High-Quality Butter: The butter is a star ingredient here, directly impacting the flavor and flakiness. Invest in the best quality unsalted butter you can find. European-style butters, known for their higher fat content and rich flavor, or artisanal Amish butters, will yield superior results, making every bite more luxurious.
- Adjust Salt Levels with Care: If you opt to use salted butter instead of unsalted, remember to reduce the amount of added salt in your dough recipe accordingly. This prevents your delicious bread from becoming overly salty and ensures the flavors remain perfectly balanced.
- Mind Your Hydration: Different flours absorb water differently based on their protein content and milling process. Pay attention to how your dough feels. If it seems excessively dry and stiff, add a tiny splash more water (a tablespoon at a time). If it’s too sticky and difficult to handle, allow it to rest for a bit longer, giving the flour more time to fully absorb the moisture before continuing.
- Keep Butter Chilled: The absolute golden rule for laminated dough is to keep the butter cold. If at any point during the stretch and fold process, or even during bulk fermentation, the dough feels too warm or the butter shows signs of melting, quickly pop it into the refrigerator for 15-20 minutes. This hardens the butter, preventing it from integrating into the dough and ensuring those distinct, flaky layers are preserved.
- Achieve Maximum Crispiness with Steam: Steam is crucial for a thin, crispy crust and maximum oven spring. If you don’t have a Dutch oven, you can create steam by placing a small pan of boiling water on the bottom rack of your oven during the first 20 minutes of baking. Even when using a Dutch oven, adding a few ice cubes around the parchment paper before closing the lid provides an excellent burst of steam for an even better crust.
- Confirm Doneness with a Thermometer: For perfectly baked bread, trust your thermometer. The bread is fully cooked when its internal temperature reaches between 200-205°F (93-96°C) in the center of the loaf. This ensures the crumb is cooked through and not gummy.
- Prevent a Burnt Bottom Crust: Some ovens run hotter at the bottom. To prevent the base of your sourdough croissant bread from burning or becoming overly hard, consider placing an empty baking sheet on the bottom rack of your oven during the bake. This acts as a heat shield, promoting even browning.
Why This Recipe Belongs in Your Baking Repertoire
- The Ultimate Hybrid: This recipe offers the best of both worlds – the unmistakable tangy complexity of sourdough combined with the luxurious, flaky, and buttery layers of a traditional croissant. It’s a truly unique creation that satisfies two cravings in one.
- Elevate Your Baking Skills: Successfully creating this loaf will make you feel like a master artisan baker. It’s an impressive bread that looks sophisticated and tastes even better, guaranteed to garner compliments and boost your confidence in the kitchen.
- Incredibly Versatile: Whether you prefer sweet or savory, this loaf is remarkably adaptable. Enjoy it plain, toasted, with various spreads, or as the base for sandwiches and desserts. Its versatility makes it a staple for any meal or snack.
- Pure Deliciousness: Simply put, this bread is incredibly delicious. The balance of tang, richness, and texture is captivating. It’s a rewarding bake that promises to become a new favorite for anyone who appreciates fine bread. Give it a try – you won’t regret it!
Frequently Asked Questions (FAQ) About Sourdough Croissant Bread
What type of flour should I use for this recipe?
For the best results, a strong bread flour with a protein content of at least 12-13% is highly recommended. This higher protein level is essential for developing a robust gluten structure, which is critical for creating that wonderfully chewy yet airy texture characteristic of good sourdough, and crucial for supporting the laminated butter layers.
How am I supposed to grate the butter?
The secret to grating butter effectively and maintaining its cold temperature is to freeze it beforehand. Cold butter is non-negotiable for creating distinct, flaky layers; if it melts into the dough, you lose that croissant-like texture. Ensure your block of butter is thoroughly frozen until you are ready to grate and incorporate it. It’s also a good practice to keep any butter that isn’t immediately being used back in the freezer while your dough rests between folds.
Do I really have to let it proof overnight?
While this recipe spans multiple days and requires patience, the overnight cold proofing in the refrigerator is a non-negotiable step that truly pays off. This slow fermentation greatly enhances the bread’s flavor, developing deeper, more complex notes. Additionally, the cold temperature helps to firm up the butter within the dough, making it much easier to handle, score, and bake for that perfect oven spring and flaky texture.
Why isn’t my dough rising properly during bulk fermentation?
Several factors can affect dough rise during bulk fermentation. Firstly, ensure your sourdough starter is vigorous and active; it should consistently double in size within 4-6 hours of being fed. If not, refresh it with regular feedings until it becomes more robust. Secondly, your kitchen environment might be too cool. Try finding a slightly warmer spot, ideally between 70°F-74°F (21°C-23°C), or extend the fermentation time. For this specific recipe, remember that keeping the dough cool to preserve the butter layers will naturally slow down the rise compared to a standard sourdough. Don’t be alarmed if it takes longer; embrace a longer bulk fermentation time, up to 9-10 hours, allowing the dough to rise at its own pace while maintaining a cool internal temperature.

Can I use all-purpose flour instead of bread flour for this Croissant Sourdough Bread Recipe?
While you can use all-purpose flour as a substitute, be aware that the results may differ. All-purpose flour has a lower protein content, which means the dough might be softer, less elastic, and potentially harder to handle during the lamination process. If you do choose to use all-purpose flour, consider slightly reducing the water content in the recipe to prevent the dough from becoming overly sticky and to help maintain some structure.
Why is my Croissant Sourdough Bread dense instead of light and airy?
A dense crumb often indicates under-fermentation. The key to a light and airy sourdough lies in a strong, active starter and sufficient bulk fermentation time. Ensure your starter is consistently doubling after feeding. During the bulk fermentation, allow the dough enough time to significantly increase in volume and develop bubbles. Additionally, avoid over-mixing the dough excessively, as this can knock out crucial gases. Handle the dough gently during shaping to preserve the delicate air pockets, which are essential for its open structure.

How do I store leftover sourdough croissant bread?
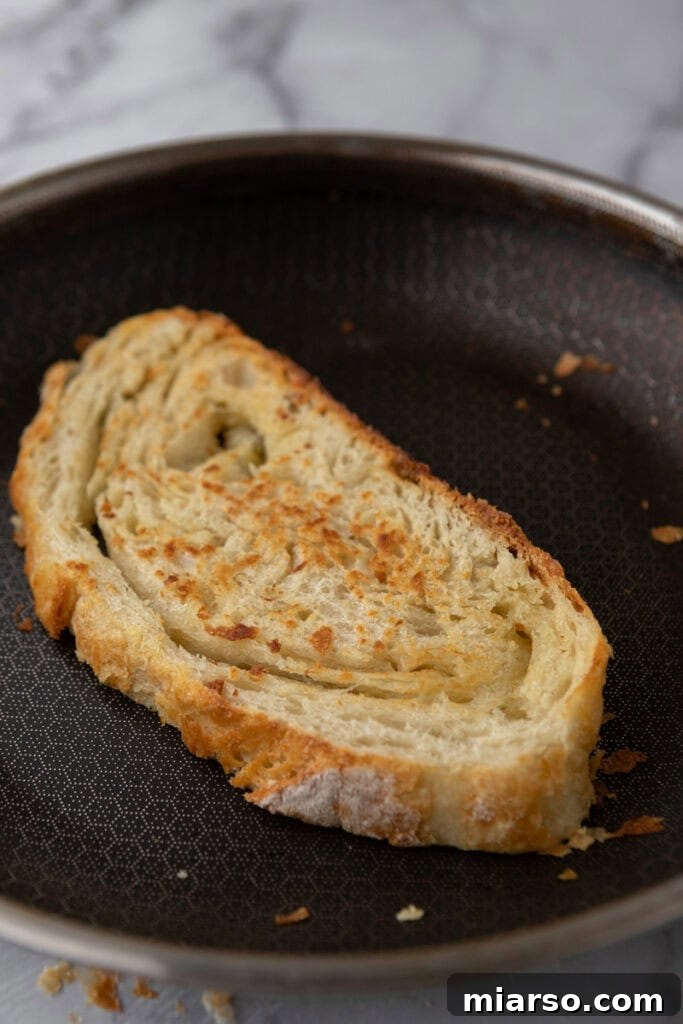
To keep your leftover bread fresh, store it in a sealable plastic bag or an airtight container at room temperature for up to 3 days. For longer storage, refrigerate it for up to a week. If you wish to extend its freshness even further, wrap individual slices or the entire loaf tightly in plastic wrap, followed by aluminum foil, and store it in the freezer for up to a month. When ready to enjoy, always toast, air fry, or gently reheat it in the oven to revive its flaky texture and rich flavors.
How can I serve and enjoy this incredible croissant bread?
The versatility of this buttery, flaky sourdough croissant bread means there’s an abundance of delicious ways to enjoy it:
- Freshly Sliced Delight: When you first cut into it, savor a slice plain, or enhance it with a drizzle of honey, a sprinkle of flaky sea salt, or a smear of your favorite sweet or savory spread.
- Classic Toasted Experience: Toast a slice and spread a generous dollop of butter for the purest expression of homemade sourdough croissants.
- Chocolate Indulgence: After toasting, spread some creamy Nutella for a quick and delightful “chocolate croissant” experience.
- Avocado Toast Reinvented: Elevate your breakfast avocado toast with the unique texture and flavor of this bread.
- Jam and Nut Butter Perfection: Enjoy it toasted with a variety of fruit jams, preserves, or your favorite nut butter.
- The Ultimate French Toast Base: Move over brioche! The rich, buttery nature of this bread makes it an unparalleled base for an extraordinary French toast. Its flaky layers will absorb the custard beautifully.
- Gourmet Sandwiches: It’s perfect for crafting elevated peanut butter and jelly sandwiches or luxurious deli meat and cheese creations.
- Decadent Bread Pudding: Given its buttery and flaky characteristics, this bread transforms into an incredibly rich and satisfying bread pudding.
- Soup’s Best Companion: Serve slices alongside your favorite soup, or cube it, toast it, and use it as a flavorful crouton topping.

The Best Sourdough Croissant Bread Recipe

Sourdough Croissant Bread
Print Recipe
Ingredients
Dough:
- 350 g water about 1 ½ cups minus 1 tbsp, room temperature
- 100 g active sourdough starter (100% hydration) about ½ cup
- 500 g bread flour about 3 ¾ cups
- 10 g salt about 1 ¾ tsp, use less if you’re using salted butter
Butter Layer:
- 113 g unsalted butter cold from the freezer, grated (1/2 cup)
Instructions
Step 1: Prepare the Dough
-
In a large bowl, mix together flour, water, sourdough starter, and salt until fully combined.350 g water, 100 g active sourdough starter (100% hydration), 500 g bread flour, 10 g salt
-
Cover with a damp towel and let it rest for 30 minutes to allow the flour to hydrate.
Step 2: Stretch & Folds with Butter Incorporation
-
Perform four sets of stretch and folds every 30 minutes.
-
Do the first stretch and fold without adding any butter, this is done to make the dough smoother and more elastic before the next step.
-
During the second stretch and fold, grate half of the cold butter directly over the dough and fold it in. Cover and allow it to rest for 30 minutes. Place the rest of the butter back in the freezer.113 g unsalted butter
-
On the third stretch and fold, add the remaining butter and fold again. Continue folding until the butter is well incorporated. Cover and rest for another 30 minutes.
-
On the fourth stretch and fold, just do the same step as the previous stretch and fold but without adding any more butter.
Step 3: Bulk Fermentation
-
Cover and let the dough rise at room temperature (70-72°F) for 6-7 hours until it has risen about 2/3 of the way and has visible bubbles that you can see at the bottom of your glass bowl.
-
If the dough gets too warm, refrigerate it for 20-30 minutes to keep the butter from melting. (It’s crucial to check your dough temperature everytime you work with it, and every few hours to make sure it isn’t too hot)
Step 4: Pre-Shaping & Cold Proofing
-
Lightly flour your work surface. Use just enough flour to prevent sticking, but not too much or it will affect how the dough seals.
-
Gently turn out the dough. Place the dough upside down from the bowl onto the floured surface. Try not to deflate it too much; you want to keep the air bubbles intact.
-
Gently flatten the dough into a rough rectangle (do not press too hard to keep air pockets intact). Fold the top third down toward the center, like folding a letter.
-
Fold the bottom third up over the previous fold.
-
Rotate 90° and gently pull the edges in toward the center, tucking them under to create surface tension. We are shaping it into a ball in this recipe, so keep moving your hand in a C shape it make a tight boule. Using a bench scraper, pick it up and place it smooth side down onto the floured baneton. Let it rest for 10-20 minutes then seal the top before covering it with plastic wrap and refrigerating overnight (8-12 hours) for better flavor.
Step 5: Scoring & Baking
-
Preheat the oven to 450°F (230°C) with a Dutch oven inside for at least 30 minutes.
-
Remove the dough from the fridge, place it on parchment paper, and score the top with a sharp blade.
-
Transfer into the hot Dutch oven, cover, and bake for 30 minutes covered.
-
Remove the lid, reduce the heat to 390F (198°C) and bake for another 15-20 minutes until deep golden brown and the internal temperature reaches 200°F.
Step 6: Cooling & Serving
-
Transfer the bread to a cooling rack as soon as it comes out of the oven and let it cool for at least 1 hour before slicing to allow the crumb to set.
-
Enjoy the flaky, buttery sourdough croissant bread with jam, honey, Nutella, or on its own!
Nutrition
Nutrition information is automatically calculated, so should only be used as an approximation.
If you enjoyed this Croissant Sourdough Bread Recipe, make sure to pin it for later!