
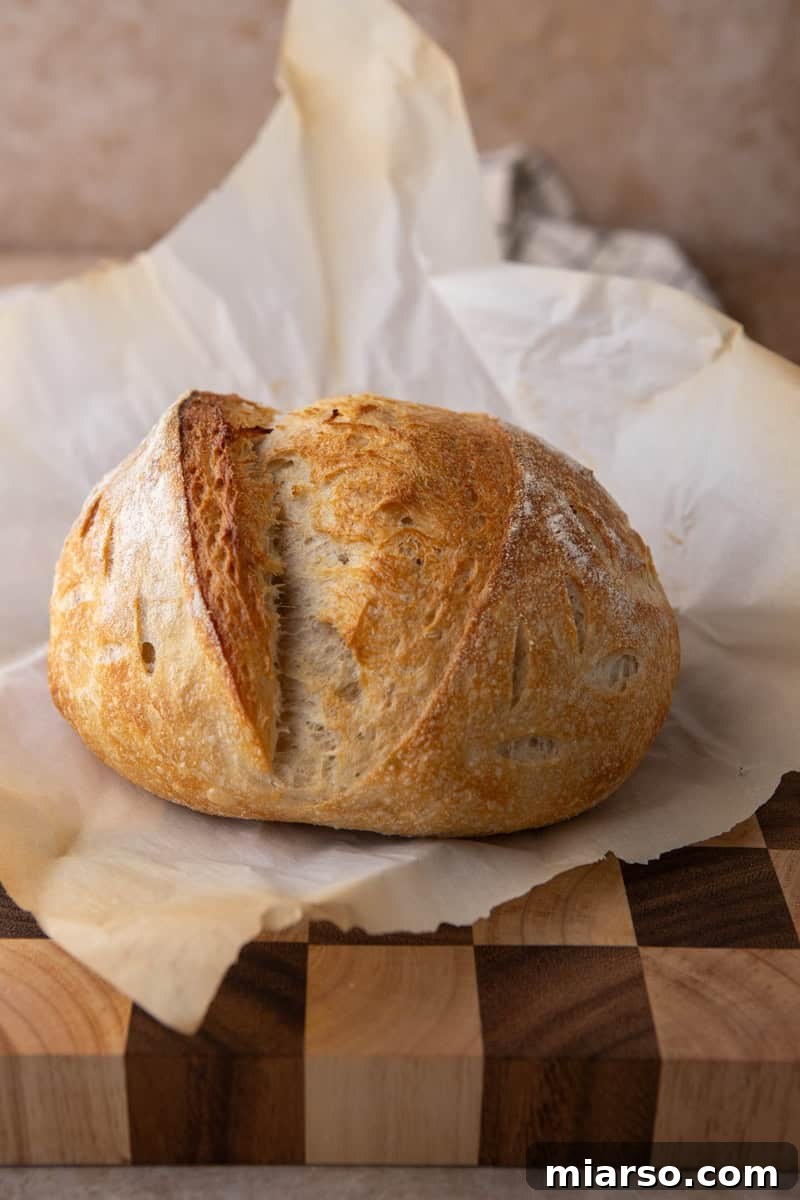
Welcome to the ultimate guide for baking delicious, crusty sourdough bread in a single day! Forget the traditional multi-day process; this game-changing Same Day Sourdough Bread recipe is designed for busy bakers and sourdough enthusiasts who crave fresh, homemade loaves without the long wait. Whether you’re a beginner looking for an easy entry into the world of sourdough or an experienced baker seeking a quick alternative, this recipe delivers impressive results – a beautifully airy crumb, a satisfyingly chewy texture, and that signature tangy flavor, all within hours. If you’ve ever wondered How to Make Sourdough in One Day, this comprehensive guide is precisely what you need to transform your kitchen into a bustling bakery on demand.
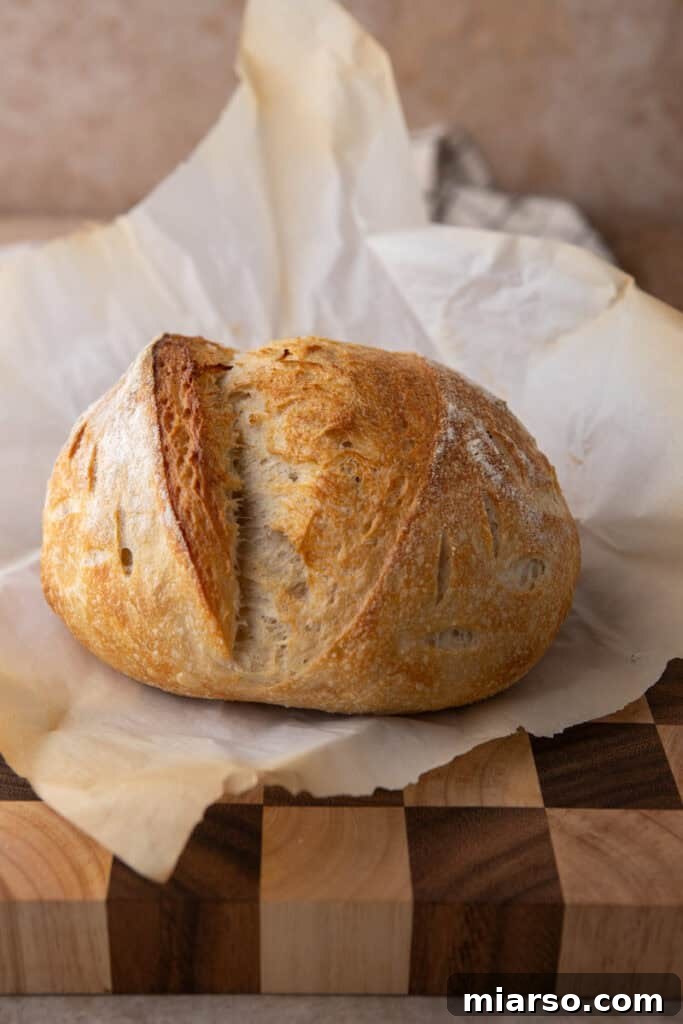
Mastering Same Day Sourdough Bread: A Quick & Easy Recipe Guide
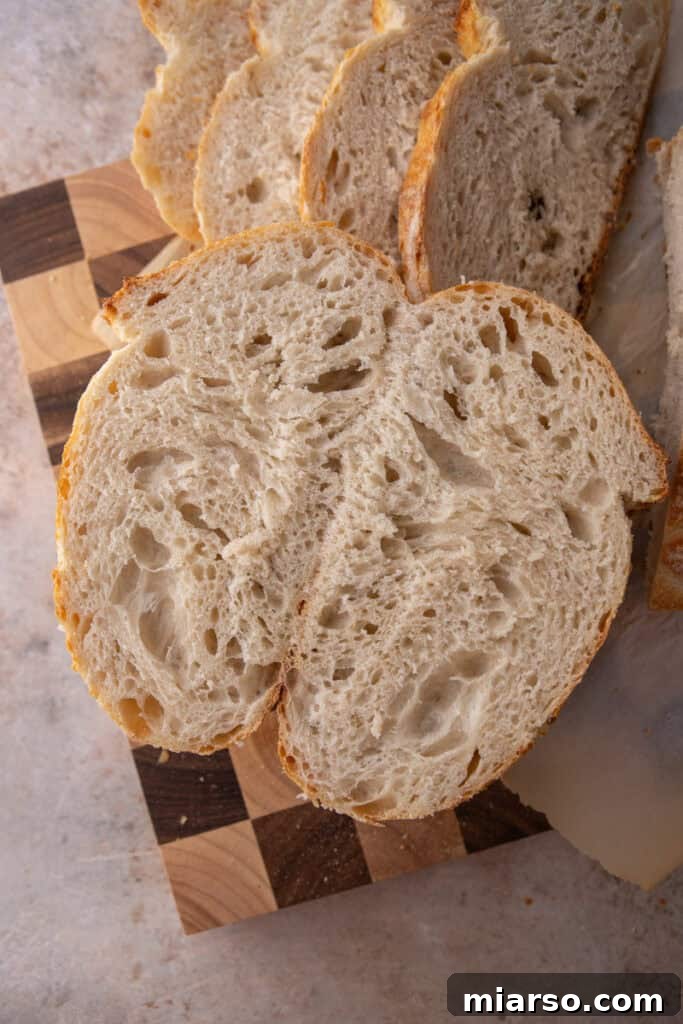
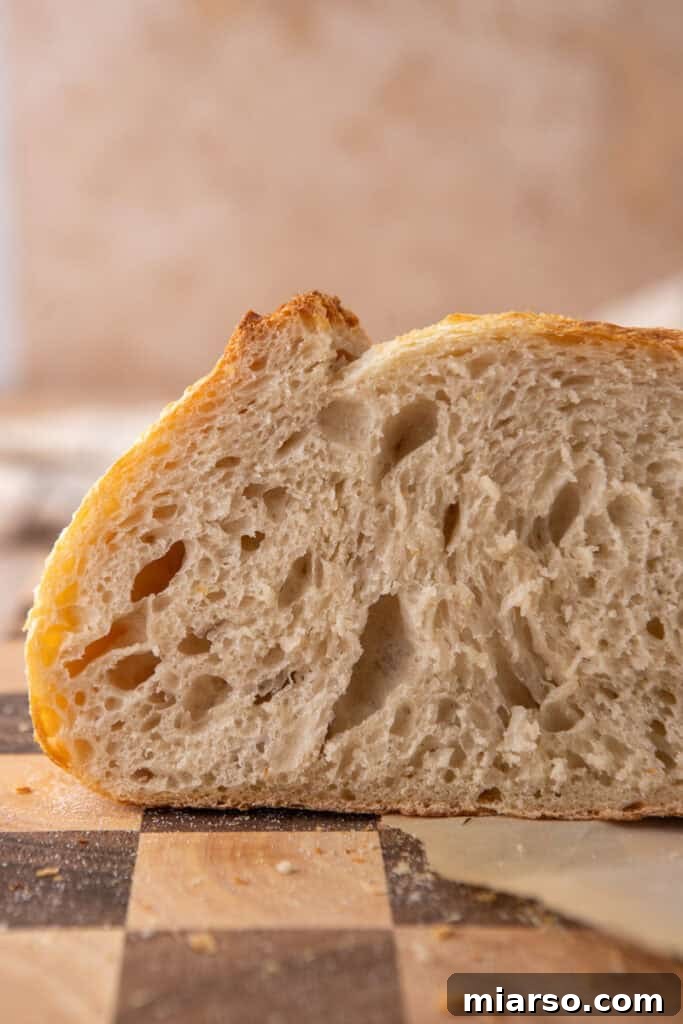
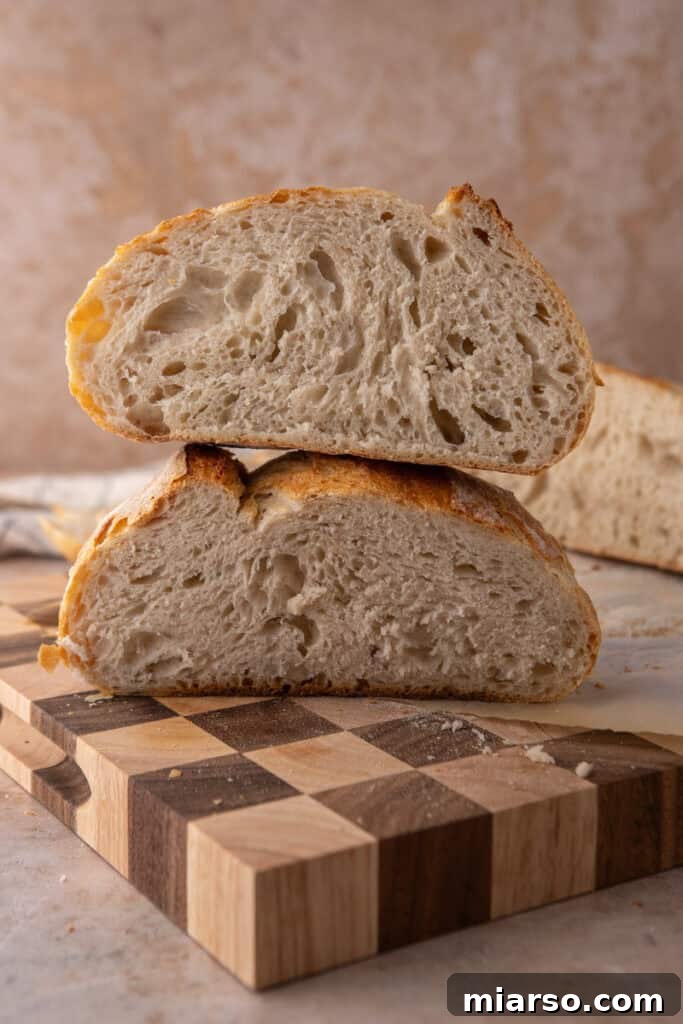
Sourdough baking is renowned for its extended fermentation, a process that typically spans 24 hours or more, allowing complex flavors and robust gluten structures to develop. While the results are undeniably magnificent, the time commitment can be a significant hurdle. This quick sourdough bread recipe offers a brilliant solution, streamlining the bulk fermentation stage without compromising the core characteristics that make sourdough so beloved. You’ll still achieve that desirable open crumb and delightful tang, making fresh, warm sourdough a spontaneous indulgence rather than a meticulously planned event.
The Magic of Same Day Sourdough: How It Works
Traditional sourdough recipes involve a lengthy bulk fermentation, often overnight or even longer, which allows the wild yeast and bacteria in your starter ample time to break down the flour, develop gluten, and create a deep, complex sour flavor. This fast sourdough recipe cleverly accelerates that process. We achieve this by optimizing a few key elements: a shorter bulk fermentation period, a lively and well-fed sourdough starter, and often a slightly warmer environment to encourage yeast activity. While you might experience a slightly milder tang compared to a prolonged cold fermentation, the vibrant, active starter ensures excellent rise, a wonderfully stretchy dough, and an irresistible texture, complete with those coveted air bubbles. It’s a testament to smart baking, proving that you don’t always need to wait to enjoy artisan-quality bread.
Why This Quick Sourdough Recipe is a Game-Changer
The primary advantage of this easy sourdough bread recipe is undoubtedly its unparalleled convenience. Life is unpredictable, and sometimes, waiting a full day for your bread simply isn’t an option. Imagine waking up with an undeniable craving for fresh, warm sourdough, or perhaps discovering last-minute that you need an impressive centerpiece for a dinner gathering. This recipe rises to the occasion, literally and figuratively. It empowers you to enjoy the unparalleled satisfaction of homemade sourdough on your schedule, making it perfect for spontaneous baking, busy weekdays, or when you simply can’t wait to dive into a warm loaf. Beyond the convenience, there’s a genuine joy in pulling a golden-brown, artisan-style loaf from your oven, knowing you created it from scratch in a matter of hours. This recipe makes that impressive feat easily achievable for any home baker.
Since you are here and love sourdough recipes, be sure to explore more culinary delights! Check out this Starbucks Grilled Cheese Sandwich Copycat for a quick meal, this aromatic Rosemary Sourdough Bread for a flavorful twist, this indulgent Dutch Apple Pie with Crumb Topping, this delightful Family Style Dutch Baby Pancake Recipe, this wholesome Healthy No Sugar Added Banana Bread, or learn to cultivate your own with this essential Make Your Own Sourdough Starter Recipe.
Essential Ingredients for Your Fast Sourdough Loaf
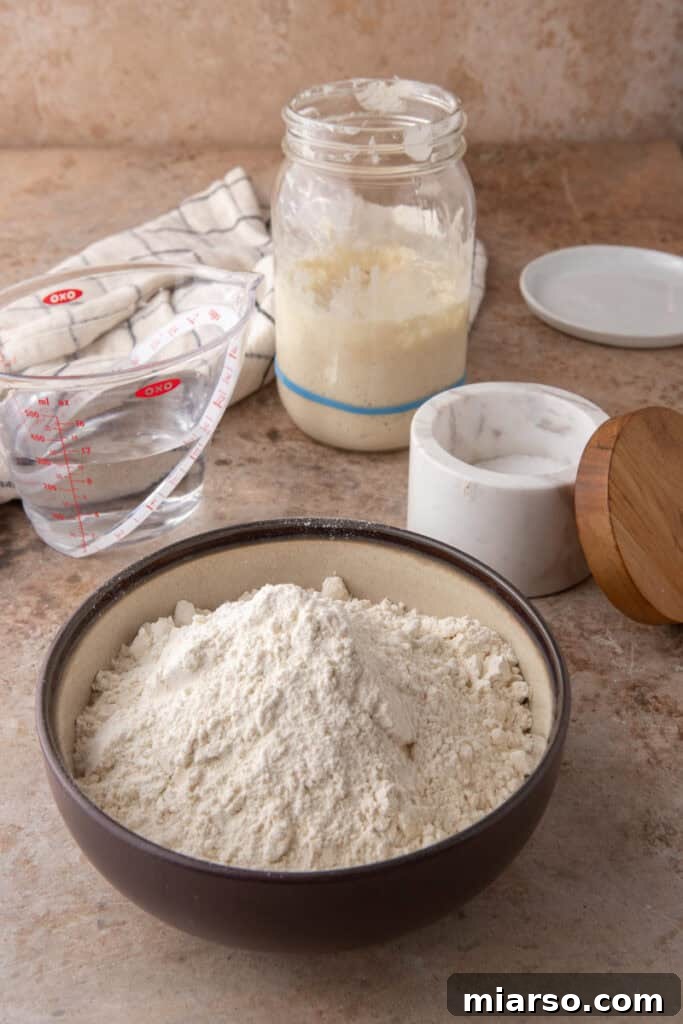
Crafting this incredible same-day sourdough bread requires just a few basic, high-quality ingredients. Each plays a crucial role in achieving the perfect texture and flavor. For precise measurements, please refer to the detailed recipe card conveniently located at the bottom of this page.
- Bread Flour: This is the backbone of your sourdough. Bread flour boasts a higher protein content (typically 12-14%) compared to all-purpose flour, which is vital for developing a strong gluten network. This robust gluten structure provides the elasticity and strength necessary for the dough to trap gases, creating those large, beautiful air bubbles and a wonderfully chewy texture. Using quality bread flour is key for a successful rise in a shorter fermentation time. I highly recommend this one!
- Water (Room Temperature & Filtered): Water isn’t just for hydration; it’s the medium that allows gluten to form and the sourdough culture to thrive. Using filtered water is important as chlorine in tap water can inhibit the activity of your sourdough starter. Aim for room temperature (around 70-75°F or 21-24°C) to kickstart fermentation effectively without shocking your starter.
- Active Sourdough Starter: The heart of any sourdough recipe, your active sourdough starter is a living culture of wild yeast and bacteria. For a same-day recipe, it’s absolutely crucial that your starter is robust, well-fed, and highly active – meaning it should have doubled in size and be full of bubbles within 4-8 hours of feeding. This ensures it has the leavening power needed for a quicker rise. Curious about how to make your own sourdough starter? Our guide has you covered!
- Salt: More than just a seasoning, salt is fundamental to sourdough baking. It not only enhances the bread’s flavor profile, balancing the tang, but also plays a significant role in strengthening the gluten network. Salt tightens the gluten, which helps the dough hold its shape and improves crumb structure, preventing over-fermentation and producing a more resilient dough.
Step-by-Step Guide to Baking Same Day Sourdough Bread
Follow these detailed instructions to create your perfect 8-hour sourdough bread. For precise oven temperatures, baking durations, and a complete breakdown of each step, refer to the comprehensive recipe card at the end of this post.
Phase 1: Mix & Rest (The Fermentolyse)
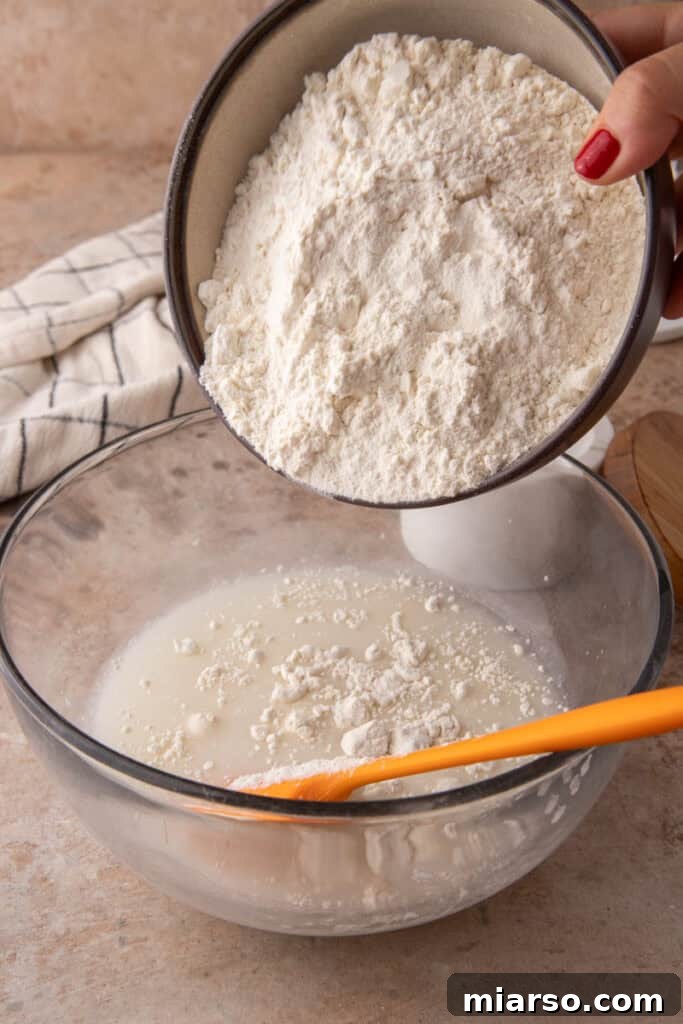
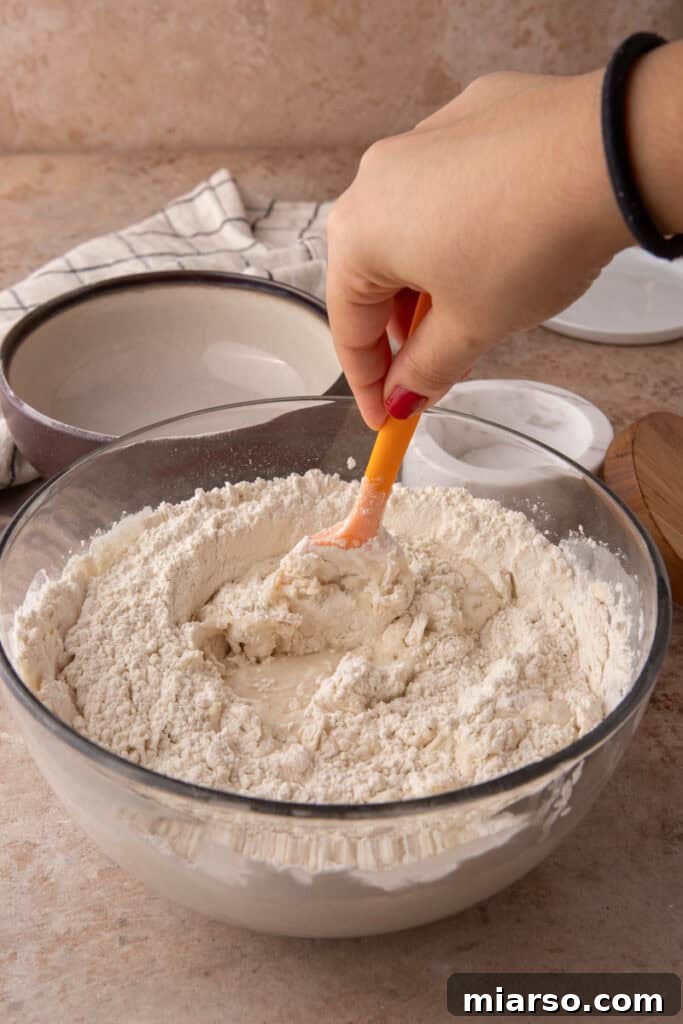
- Combine Initial Ingredients: In a large mixing bowl, thoroughly combine your bread flour, room temperature water, and active sourdough starter. Stir with a sturdy spoon or your hand until all dry spots of flour are fully hydrated and a shaggy dough forms. Avoid overmixing at this stage.
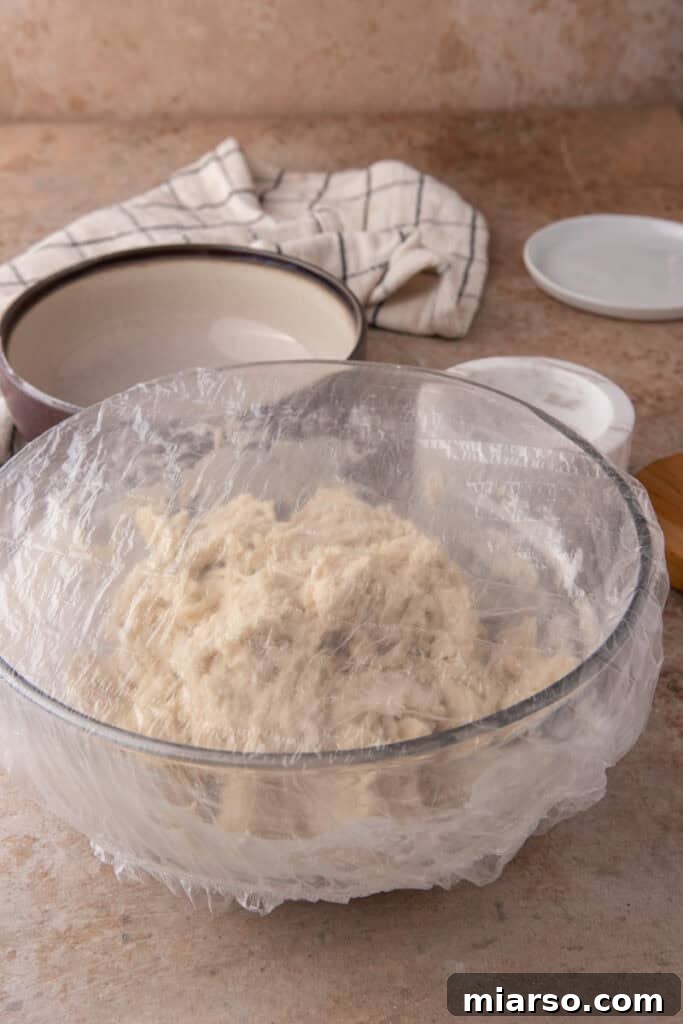
- Initiate Fermentolyse: Cover the bowl with a damp kitchen towel or plastic wrap to prevent drying. Allow the mixture to rest undisturbed for 30 minutes. This crucial resting period, known as fermentolyse (a variation of autolyse with the starter included), allows the flour to fully hydrate, activates key enzymes for gluten development, and kickstarts the fermentation process, laying the groundwork for a pliable dough.
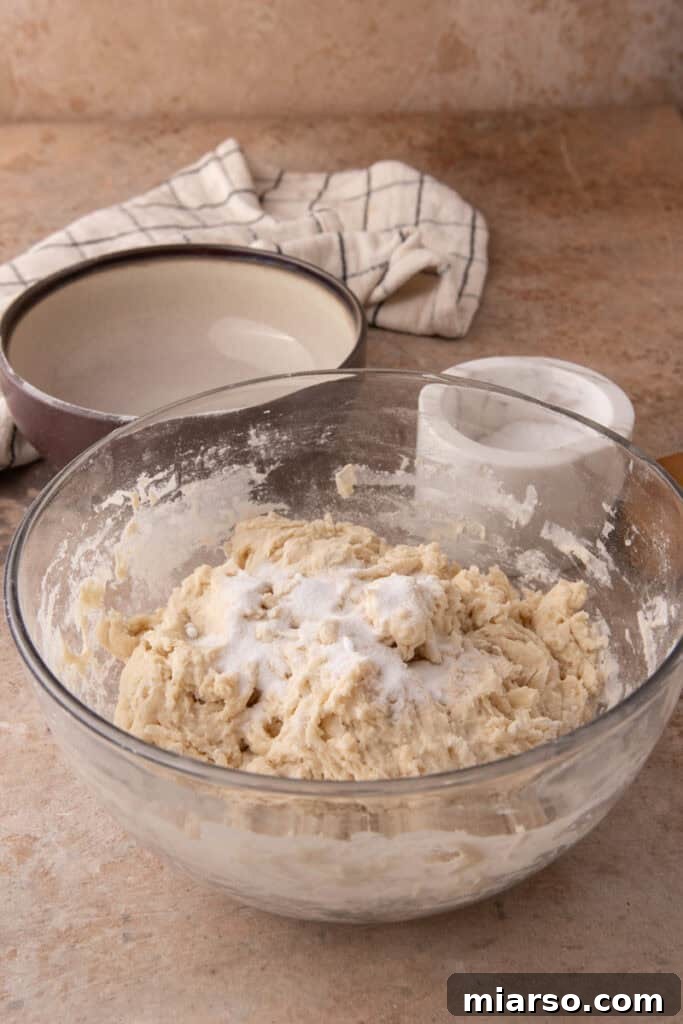
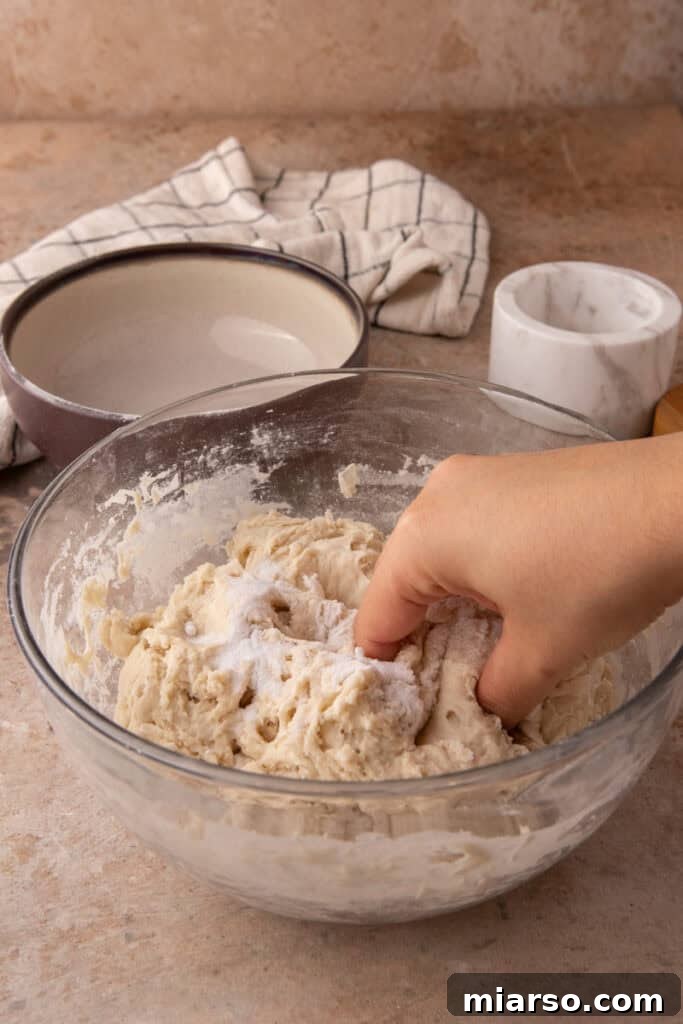
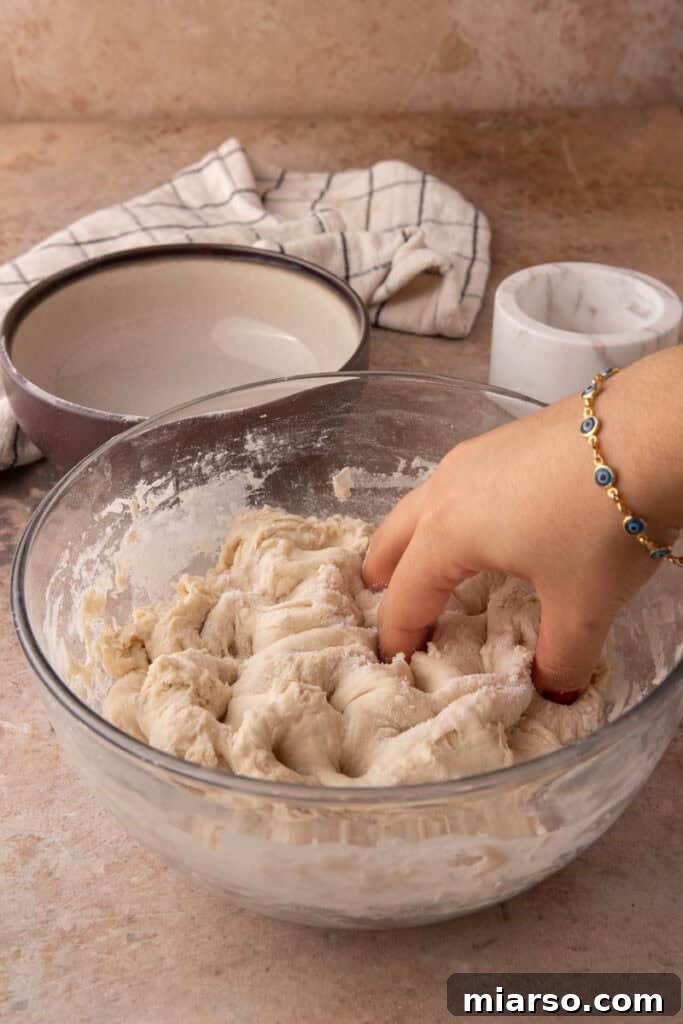
- Incorporate Salt: After the fermentolyse, evenly scatter the salt over the surface of the dough. Gently work the salt into the dough using a “pinch-and-fold” or “stretch-and-fold” technique, ensuring even distribution. This will strengthen the gluten. Once incorporated, allow the dough to rest for another 10 minutes; this gives the salt time to fully dissolve and integrate into the dough, enhancing its flavor and structure.
Phase 2: Bulk Fermentation (Rise to Perfection)
Bulk fermentation is where your dough truly comes to life, developing strength and airiness. Maintain a warm environment for your dough during this stage, ideally between 75-80°F (24-27°C), to encourage swift and effective fermentation. This is crucial for a successful same-day sourdough.
- Maintain Warmth: Throughout the entire bulk fermentation process, ensure your dough remains covered (to prevent a skin from forming) and is kept in a consistently warm place. A draft-free spot is ideal, or you can use a proofing box, a turned-off oven with the light on, or near a warm appliance.
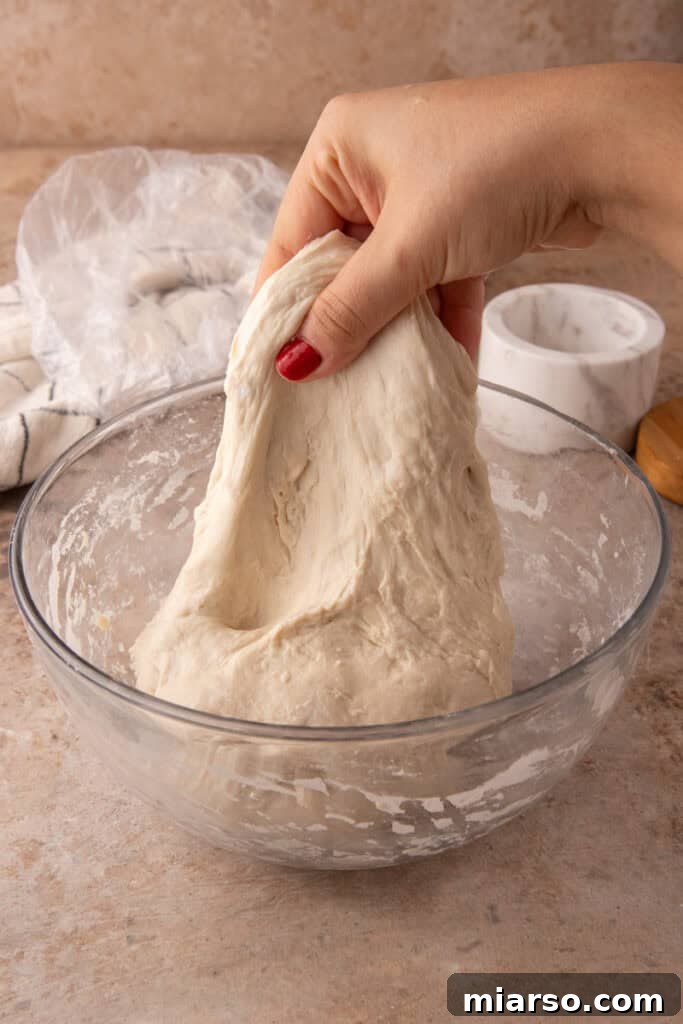
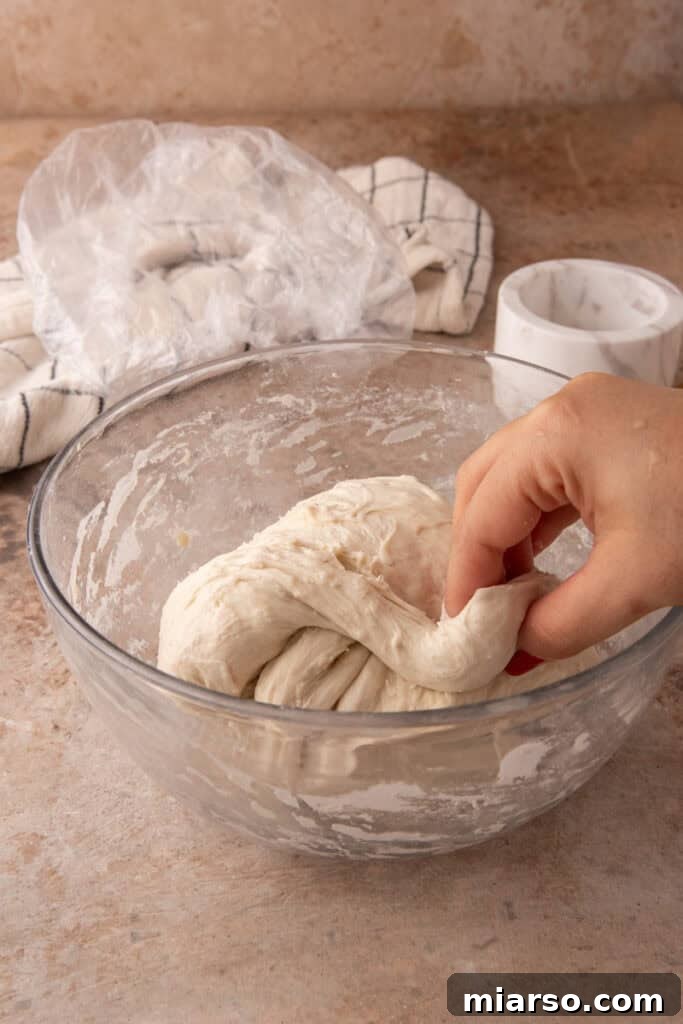
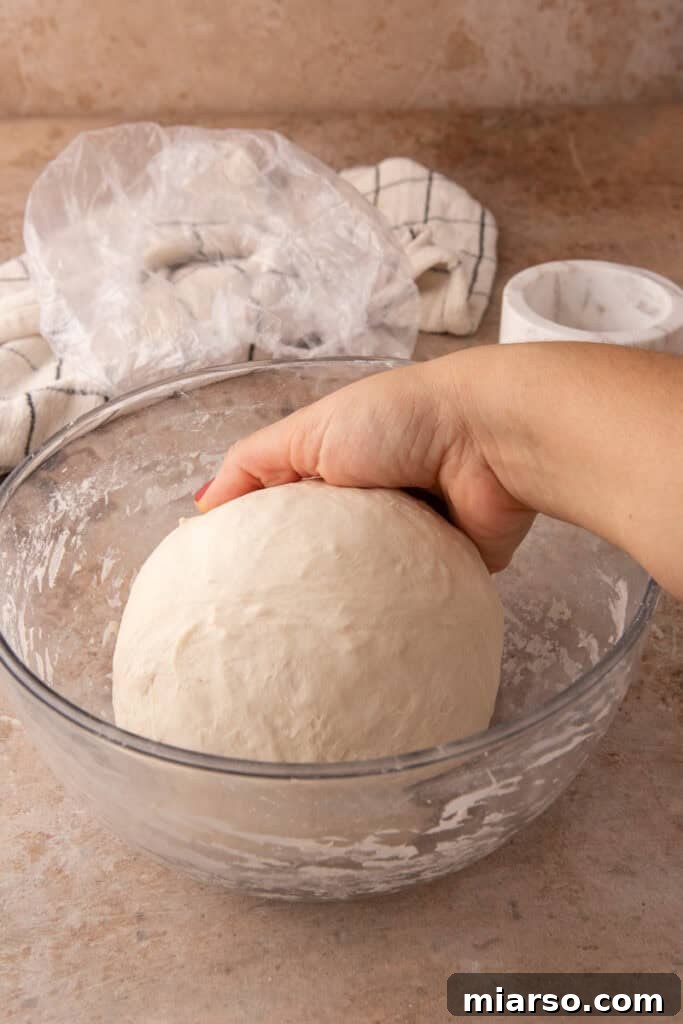
- Perform Stretch and Folds: For the initial 90 minutes of bulk fermentation, you will perform three rounds of stretch and folds, spaced 30 minutes apart. To execute a stretch and fold, gently lift a portion of the dough from one side (imagine north, then south, then east, then west) and fold it over towards the center of the dough. Repeat this motion around the entire dough until it feels slightly firmer and more elastic. This technique builds gluten strength without intense kneading, ensuring a light and open crumb.
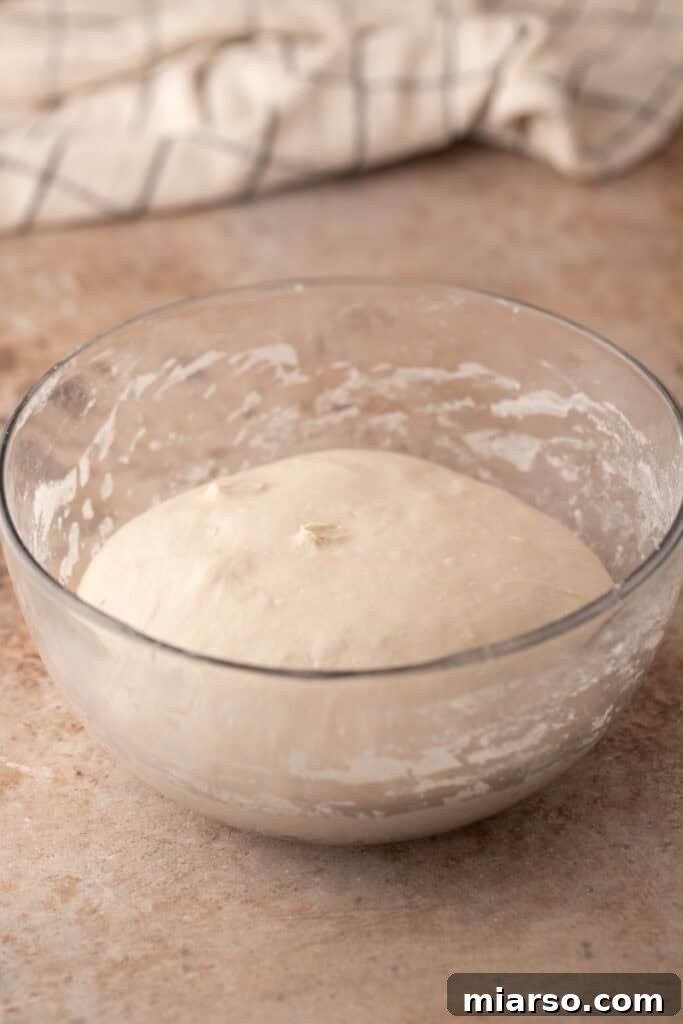
- Final Bulk Rise: After completing the three sets of stretch and folds, re-cover the dough. Allow it to continue rising for an additional 1-2 hours, or until it appears noticeably airy and has expanded in volume by approximately 50%. The exact time will depend on your kitchen temperature and starter activity. Look for visual cues like increased airiness and a domed surface.
Phase 3: Pre-shape & Bench Rest (Preparing for the Final Form)
Pre-shaping is an important intermediate step that helps build initial tension in the dough, making the final shaping process much easier and more effective for your quick sourdough loaf.
- Turn Out the Dough: Gently turn the dough out onto a lightly floured surface. Be careful not to deflate it too much, preserving the precious air bubbles that have developed.
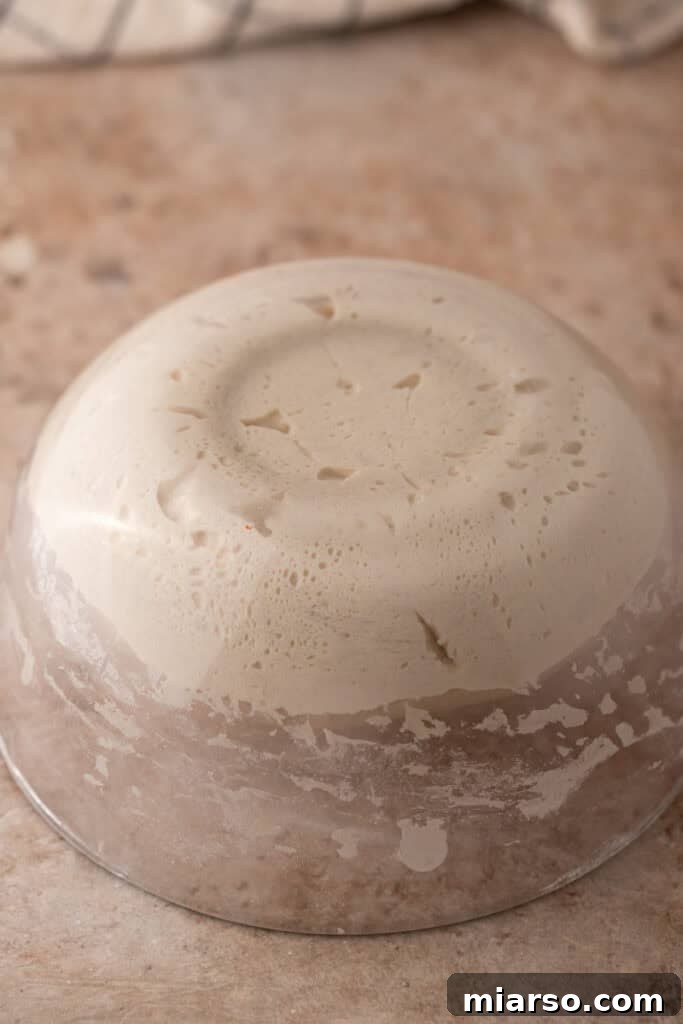
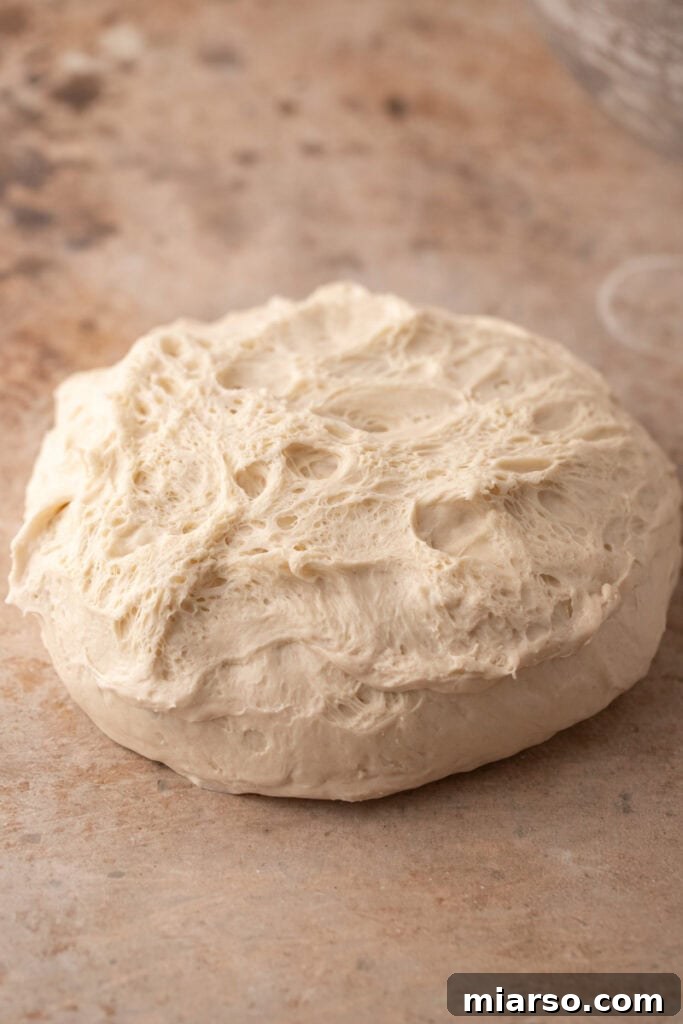
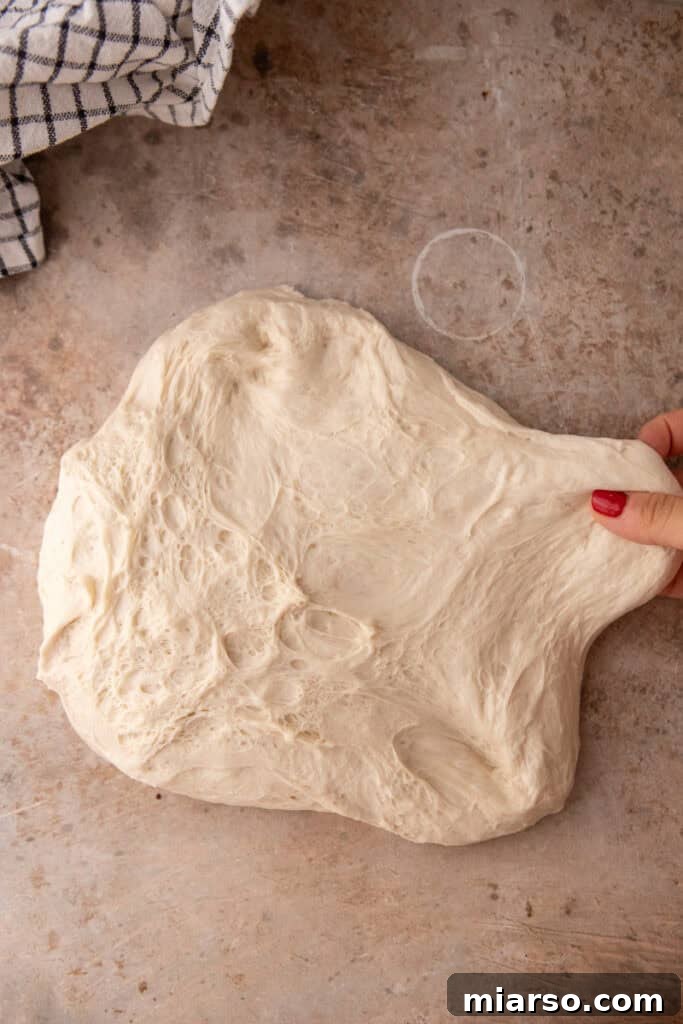
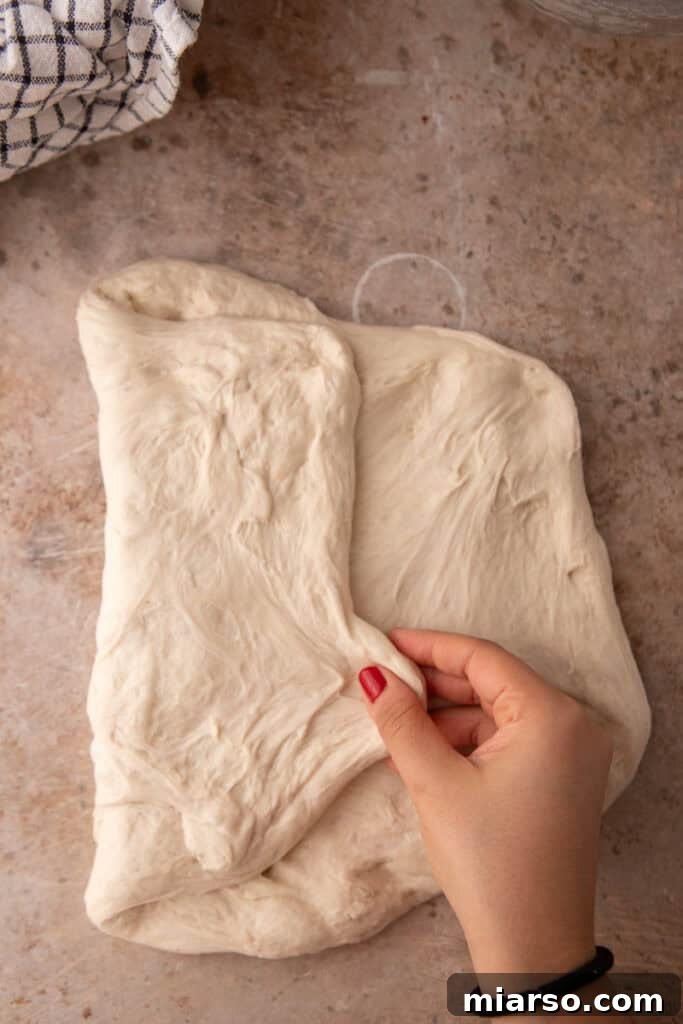
- Pre-shape into a Boule: Lightly stretch the dough into a rectangular shape. Then, perform a series of gentle folds: fold the dough horizontally into thirds, like a letter. Next, roll it up vertically from one end to the other, creating a loose round shape (boule). A bench scraper can be very helpful here for gentle handling and manipulation. This initial shaping helps organize the gluten structure.
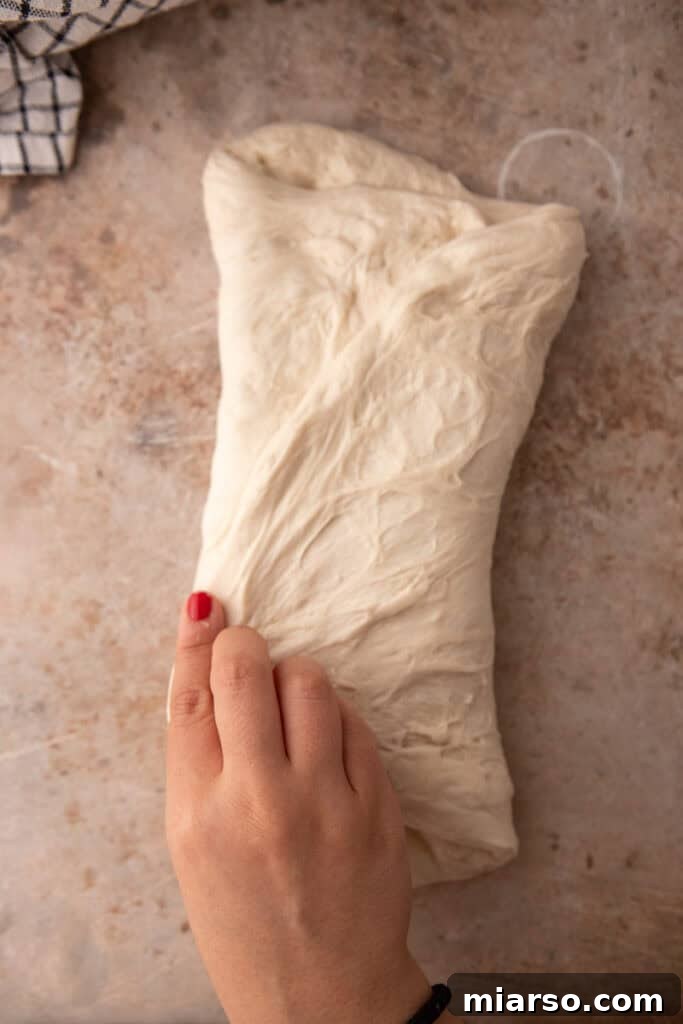
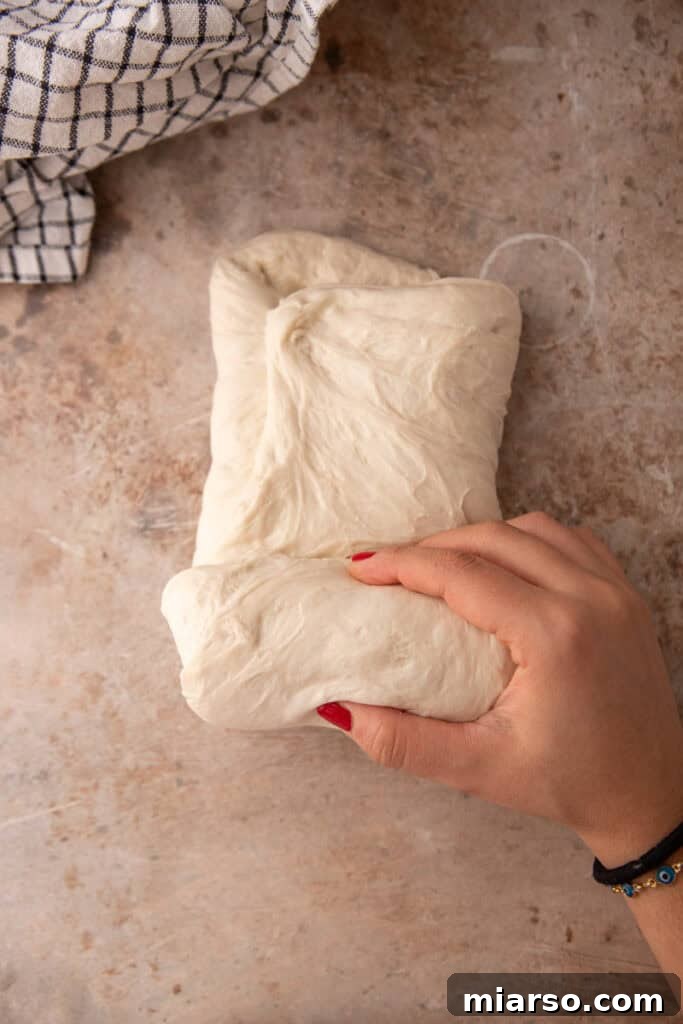
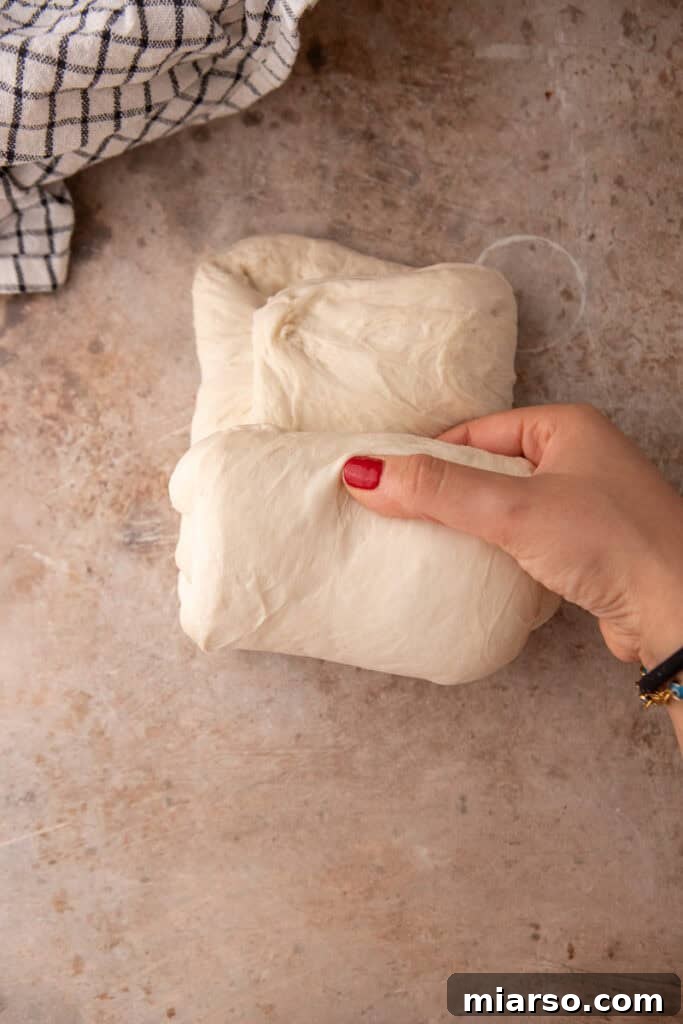
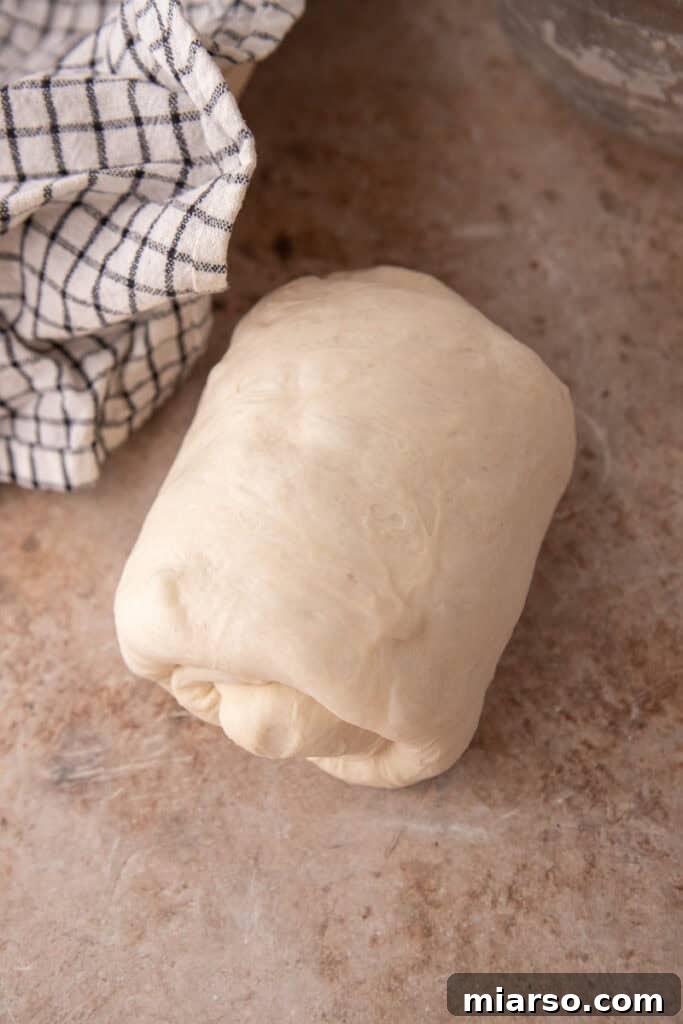
- Bench Rest: Leave the pre-shaped dough seam-side down on your lightly floured surface. Cover it with a damp kitchen towel or an inverted bowl to prevent it from drying out. Let it relax for 30 minutes. This bench rest allows the gluten to relax after handling, making the dough more pliable for the final shaping.
Phase 4: Final Shaping & Proofing (The Grand Finale Before the Oven)
The final shaping builds maximum surface tension, which is critical for a good oven spring. Proofing allows the dough to expand one last time before baking.
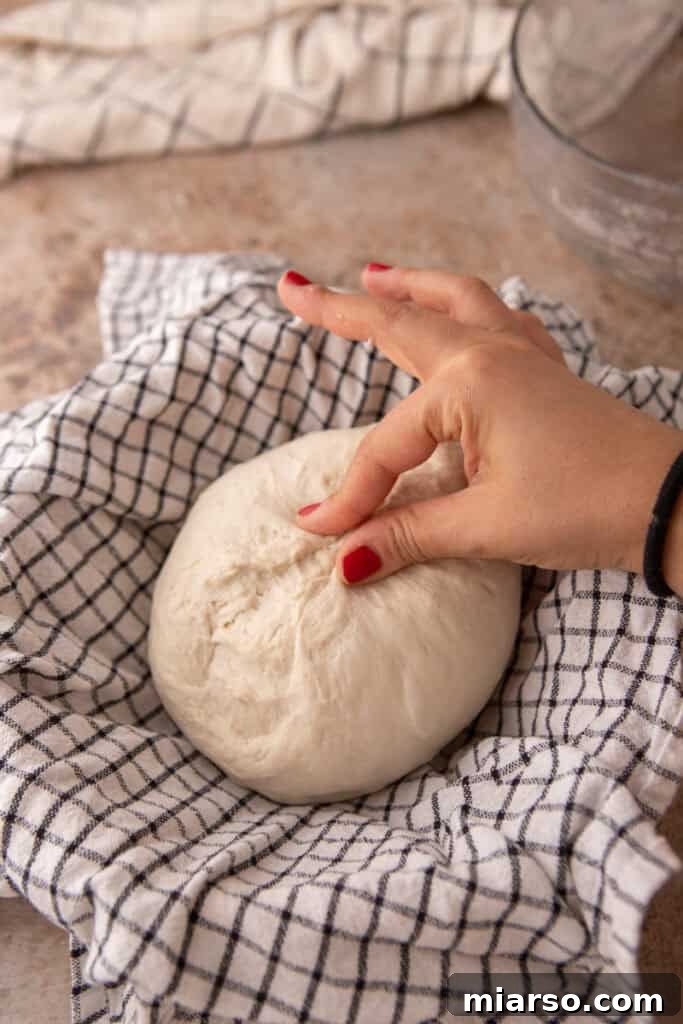
- Final Shaping for Tension: Turn the dough over so the seam side is up. Reshape the dough, aiming for a tighter structure than the pre-shape. Gently tuck the edges of the dough underneath itself, alternating with quarter turns, until you create a taut, smooth surface on top. This surface tension is vital for the bread to rise upward during baking rather than spreading outward.
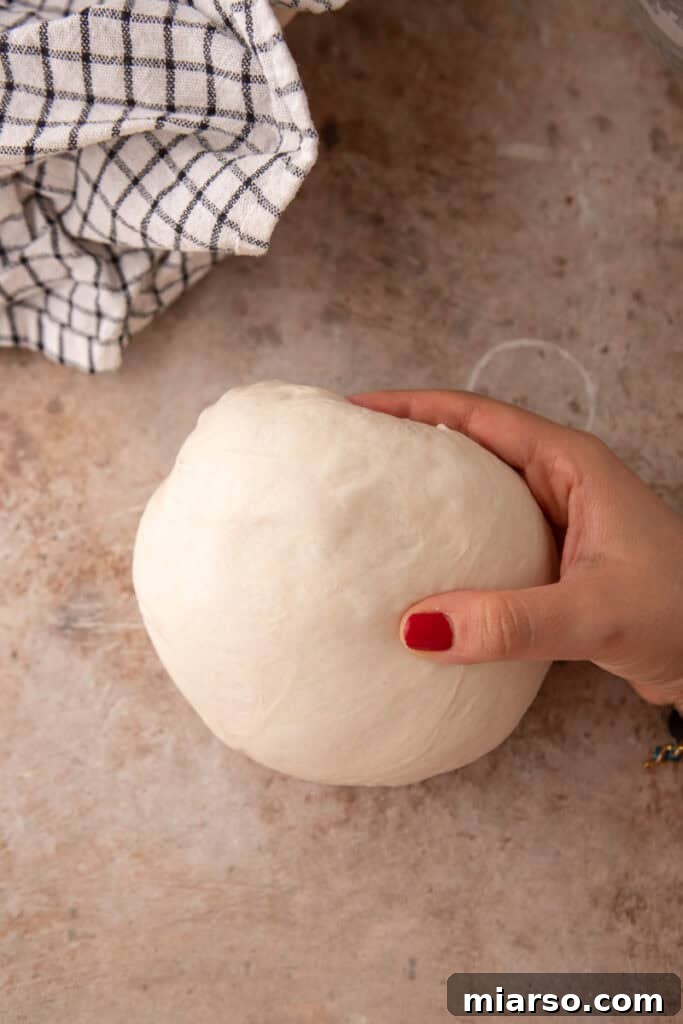
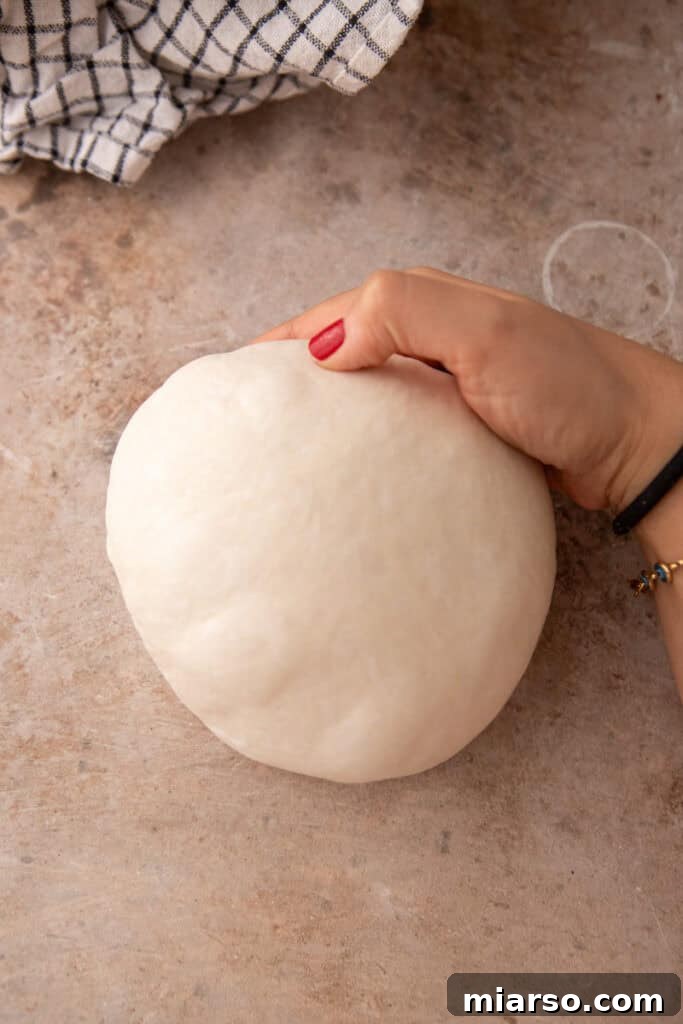
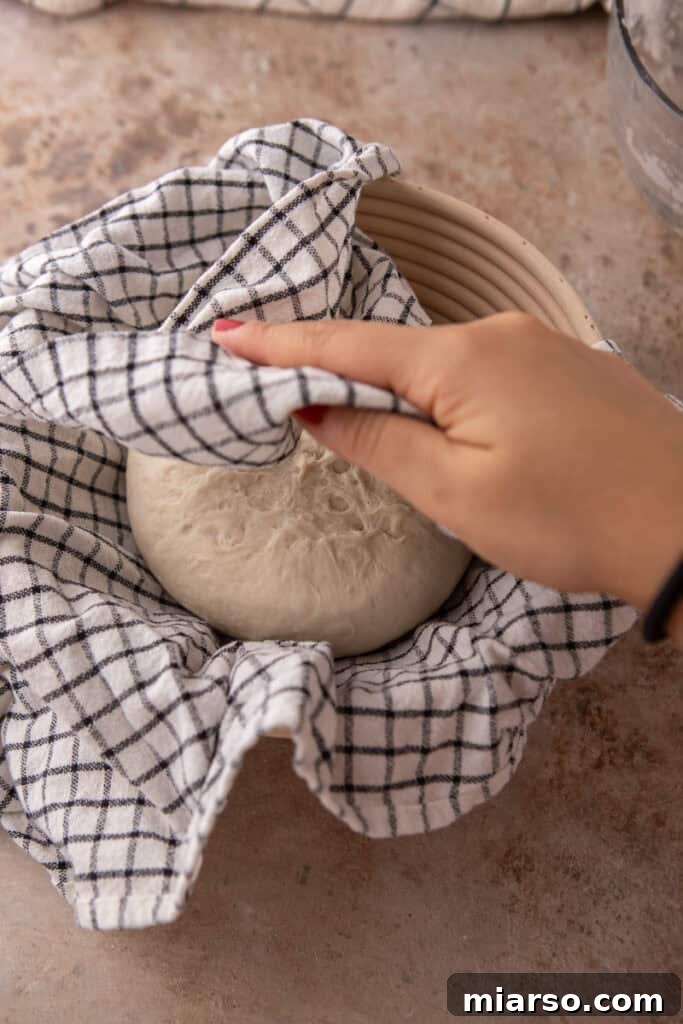
- Transfer to Proofing Basket: Carefully transfer your perfectly shaped dough, seam-side up, into a well-floured proofing basket (banneton) or a bowl lined with a floured kitchen towel. The flour prevents sticking, and the basket helps the dough maintain its shape.
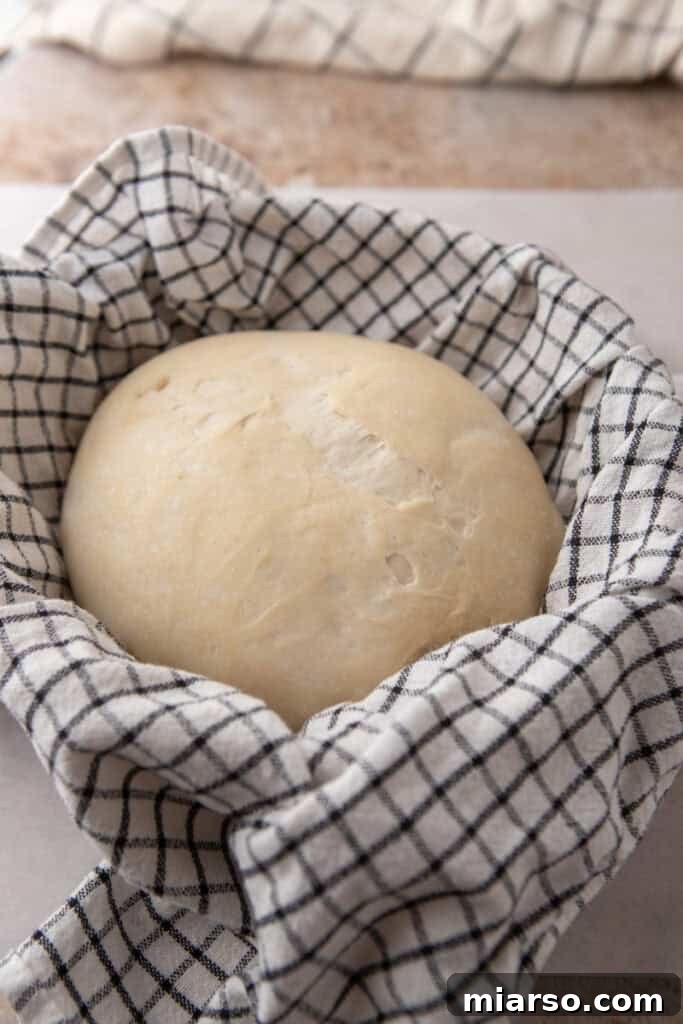
- Final Proof (Room Temperature): Cover the proofing basket and let the dough proof in a warm spot on your kitchen counter. This is the final rise before baking. The dough should become visibly puffed and increase in volume by approximately 50–75%. To test for readiness, gently press the dough with a floured finger. If it slowly springs back, it’s ready to bake. If it springs back too quickly, it needs more time. If it doesn’t spring back at all and leaves an indentation, it might be slightly over-proofed, but don’t worry, it can still bake into a delicious loaf!
Phase 5: Bake Your Masterpiece
Baking sourdough in a Dutch oven is highly recommended for achieving that iconic crust and airy interior, especially for a quick sourdough bake.
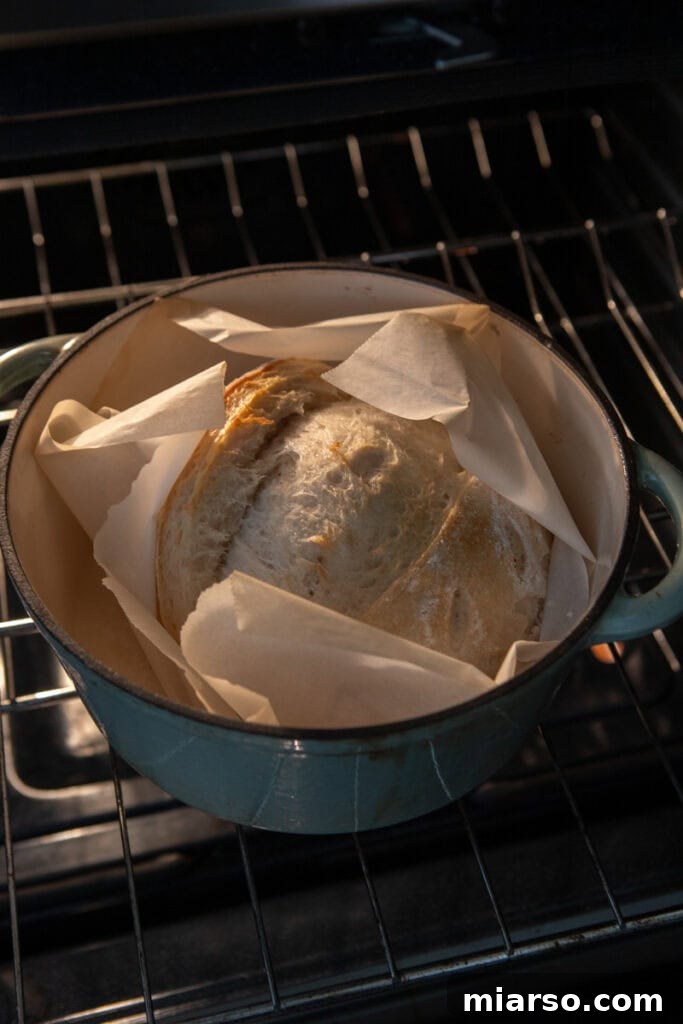
- Preheat Oven & Dutch Oven: Approximately 45 minutes to an hour before you plan to bake, place your Dutch oven (with its lid) into your oven and preheat both to a high temperature. This ensures the Dutch oven is scorching hot, creating the perfect environment for a strong oven spring.
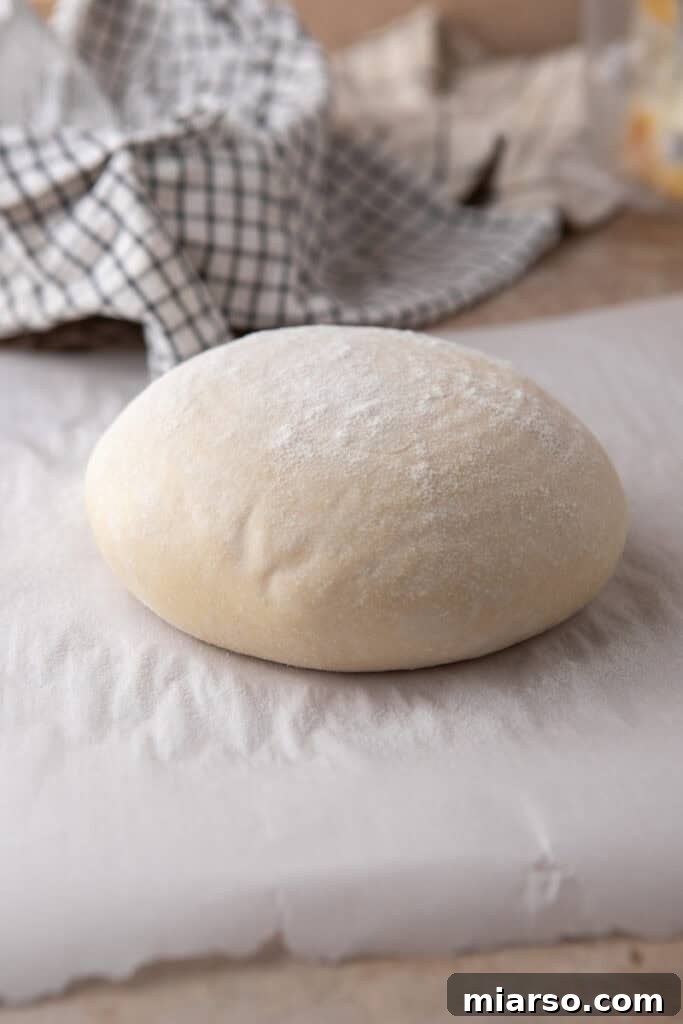
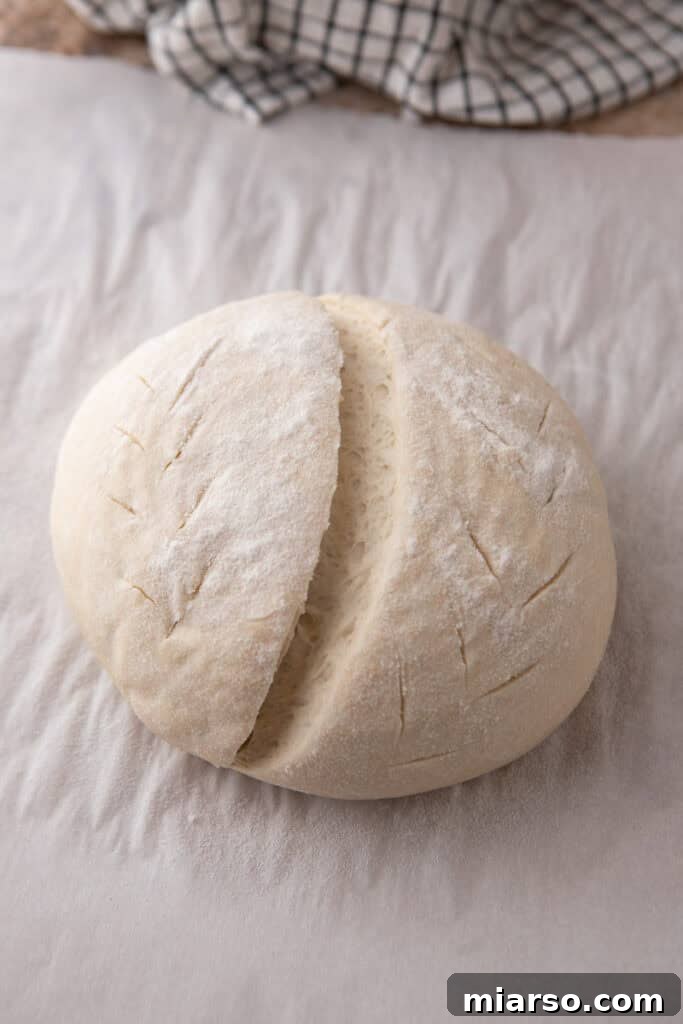
- Score and Transfer: Once your oven and Dutch oven are fully preheated, carefully remove the hot Dutch oven. Gently flip your proofed dough out of the basket onto a piece of parchment paper. Using a razor blade (lame) or a very sharp knife, score the top of the dough. This controlled cut allows the bread to expand beautifully during baking. Then, carefully lower the dough (still on the parchment paper, or using a silicone bread sling) into the hot Dutch oven.
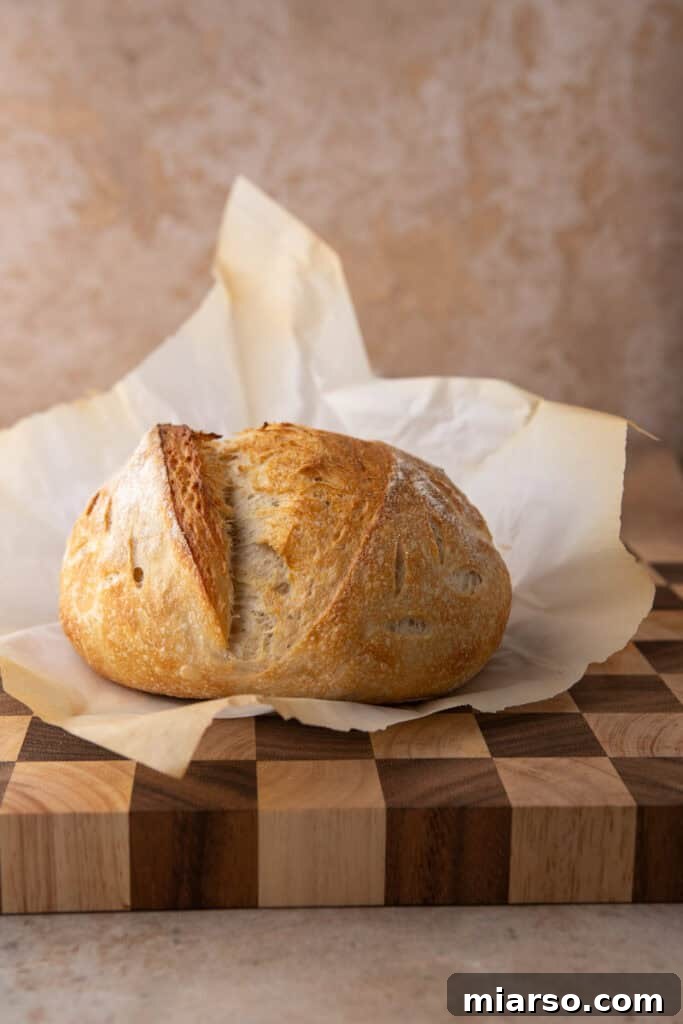
- Bake Covered, Then Uncovered: Place the lid back on the Dutch oven and bake in the hot oven for 20 minutes. The lid traps steam, which keeps the crust soft and pliable, allowing for maximum expansion. After 20 minutes, remove the lid, reduce the oven temperature, and continue baking for another 15-25 minutes, or until the crust is a deep, rich golden brown. This uncovered baking phase develops the signature crispy crust.
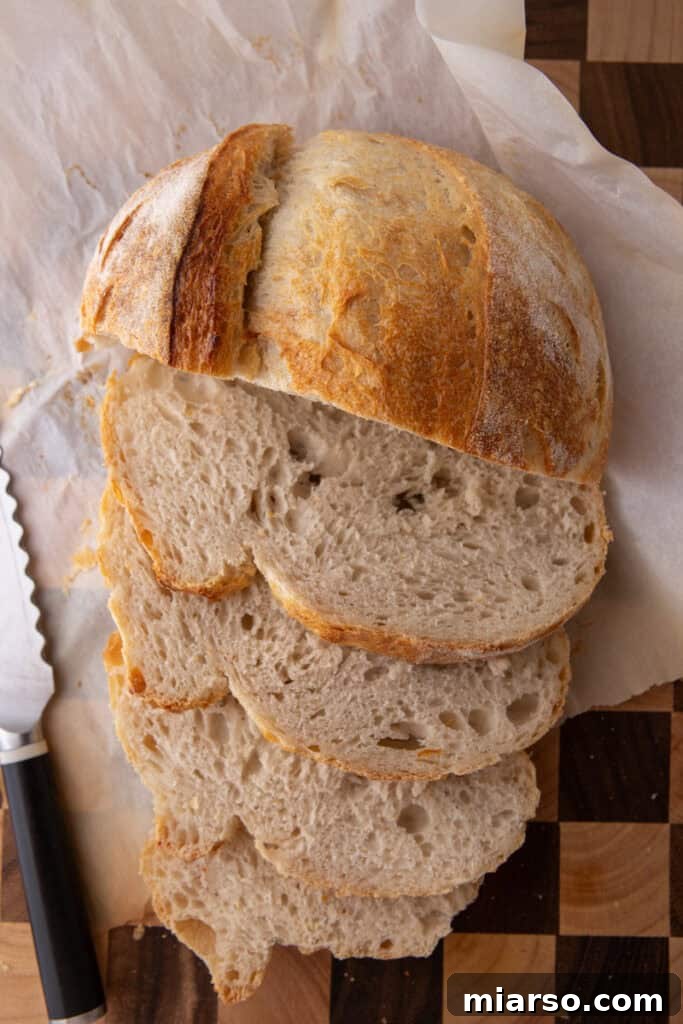
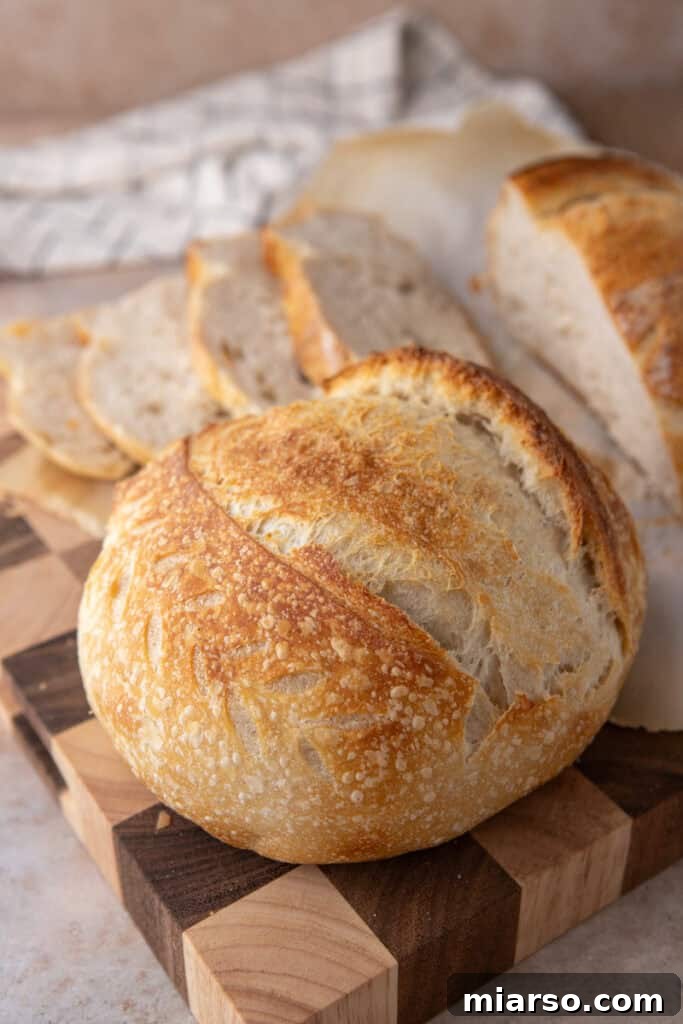
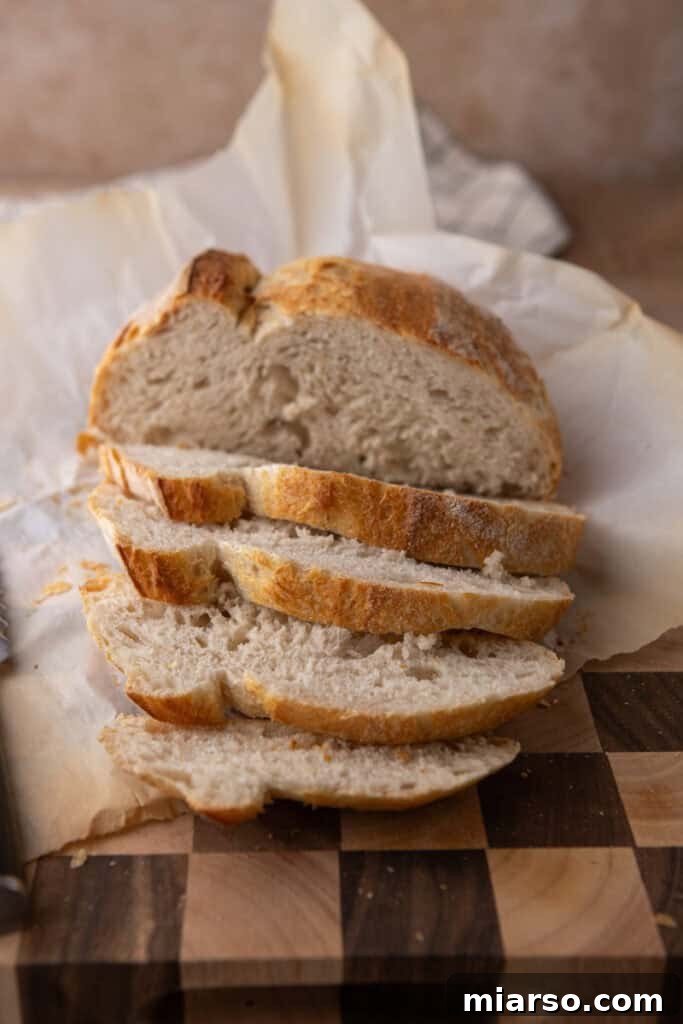
- Cool Completely: The final, crucial step: resist the urge to slice into your beautiful loaf immediately! Transfer the baked bread to a wire rack and allow it to cool completely for at least 1-2 hours. Slicing warm sourdough can collapse the delicate crumb structure, making it gummy. Patience will reward you with a perfectly soft, open, and satisfyingly chewy interior.
Your Same Day Sourdough Schedule: At a Glance
To help you plan your baking day and ensure success, here’s a simplified, easy-to-follow schedule for your same-day sourdough bread. These times are approximate and can be adjusted based on your kitchen’s temperature and your starter’s activity.
- 9:00 AM: Fermentolyse Begins: Mix bread flour, water, and active starter until thoroughly combined. Cover and let rest.
- 9:30 AM: Add Salt: Evenly scatter salt over the dough and gently mix it in using stretch-and-fold techniques.
- 9:45 AM: Bulk Fermentation Starts: Place dough in a warm spot, covered.
- 10:15 AM: First Stretch and Fold: Perform the first set of stretch and folds.
- 10:45 AM: Second Stretch and Fold: Perform the second set of stretch and folds.
- 11:15 AM: Third Stretch and Fold: Perform the third and final set of stretch and folds.
- 11:15 AM – 1:15 PM: Remainder of Bulk Fermentation: Let the dough rest undisturbed until it has expanded by approximately 50%.
- 1:15 PM: Pre-shape Dough: Turn dough onto a lightly floured surface, gently pre-shape into a boule, cover, and let rest on the counter.
- 1:45 PM: Final Shape & Transfer: Perform the final shaping, creating good surface tension. Transfer to a floured banneton basket or proofing bowl, seam side up.
- 1:45 PM – 3:15 PM: Final Proof: Cover and proof the dough at room temperature until it passes the poke test (slowly springs back).
- 2:45 PM: Preheat Oven: Place your Dutch oven inside the oven and preheat to 475°F (245°C).
- 3:30 PM: Score & Bake: Carefully flip dough onto parchment, score the top, and transfer into the hot Dutch oven.
- 4:15 PM – 4:30 PM: Cool Down: Remove the baked loaf from the oven and Dutch oven. Let it cool completely on a wire rack for at least an hour before slicing.
Please remember, these times are estimates. Your actual timing may vary depending on when you start, the ambient temperature of your ingredients and kitchen, and your personal working speed. Keeping a notepad or using your phone to track your progress can be incredibly helpful!
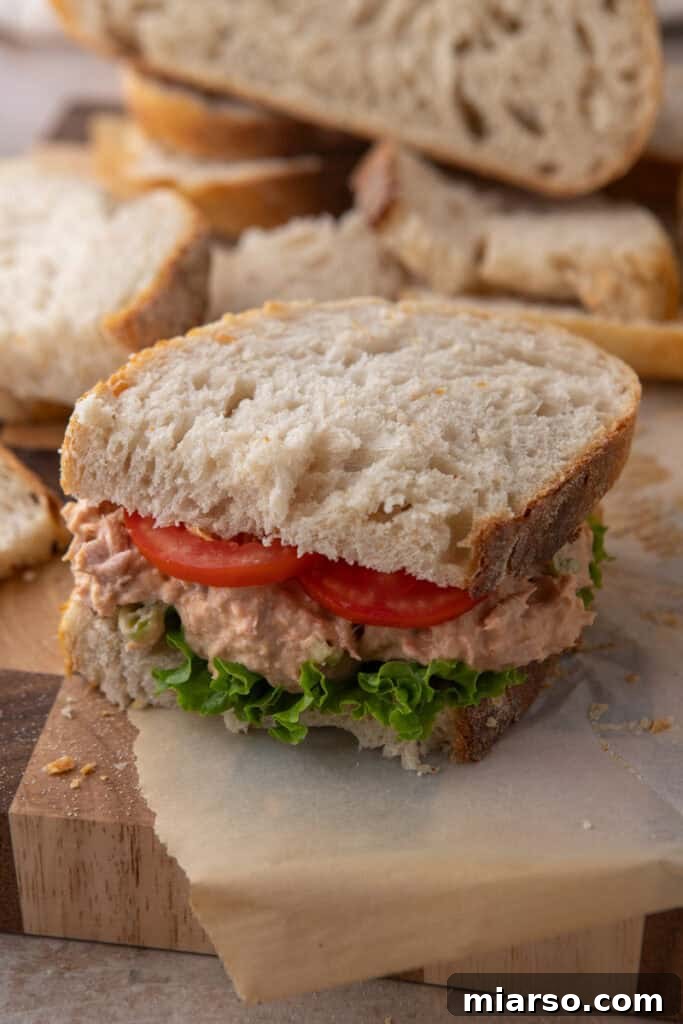
Enjoy your freshly baked sourdough with a generous spread of butter, a drizzle of olive oil, or alongside a warm bowl of this comforting Chicken and Cabbage Soup.
Expert Tips and Tricks for Perfect Same Day Sourdough
Achieving the best results with your same-day sourdough bread is easier with these expert tips:
- Steam is Essential for Crust: Steam is critical during the initial baking phase to create a thin, crispy crust and allow for maximum oven spring. If you’re using a Dutch oven with a tight-fitting lid, you’re perfectly set. If you don’t have a lid, simulate steam by placing a tray of boiling water in the bottom of your oven during the first 20 minutes of baking, then carefully remove it.
- Precision with a Kitchen Scale: For consistent and accurate baking, especially with sourdough, a kitchen scale is indispensable. Measuring by weight (grams) ensures far greater precision than volume measurements (cups), which can significantly impact dough hydration and overall success.
- Ensure an Active Starter: The success of a same-day sourdough hinges on a vibrant, well-fed, and active sourdough starter. It should be bubbly, have doubled (or nearly doubled) in size after its last feeding, and pass the float test (a small spoonful floats in water). A sluggish starter will result in a flat, dense loaf.
- Mind the Temperature: Warm water (around 70-75°F or 21-24°C) is ideal for stimulating yeast activity and accelerating fermentation. If your kitchen runs on the cooler side, consider using slightly warmer water (up to 80-85°F or 27-29°C) to help keep your fermentation on track. Always use filtered water to avoid chlorine interference.
- Gentle Handling with Wet Hands: When performing stretch and folds or shaping, be gentle with your dough to preserve the delicate gluten network and trapped gases. Wetting your hands slightly will prevent the dough from sticking, making the process much smoother.
- Create Surface Tension During Shaping: For a beautiful, tall loaf with good oven spring, it’s vital to create strong surface tension during the final shaping. Achieve this by pulling and tucking the dough underneath itself tightly, aiming for a smooth, taut outer skin. This encourages upward expansion rather than sideways spread.
- Adjust Hydration for Desired Crumb: If you’re comfortable handling a slightly wetter dough, you can increase the hydration level to 72–75% (around 290–300g water) for a more open and airy crumb. This requires a bit more practice but can yield stunning results.
- Adapt to Your Kitchen’s Climate: If your kitchen is particularly cool, you may need to extend the bulk fermentation and final proofing times slightly. Placing the dough near a warm appliance or in a turned-off oven with the light on can also help maintain an optimal temperature.
The Irresistible Appeal: Why Bake Same Day Sourdough?
Beyond its ingenious time-saving aspect, this same-day sourdough recipe offers a multitude of compelling reasons to make it a staple in your baking repertoire:
- Perfect for Beginner Bakers: This recipe is an excellent starting point for anyone new to sourdough. By shortening the fermentation, it reduces some of the complexity and waiting time, making the entire process feel more approachable and less intimidating, allowing beginners to gain confidence with a whole loaf.
- Instant Gratification: No more waiting until tomorrow for that glorious crusty bread! This recipe shatters the traditional barrier, allowing you to enjoy hot, fresh, homemade sourdough bread within hours of starting, perfect for satisfying sudden cravings.
- Impressive & Effortless Entertaining: Imagine pulling a warm, artisan-style loaf from your oven just in time for an unexpected brunch or dinner party. This recipe is incredibly impressive and makes you look like a seasoned baker, effortlessly elevating any meal or gathering on the same day.
- Wholesome and Simple Ingredients: You need only four clean, basic, and natural ingredients: bread flour, water, active sourdough starter, and salt. There are no preservatives, artificial additives, or commercial yeast, giving you complete control over what goes into your food.
- Superior Flavor & Health Benefits: Unlike many homemade bread recipes that rely on commercial yeast, this sourdough loaf utilizes wild yeast and beneficial bacteria from your starter. This natural leavening process not only creates a richer, more complex, and nuanced flavor profile but also contributes to better digestibility and potential health benefits.
- Endless Customization Potential: This recipe serves as a fantastic blank canvas for your culinary creativity. You can effortlessly customize the flavor of your bread with a wide array of mix-ins, transforming a simple loaf into a personalized masterpiece.
Frequently Asked Questions about Quick Sourdough (FAQ)
How long does this same day Sourdough bread take?
The entire process for this same day sourdough bread, from the initial mixing to a fully baked and cooled loaf, typically takes about 8 hours. To make the most of your day, I recommend starting by 10 AM at the absolute latest. This schedule allows the bread to be ready by 6 PM, perfectly timed for slicing and serving warm with dinner. It’s an ideal way to enjoy fresh sourdough without the overnight commitment.
Why do we use bread flour?
Bread flour is preferred in sourdough baking because it has a significantly higher protein content (usually 12-14%) compared to all-purpose flour. This higher protein level is crucial for superior gluten development. More gluten means more elasticity and strength in your dough, which allows it to stretch further and trap gases more effectively during fermentation and baking. The result is a chewier bite, a more open crumb structure with desirable air bubbles, and a more robust loaf overall. It truly enhances the sourdough experience.
Can I use all-purpose flour instead for this same day sourdough bread?
While all-purpose flour can certainly be used and will yield a decent loaf, for the best results with this quick sourdough bread recipe, bread flour is highly recommended. As explained, bread flour’s higher protein content facilitates faster and stronger gluten development, which is particularly beneficial when working with a shorter fermentation timeline. This ultimately contributes to a better rise, more appealing texture, and improved structural integrity of your bread. If possible, opt for bread flour for an optimal outcome.
Why is my dough not rising during the bulk fermentation?
Several factors can affect dough rise during bulk fermentation. First, ensure your active sourdough starter is truly vigorous and bubbly. A sluggish starter won’t provide enough leavening power. Second, and most commonly, check the temperature of your kitchen and the dough itself. The ideal temperature for active fermentation is between 75-80°F (24-27°C). If your kitchen is too cool, the yeast will be less active. To remedy this, you can place the dough in a turned-off oven with only the light on (which generates a gentle warmth), near a warm appliance, or in a proofing box to encourage more effective rising.
How do I know when the dough is ready to bake?
During the final proof, your dough should appear visibly puffed and noticeably larger. The most reliable way to confirm its readiness is by performing the “poke test.” Gently press the dough with a floured finger about an inch deep. If the indentation slowly springs back, your dough is perfectly proofed and ready to bake. If it springs back too quickly, it needs more time to proof. If the indentation remains and doesn’t spring back at all, the dough may be over-proofed, but you can still bake it, though the rise might be less dramatic.
Do I have to use a Dutch oven for the same day sourdough bread?
While not strictly mandatory, using a Dutch oven is by far the easiest and most reliable method for achieving excellent results, especially for home bakers who aren’t professionals. The Dutch oven creates a steamy environment during the initial phase of baking, mimicking a professional bakery oven. This trapped steam is crucial for preventing the crust from setting too quickly, allowing the dough to expand beautifully (oven spring), and developing that perfect, chewy crust with an open, airy crumb. Without a Dutch oven, you would need to get more creative with steam generation, such as using a preheated baking steel or stone with a pan of boiling water or lava rocks in the oven. While these methods can work, they are generally more complex and harder to execute consistently for most home bakers. The Dutch oven simplifies the entire process, making sourdough bread baking much more reliable and straightforward.
How do I store my leftover bread?
Proper storage is key to maintaining the freshness of your same-day sourdough bread. At room temperature, wrapped in a paper bag (to allow the crust to breathe) or a plastic bag (for a softer crust), it will stay fresh for about 3 days. For extended freshness, you can store it in the refrigerator for up to a week. For longer-term storage, sourdough freezes exceptionally well. Wrap the cooled loaf tightly in a layer of plastic wrap, followed by aluminum foil, to prevent freezer burn and keep it fresh for about one to two months. Thaw at room temperature and refresh in a warm oven for a few minutes before serving.
Can I add flavors to the same day sourdough bread?
Absolutely! One of the most enjoyable aspects of this recipe is its versatility and the endless possibilities for customization. You can easily infuse your quick sourdough bread with various delightful flavors. Consider adding minced roasted garlic, caramelized onion bits, chopped kalamata olives, shredded cheese (like cheddar or Gruyère), or nuts such as pecans or walnuts. To properly incorporate these mix-ins, you’ll want to add them during the first round of stretch and folds. This ensures they are evenly distributed throughout the dough as you continue with the subsequent folds, resulting in a beautifully flavored loaf with every slice.

Same-Day Sourdough Bread Recipe
Fresh sourdough in a day! This same-day recipe skips the long wait and delivers a crusty, flavorful loaf fast. A must-have for every baker!
Cook: 40 mins
Total: 7 hrs 40 mins
Servings: 1 loaf
Print Recipe
Ingredients
- 400 g Bread flour
- 280 g Water (filtered, room temperature)
- 80 g Sourdough starter (active, 100% hydration)
- 8 g Salt
Instructions
Fermentolyse – 30 minutes
- In a large bowl, mix the bread flour, water, and active sourdough starter together until no dry bits of flour remain. Cover the bowl and let the mixture rest for 30 minutes. This step activates enzymes, begins gluten development, and kickstarts fermentation.
- Evenly sprinkle the salt over the dough. Gently work the salt into the dough using a pinch-and-fold or stretch-and-fold method. Allow the dough to rest for another 10 minutes to ensure the salt fully dissolves and integrates.
Bulk Fermentation (3.5 to 4 hours)
Keep the dough covered and in a warm environment (ideally 75–80°F / 24-27°C) throughout this step.
- For the first 90 minutes of bulk fermentation, perform three rounds of stretch and folds at 30-minute intervals. To do this, gently lift each side of the dough (north, south, east, and west) and fold it over toward the center.
- After the three sets of stretch and folds, cover the dough and let it continue to rise for the remainder of the bulk fermentation (approximately 1-2 hours) until it looks airy and has expanded by about 50%.
Pre-shape & Bench Rest (30 minutes)
- Gently turn the dough out onto a lightly floured surface. Loosely shape it into a round (boule) or oval (batard) by gently stretching and folding it.
- Leave the dough seam-side down, cover with a damp kitchen towel or an inverted bowl, and let it relax on the counter for 30 minutes.
Final Shape & Proof (1.5 to 2 hours)
- Reshape the dough with a tighter structure. Create surface tension by gently tucking the dough underneath and alternating with quarter turns until the surface is taut and smooth.
- Carefully transfer the dough to a floured proofing basket or a bowl lined with a floured towel, seam side up.
- Cover the dough and proof it in a warm spot on the kitchen counter until it passes the poke test (slowly springs back when gently pressed). It should have risen by about 50–75%.
Optional: Chill the dough in the fridge for 30-60 minutes before scoring. This makes scoring much easier and cleaner!
Bake
- Preheat your oven to 450°F (232°C) with your Dutch oven inside for at least 45 minutes to an hour.
- Carefully flip the proofed dough onto a piece of parchment paper. Score the top of the dough with a razor blade or a sharp knife. Gently lower the dough (using the parchment paper or a silicone bread sling) into the hot Dutch oven.
- Bake in the preheated oven with the lid on for 20 minutes. After 20 minutes, remove the lid, reduce the oven temperature to 390°F (199°C), and continue baking for another 15-20 minutes, or until the crust is deeply golden brown. The internal temperature should reach between 200-210°F (93-99°C).
- Transfer the baked loaf to a wire rack and let it cool completely for at least 1-2 hours before slicing. This preserves the soft, open crumb structure.
Notes
- Check the main blog post for a sample time sheet to help you plan your baking day.
- Notes for Success:
- You can bump hydration to 72–75% (290–300g water) for a more open crumb if you’re comfortable handling wetter dough. This will make the dough stickier but yield a more airy interior.
- If your kitchen is cooler, let the dough proof a bit longer or place it near a warm appliance (like a stove pilot light or a dehydrator on a low setting) to maintain an optimal temperature.
- Optional add-ins (mix in during the first few stretch and folds): roasted garlic, chopped olives, fresh herbs like rosemary or thyme, shredded cheese, or toasted nuts.
Nutrition
Nutrition information is automatically calculated and should only be used as an approximation.
Like this recipe? Leave a comment below and share your baking success!