
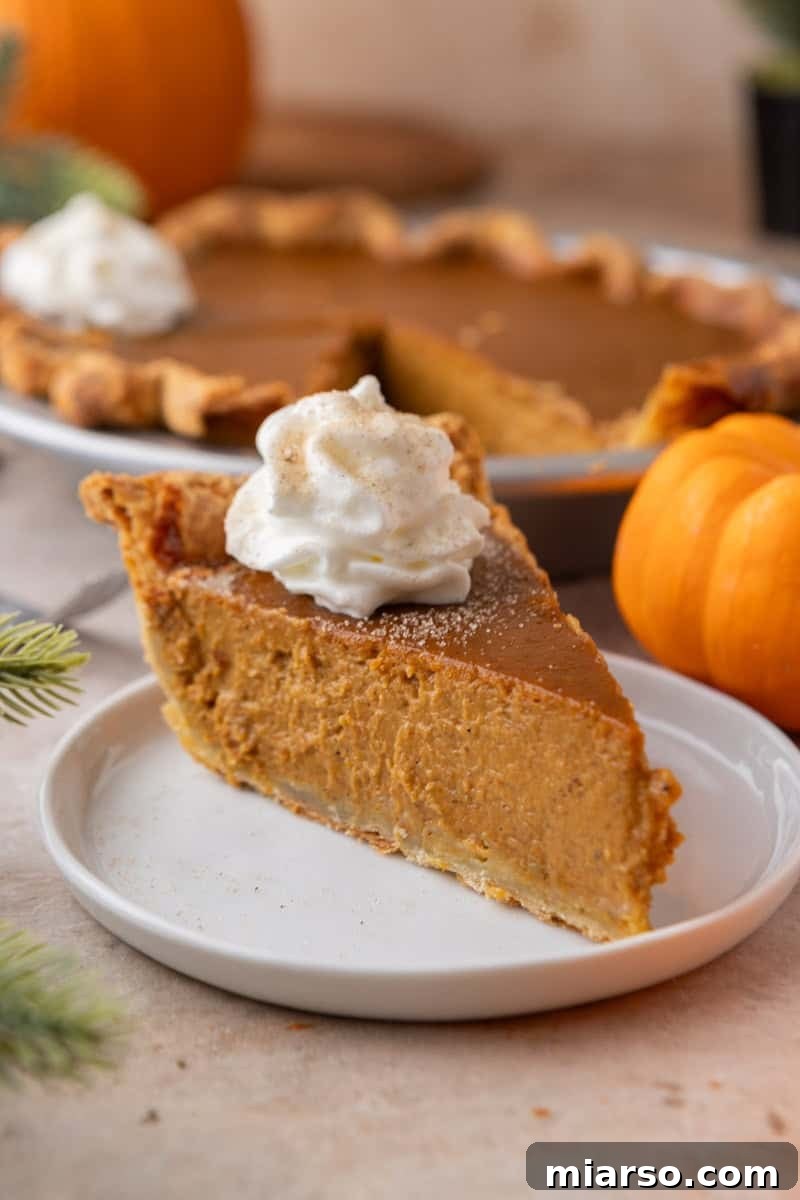
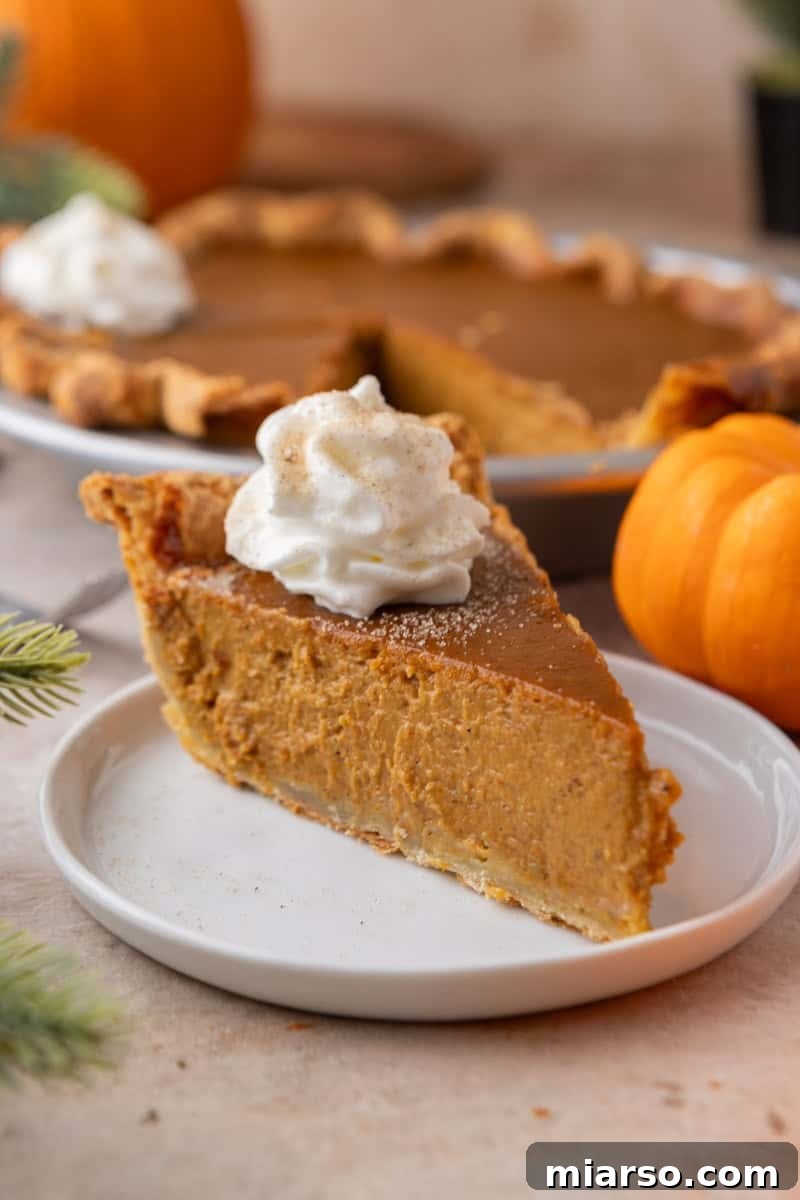
There’s nothing quite like the comforting aroma and taste of a **homemade pumpkin pie** to mark the arrival of fall or to grace your Thanksgiving table. Forget complicated recipes and disheartening baking mishaps like cracked tops or soggy crusts. This isn’t just *another* pumpkin pie recipe; it’s your new go-to, perfected over countless tests to ensure a **silky-smooth, custardy filling** and a wonderfully **flaky, buttery crust** every single time.
Whether you’re a seasoned baker or new to the world of pies, this **easy pumpkin pie recipe** is designed for success. It leverages simple techniques and a full can of pumpkin puree, delivering a rich, spiced flavor that captures the essence of the season. Get ready to impress your family and friends with a pie that tastes as good as it looks – a true centerpiece for any **fall gathering or holiday feast**.
“Second year in a row following this recipe and looking forward to many more years of making it! *just a friendly suggestion to anyone reading, if you can get your hands on a couple ducks eggs it makes the pie a million times creamier 🤤”
– Brinna
Let’s Chit Chat! My Secret Ingredient This Year
This year, I found myself utterly captivated by the subtle allure of cardamom. Naturally, I wondered how it would transform my beloved classic pumpkin pie. Adding just a pinch to the filling was a revelation! It doesn’t overpower the traditional pumpkin spice blend but instead introduces a warm, slightly floral, almost citrusy note that deepens the pumpkin flavor, making it taste incredibly complex and sophisticated. It’s like taking your favorite cozy sweater and upgrading it to cashmere.
Rest assured, this recipe maintains everything you adore about a traditional pumpkin pie: the iconic creamy texture, the reliably flaky crust, and a beautifully balanced spice profile. However, that whisper of cardamom elevates it from simply delicious to truly extraordinary, adding a unique twist that feels both familiar and refreshingly new. If you’re eager to “level up” your homemade pumpkin pie and explore a more refined flavor palette, this simple addition will be your secret weapon.
Why You’ll Love This Easy Pumpkin Pie Recipe
Have past pumpkin pie attempts left you with a cracked surface or a dishearteningly soggy crust? Say goodbye to those frustrations! This recipe has been meticulously tested and perfected to guarantee a consistently creamy consistency, a harmonious balance of sweetness and spice, and a crust that stays crisp. Here’s a closer look at what makes this pumpkin pie truly special and why it will quickly become a cherished tradition:
- Unbelievably Creamy & Custard-Like Texture: Achieve that sought-after smooth, rich custard that slices beautifully without crumbling or weeping. Each bite melts in your mouth.
- Effortless Filling Preparation: The pumpkin pie filling comes together in mere minutes. No fancy stand mixer required – a simple whisk and a bowl are all you need for a perfectly blended mixture.
- Rich Yet Balanced Flavor Profile: Experience a deeply satisfying flavor that’s robust but never heavy. The spices are perfectly balanced, enhancing the natural sweetness of the pumpkin without overpowering it.
- Uses a Full Can of Pumpkin Puree: No awkward leftover pumpkin! This recipe is designed to use an entire 15-ounce can of pumpkin puree, making it convenient and efficient.
- Perfectly Balanced Sweetness & Spice: The ratio of sugars and spices is carefully calibrated to create a pie that’s sweet enough to be a treat but still allows the rich pumpkin and warm spices to shine through.
- Foolproof Lower-Rack Baking Method: Our unique two-stage baking approach, utilizing the lower oven rack, ensures your crust bakes through to golden perfection, preventing any dreaded sogginess, while the custard sets beautifully.
Essential Ingredients to Make The Best Pumpkin Pie From Scratch
Crafting the perfect pumpkin pie starts with understanding each ingredient’s role. Here’s a detailed breakdown of what you’ll need to achieve that sublime texture and irresistible flavor:
- Pumpkin Puree: The star of the show! It’s crucial to use 100% pure pumpkin puree. Avoid pumpkin pie filling, which is pre-sweetened and spiced, as it will throw off the recipe’s balance. For the best consistency, ensure your puree is well-drained if homemade or particularly wet.
- Eggs + Egg Yolk: Eggs are essential for binding the custard, giving it structure and preventing it from being too runny. The extra egg yolk contributes to a richer, more luxurious, and silkier texture, adding that desirable smooth mouthfeel.
- Heavy Cream and Evaporated Milk: This dynamic duo creates the ideal creamy, balanced texture. Heavy cream provides richness and body, while evaporated milk contributes a subtle caramelized depth and helps achieve a perfectly smooth, silky custard without being overly dense.
- Brown Sugar and White Sugar: A blend of sugars offers a more complex sweetness. Brown sugar (light or dark, depending on your preference for depth) adds moisture and molasses notes, complementing the fall spices beautifully, while granulated white sugar provides pure sweetness and helps with browning.
- Pumpkin Pie Spice: This pre-mixed blend typically includes cinnamon, nutmeg, ginger, and cloves, delivering all the classic, cozy fall flavors in one convenient go.
- Cinnamon: While pumpkin pie spice contains cinnamon, an extra touch amplifies its warm, comforting notes, adding a deeper aromatic dimension to your pie.
- Cardamom: (Optional but highly recommended!) As discussed, a pinch of ground cardamom introduces a sophisticated, warm, and slightly citrusy undertone that elevates the pumpkin flavor, making the pie taste truly special and unique.
- Cornstarch: This acts as a subtle thickener, helping the custard set to a firm yet silky consistency. It’s key for ensuring clean, perfect slices every time.
- Salt: A pinch of salt is vital! It balances the sweetness of the pie, preventing it from tasting one-dimensional, and enhances all the other flavors, bringing them into sharper focus.
- Pre-baked Pie Shell: A crucial step for preventing a soggy bottom! Using a pre-baked (or blind-baked) pie crust ensures it remains crisp and flaky under the moist pumpkin custard. You can use a high-quality store-bought crust or try a homemade pie crust recipe for an even more superior flavor. For expert tips, refer to this Pie Crust Guide from a French Pastry Chef.
Pumpkin Puree vs. Pumpkin Pie Filling: Know the Difference
This is a common point of confusion, but understanding the distinction is paramount for a successful pie. **Pumpkin puree** is simply 100% cooked, mashed pumpkin, with no other ingredients added. It’s natural, unsweetened, and unspiced. **Pumpkin pie filling**, on the other hand, is a pre-made mixture that already contains sugar, spices, and sometimes other thickeners. If you inadvertently use pumpkin pie filling instead of pure puree, your pie will be excessively sweet and overly spiced, throwing the entire recipe out of balance. Always double-check your label to ensure you’re using **pure pumpkin puree** for the best and most predictable results.
Mastering the Art of Blind Baking Your Pie Crust
Blind baking is a fundamental step for any custard-based pie like pumpkin pie. It ensures your crust is fully cooked and wonderfully crisp, creating a robust foundation that won’t become soggy under the moist filling. Follow these simple steps for a perfectly pre-baked crust:
- Prepare the Dough: On a lightly floured surface, roll out your pie dough to a 12-inch circle. Carefully transfer it into a 9-inch pie pan, pressing it gently into the bottom and up the sides. Trim any excess dough, leaving about a ½-inch overhang, then crimp the edges decoratively.
- Chill for Stability: This step is critical! Place the prepared pie crust in the refrigerator for at least 20-30 minutes. Chilling the dough thoroughly before baking helps to firm up the butter, which prevents the crust from shrinking excessively in the oven.
- Weight It Down: Line the chilled crust with parchment paper or aluminum foil, making sure it covers the edges to prevent them from burning. Fill the liner with pie weights, dried beans, or even uncooked rice. These weights prevent the crust from puffing up and maintain its shape during baking.
- First Bake – Initial Set: Place the pie pan on the lower oven rack. Preheat your oven to 375°F (190°C) and bake the weighted crust for 30 minutes. The lower rack ensures the bottom crust receives direct heat, promoting a golden, cooked-through base.
- Second Bake – Golden Finish: Carefully remove the pie weights and parchment paper. Return the crust to the oven (still on the lower rack) and bake for another 15 minutes, or until the bottom and sides are lightly golden brown and look dry. This ensures a fully baked, crisp crust.
- Cool Completely: Remove the pie crust from the oven and let it cool completely on a wire rack before adding your pumpkin filling. This prevents steam from building up and making the crust soggy.
Crafting a Silky Smooth Pumpkin Pie From Scratch: Step-by-Step
With your perfectly blind-baked crust ready, it’s time to create the luscious, spiced pumpkin filling that defines this classic dessert. Our method ensures a velvety texture and rich flavor.
- Blind Bake Your Crust: (Refer to the detailed instructions above for full guidance.) Begin by rolling and pressing your pie dough into a 9-inch pie pan. Prick the bottom lightly with a fork (docking) to allow steam to escape. Chill the crust for 30 minutes. Line with parchment paper, fill with pie weights, and bake at 375°F (190°C) for 30 minutes. Remove weights and parchment, then bake for an additional 15 minutes until lightly golden brown. Allow the crust to cool completely on a wire rack before proceeding.
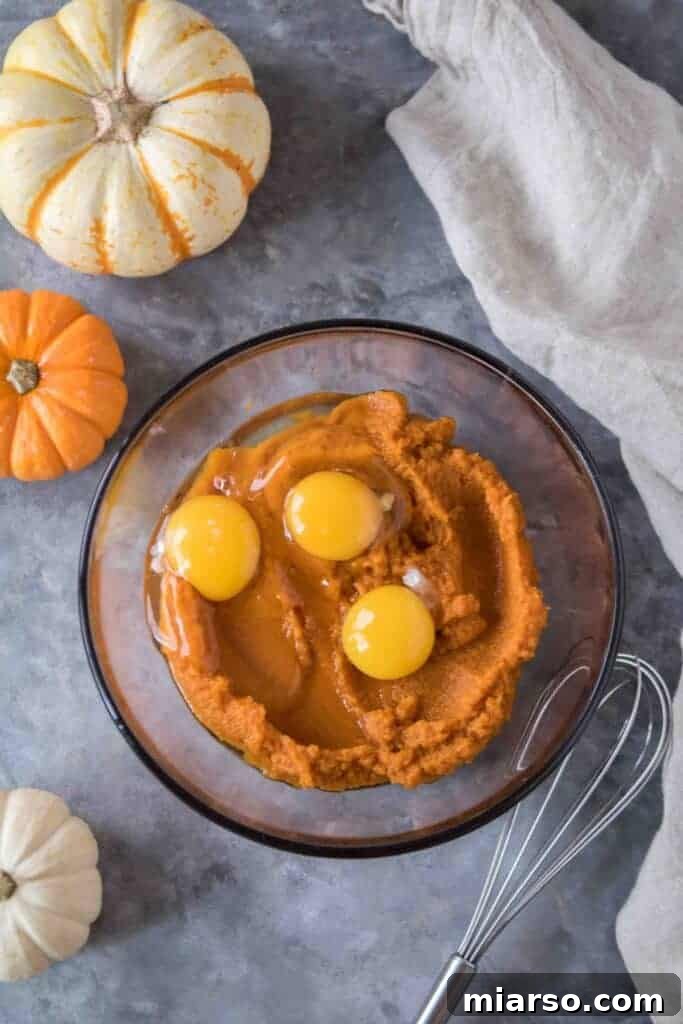
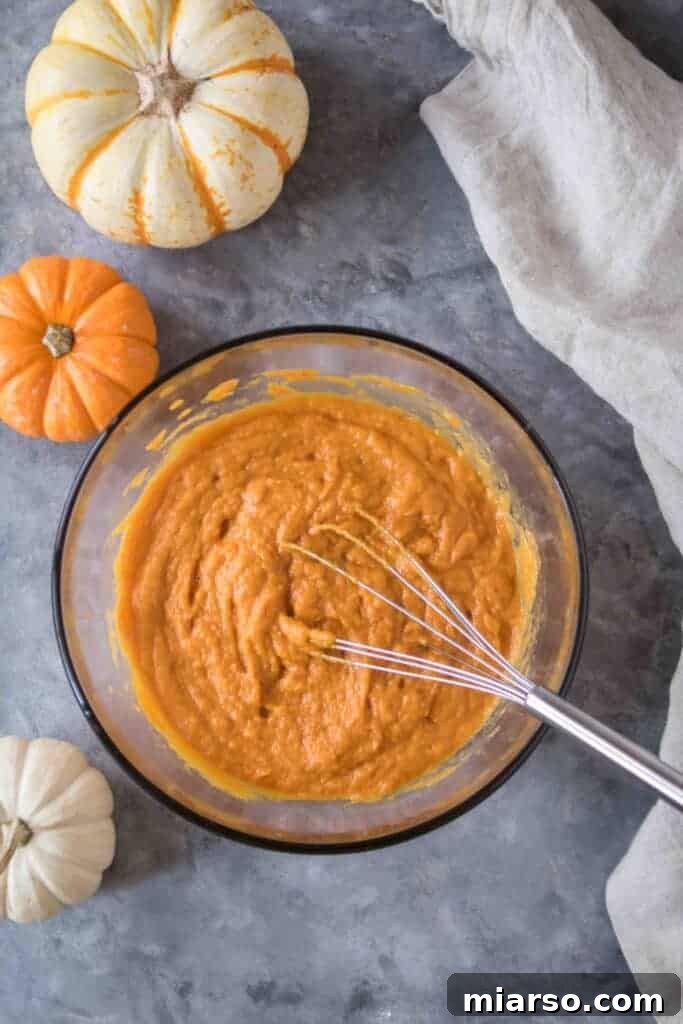
- Prepare the Velvety Filling: In a large mixing bowl, combine the pure pumpkin purée, large eggs, extra egg yolk, both brown and granulated sugars, pumpkin pie spice, the optional (but recommended) cardamom, cornstarch, and salt. Whisk all these ingredients vigorously until they are thoroughly combined and the mixture is smooth. Next, gradually whisk in the heavy cream, evaporated milk, and vanilla extract until the filling is perfectly silky and uniform. For an absolutely luxurious, restaurant-quality custard that is free of any tiny lumps or stringiness, press the entire filling mixture through a fine-mesh sieve into another clean bowl before pouring it into your crust. This extra step takes seconds but makes a remarkable difference.
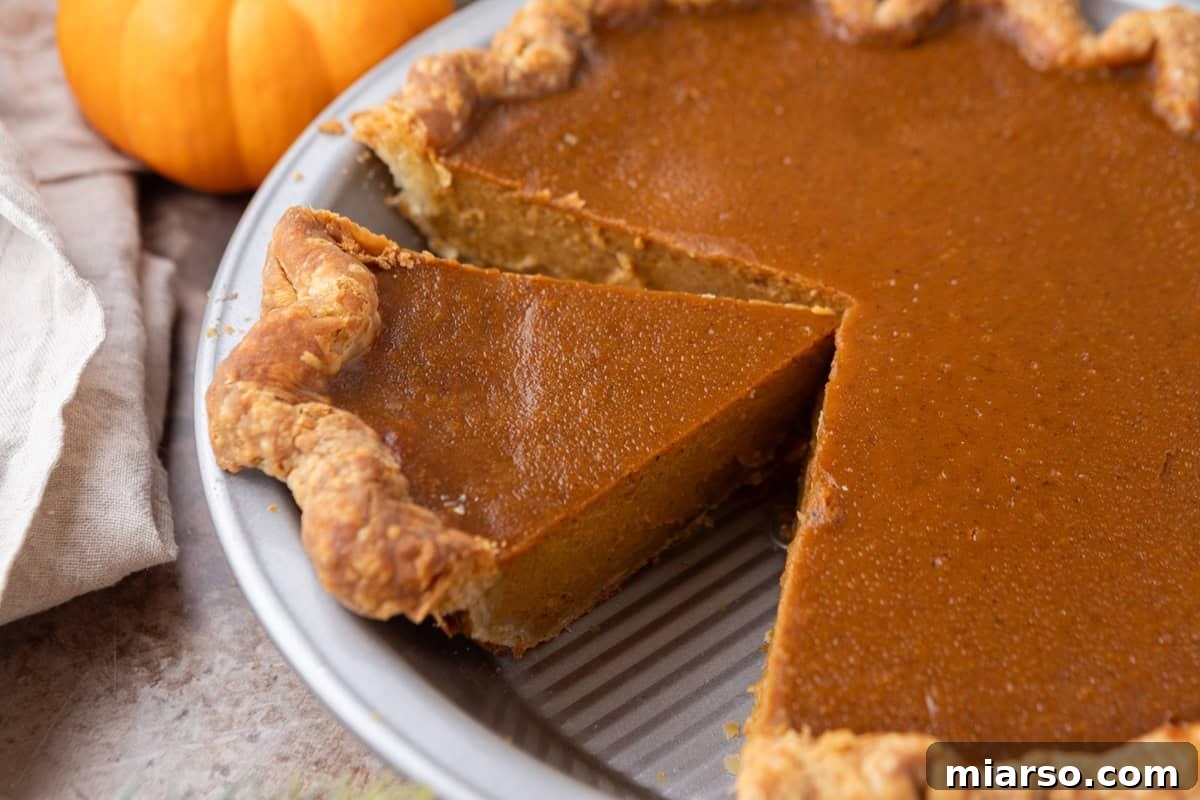
- Bake to Perfection (Lower-Rack, Two-Stage Method): Position an oven rack in the lower third of your oven and preheat it to a searing 425°F (220°C). Carefully pour the prepared pumpkin filling into your cooled, pre-baked pie shell. Place the pie directly on the lower rack. Bake for an initial 10 minutes at this high temperature. This quick burst of heat helps to set the crust and the outer edges of the filling. **Without opening the oven door**, reduce the oven temperature to 350°F (175°C). Continue to bake for an additional 35–45 minutes. The pie is done when the edges appear set and slightly puffed, but the very center still has a slight, delicate jiggle when gently shaken. The internal temperature, checked with an instant-read thermometer inserted about an inch from the edge, should register around 175°F (80°C). Overbaking can lead to cracks, so watch it carefully!
- Cool Completely: Once baked, carefully remove the pie from the oven and place it on a wire rack to cool completely for at least 2–3 hours at room temperature. The filling will continue to set and firm up as it cools, achieving that perfect sliceable consistency. Resist the urge to cut into it too early!
Remember, blind baking is your shield against the dreaded soggy bottom, ensuring your crust remains gloriously flaky and crisp beneath the rich pumpkin custard.
How to Know When Your Pumpkin Pie Is Perfectly Done
Knowing exactly when to pull your pumpkin pie from the oven is crucial for achieving that ideal, smooth, crack-free surface and creamy texture. Here’s what to look for:
- Visual Cues: The edges of the pumpkin filling should appear set and slightly puffed. You might notice a subtle browning around the crust edge.
- The Gentle Jiggle Test: When you gently nudge the pie pan, the very center of the filling should still have a slight, delicate jiggle, like a very soft gelatin. It should not slosh like liquid, nor should it be completely firm and solid. The residual heat will continue to cook the center as it cools.
- Internal Temperature: For the most precise measurement, insert an instant-read thermometer into the filling about an inch from the edge (avoid touching the crust). The internal temperature should read approximately 175°F (80°C).
Important Note: Do not continue baking until the center is completely firm and no longer jiggles. This is the most common cause of cracks on the top of your pumpkin pie. The pie will finish setting beautifully as it cools down.
Expert Tips for Your Best Pumpkin Pie Ever
Achieving pumpkin pie perfection is easier than you think with these professional insights:
- Strain the Filling for Unmatched Smoothness: This is a game-changer! After mixing, pass your pumpkin filling through a fine-mesh sieve. This simple step removes any tiny lumps or stringy bits from the pumpkin puree, guaranteeing an incredibly silky, professional-grade custard texture.
- Always Blind Bake the Crust: Do not skip this step! Blind baking prevents the bottom of your pie crust from becoming soggy under the moist custard. It ensures a crisp, flaky base that holds up beautifully.
- Employ a Lower-Rack, Two-Stage Bake: Our specific baking method is key to a flawless pie. The initial high heat on the lower rack quickly sets the bottom crust and the outer edges of the filling. Reducing the temperature without opening the oven allows the custard to gently cook through to a perfect, creamy consistency without overbaking the center or burning the crust.
- Avoid Overbaking at All Costs: Overbaking is the primary culprit behind cracked pumpkin pie tops. Pull the pie from the oven when the center still has a slight, delicate jiggle. Trust that the residual heat will continue to set the custard as it cools.
- Cool Completely for Perfect Slices: Patience is a virtue here! Allow your pumpkin pie to cool fully on a wire rack for at least 2-3 hours, or even overnight. This extended cooling period is essential for the filling to set completely, ensuring clean, elegant slices that hold their shape.
Delicious Topping Ideas for Your Homemade Pumpkin Pie
While this pumpkin pie is utterly delightful on its own, a thoughtful topping can elevate the experience even further. Here are some classic and creative ideas to crown your masterpiece:
- Classic Vanilla or Maple Ice Cream: The cold, creamy sweetness of a good quality vanilla or maple ice cream provides a wonderful contrast to the warm, spiced pie.
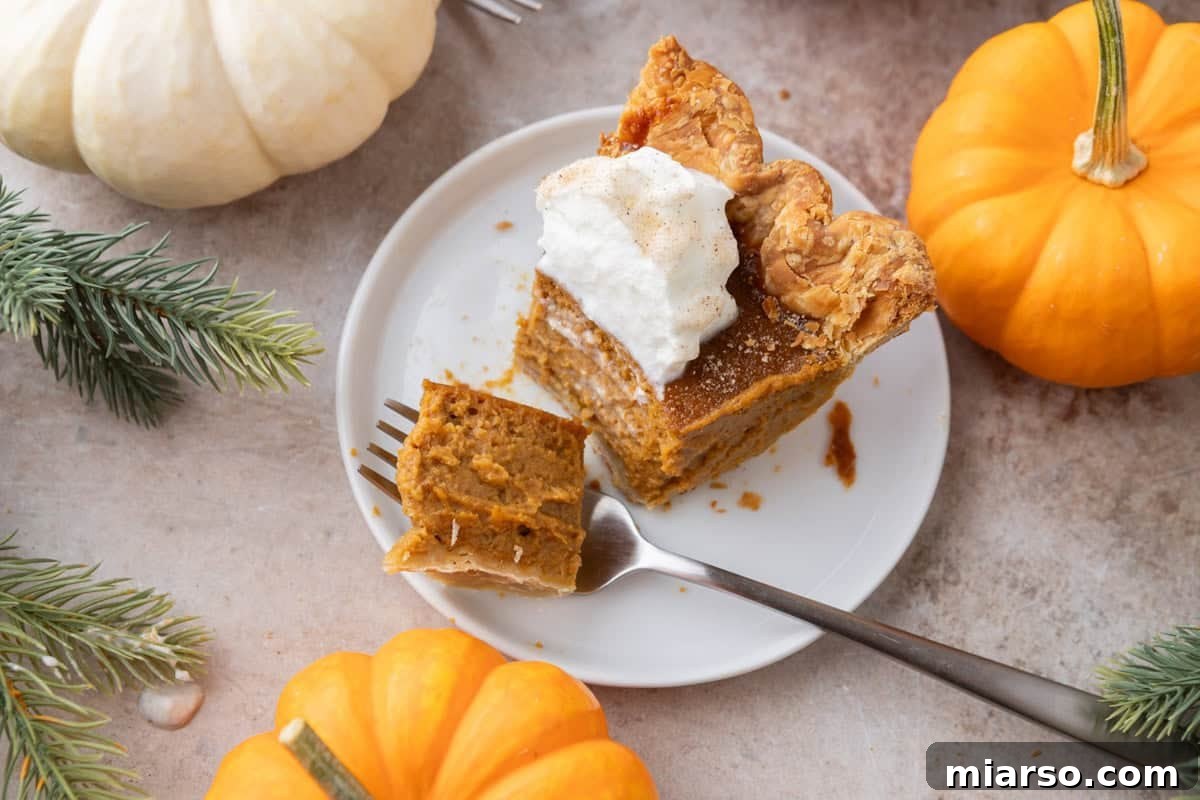
- Fresh Whipped Cream: A cloud of lightly sweetened, freshly whipped cream is the quintessential pumpkin pie topping. Its airy texture and subtle sweetness perfectly complement the rich custard.
- Salted Caramel Drizzle: For those who love a sweet and salty combination, a generous drizzle of homemade or store-bought salted caramel sauce adds a sophisticated touch and incredible depth of flavor.
- Candied Pecans or Walnuts: Add a delightful crunch and extra nutty flavor with a sprinkle of candied pecans or walnuts. Their caramelized coating adds another layer of texture and sweetness.
If your family has a unique or beloved topping tradition, please share it in the comments below – I’m always eager to discover new ways to enjoy this fall favorite!
Frequently Asked Questions – Your Pumpkin Pie Guide
Whether you’re baking this delightful homemade pumpkin pie for a grand Thanksgiving celebration or simply to enjoy a cozy fall evening, these common questions and detailed answers will help ensure your pie turns out perfectly every single time.
Yes, pumpkin pie freezes remarkably well, making it an excellent make-ahead dessert. Once your pie has completely cooled to room temperature, wrap it tightly first in plastic wrap, then in a layer of aluminum foil. This double-layer protection helps prevent freezer burn. You can freeze the pie for up to one month. To defrost, simply transfer the wrapped pie to the refrigerator and allow it to thaw overnight. It will taste just as delicious as when freshly baked!
Absolutely! Pumpkin pie is one of those fantastic desserts that often tastes even better the day after it’s baked, as the flavors have more time to meld and deepen. You can bake this pie up to two days in advance. Once it has completely cooled, cover it tightly with plastic wrap or aluminum foil and refrigerate it until you’re ready to serve. This makes it a perfect option for busy holiday meal planning.
Cracks on top of a pumpkin pie are a common issue, and they almost always indicate that the pie was overbaked or cooled too rapidly. When the custard bakes too long, it sets too firmly and then shrinks as it cools, leading to cracks. To avoid this, always pull the pie out of the oven when the center still has a slight, delicate jiggle. After baking, allow the pie to cool slowly and gradually at room temperature for several hours (at least 2-3) before refrigerating it. This slow cooling helps the custard set smoothly without cracking.
Yes, you can certainly substitute half and half for evaporated milk in this recipe. Using half and half will result in a slightly lighter custard texture, as it has a lower fat content and is less concentrated than evaporated milk. However, the flavor will still be delicious, and the consistency will remain pleasant. If you prefer a truly rich and dense custard, stick with evaporated milk.
While pumpkin pie is often enjoyed chilled, some prefer it warm. To gently reheat individual slices, place them on a baking sheet and warm them in a preheated 300°F (150°C) oven for 10–15 minutes. You’re just looking to take the chill off, not to cook it further. Alternatively, you can briefly microwave slices for 20-30 seconds, but be careful not to overheat, as this can make the custard rubbery.
Absolutely! Store-bought pie crusts are a fantastic time-saver and work perfectly with this recipe. While a homemade butter crust can offer a deeper, more artisanal flavor and flakiness, a good quality refrigerated or frozen pie crust will still yield excellent results. If you’re using a frozen crust, keep it in its original pan and proceed with the blind baking instructions directly from frozen. Ensure you still blind bake it to prevent sogginess.
Proper storage is key to enjoying your pumpkin pie for days. Once the pie has completely cooled to room temperature (this is essential to prevent condensation), wrap it tightly with aluminum foil or plastic wrap. Alternatively, you can place it in an airtight pie carrier. Refrigerate the pie immediately. A properly stored pumpkin pie will remain fresh and delicious for 4-5 days in the refrigerator.
If you’re looking for more delightful fall desserts to enjoy, be sure to try my Brown Butter Pecan Chocolate Chip Cookies or my cozy Apple Cider Donut Bundt Cake next!
Rich & Creamy Pumpkin Pie
30
50
1
20
8
servings
Print Recipe
Equipment
Ingredients
Pumpkin Pie Filling
-
15 oz 1 can pumpkin purée (Libby’s recommended or homemade, well-drained) -
2 large eggs -
1 egg yolk -
½ cup heavy cream -
½ cup evaporated milk or half & half for a lighter version -
¾ cup packed brown sugar light or dark for deeper flavor -
¼ cup granulated sugar -
2 tsp pumpkin pie spice -
½ tsp ground cardamom optional but highly recommended -
1 tbsp cornstarch -
¼ tsp salt -
1 tsp vanilla extract
Pie Crust
-
1 single 9-inch pie shell homemade or store-bought, chilled and pre-baked
Instructions
Prebake the Crust
-
Roll and press your pie dough into a 9-inch pie dish. Dock the bottom lightly with a fork to prevent bubbling.1 single 9-inch pie shell
-
Chill the prepared crust for 15 minutes in the refrigerator. This crucial step helps prevent the crust from shrinking during baking.
-
Line the chilled crust with parchment paper or aluminum foil, making sure it extends over the edges. Fill the lined crust with pie weights or dried beans.
-
Bake on the lower rack at 425°F (220°C) for 15 minutes. After this initial bake, carefully remove the parchment and pie weights. Continue to bake for another 10 minutes, or until the crust is lightly golden brown.
-
For added protection against leaks and a beautiful golden sheen, you can optionally brush the still-warm crust with a thin layer of beaten egg. Let the crust cool completely on a wire rack before adding the filling.
Make the Filling
-
In a large mixing bowl, thoroughly whisk together the pumpkin purée, large eggs, egg yolk, brown sugar, granulated sugar, pumpkin pie spice, the recommended ground cardamom, cornstarch, and salt until the mixture is completely smooth and well-combined.15 oz 1 can pumpkin purée, 2 large eggs, 1 egg yolk, ¾ cup packed brown sugar, ¼ cup granulated sugar, 2 tsp pumpkin pie spice, ½ tsp ground cardamom, 1 tbsp cornstarch, ¼ tsp salt
-
Next, gradually whisk in the heavy cream, evaporated milk, and vanilla extract. Continue whisking until the filling is perfectly silky and evenly combined.½ cup heavy cream, ½ cup evaporated milk, 1 tsp vanilla extract
-
For the ultimate smooth texture, carefully strain the prepared filling through a fine-mesh sieve into another bowl before pouring it into your pre-baked pie shell. This removes any small lumps and ensures a truly velvety custard.
Bake the Pie (Lower-Rack, Two-Stage Method)
-
Position an oven rack in the lower third of your oven. Preheat the oven to a precise 425°F (220°C).
-
Place the cooled, filled pie onto a sturdy baking sheet (to catch any potential drips and make it easier to transfer) and carefully set it on the lower oven rack.
-
Bake for 10 minutes at the initial 425°F (220°C). After 10 minutes, without opening the oven door, reduce the oven temperature to 350°F (175°C).
-
Continue baking for an additional 35–45 minutes. The pie is done when the custard appears puffed and the edges are set, but the very center still has a slight, delicate jiggle when gently shaken.
-
Begin checking for doneness around the 30-minute mark after reducing the temperature. For a perfectly set custard, the internal temperature, when measured with an instant-read thermometer about an inch from the edge, should read approximately 175°F (80°C).
-
If you notice the edges of your pie crust browning too quickly, loosely cover them with strips of aluminum foil or a pie crust shield to prevent over-browning.
-
Once baked, remove the pie from the oven and transfer it to a wire rack. Allow it to cool completely at room temperature for at least 2–3 hours. The filling will continue to set and firm up as it cools, ensuring perfect slices.
Notes
Storage Guidelines for Your Pumpkin Pie
- Refrigeration: Once your pumpkin pie is completely cooled to room temperature, cover it tightly with aluminum foil or plastic wrap. Store it in the refrigerator for up to 4 days.
- Freezing for Later: This pie freezes beautifully! Once fully cooled, wrap the entire pie or individual slices tightly in plastic wrap, then an additional layer of aluminum foil. Freeze for up to 1 month. To enjoy, thaw overnight in the refrigerator before serving.
Additional Tips for the Best Pumpkin Pie
- The Creamy Duo: The combination of both heavy cream and evaporated milk is intentional. It provides the perfect balance of decadent richness and a smooth, silky texture that defines a superior pumpkin pie custard.
- Don’t Skip Blind Baking: This step cannot be emphasized enough! Blind-baking your pie crust is the only way to guarantee a crisp, flaky base that stands up beautifully to the moist pumpkin filling and prevents any hint of sogginess.
- Embrace the Lower-Rack Bake: Our specific two-stage baking method with the pie on the lower rack is designed for success. It ensures the bottom crust achieves a beautiful golden color and a fully baked texture, which is often neglected in other recipes.
- Trust the Jiggle, Avoid Overbaking: Every oven is different, so start checking for doneness a bit early. The key is to remove the pie when the center still has a slight, delicate jiggle. Overbaking is the main cause of cracks!
- Cardamom Magic: If you’re feeling adventurous, don’t shy away from the cardamom. A small, carefully measured touch will enhance the earthy pumpkin flavor and add an unexpected layer of warmth and complexity without being overpowering. It’s a subtle but impactful elevation.
Serving Ideas: Enhance your rich and creamy pumpkin pie by topping it with a generous dollop of softly whipped cream, a delicate sprinkle of cinnamon sugar, or a luscious drizzle of pure maple syrup for the ultimate cozy fall dessert experience.
Nutrition
Calories:
321Calories
|
Carbohydrates:
45g
|
Protein:
5g
|
Fat:
14g
|
Saturated Fat:
7g
|
Cholesterol:
96mg
|
Sodium:
137mg
|
Potassium:
234mg
|
Fiber:
2g
|
Sugar:
30g
|
Vitamin A:
8629IU
|
Vitamin C:
3mg
|
Calcium:
99mg
|
Iron:
2mg
Nutrition information is automatically calculated, so should only be used as an approximation.
Like this? Leave a comment below!