
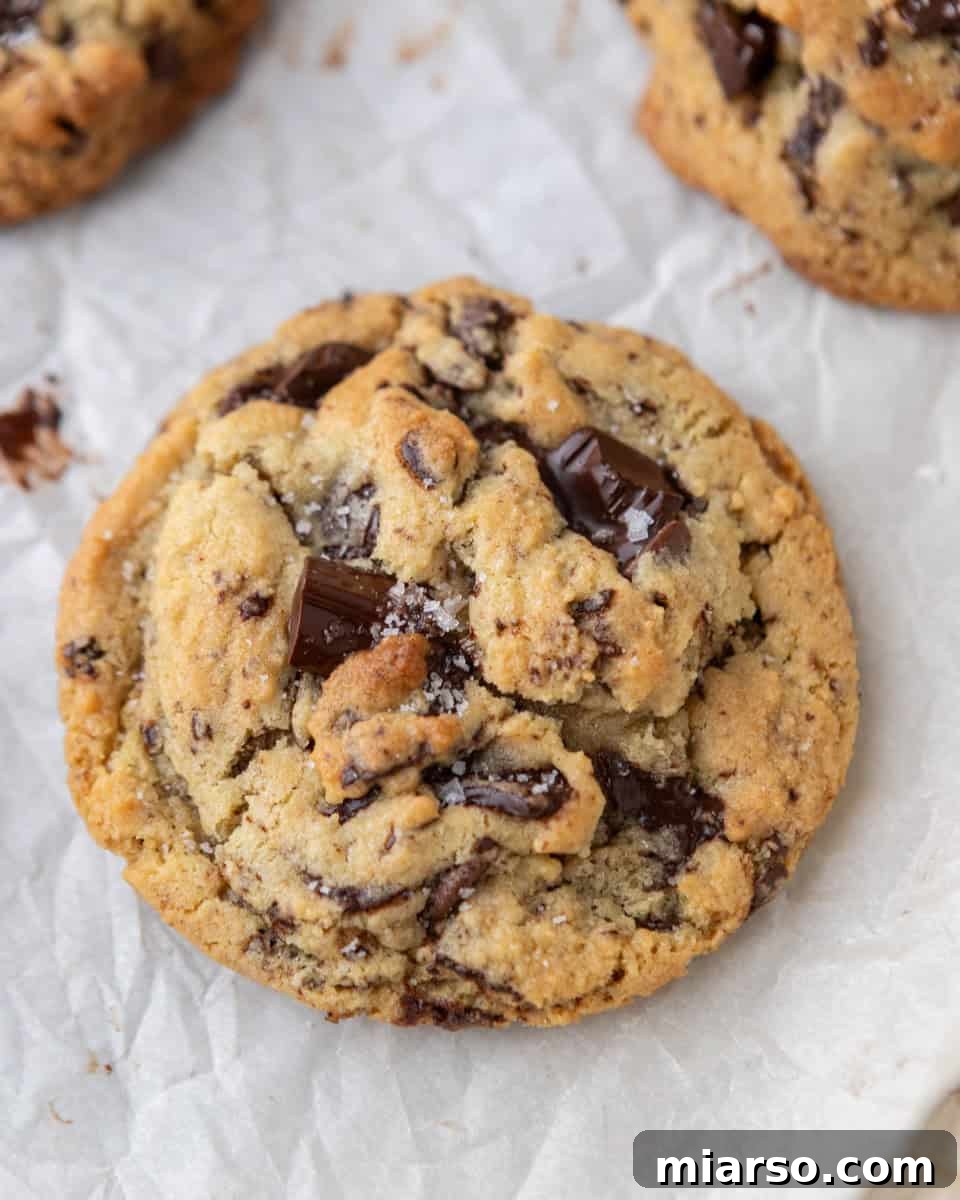
Welcome to the ultimate guide for crafting the most incredible cream cheese chocolate chip cookies you’ve ever tasted! Imagine sinking your teeth into a cookie that’s exceptionally soft, delightfully chewy, and rich beyond compare, featuring luxuriously thick centers and delicately crisp edges. This isn’t just another chocolate chip cookie recipe; it’s an elevated baking experience designed to deliver bakery-style perfection right to your kitchen. By incorporating cream cheese and additional egg yolks into the classic cookie dough, we achieve a uniquely tender texture that resists becoming cakey or overly sweet, ensuring every bite is a harmonious blend of flavor and melt-in-your-mouth goodness.
Our meticulously developed recipe has undergone extensive testing, exploring various ratios and techniques to achieve the perfect balance of spread, structure, and intense flavor. Whether you prefer baking on parchment paper for a slightly wider, flatter cookie or a silicone baking mat for a marginally thicker result, rest assured, these cookies bake uniformly and maintain their exquisite shape. The magic lies in their ability to retain their signature softness long after they’ve cooled, making them an ideal treat for sharing (or hoarding!).
While you’re here perfecting your cookie game, don’t forget to explore our other fantastic creations like these cheesecake stuffed chocolate chip cookies for an extra decadent surprise, or perhaps dive into the rich, nutty notes of our brown butter chocolate chip cookies. Each recipe is designed to inspire and delight even the most discerning cookie enthusiasts.
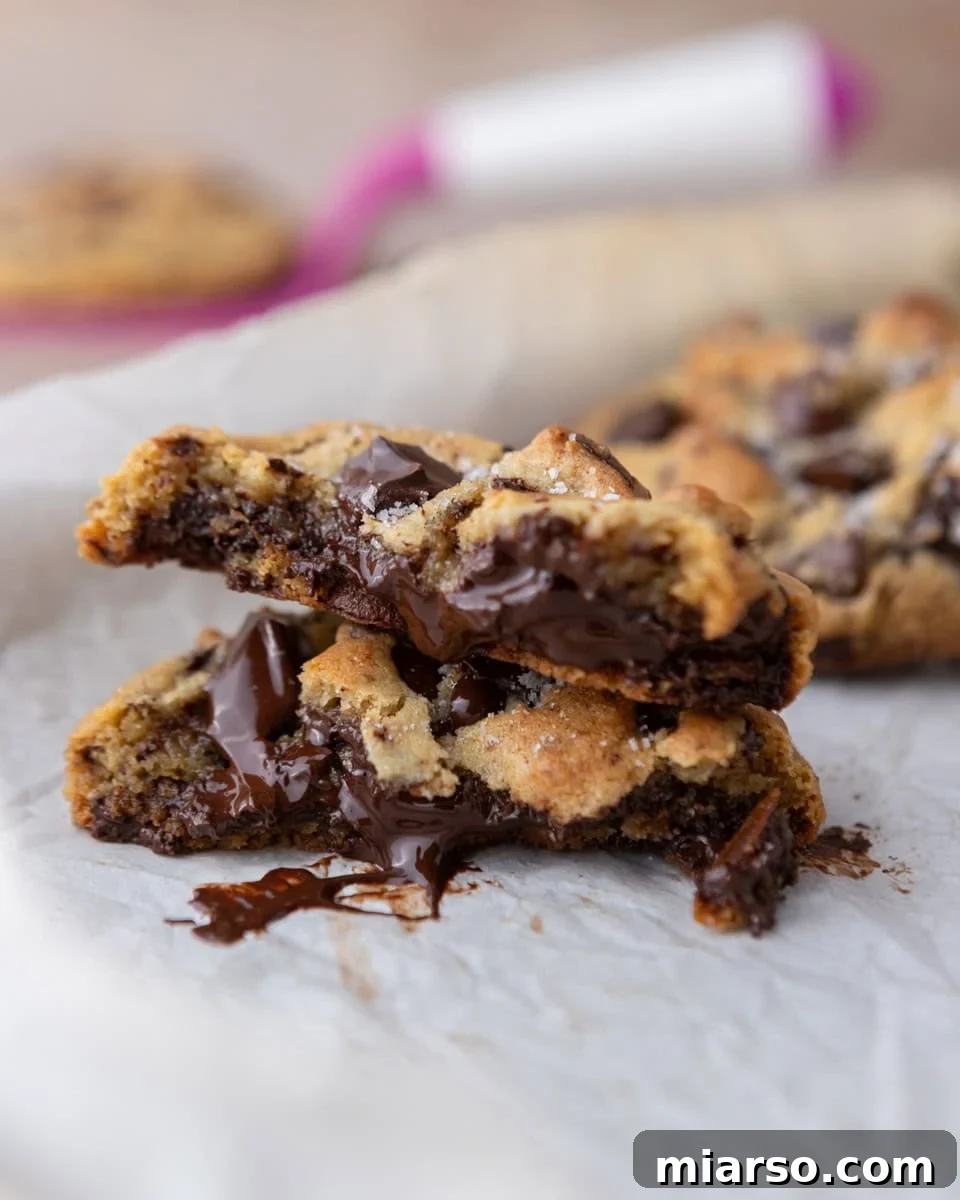
The Secret Ingredient: Why Cream Cheese Elevates Chocolate Chip Cookies
For anyone seeking to transform their homemade chocolate chip cookies from good to truly exceptional, incorporating cream cheese is a game-changer. This seemingly simple addition plays a pivotal role in creating a cookie that boasts an unparalleled texture and richness. Unlike traditional recipes that might rely on extra fat or sugar to enhance moisture, cream cheese provides a unique combination of moisture and a delicate tang that perfectly complements the sweetness of the chocolate.
When cream cheese is creamed with butter and sugar, it forms an incredibly smooth and cohesive base for the dough. This luxurious emulsion traps moisture within the cookie as it bakes, preventing it from drying out and ensuring a consistently soft and tender crumb. It acts as a natural tenderizer, contributing to that desirable “soft batch” texture without making the cookies dense or overly heavy. The subtle cream cheese flavor also adds a sophisticated depth, making these cookies taste far more complex and refined than their simple appearance might suggest. It’s this unique interaction of ingredients that results in cookies that not only taste incredible but also stay tender for days, retaining their fresh-baked quality much longer than their counterparts.
The Science of Softness: The Role of Egg Yolks in Our Recipe
In the quest for the ultimate chocolate chip cookie, every ingredient matters, and our recipe’s deliberate use of only egg yolks (rather than whole eggs) is a crucial decision. Egg yolks are powerhouses of fat and natural emulsifiers, which are essential for achieving that sought-after chewy texture and profound richness that defines a truly exceptional cookie. The fat in the yolks contributes directly to the tender crumb and moist consistency, while the emulsifiers help bind the fats and liquids in the dough, creating a smoother, more uniform batter.
By omitting the egg whites, we effectively limit the amount of excess moisture and protein in the dough. Egg whites, while useful for some baked goods, can lead to a cakier, drier texture in cookies and promote excessive puffing during baking. With just the yolks, our cookies spread beautifully and evenly in the oven, achieving that perfect flat, crinkly top and thick, gooey center without becoming overly fluffy or losing their distinctive chewiness. For optimal blending and to ensure the smoothest dough, always use egg yolks that have been brought to room temperature before incorporating them into your butter and cream cheese mixture. This small step makes a significant difference in the final texture and consistency of your cookies.
Essential Ingredients for Unforgettable Cream Cheese Chocolate Chip Cookies
Every exceptional cookie starts with a carefully selected array of ingredients. Here are the key players that make these cream cheese chocolate chip cookies truly remarkable, along with a deeper dive into their individual contributions:
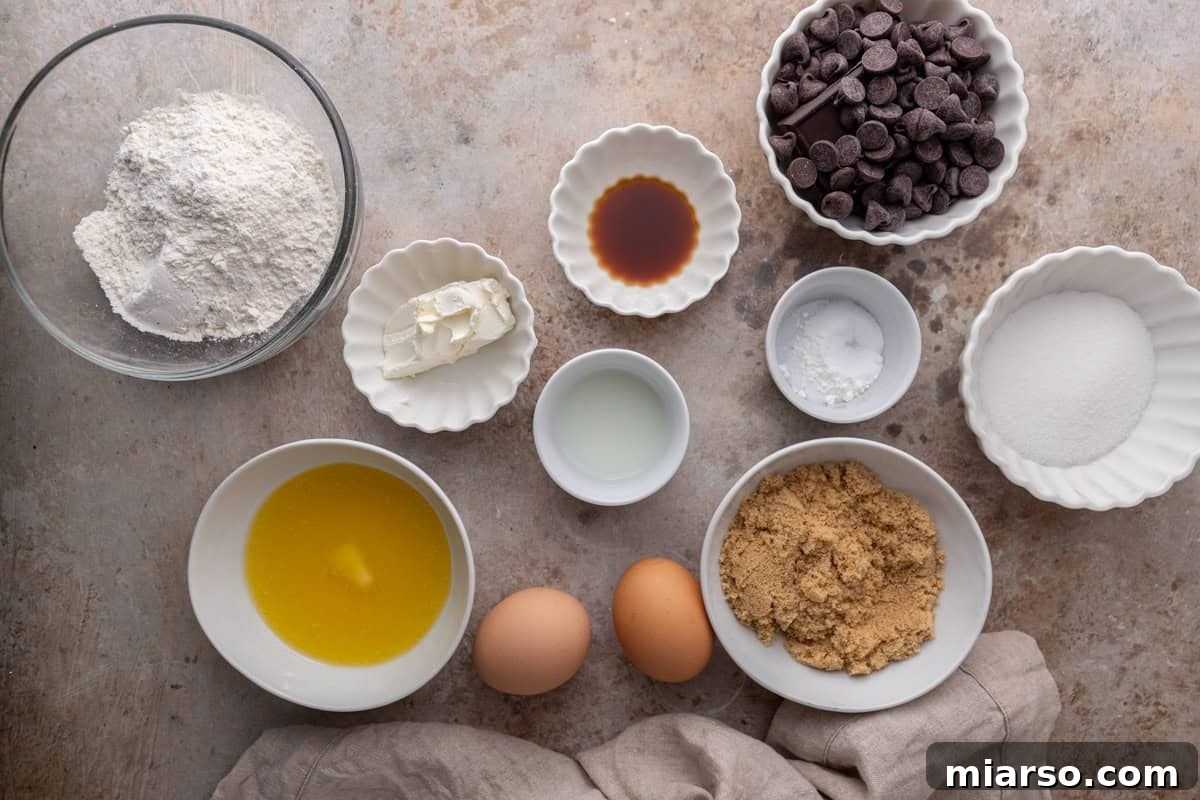
- Butter (Melted and Cooled): Starting with melted butter rather than softened butter is critical. It contributes to the chewy texture and intense butter flavor while promoting a desirable spread. Cooling it slightly prevents it from “cooking” the egg yolks.
- Full-Fat Brick Cream Cheese: This is the star ingredient! It adds incredible moisture, richness, and a subtle tang that balances the sweetness. Crucially, it helps keep the cookies soft and tender for days, providing that signature bakery-style crumb. Ensure it’s very soft for smooth incorporation.
- All-Purpose Flour: The backbone of our cookies, providing the necessary structure without making them tough. Measuring it correctly (spooned and leveled) is key to preventing dry, crumbly cookies.
- Cornstarch: A secret weapon for tender cookies! Cornstarch helps soften the gluten in the flour, resulting in a wonderfully soft and delicate texture that almost melts in your mouth.
- Light Brown Sugar: This moist sugar contributes to the chewiness of the cookies and imparts a rich, molasses-like depth of flavor. Its hygroscopic nature helps keep the cookies moist.
- Granulated Sugar: Provides sweetness and helps with the crisp edges and that characteristic crinkly top. The combination of both sugars creates a balanced flavor and texture profile.
- Large Egg Yolks: As discussed, egg yolks add richness, fat, and emulsifiers, enhancing chewiness and helping to control the spread for perfectly shaped cookies. Room temperature yolks integrate best.
- Vanilla Extract: An essential flavor enhancer that complements the chocolate and adds warmth and complexity to the overall taste without overpowering other ingredients.
- Milk: A small amount of milk helps to achieve the perfect dough consistency, ensuring the cookies remain moist and tender.
- Baking Soda: This leavening agent reacts with the acidic brown sugar and cream cheese to help the cookies rise slightly and spread beautifully, contributing to their soft interior.
- Salt (in dough and Sea Salt on top): A pinch of salt in the dough balances the sweetness and enhances all the flavors. A sprinkle of flaky sea salt on top after baking provides a stunning finish and a delightful counterpoint to the sweet chocolate.
- Chocolate Chips or Chunks: The star of any chocolate chip cookie! Use high-quality semi-sweet or dark chocolate chips or chunks for the best flavor and melt. They create glorious pockets of gooey, melted chocolate throughout the cookie.
It’s important to combine the dry ingredients thoroughly in a separate bowl before gently folding them into the wet mixture. This technique ensures even distribution of leavening and salt, and prevents overmixing, which can lead to tough cookies.
Step-by-Step Guide: How to Make Cream Cheese Chocolate Chip Cookies
This recipe is designed for ease and convenience, primarily utilizing a one-bowl method to minimize cleanup without compromising on flavor or texture. Follow these detailed steps to create your own batch of heavenly cream cheese chocolate chip cookies:
-
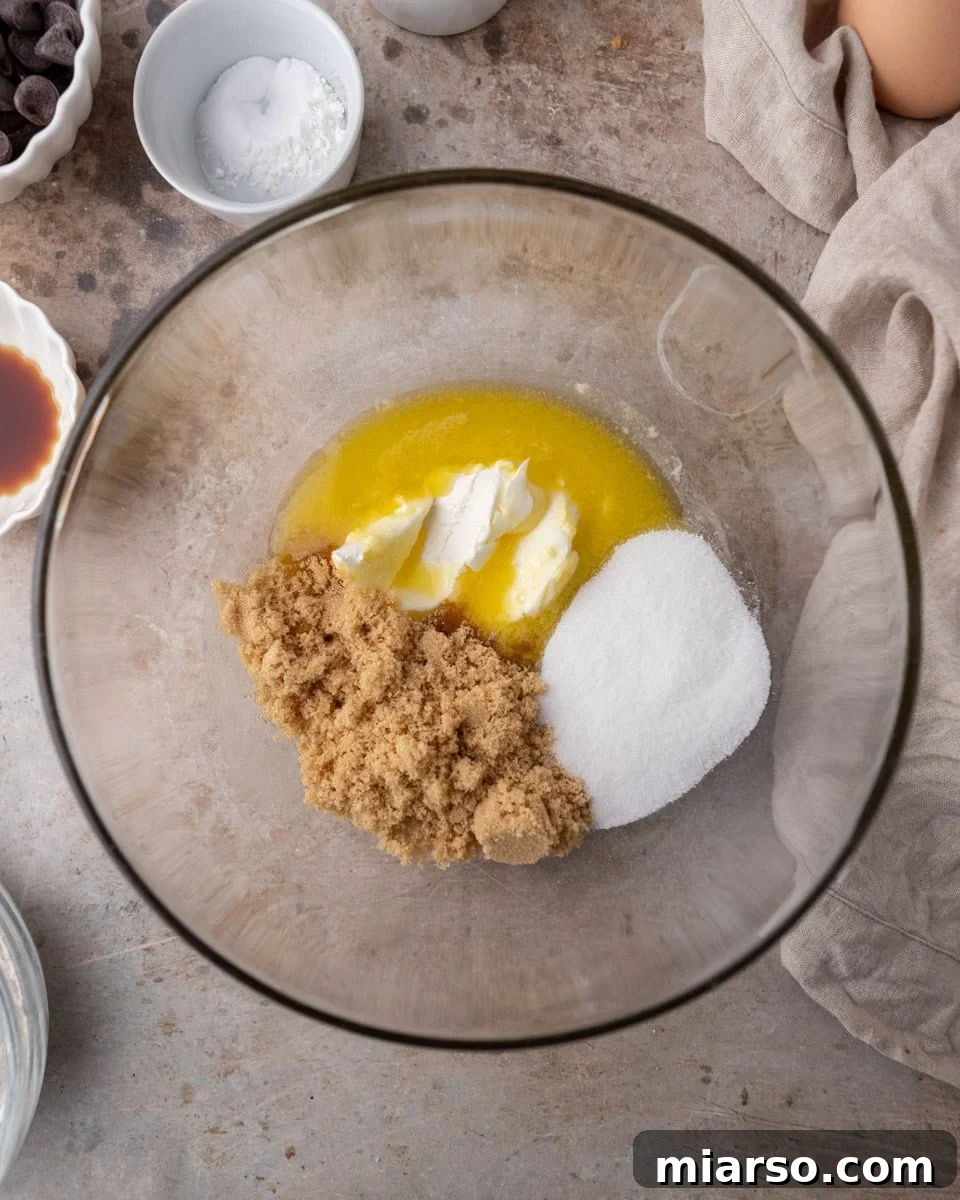
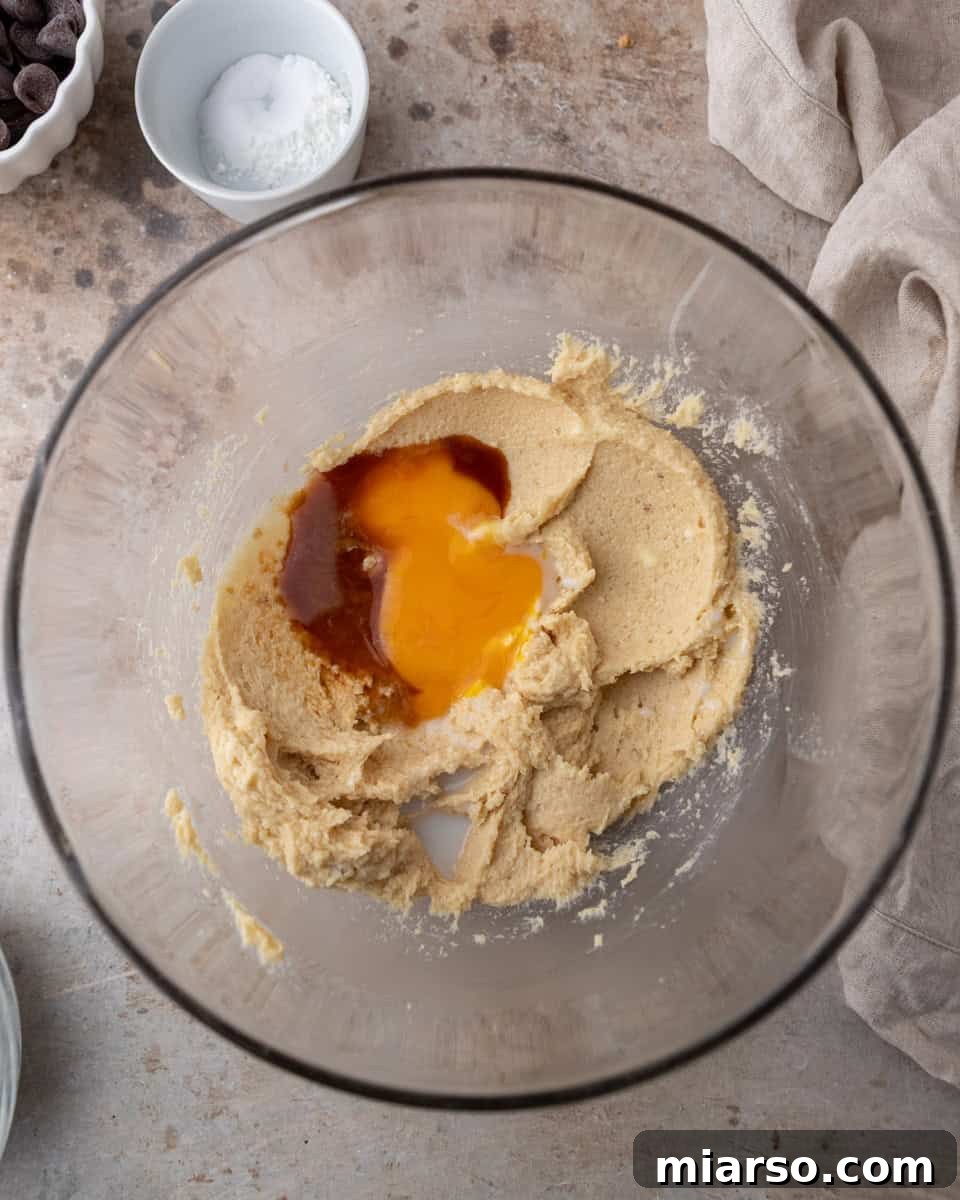
Prepare the Wet Ingredients: Begin by preheating your oven to 360°F (180°C). Line two large baking sheets with parchment paper or silicone baking mats; this ensures even baking and easy removal. In a spacious mixing bowl, combine the cooled melted unsalted butter, softened full-fat cream cheese, light brown sugar (packed), and granulated sugar. Whisk vigorously until the mixture is completely smooth, light, and glossy. This initial step is crucial for incorporating air and creating a uniform base. Next, whisk in the room temperature egg yolks, vanilla extract, and milk until the entire mixture is cohesive, smooth, and shiny. Scrape down the sides of the bowl to ensure everything is thoroughly combined.
-
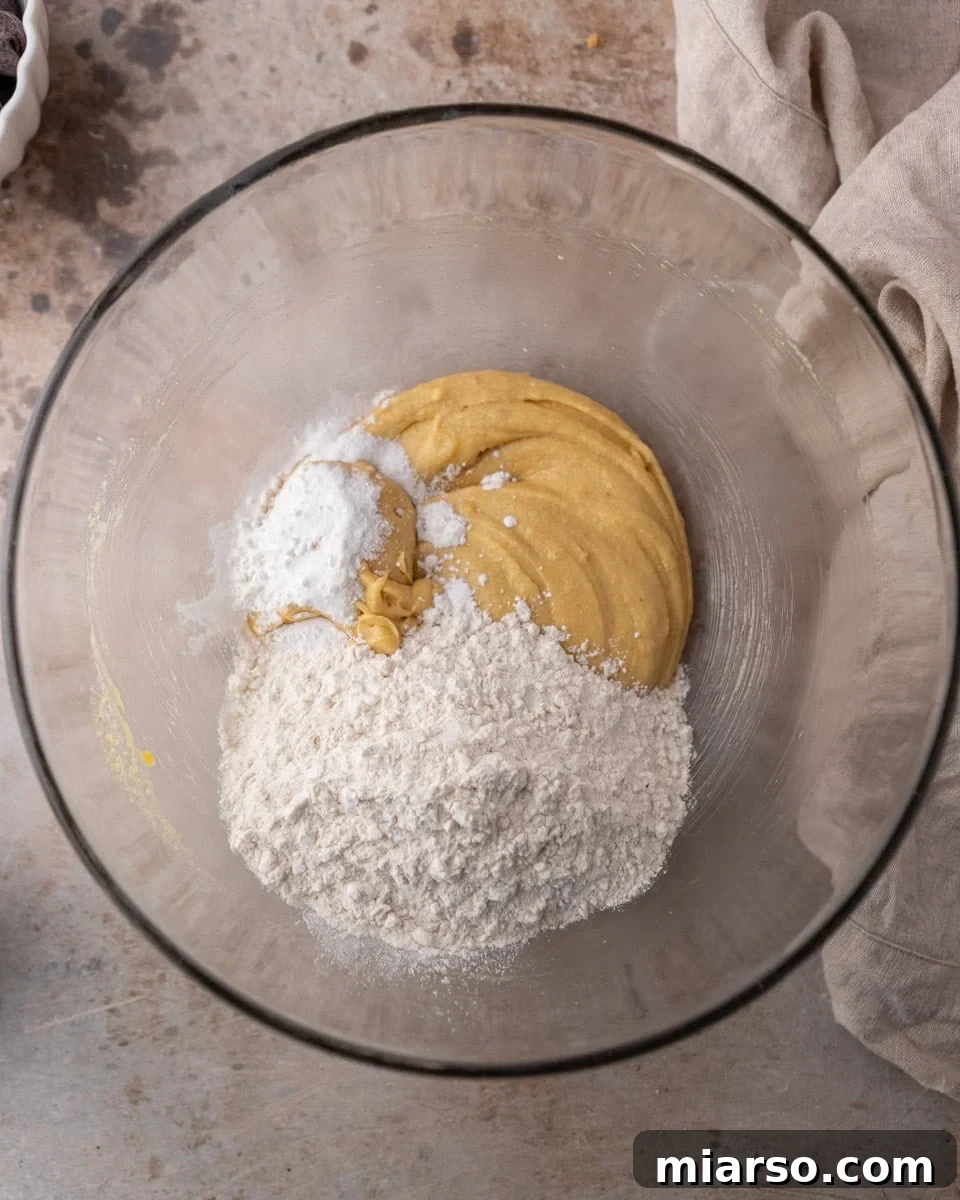
Combine Dry and Wet Ingredients: In a separate, medium-sized bowl, whisk together the all-purpose flour (spooned and leveled), cornstarch, baking soda, and salt until well combined. This ensures that the leavening agents and salt are evenly distributed throughout the dry mixture. Gently add the dry ingredients to the wet mixture in the large bowl. Switch to a rubber spatula or wooden spoon and fold the ingredients together just until no streaks of dry flour are visible. Be careful not to overmix the dough, as overworking the gluten can result in tough cookies. The dough might still appear slightly shaggy, which is perfectly fine.
-
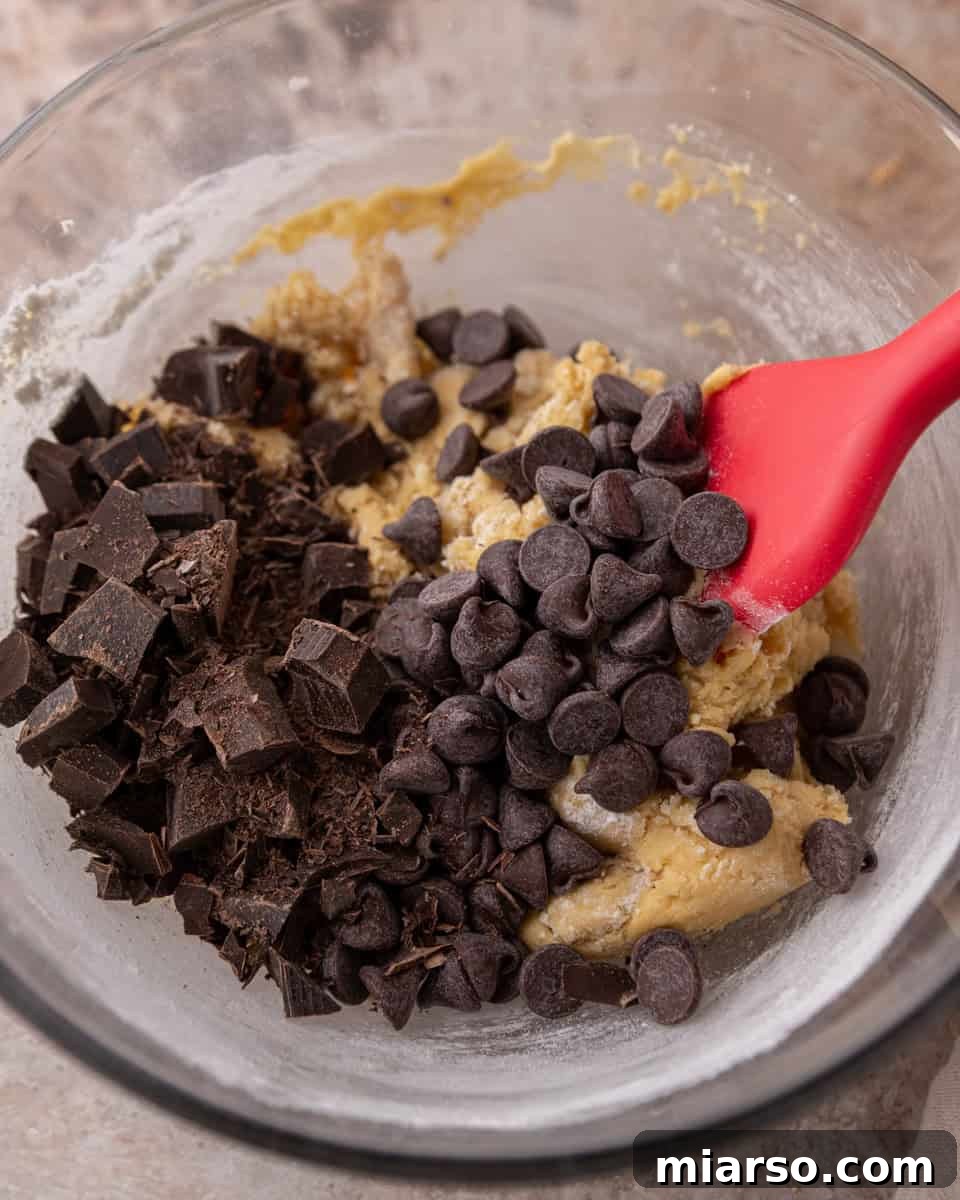
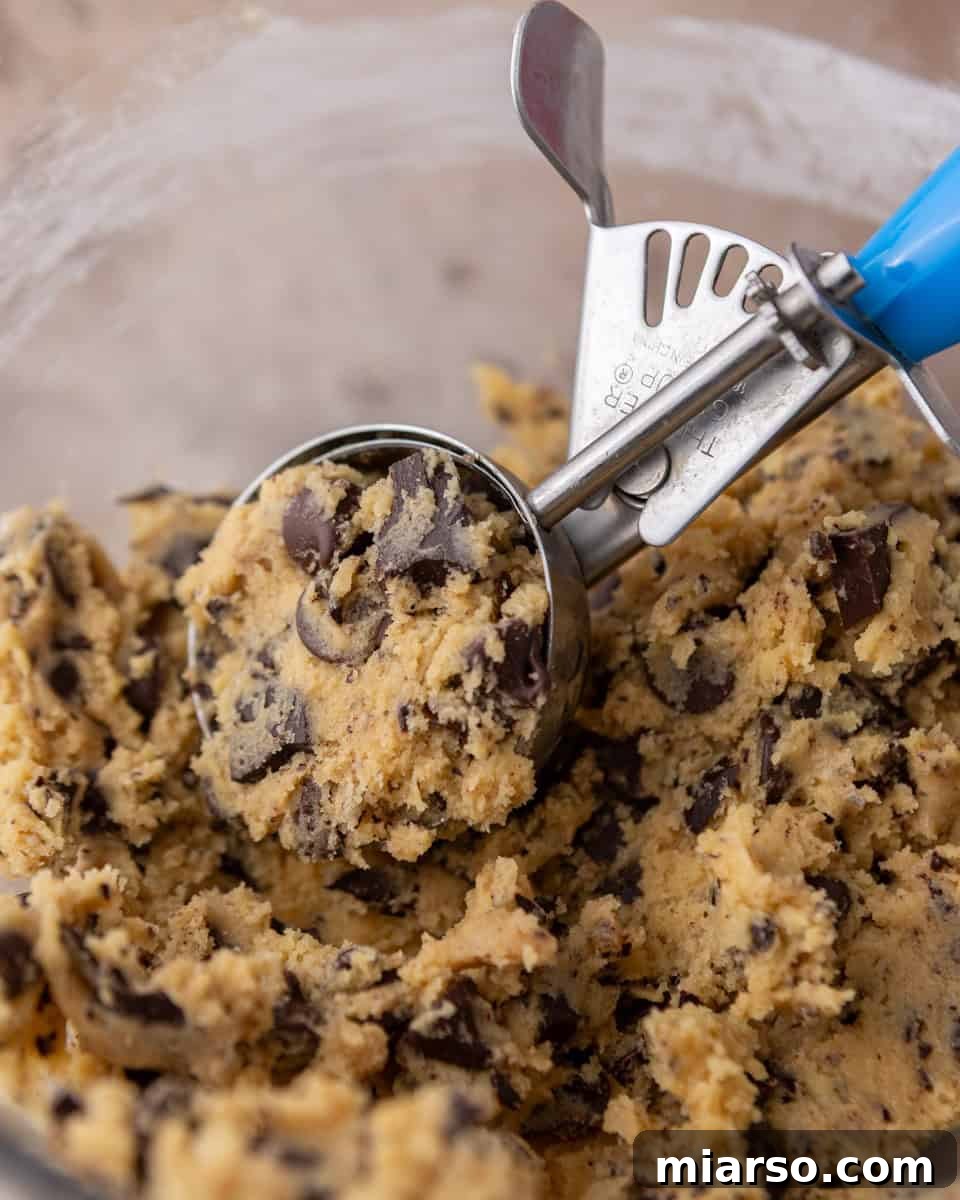
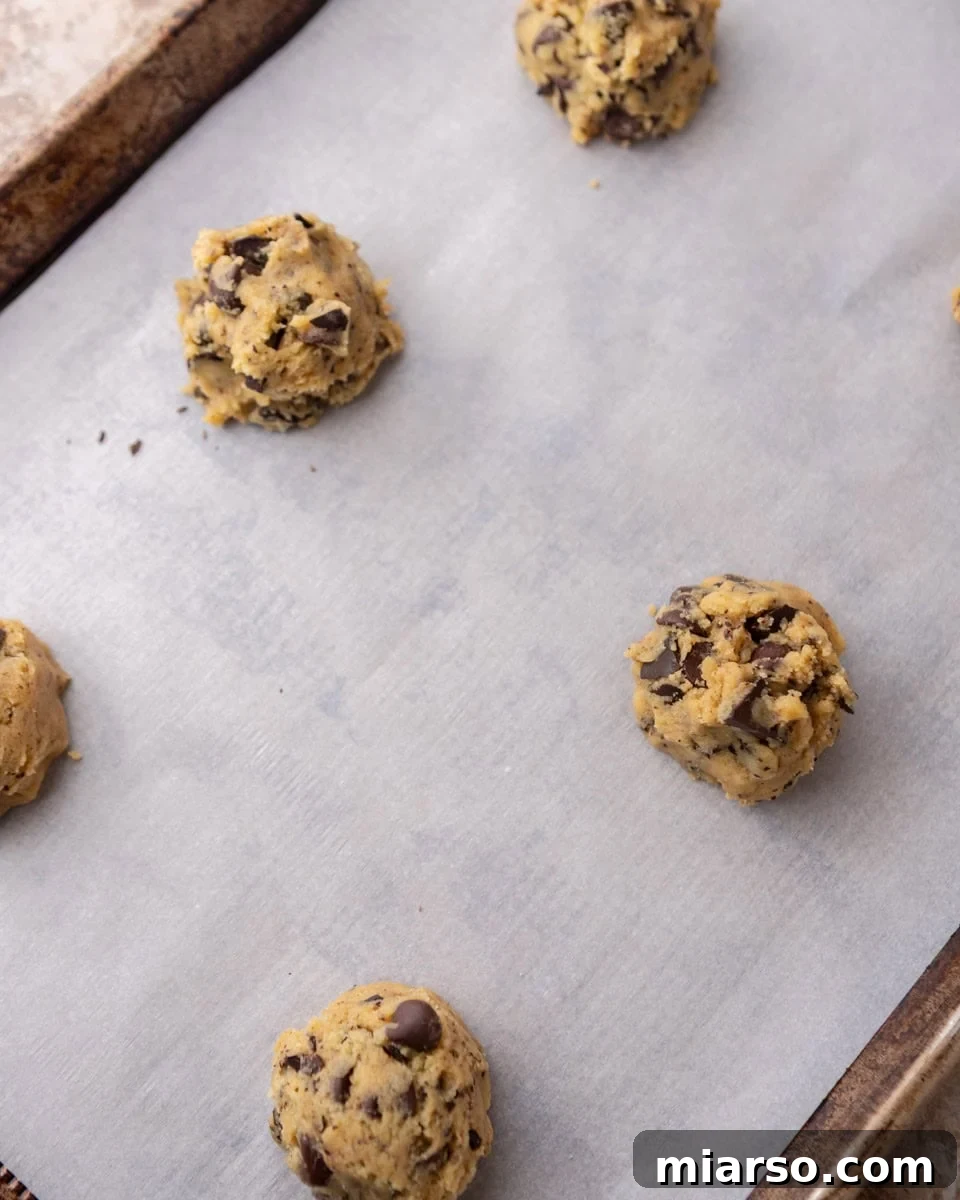
Add Chocolate and Scoop Dough: Fold in the chocolate chips or chunks until they are evenly distributed throughout the dough. For a fun variation, you can also substitute M&M candies or a mix of both. Once the chocolate is incorporated, use a cookie scoop (approximately 3 tablespoons per cookie) to portion the dough into uniform balls. Place no more than four cookie dough balls on each prepared baking sheet, ensuring they are well-spaced to allow for proper spreading during baking. This prevents them from merging into one giant cookie.
Expert Baking Tips for Achieving Perfection
To ensure your cream cheese chocolate chip cookies turn out perfectly every time, keep these invaluable tips in mind:
- Always Preheat Your Oven Thoroughly: Baking in a fully preheated oven is non-negotiable for even heat distribution and consistent cookie spread. If your oven isn’t hot enough, cookies can spread too much or not enough. A good oven thermometer can help verify accuracy.
- Understand Baking Surface Differences: Cookies baked on parchment paper tend to spread slightly more and result in a wider, thinner cookie with crispier edges. Silicone baking mats, on the other hand, provide more insulation, leading to slightly thicker cookies with chewier centers. Both are excellent; choose based on your preferred texture.
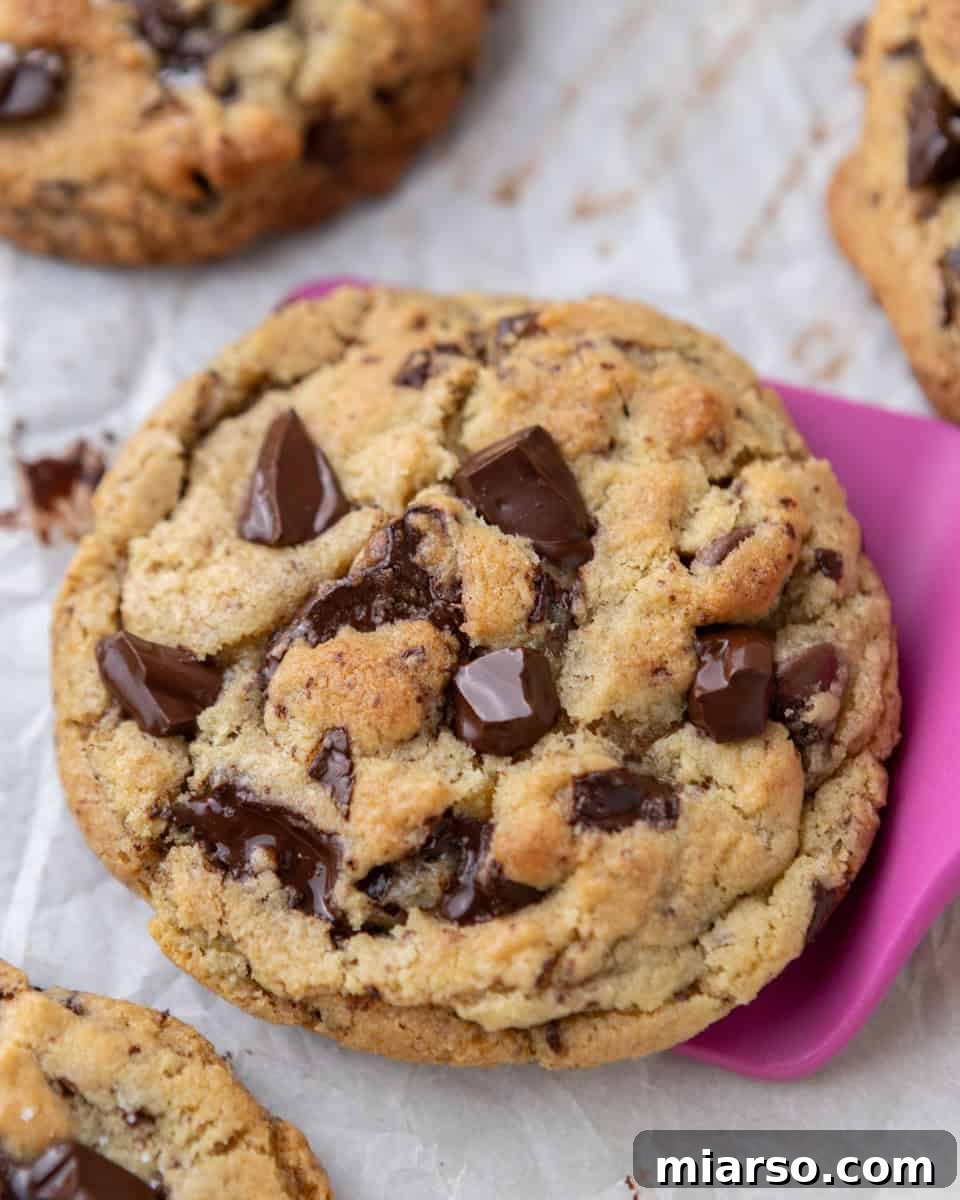
- The “Extra Chocolate Chip” Trick: For a truly professional, bakery-worthy appearance, gently press a few extra chocolate chips or chunks onto the tops of your warm cookies immediately after they come out of the oven. This not only enhances visual appeal but also helps the cookies settle and flatten beautifully as they cool, creating that irresistible “chocolate pool” look.
- Achieve Perfectly Round Edges with the “Cookie Cutter Swirl”: If you desire perfectly round cookies, perform the “cookie cutter swirl trick.” While the cookies are still warm and pliable on the baking sheet, place a round cookie cutter (slightly larger than your cookie) around each cookie. Gently swirl the cutter around the cookie to nudge the edges into a perfectly circular shape. This simple technique works wonders for aesthetics.
- Patience is Key for Cooling: Resist the urge to transfer your cookies to a cooling rack too soon. Allow them to cool on the baking sheet for at least 15 minutes. During this crucial time, the cookies continue to set and firm up, preventing them from breaking or losing their shape when moved. This also contributes to their final soft and chewy texture.
Let the cookies cool sufficiently on the baking sheet before transferring them to a wire rack. This allows them to finish setting properly and prevents them from falling apart.
Storage & Freezing Instructions: Keeping Your Cookies Fresh
One of the many benefits of adding cream cheese to this recipe is its ability to keep these chocolate chip cookies wonderfully soft and fresh for an extended period. To maximize their deliciousness and longevity, follow these storage and freezing guidelines:
For Baked Cookies: Store your freshly baked cream cheese chocolate chip cookies in an airtight container at room temperature. Thanks to the cream cheese, they will maintain their incredible softness and chewy texture for up to 4 days. This is significantly longer than many traditional chocolate chip cookie recipes, making them perfect for preparing ahead or enjoying over several days.
For Freezing Baked Cookies: If you’ve baked a large batch or simply want to save some for later, these cookies freeze beautifully. Once completely cooled, place them in a single layer in a freezer-safe zip-top bag or an airtight container, ensuring as much air as possible is removed. They can be frozen for up to 3 months. When you’re ready to enjoy them, simply allow them to thaw at room temperature for an hour or two before serving. You can also warm them slightly in the microwave for a few seconds for that fresh-from-the-oven experience.
For Freezing Cookie Dough: You can also prepare the dough ahead of time and freeze it. Scoop the cookie dough into balls and place them on a parchment-lined baking sheet. Freeze until solid (about 1-2 hours), then transfer the frozen dough balls to an airtight freezer bag or container. They can be stored for up to 3 months. When ready to bake, you can bake them from frozen, adding an extra minute or two to the baking time. This is a fantastic way to always have freshly baked cookies on hand!
Frequently Asked Questions About Cream Cheese Chocolate Chip Cookies
Absolutely! This recipe is excellent for meal prepping or baking in advance. You can refrigerate the cookie dough for up to 24 hours, which can actually enhance the flavors as they meld together. For longer storage, you can freeze the scooped cookie dough balls for up to 3 months. If baking from frozen, you might need to slightly flatten the dough balls before baking to ensure even spreading, and add a couple of minutes to the baking time.
The type of baking surface significantly impacts how your cookies spread and bake. Parchment paper, being thinner, allows for more direct heat transfer to the bottom of the cookies, often resulting in a slightly wider, flatter cookie with crispier edges. Silicone baking mats, conversely, offer a layer of insulation, which slows down the heat transfer to the dough, causing the cookies to bake up a bit thicker and chewier. Both methods yield delicious results; the choice simply comes down to your personal preference for texture.
Yes, absolutely! M&M candies are a fantastic substitute for chocolate chips in this recipe, adding a delightful crunch and a burst of color. You can swap them in for all or a portion of the chocolate chips, depending on your preference. Feel free to experiment with different varieties of M&Ms for holiday themes or specific flavor profiles.
No, once these cookies are baked, they do not require refrigeration. They can be stored perfectly well at room temperature in an airtight container for up to 4 days. The presence of cream cheese helps them retain their moisture and soft texture longer than traditional cookies, so there’s no need to take up valuable fridge space.
For the best results, it’s highly recommended to use room temperature egg yolks and very soft cream cheese. Cold ingredients can cause the batter to seize and become lumpy, making it difficult to achieve a smooth, cohesive dough. Melted butter should also be cooled slightly to just warm, not hot, to avoid scrambling the egg yolks.
While semi-sweet chocolate chips or chunks are a classic choice and work wonderfully, feel free to experiment with different types. Dark chocolate chunks will add a more intense, sophisticated flavor that beautifully complements the tang of the cream cheese. Milk chocolate can be used for a sweeter, creamier profile, or even a mix of different chocolates for a complex flavor experience.

Crinkly-Top Cream Cheese Chocolate Chip Cookies
20 minutes
10 minutes
30 minutes
16
cookies
Print Recipe
Ingredients
-
½
cup
butter
salted or unsalted, fully melted and cooled until just warm -
2
oz
full-fat brick cream cheese
very soft -
⅔
cup
brown sugar
packed -
½
cup
granulated sugar -
2
large egg yolks
room temperature -
2
teaspoons
vanilla extract -
1
tablespoon
milk -
1¾
cups
all-purpose flour
spooned and leveled -
1
teaspoon
cornstarch -
1
teaspoon
baking soda -
½
teaspoon
salt -
1 & 1/2
cups
chocolate chips or chunks
use at least semi-sweet; darker is even better
Instructions
-
Preheat the oven to 360°F (180°C). Line two large cookie sheets with parchment paper or silicone baking mats. (See notes for baking surface preferences.)
-
In a large bowl, whisk together the melted butter, very soft cream cheese, packed brown sugar, and granulated sugar until the mixture is smooth, glossy, and completely combined. This should take about 1-2 minutes.½ cup butter,
2 oz full-fat brick cream cheese,
⅔ cup brown sugar,
½ cup granulated sugar -
To the butter and sugar mixture, whisk in the room temperature egg yolks, vanilla extract, and milk. Continue whisking until the mixture is completely cohesive, smooth, and shiny, ensuring all ingredients are fully incorporated. Scrape down the sides of the bowl as needed.2 large egg yolks,
2 teaspoons vanilla extract,
1 tablespoon milk -
Switch to a sturdy rubber spatula. Add the all-purpose flour, cornstarch, baking soda, and salt to the wet ingredients. Gently fold the dry ingredients into the wet mixture until just no streaks of dry flour remain. It’s crucial not to overmix the dough to keep the cookies tender.1¾ cups all-purpose flour,
1 teaspoon cornstarch,
1 teaspoon baking soda,
½ teaspoon salt -
Gently stir in the chocolate chips or chunks until they are evenly distributed throughout the cookie dough. For a picture-perfect finish, you can reserve some chocolate chips to press on top of the warm cookies after baking.1 & 1/2 cups chocolate chips or chunks
-
Using a 3-tablespoon cookie scoop, portion the dough into uniform balls. Arrange a maximum of 4 cookie dough balls per prepared baking sheet, ensuring generous spacing to allow for optimal spreading during baking.
-
Bake one pan at a time for 10-11 minutes. The cookies are ready when their edges appear set and lightly golden brown, while their centers still look slightly soft and puffy. This indicates a perfectly gooey interior.
-
Immediately remove the baking sheet from the oven. If desired (and highly recommended for that bakery look!), gently press a few extra chocolate chips onto the tops of the warm cookies.
-
Allow the cookies to cool on the baking pan for a minimum of 15 minutes before carefully transferring them to a wire rack to cool completely. This crucial cooling period allows the cookies to fully set and develop their perfect texture.
Notes
-
Parchment vs. Silicone Baking Mats:
These delightful cookies will naturally spread slightly more when baked on parchment paper, resulting in a wider, flatter cookie with crispier edges. Conversely, baking on silicone mats provides more insulation, which tends to produce a slightly thicker, chewier result. Both options yield fantastic cookies, so choose based on your desired texture and aesthetic preference.
-
The Magic of Extra Chocolate on Top:
For that irresistible, professional bakery appeal, pressing a few extra chocolate chips or chunks onto the cookies immediately after baking is a simple yet impactful trick. This not only significantly enhances their visual allure but also assists the cookies in settling and flattening more evenly as they cool, creating those gorgeous pools of melted chocolate.
-
Achieving Perfectly Round Cookies:
If you’re aiming for impeccably round cookies, utilize the clever cookie cutter swirl trick while the cookies are still warm and pliable. Simply place a round cookie cutter that is slightly larger than the cookie around it, then gently swirl the cutter to coax the edges into a flawless circular shape. This technique elevates the presentation effortlessly.
-
The Importance of Proper Cooling:
These cookies are still quite delicate when they first come out of the oven. They will continue to spread slightly and finish setting as they cool. It’s essential to let them rest on the baking sheet for at least 15 minutes before attempting to transfer them. This crucial cooling period prevents them from breaking and ensures they develop their optimal texture.
Nutrition
Calories:
279
Calories
|
Carbohydrates:
35
g
|
Protein:
3
g
|
Fat:
14
g
|
Saturated Fat:
8
g
|
Polyunsaturated Fat:
1
g
|
Monounsaturated Fat:
4
g
|
Trans Fat:
0.2
g
|
Cholesterol:
44
mg
|
Sodium:
204
mg
|
Potassium:
134
mg
|
Fiber:
2
g
|
Sugar:
22
g
|
Vitamin A:
268
IU
|
Calcium:
30
mg
|
Iron:
2
mg
Nutrition information is automatically calculated, so should only be used as an approximation.
Love this recipe? Leave a comment below!