
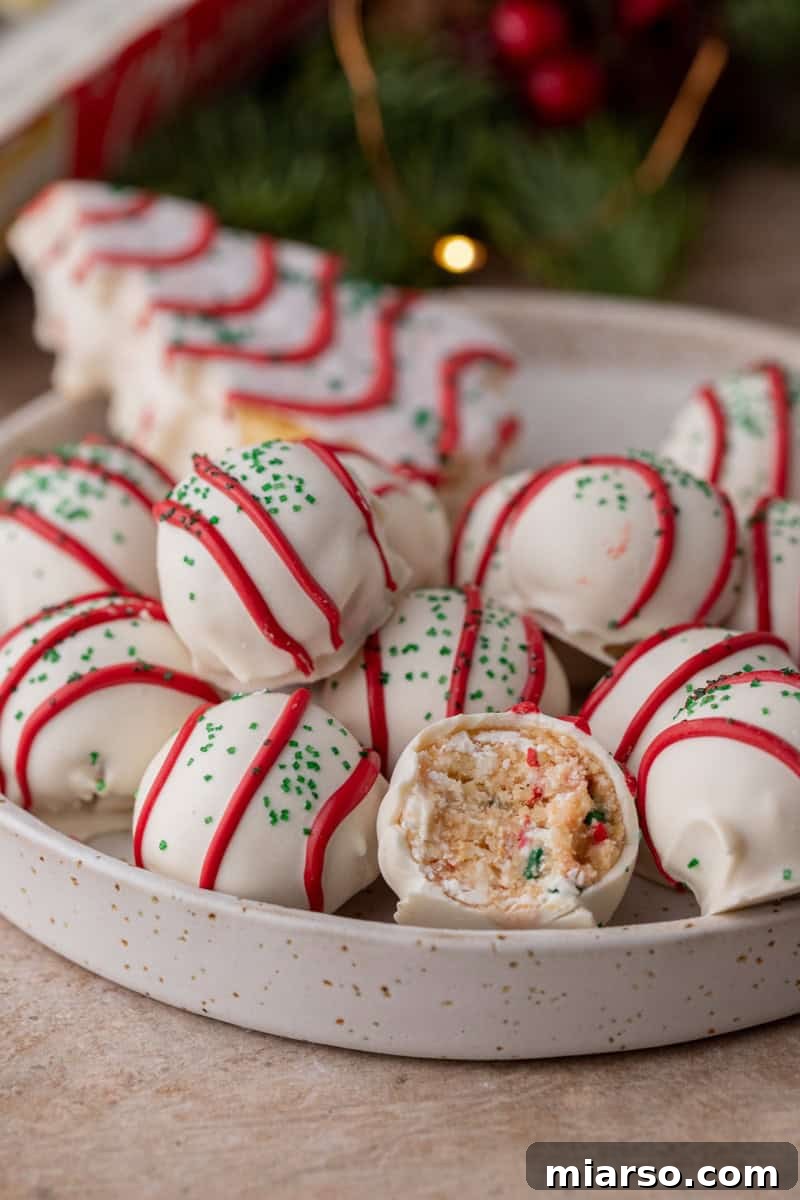
Easy No-Bake Little Debbie Christmas Tree Cake Truffles: Your Ultimate Holiday Treat
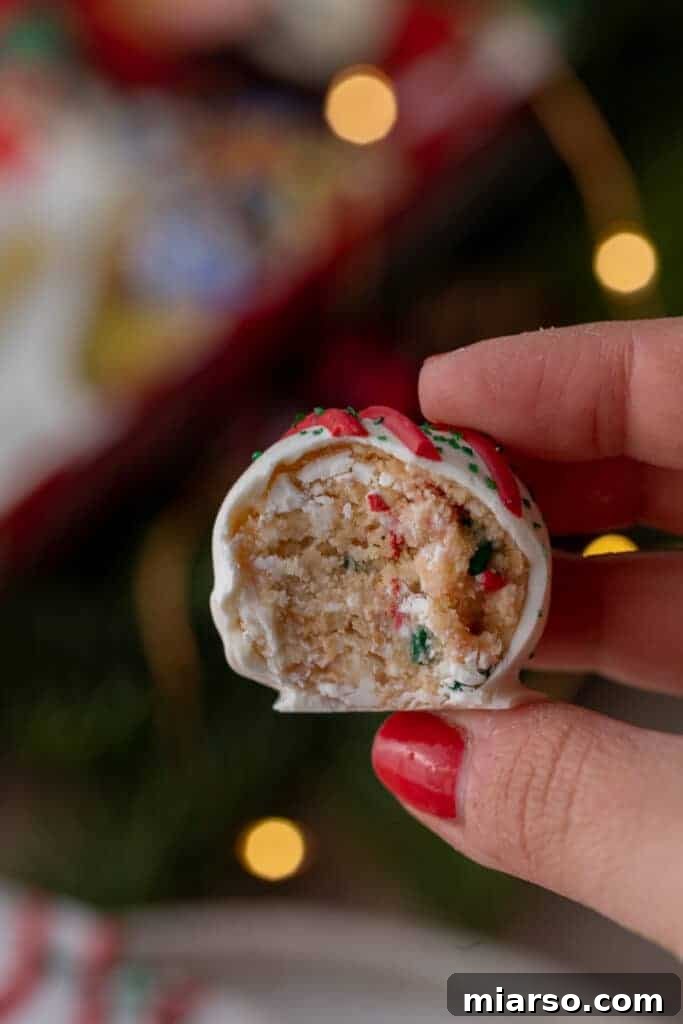
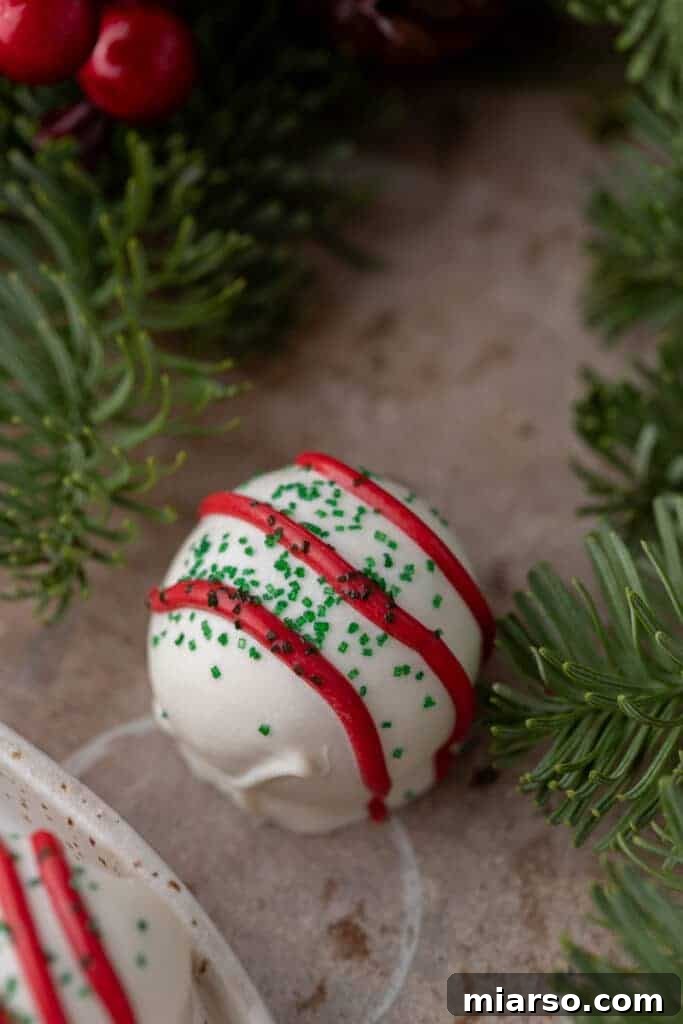
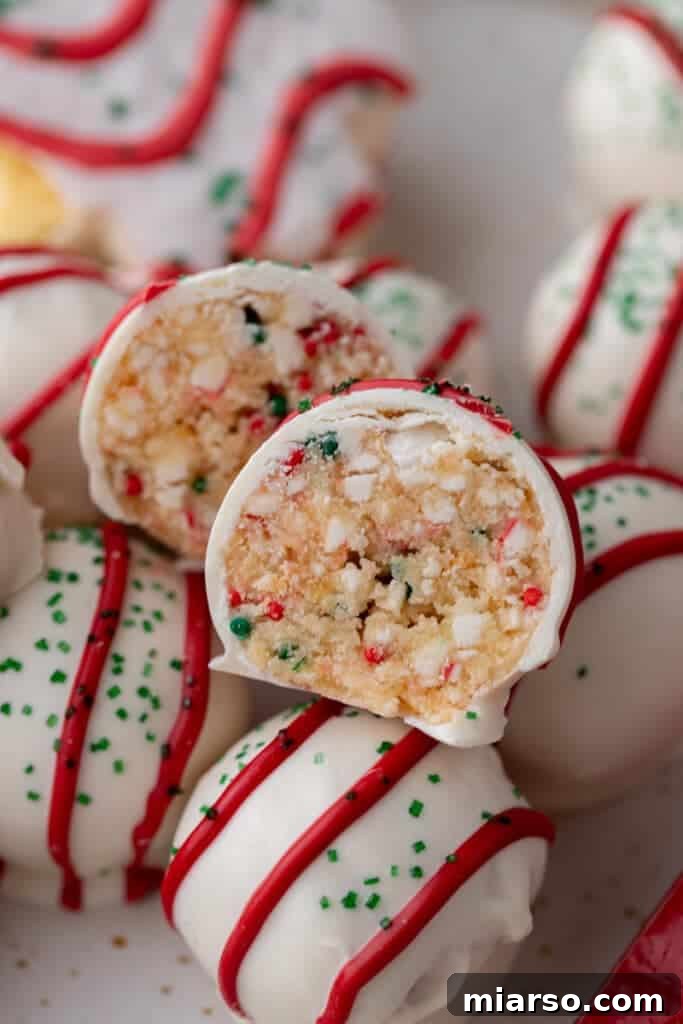
Get ready to infuse your holiday season with an extra dose of cheer with these delightful Little Debbie Christmas Tree Cake Truffles. This simple, no-bake recipe transforms the beloved iconic snack cakes into elegant, bite-sized desserts perfect for any festive gathering. Featuring a tender vanilla cake center enrobed in a smooth white chocolate shell and adorned with a sprinkle of holiday magic, these truffles are not only irresistible but also incredibly easy to make. Whether you’re preparing for a Christmas party, seeking a charming homemade gift, or simply craving a taste of nostalgia, these truffles are designed to impress and delight with minimal effort.
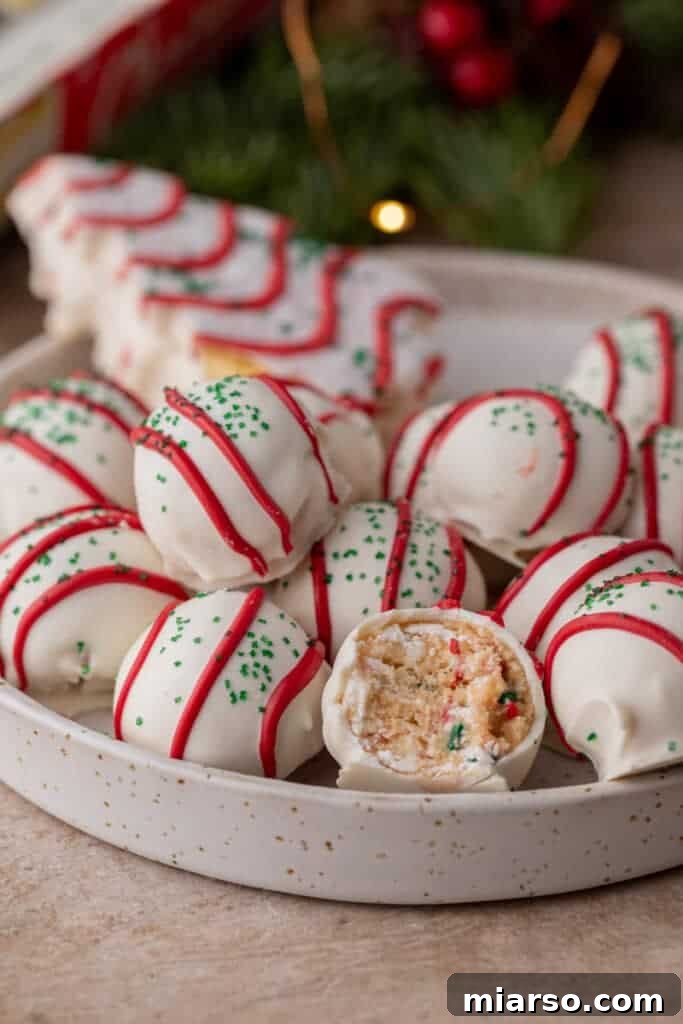
While Little Debbie Christmas Tree Cakes are available in both vanilla and chocolate varieties, this particular recipe focuses on the classic vanilla cakes to capture that authentic holiday flavor. The vanilla cakes provide a perfect sweet and soft base that pairs wonderfully with the white chocolate coating. However, if you’re a fan of chocolate and wish to explore that delightful option, you can easily adapt the concept or find a dedicated recipe for The Best Little Debbie Chocolate Christmas Tree Cake Truffles. This versatility ensures that every holiday preference is catered to!
If your search for delightful desserts has led you to the wonderful world of truffles, you’re in for a treat! We highly recommend exploring other fantastic no-bake truffle recipes that are equally simple and delicious. Why not try these Easy Chocolate-Dipped Pumpkin Truffles for a fall-inspired twist, whip up a batch of this playful No-Bake Grinch Oreo Truffles Recipe, or indulge in the creamy goodness of these Golden Oreo Truffles with Cream Cheese? Each recipe offers a unique flavor profile and the same no-fuss preparation, making them perfect additions to your dessert repertoire.
Why These Truffles Are a Must-Make This Holiday Season!
For many, the sight of Little Debbie Christmas Tree Cakes signals the true start of the holiday season, evoking a powerful sense of nostalgia. Each year, I find myself drawn to a box, not just for the taste, but for the comforting memories they bring. A couple of years ago, a simple idea transformed these festive cakes into the easiest no-bake truffles imaginable, and I haven’t looked back since. Now, these homemade truffles are a cherished December tradition I eagerly anticipate!
These truffles aren’t just sweet; they encapsulate the very essence of the holidays. With their wonderfully creamy interior, a subtle delightful crunch from sprinkles, and an overall burst of Christmas cheer, they’re truly a festive sensation. They offer all the beloved flavors of the classic snack cake but in a more refined, shareable format that’s perfect for gifting or serving at parties. The joy they bring, both in making and tasting, is unparalleled.
Essential Ingredients for Your Little Debbie Christmas Tree Cake Truffles
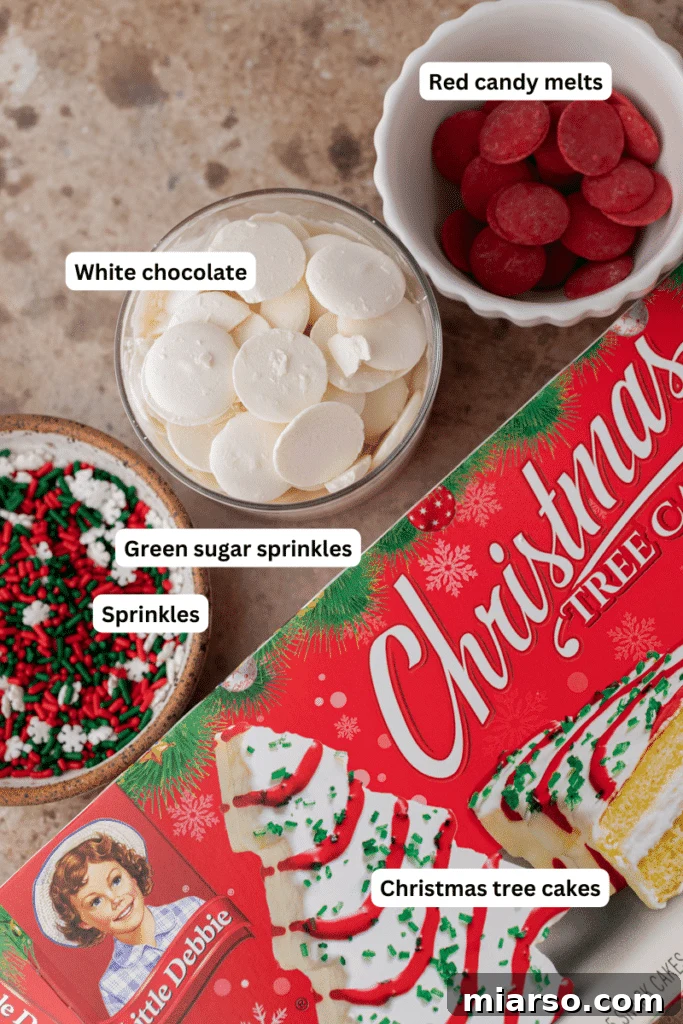
Crafting these delectable truffles requires just a handful of readily available ingredients. You’ll find everything you need at your local grocery store, ensuring a stress-free baking experience. For precise measurements, be sure to consult the detailed recipe card found towards the end of this page.
- Little Debbie Christmas Tree Cakes: The star of our show! It’s crucial to select the vanilla-flavored Christmas Tree Cakes for this recipe. These classic cakes provide the sweet, moist foundation for our truffles, offering that unmistakable nostalgic flavor that makes them so special.
- White Chocolate or White Candy Melts: This forms the beautiful, smooth outer shell of your truffles. Both white chocolate chips and white candy melts work perfectly. Candy melts are often easier to work with as they melt more smoothly and set quickly, providing a professional finish. If using white chocolate chips, ensure you temper them correctly for a glossy, snap-free coating, or use a good quality compound chocolate.
- Red Candy Melts: Used for a vibrant, decorative drizzle. A touch of red candy melts adds a festive contrast and mimics the look of classic Christmas ornaments on your tree truffles. This is an optional but highly recommended step for an extra festive touch.
- Green Sanding Sugar: This adds a lovely sparkle and the signature green color reminiscent of the original Little Debbie Christmas Tree Cakes. It’s applied while the white chocolate is still wet to ensure it adheres properly.
- Festive Christmas Sprinkles: These are mixed directly into the mashed cake batter, adding an extra layer of texture, color, and holiday flair to the truffle’s core. While optional, they truly elevate the truffles to the next level of festive fun. Choose sprinkles with a mix of colors and shapes for maximum visual appeal.
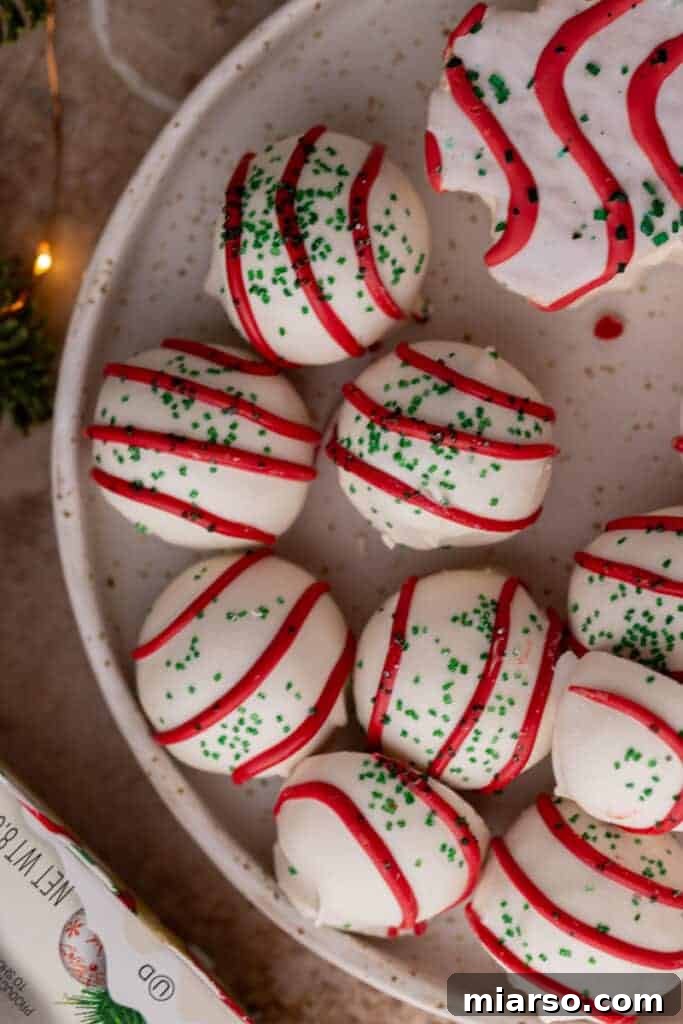
Step-by-Step Guide: How to Make Little Debbie Christmas Tree Cake Truffles
Creating these festive truffles is a straightforward process that yields impressive results. Follow these detailed instructions for a smooth and enjoyable experience. For a complete, print-friendly recipe card, scroll to the bottom of the page.
- Prepare the Cake Base: Begin by carefully unwrapping all the Little Debbie Christmas Tree Cakes. Place them into a large mixing bowl. Using a stand mixer with a paddle attachment or an electric hand mixer, mash the cakes together until they form a consistent, crumbly, dough-like mixture. Ensure there are no large lumps remaining. Once mashed, add your festive Christmas sprinkles to the mixture and mix again until they are evenly distributed throughout the cake dough. The sprinkles will add both color and a delightful textural element to the center of your truffles.
- Prepare Your Baking Surface: Line a cookie sheet, baking tray, or a sturdy cutting board with parchment paper, wax paper, or a silicone baking mat. This will prevent the truffles from sticking and make them easy to handle once rolled and dipped.
- Roll the Truffles: Using a small cookie scoop (approximately 1 tablespoon in size) or a measuring spoon, scoop out portions of the cake mixture. Roll each portion between the palms of your hands to form smooth, uniform 1-inch balls. Place these rolled cake balls onto your prepared baking sheet, ensuring a little space between each one. This batch should yield about 12 truffles, but exact numbers may vary slightly.
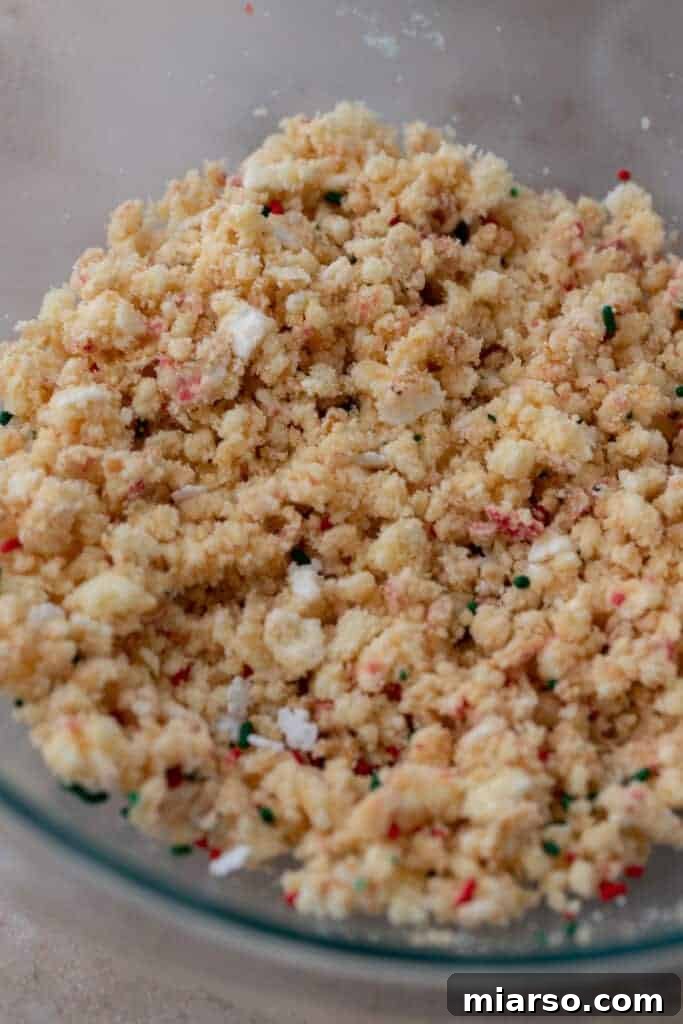
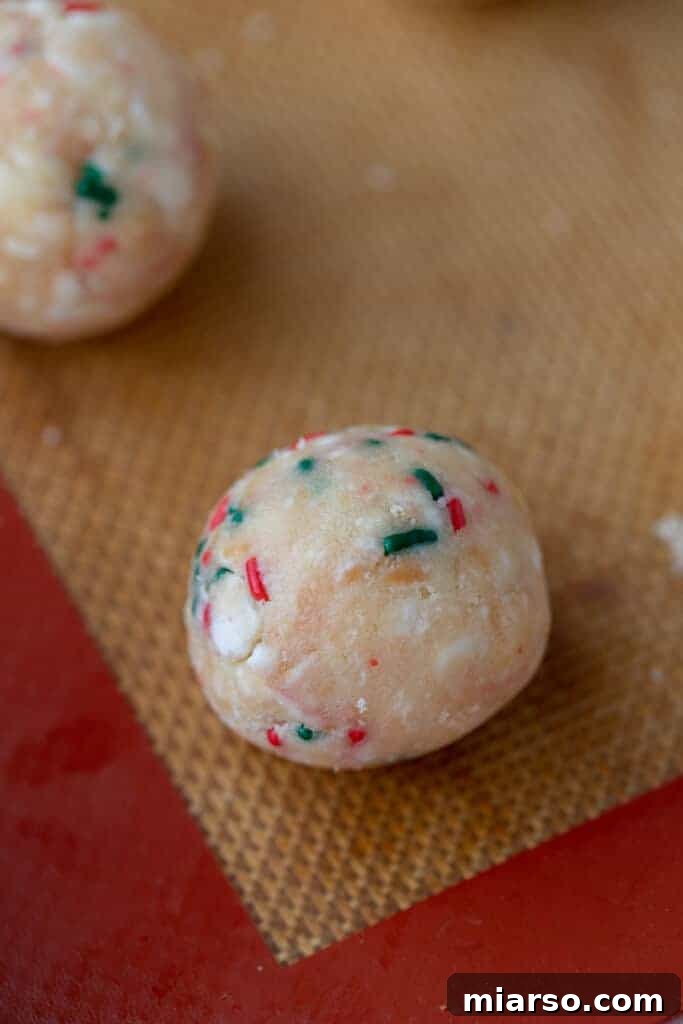
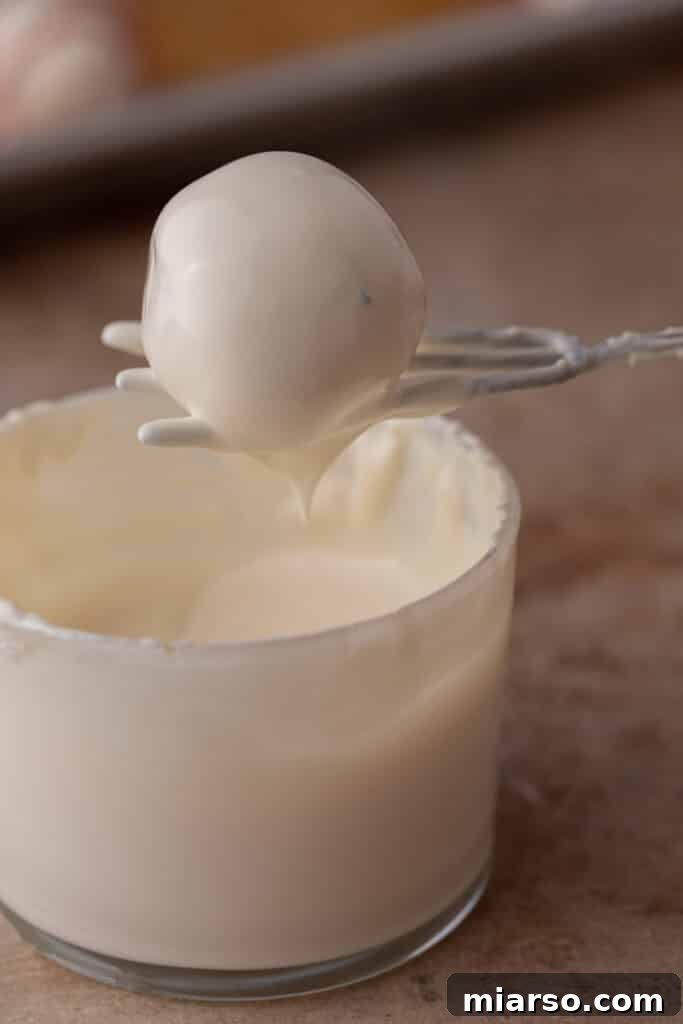
- Chill the Truffles: Once all the cake balls are rolled, transfer the baking sheet to the refrigerator. Allow them to chill for at least 15-20 minutes. Chilling is a critical step as it helps the truffles firm up, making them much easier to dip in chocolate without falling apart. While they are chilling, prepare your white chocolate.
- Melt the White Chocolate: Place your white chocolate chips or candy melts into a microwave-safe mixing bowl. Microwave on high in 30-second increments, stirring thoroughly after each interval. Continue this process until the chocolate is completely melted and smooth. Be careful not to overheat the chocolate, as it can seize and become unusable. Alternatively, you can melt the chocolate using a double boiler for a more controlled melting process.
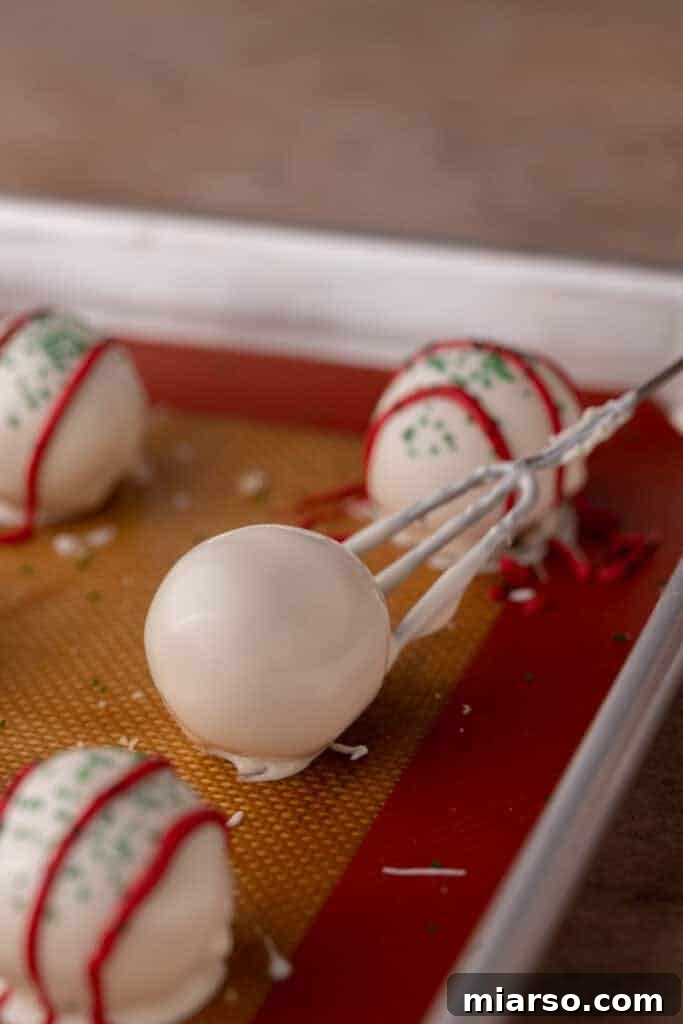
- Dip the Truffles: Remove the chilled cake balls from the refrigerator. Using a dipping fork or a regular fork, carefully dip each truffle into the melted white chocolate, ensuring it’s fully coated. Gently tap the fork against the side of the bowl to allow any excess chocolate to drip off. This helps create a smooth, even coating. Carefully transfer the dipped truffles back onto the prepared baking sheets.
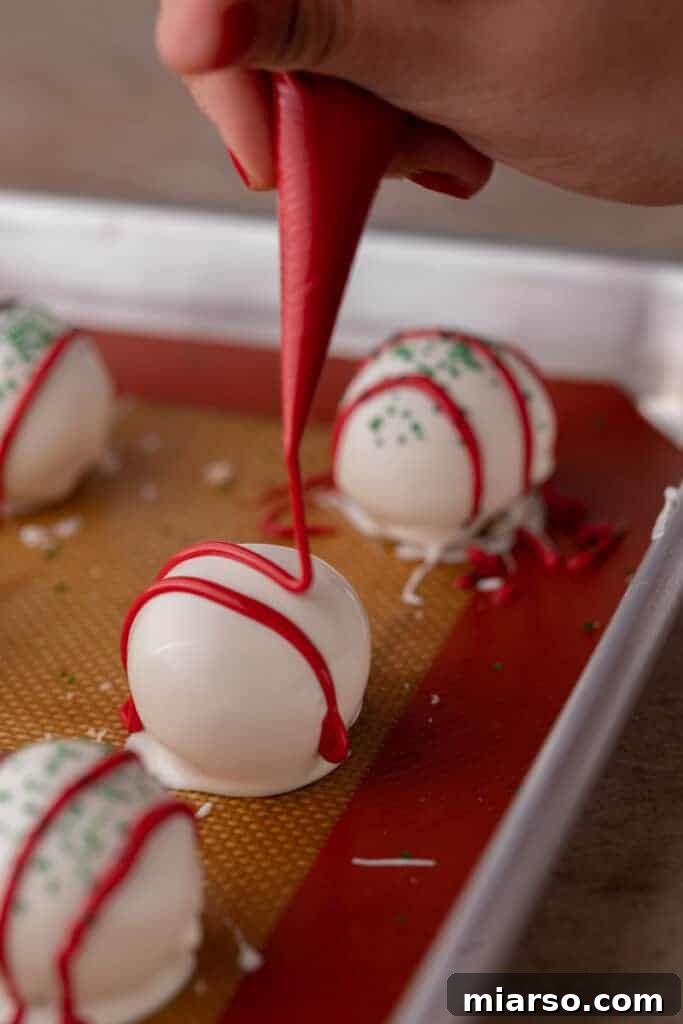
- Prepare Red Candy Drizzle: Place the red candy melts into a small microwave-safe bowl. Microwave in 30-second increments, stirring in between, until completely melted and smooth. Transfer the melted red candy melts into a piping bag or a small Ziploc bag. If using a Ziploc bag, snip a tiny corner off the bag to create a fine opening for drizzling.
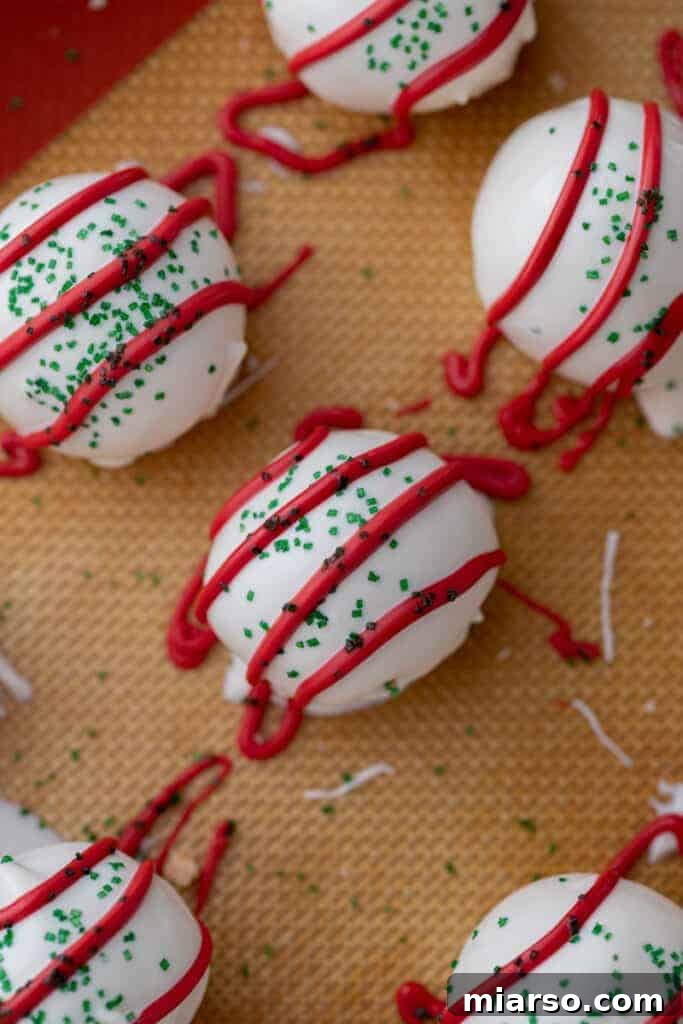
- Decorate and Set: Immediately after dipping a few truffles (before the white chocolate sets), drizzle the melted red candy melts over them in a zig-zag pattern. While the red drizzle and white chocolate are still wet, generously sprinkle green sanding sugar over each truffle. This quick action ensures the decorations adhere beautifully. Once decorated, place the baking sheet back into the refrigerator for another 10-15 minutes, or until the chocolate coating has fully set and hardened.
- Enjoy! Once set, your Little Debbie Christmas Tree Cake Truffles are ready to be enjoyed! Store them in an airtight container in the refrigerator to maintain freshness.
Recipe Pro Tip: Timing is Everything!
To ensure your truffles have that perfect festive finish, proper timing for the red candy melt drizzle and green sanding sugar is key. These decorations need to be applied while the white chocolate coating is still wet and pliable, allowing them to adhere beautifully. To avoid any last-minute rush or frustration, prepare all your decorating elements *before* you even start melting the white chocolate. Have your melted red candy melts ready in a piping bag, your green sanding sugar open and within reach, and any other festive sprinkles at hand. This simple preparation will allow you to work quickly and efficiently, achieving a stunning, professional-looking result on every truffle before the chocolate has a chance to solidify at room temperature.
Why You Absolutely Must Make This Recipe!
- Effortlessly Simple Ingredients: You’ll only need a handful of basic ingredients, all easily found at your local grocery store. No specialty items or complicated sourcing required, making this a truly accessible holiday treat.
- Transformative Treat: Elevate humble Little Debbie snack cakes into a sophisticated and festive dessert. It’s a fantastic way to impress guests with minimal effort, turning a childhood favorite into an elegant holiday offering.
- Perfect for Planning Ahead (No-Bake Bliss): This recipe requires absolutely no baking, making it ideal for busy holiday schedules. It’s excellent for preparing in large batches days in advance, ensuring you’re fully ready for any special occasion, party, or unexpected guests.
- Customizable and Fun: Get creative with your decorations! While we suggest classic red drizzle and green sugar, feel free to experiment with other Christmas-themed sprinkles, edible glitter, or even different colored candy melts to truly make them your own. It’s a fun activity for all ages!
- Crowd-Pleaser & Gifting Gem: These truffles are universally loved for their sweet, nostalgic flavor and appealing presentation. They make fantastic homemade gifts for neighbors, teachers, or friends, beautifully packaged in small boxes or cellophane bags.
Frequently Asked Questions – FAQ
Proper storage is essential to maintain the freshness and quality of your truffles. If you’re keeping them on a sheet pan temporarily, wrap it tightly in plastic wrap. However, for longer storage, the best method is to transfer them to an airtight container. When stored in an airtight container in the refrigerator, these truffles will remain fresh and delicious for up to two weeks. Ensure they are kept away from strong-smelling foods, as chocolate can absorb odors.
Absolutely! These truffles freeze wonderfully, making them an excellent make-ahead option for even longer storage. Place them in a single layer in a freezer-safe bag or an airtight container, ensuring they don’t get crushed. They will keep well in the freezer for up to a couple of months. To enjoy, simply remove them from the freezer and let them thaw at room temperature for about 15-30 minutes before serving. This way, you can enjoy these festive treats long after the holidays!
While the red drizzle and green sanding sugar are classic, don’t hesitate to get creative with your toppings! A few tasty and easy suggestions for extra flair include finely crushed candy canes for a minty crunch, small pretzel pieces for a delightful sweet and salty contrast, or chopped peanuts or pecans for added texture and nutty flavor. Mini chocolate chips or white chocolate curls also make elegant additions. The possibilities are endless for customizing your truffles!
No problem at all! If white chocolate isn’t your preference or isn’t available, you have excellent alternatives. You can easily substitute it with white candy melts, which you’ll typically find in the baking aisle of most grocery stores or craft stores. White candy melts are designed to melt smoothly and set quickly, offering a similar look and texture to a white chocolate coating. Alternatively, you could use milk chocolate or dark chocolate for a completely different flavor profile, transforming these into chocolate Christmas tree truffles. Just melt and dip your truffles as directed, regardless of your chosen coating.
I Have Leftover White Chocolate, What Should I Do with It?
It’s common to have a little melted white chocolate remaining after dipping your truffles, and it would be a shame to let it go to waste! Luckily, there are many delicious ways to use up that excess chocolate. Here are a couple of my favorite recipes that perfectly utilize leftover white chocolate, ensuring nothing goes to waste:
- The Best Cranberry White Chocolate Fudge Recipe: A delightful blend of tart cranberries and sweet white chocolate creates a festive and rich fudge.
- The Best Creamy White Hot Chocolate Recipe: Transform your leftover chocolate into a luxurious, comforting beverage perfect for a chilly evening.
- The Best Christmas Fudge Recipe: Another fantastic fudge option that often calls for white chocolate, offering a different seasonal flavor profile.
Just remember to weigh or estimate your leftover white chocolate and adjust the quantities in your chosen recipe accordingly. Enjoy experimenting with these delightful possibilities!
Christmas Tree Cake Truffles with Little Debbies
These Christmas Tree Cake Truffles, made with Little Debbie cakes, are a delicious no-bake holiday treat that’s quick, easy, and full of festive cheer!
Print Recipe
Ingredients
- 1 box of Little Debbie Christmas Tree Cakes (5 cakes, vanilla flavor)
- 8 ounces white chocolate chips or white candy melts
- 3 tablespoons Festive Christmas sprinkles (for mixing into cake batter)
- 3 tablespoons Red candy melts (for drizzling, optional)
- Green sanding sugar (for decoration)
Instructions
- Unwrap all 5 Little Debbie Christmas Tree Cakes and place them into a large mixing bowl.
- Using an electric hand mixer or stand mixer, mash the cakes until a crumbly, dough-like consistency is achieved. Add the festive sprinkles and mix again until well combined.
- Line a baking sheet with parchment paper, wax paper, or a silicone mat. Using a tablespoon or small cookie scoop, portion out the cake mixture and roll into smooth 1-inch balls. Place them on the prepared baking sheet.
- Chill the rolled truffles in the refrigerator for at least 15-20 minutes to firm up.
- While truffles chill, melt the white chocolate chips or candy melts in a microwave-safe bowl. Microwave in 30-second intervals, stirring after each, until completely smooth.
- Dip each chilled cake ball into the melted white chocolate using a dipping fork. Allow excess chocolate to drip off, then return the truffle to the baking sheet.
- Melt the red candy melts in a separate microwave-safe bowl or directly in a piping bag/Ziploc bag in 30-second increments, massaging or stirring until smooth. Snip a tiny corner off the bag.
- Immediately drizzle the melted red candy melts over the still-wet white chocolate on the truffles. Sprinkle with green sanding sugar.
- Place the decorated truffles back in the refrigerator for another 10-15 minutes until the chocolate coating is fully set. Enjoy!
Nutrition
Calories: 183 Calories | Carbohydrates: 27g | Protein: 2g | Fat: 7g | Saturated Fat: 4g | Polyunsaturated Fat: 0.3g | Monounsaturated Fat: 2g | Cholesterol: 29mg | Sodium: 174mg | Potassium: 79mg | Fiber: 0.2g | Sugar: 21g | Vitamin A: 44IU | Vitamin C: 0.1mg | Calcium: 55mg | Iron: 1mg
Nutrition information is automatically calculated and should only be used as an approximation.
Like this? Leave a comment below!